there is no simple answer to most of your questions. But the ardupilot wiki has some pages that are a good entry point to learn about multicopters and the components involved:
The component specs look OK overall.
As far as ESCs go I would definitely look into the suggested upgrade to ones with either the SimonK or BLHeli firmware. In comparison to the stock firmware these provide better performance on multicopters as they are able to produce softer acceleration curves and higher control rates. You might be able to upgrade the suggested HK 20A ESC but you would need additional tools for that. There is a video on the process in the product comments on HK.
As far as mounting goes you will definitely have to figure out something as you wont be able to find exactly the mounting holes on the frame you need for the Pi.
Apart from that the only thing is that the DJI Flamewheel style frames have the reputation of not being very rigid. This might result in vibration issues. You will find this topic discussed in this forum here as in any other multicopter community as it is always an issue with multicopters. I can recommend another writeup of this topic in the ardupilot wiki: http://copter.ardupilot.com/wiki/initial-setup/assembly-instructions/vibration-damping/
Edit:
Another thing. You should look for a battery with XT60 connector. Especially if you want to use the power supply sold by emlid. Apart from that the HK style battery connectors a frankly crap. That’s why most of the LiPos on HK are nowadays available with XT60 as well.
Whatever frame you end up using, make sure to have some crash protection for your Pi/Navio because if you just get started you will definitely crash/flip your copter some time as we all did/do.
Just one point of scale. The old flamewheels are well known, but many people are now choosing the 250 class “racer” quadcopters, especially after watching all the Charpu videos. The motors and ESC combo here are slower turning with larger blades for a larger copter (lower KV). If you want to make something which looks like the picture on the start page of Emlid Navio+ that’s the Hobby King/Banggood Diatone FPV250 frame with some smaller but faster motors (higher KV) like the Baby Beast V2 and AFro 12A ESCs.
One tip with the Baby Beasts, make sure you get the combo pack because that’s the only way to get hold of the CW/CCW prop adapters. My personal favourite is the FPV250LH (“low hung / clean-and-dirty”) which is especially good because it’s one of a few designs where the whole electronics carrying chassis is vibration isolated. With a Mobius stuck straight inside the lower frame I get gimbal like (smooth, jelly free) FPV and HD recordings, just on velcro, no additional vibration pads necessary.
Pixhawk compatible PDB (built-in volt+amp sensor, fits perfectly in top/centre of FPV250):
For radio I recommend the open source FrSky gear, i.e. current price performance model is Taranis Plus radio then. However as Navio+ only support CPPM rather than the newer SBUS you would need an SBUS to CPPM adapter for any of the preferred radio receivers like the X4RSB or X8R.
If you go the Futaba route then as far as I am aware it’s primarily CPPM. Seems like the whole Taranis thing is better from what I have seen so far, but don’t have one so can’t comment on how open their firmware/hardware-hacking/add-ons are. When you get the telemetry working on the Taranis it’s great and there is a long list of upgrades I can do.
As I also had Pixhawk which already supports SBUS on the RC connector (and Emlid say maybe it’s possible later on Navio+) I just got the X4RSB so all my quadcopters will be controlled by the Taranis and SBUS capable/future proof 16 channels. However if you decide you don’t need telemetry then you can get some real cheapo stuff and just use the radio to takeoff and land or backup (so I heard the people using cellular/wifi joystick control do).
This Taranis Plus combo is only 8 dollars more including the X8R which is a bit of overkill but great:
And the CPPM converter until when/if Emlid get SBUS working on the RC port of Navio+:
Regarding ESCs I tested both Afro 12A and 20A ESCs and the 12A won because the battery lasts up to a minute longer. The motors put out between over 600g of thrust each with 6045 3-blade props (!!!). But NOT with 30 pitch props (not with the standard 5030) which is less than 300g each, not good when fully loaded with computers and FPV equipment. When you use 6 inch props on this frame, there’s no room for the Navio+ on top, so you need the Low-Hung frame then or some other solution. I’m also testing the lower part of the FPV250LH with the upper part of the new FPV260 “upswept” variant as I want to eliminate prop-wash when descending and increase stability.
It’s a real racer, I’m building a whole fleet of them for some experimentation. The thing shoots up into the air like a rocket, to 300m from ground height in just a few seconds. Larger ESC is not always better, 20% more than specification is the rule, so 12A on Baby Beast v2 is perfect.
p.s. I’ve already documented the build with photos and am about to upload it all to a new web site I’m building. I’ll post back here when it’s ready.
Thanks a ton Tony, Your inputs are most valuable , Please do post the link for your new website.
with all your suggestion and for the easy mounting options for navio+ and raspberry PI 2 i would prefer to go with the FPV250LH Frame.
If possible can you please provide pics/details on how to interface the Pixhawk compatible PDB with the motors.
I shall post the list of components when with the link into to buy in this post.
I hope the the below components are fine:
Battery:
that lipo might be too big for the FPV250LH frame.
The discription states 2200mAh as the biggest lipo.
If you attach it to the underside of the cage it might fit, but flying with a to heavy multirotor takes the fun out of it.
The charger should be ok.
Edit: And for the FPV260 frame they state 1300mAh as max lipo size
For batteries I’d start with a ~2.2A which is lighter. The battery you chose is okay on specification but as a minor point you probably want to cut and re-solder an XT60 connector like the charger and many other (almost a standard now) cables/devices use. I also found the right battery many times with the wrong connector. Soldering XT60 connectors can be a pain but there are some tricks to make it easier (I’ve documented that and it’s all on YouTube too).
It’s a balance between power+C/weight/size when choosing a battery. On the 250 frames there are two mounting options for the battery, specifically with the Low-Hung chassis the top is free for strapping on a battery. The size of this battery is good because it fits perfectly on top even with 6 inch props:
That’s what I use to get about 8 minutes of flight time with 6040 three blade props.12A ESCs and the Baby Beast v2.
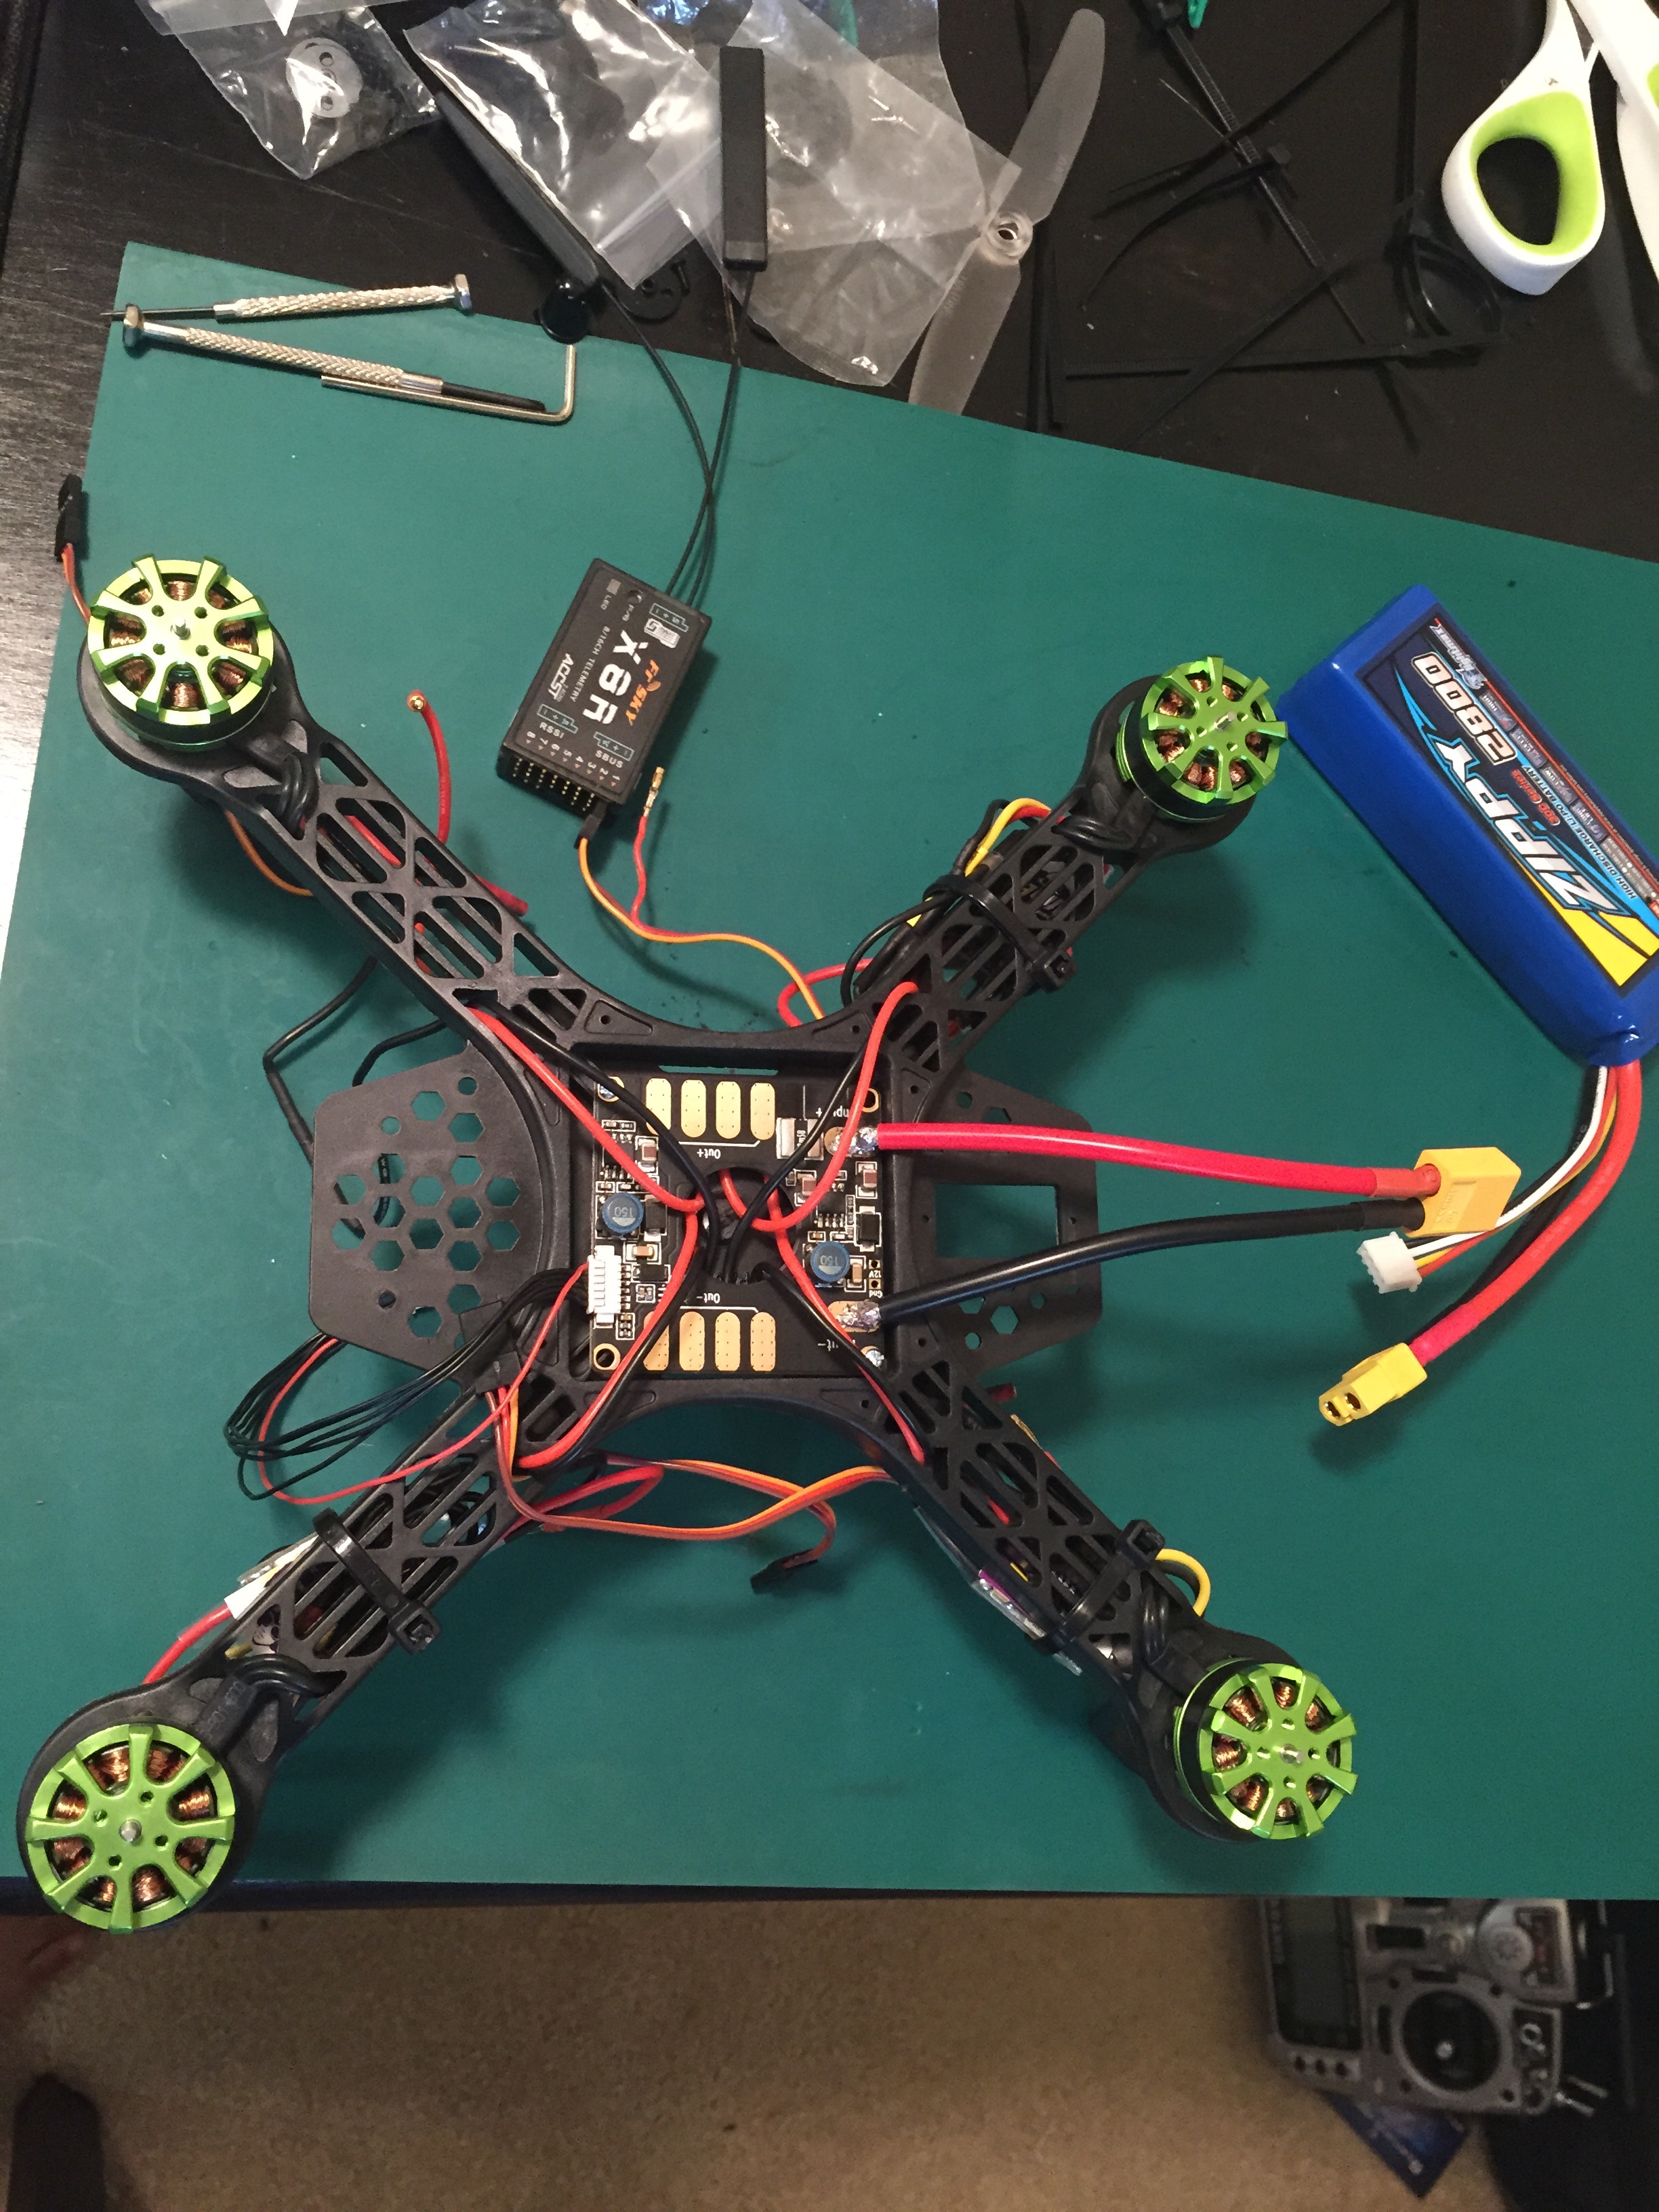
Later I found the Zippy make of battery have a better power/weight ratio so was going to try something like this next:
As the weight is lower but capacity higher it should last a good amount longer, I’d guess at least 9 minutes but have yet to test that particular combination and need to check the sizes to see if it still fits on top.
The second mounting option for larger batteries is strapping them below the frame. I’ve tested that with three different types of battery. One new issue then is you either need to find longer legs or land on top of the battery (not advised). I found the 3D model for the FPV250 legs on Thingiverse and edited it to make them longer. The other idea I prefer, is to get a set of helicopter skids and mount them below, then completely remove the legs on each arm.
And even a 5A 3S monster which is almost as long as the whole frame. What I found is the 4A 3S has the best weight/flight time balance (over 12 minutes) as beyond a certain point the weight added is more than the flight time. 4 cell is heavier at the same capacity because of the extra cells of course, but they do pack more punch and help if you have 12v devices (e.g. FPV video transmitter or Wifi) which are sensitive to the slightly lower (11v) voltage you will get when a 3S is below 60% charge.
Here is what it looks like mounted the first way:
I don’t have pictures of the Emlid setup yet but I plan to do it this weekend. The general plan is to remove a pair of the support struts in the middle so there is room for the slightly longer Pi+Navio (the HKPilot32 Pixhawk clone was already a squeeze in the middle and it’s still strong with 6 struts) then mount the RasPi camera directly on the front.
The PDB is wired-up like this:
Of course that is Pixhawk clone (HKPilot32) but the connector is the same to the Emlid Navio+, it’s the APM standard. Additionally this PDB has 5v and 12v output via built-in BECs so I would solder a second cable/connector and plug that into the RC receiver which then should power back the servo rail, or directly into the servo rail I haven’t decided yet. Also the wires to the battery were a bit thin on that first version, here is my final version below nicely shrink-wrapped and perfectly packed into the centre of the 250 frame. Note the 5v and 12v connectors too.
The 6 inch props are a tight fit and we don’t want them to cut into the battery if it slips in flight, so I used additional vertical spacers from a second 250 frame kit (get more, they are cheap and you will crash) to make a cage around the battery. The 2.2 nanotech battery (I linked at the start) fits perfectly into that. Later I’ve found the proper Diatone struts sold separately on Banggood:
Also save money on battery straps and velcro with these, they are so super strong and even without a cage, (e.g. mounted underneath) when you make a cross they battery won’t slip out:
For charging you might want to spend more money upfront so you can parallel charge a load of batteries in a shorter time. I got this and the necessary expansion boards so it can do up to 4 XT60+JST-XH (standard balance lead) connected batteries at once:
And finally some other bits and pieces for batteries/charging:
I’m still toying with the best layout and battery capacity so my design is not finalized yet. But I am happy with the FPV250LH frame for all the different layout options, and motor/power combo, so will stick with them. I’ve bought a load of different size and pitch propellers because later I may go down a bit on the torque (maybe to 5045 three blade or 6045 two blade) to see if I can reduce the amps on the motors for the same amount of thrust = get more battery time. But even in this initial “Ferrari” configuration I think 7 minutes is great to start with, instead I just invested in a bag of batteries to keep me occupied when I go out with it for some fun
Thank you for all the pics, i see that you have got a good amount of experience , this is i want to gain a good experience in design of making a drone and then understanding the software/hardware working together.
I am almost done with the ordering of the first set of components. Now need to wait until i get these.
My plan to to get started now and i am sure that i will run in to a lot of issues , for which i would come back here and ask all you kind people for some help.
Finally i have received all the basic parts and have started to assemble the quad.
I finally ordered
Fr-Sky x8R and Taranis-Plus
Below are some of the questions i have:
I completed the PDB wiring as shown in your pic.
Hooked up the Afro ESC to the PDB
Hooked the power supply to PDB
I get a beep from the ESC with no LED , every second. ( is this normal ?)
When i hook up the a single ESC to X8R, bind it to Taranis-Plus , if throttle is applied , the motor works properly and i can see ESC green LED color, no beep are head when connected to X8R and led is Green.
Is it possible to hook all the ESC to X8R and upon throttle from Taranis-Plus , all the motors should spin (just as test)
Do we need to connect the motor wiring in such a way that 2 motors spin clockwise and 2 motors spin anti-clockwise?
I have not yet received Navio+ boards (already shipped), Do i need to connect the 4wire connector from PDB to Navio+ for power or do i need to use the Navio+ power supply cable?
Do you the pictures as how the connections form ESC and PDB are done to the Navio+ board?
Beeping ESC is normal, it means “lights on but nobody at home” If the props were on you might see them “twitch”, I think it does a few milliseconds of power to show the rotation. Same effect after a crash when APM disables itself for safety (something I learnt the hard way).
To power the Navio+ you use the supplied (in the PDB box) 6 wire “Pixhawk/APM” power cable from the small white “DF13” connector and plug this straight into the power connector of Navio+. Besides powering the flight controller it also sends voltage and amperage information (you don’t need that optional power/voltage cable from Emlid when you have this PDB, but if you’ve ordered it anyway you should find it useful for bench testing).
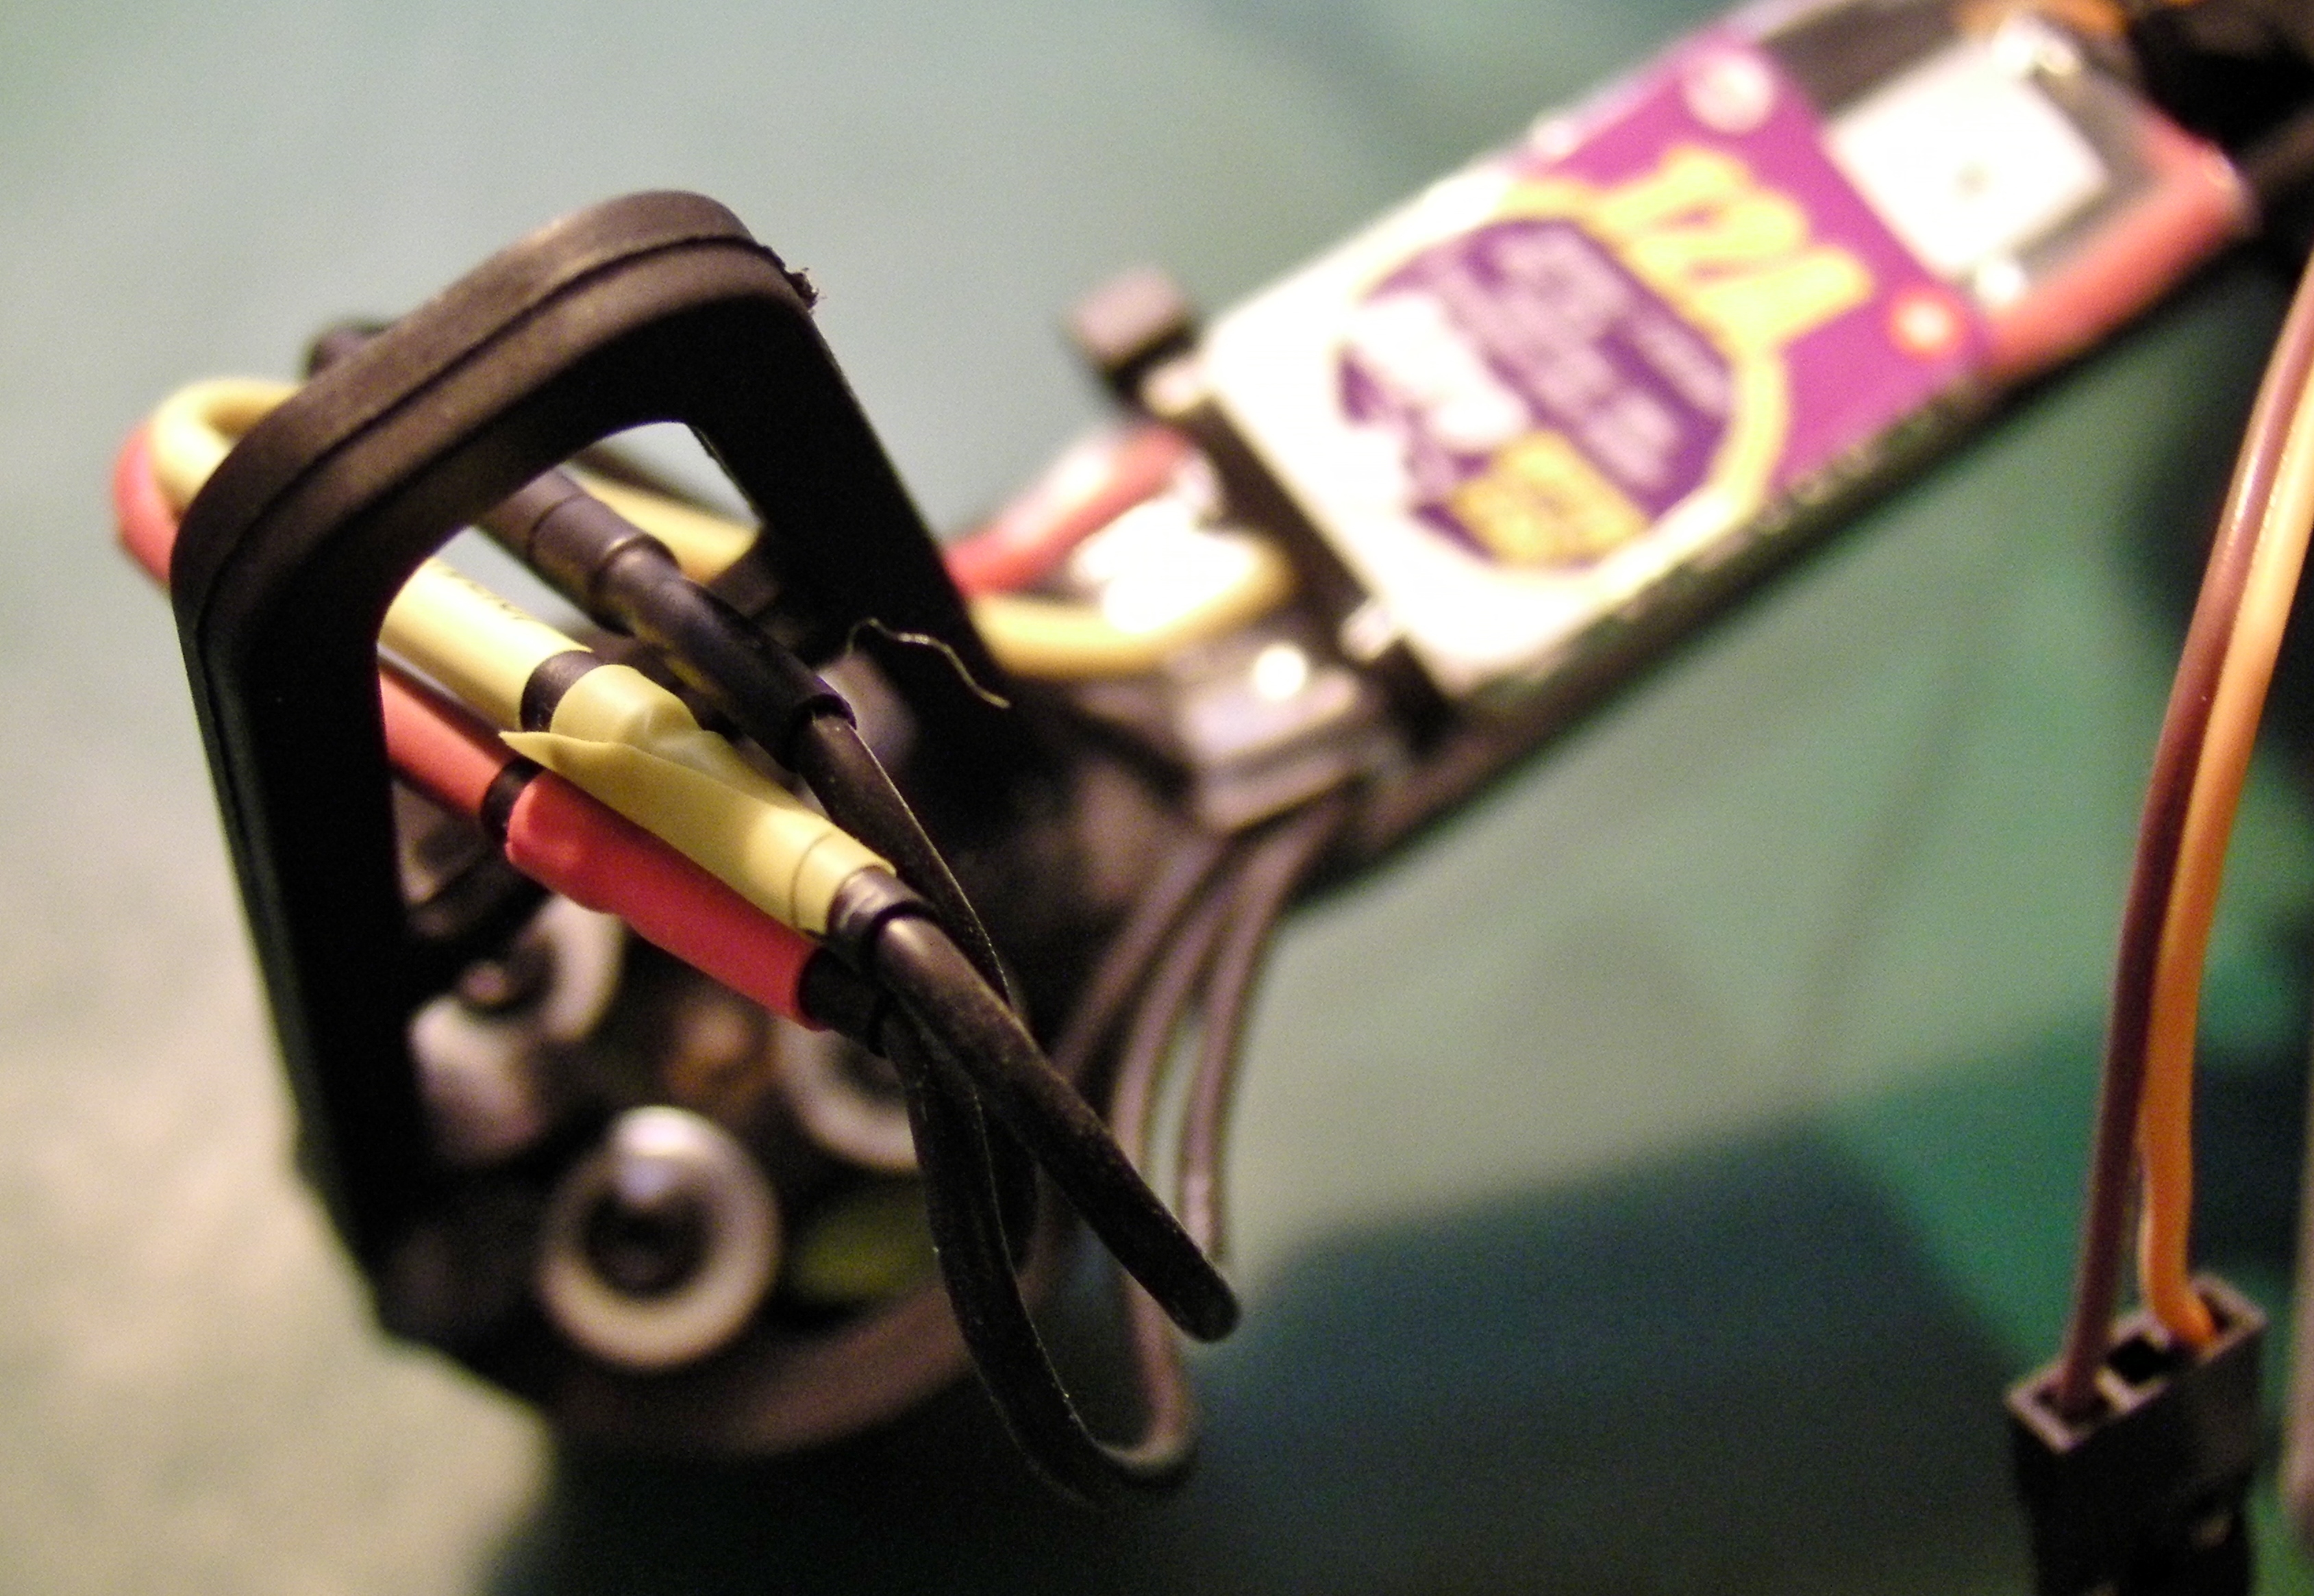
To power the receiver, you go via the servo rail. Leave ONE of the four ESC red wires connected. That means you MUST disconnect the other three. It’s all covered in detail in the Emlid docs link below. Note the tiny crosses X over three of the four ESC wires (a bit hard to see but the text clearly warns you about it):
By the way if you had OPTO ESCs (no BEC) you would take the 5v from the PDB down to the servo rail. So you have lots of options. Oh remember you need the FrSky SBUS to CPPM converter between your receiver and Navio+ because the X8R speaks the newer SBUS language which is not supported yet by the Navio+ drivers.
There are two calibration procedures you should do when you get the Navio+ and have everything connected:
ESC calibration. Follow the APM:Copter docs for “all at once calibration” but read the Emlid docs/forum on how to do this by setting parameters instead of using the Pixhawk “arm switch” (which we don’t have on Navio+). Still easy, just a slightly different technique.
Voltmeter calibration. As documented (with no changes) in APM:Copter web site, but take note that you have to generate about 10A of power before you’ll get an accurate ratio. And don’t worry about readings at low amps, none of the boards are accurate at low amps. That’s why you have to take the setting at about 10 amps.
On that subject there is one thing I forgot to add to the list. Everyone with a battery powered RC model should have a multimeter. I like this one from HobbyKing because it does all the combinations of reading voltages (battery balance lead checking, battery load/performance checking and more) plus it has nice features (at the same cheap price) like a servo tester and RPM meter.
The other thing which is useful when you are playing around the first time, is to have a beeper when the battery is low. Sure the built-in telemetry and other features are supposed to prevent that. But when you’re getting everything setup you’ll easily forget. Then your drone drops out the sky and your battery will have had a dangerously low voltage (not good for health/potential fire in extreme cases). So just get any one of these an hang it off the balance lead, secure it with velcro somewhere, e.g. back on top of the battery strap works well for me. This is the one I bought but there are others which also show the voltage which I’d probably get the next time:
Finally to answer your other question, yes for testing you can easily get all the motors to spin. Just create a “mix” on your Taranis, which takes the throttle input and sends it out on all four channels of the receiver. You couldn’t fly with that as there would be no levelling. But it would help you test the prop rotation and ESCs.
p.s. one other part you need in the toolbox later is an ESC programmer. No worry because Hobby King always flash the ESCs to some recent SimonK build and in a combo box like you bought they should all be the same version. But later you might want to learn how to update your ESCs with this:
p.p.s. The legs fall off that frame quite easily so what I do is loop the three motor power wires through them and cable tie. That way when they fall off they just dangle down (not lost in the grass).
I am able to figure out how to get all the 4 motors working using the taranis-plus , i needed to just do the proper settings in the Mixer settings, and i also figured out that we need to remove the middle power cable from the ESC and keep only one ESC middle power cable, Now i can get all the 4 motors to spin.
Do we need to connect the motor wiring in such a way that 2 motors spin clockwise and 2 motors spin anti-clockwise?
also i had questions regarding the mounting of the Raspperry pi2 + Navio board on the frame, so you have some special arrangements as a mounting plate?
also the low voltage checked for the battery , my battery is 3S, 11.1V and the one you mentioned in the link has a low voltage threshold of 3.3v per cell, i am wondering in a balanced charge mode , if each cell has 3.6V(as max i guess), so does the 3.3v per cell threshold seem bit too early to warn? or probably i am missing something here , Please correct me.
You have a Quad-X frame, so looking at the top with the drone pointing forwards away from you:
Channel 1 is top right and rotates Counter-ClockWise.
Channel 2 is diagonally opposite 1 at the bottom left also rotating CCW.
Channel 3 is to the left of channel 1 and rotates ClockWise.
Channel 4 is diagonally opposite 3 at the bottom right also rotation CW.
##Propeller Mounts (CW/CCW Adapters)##
Regarding your self-tightening prop adapters you got with the Multistart combo. You use the threads/caps with the opposite direction so they tighten as the motor moves. That is when a CW threaded adapter is on motor 1, it rotates CCW so the inertia/friction/torque of the motor pushing hard to rotate will make the cap nut force itself to tighten DOWN against the CW thread.
You can test this, hold the prop adapter top then rotate the outside of the motor in the direction it turns, the propeller should be tightened. It’s so easy and when you are used to them, you can just quickly spin them down to as tight as your hand can make without too much stress, then let them tighten themselves completely when you spin up the motors to take off. Worst case if you left them lose the props skid a bit until they are tight. but they will never come off.
##Mounting in Frame##
When you build the lower case of the Low-Hung FPV250, leave one set of those red support spacers out, the one in the middle offset towards the back is best, leaving the front bay separated for FPV equipment. There are slots along the sides, to start with use cable ties to mount the board. Later if you can get hold of a 3D printer or order a print online you could mount the Pi and Navio+ inside one of the custom cases posted here:
You could also use only the bottom half of any standard RasPi case if you want a stronger base. With any case it’s probably best to velcro it down as they don’t normally have fixing loops for cable ties. In the long run I’m thinking of modifying the base of the LH to make it fit aound the Navio+ (and even Pixhawk was a squeeze) without removing any spacers and with optional cable tie loops.
##Batteries##
Caution you need to know about Lipo safe voltage ranges. For each cell, it is 3.0v to 4.2v and below 3.3v is “dangerous”, below 3.0v “critical” meaning it may catch fire or explode. Hence the Lipo bags for storage and transportation. In fact your charger may refuse to work with batteries where any cell is below 3.3v (there is a trick to charge briefly up to 3.3v per cell as a NiMH but you’ve still taken some life out of it so want to avoid this). The normal level for the cells battery is 3.7v and the further below this you fly the more stress on the battery.
With a 3S (cell) battery we have the following tables to consider:
Cell Voltage Ranges
3.3v per cell empty (danger)
4.2v per cell full
= 0.9v range discharge (100%)
0.7v range used (80% rule) = warning land now!
3 Cell Battery Voltage Ranges
9.9v 0% empty (danger)
11.4v 20% empty (safe) = warning land now!
12.6v 100% full
It’s all explained here:
p.s. for the Hobby King PDB volt and amp sensor I used these values in the APM configuration:
ArduPilot Battery Settings
Voltage Divider 10.125635
Amps Per Volt @ ~10.86A = 20.5530
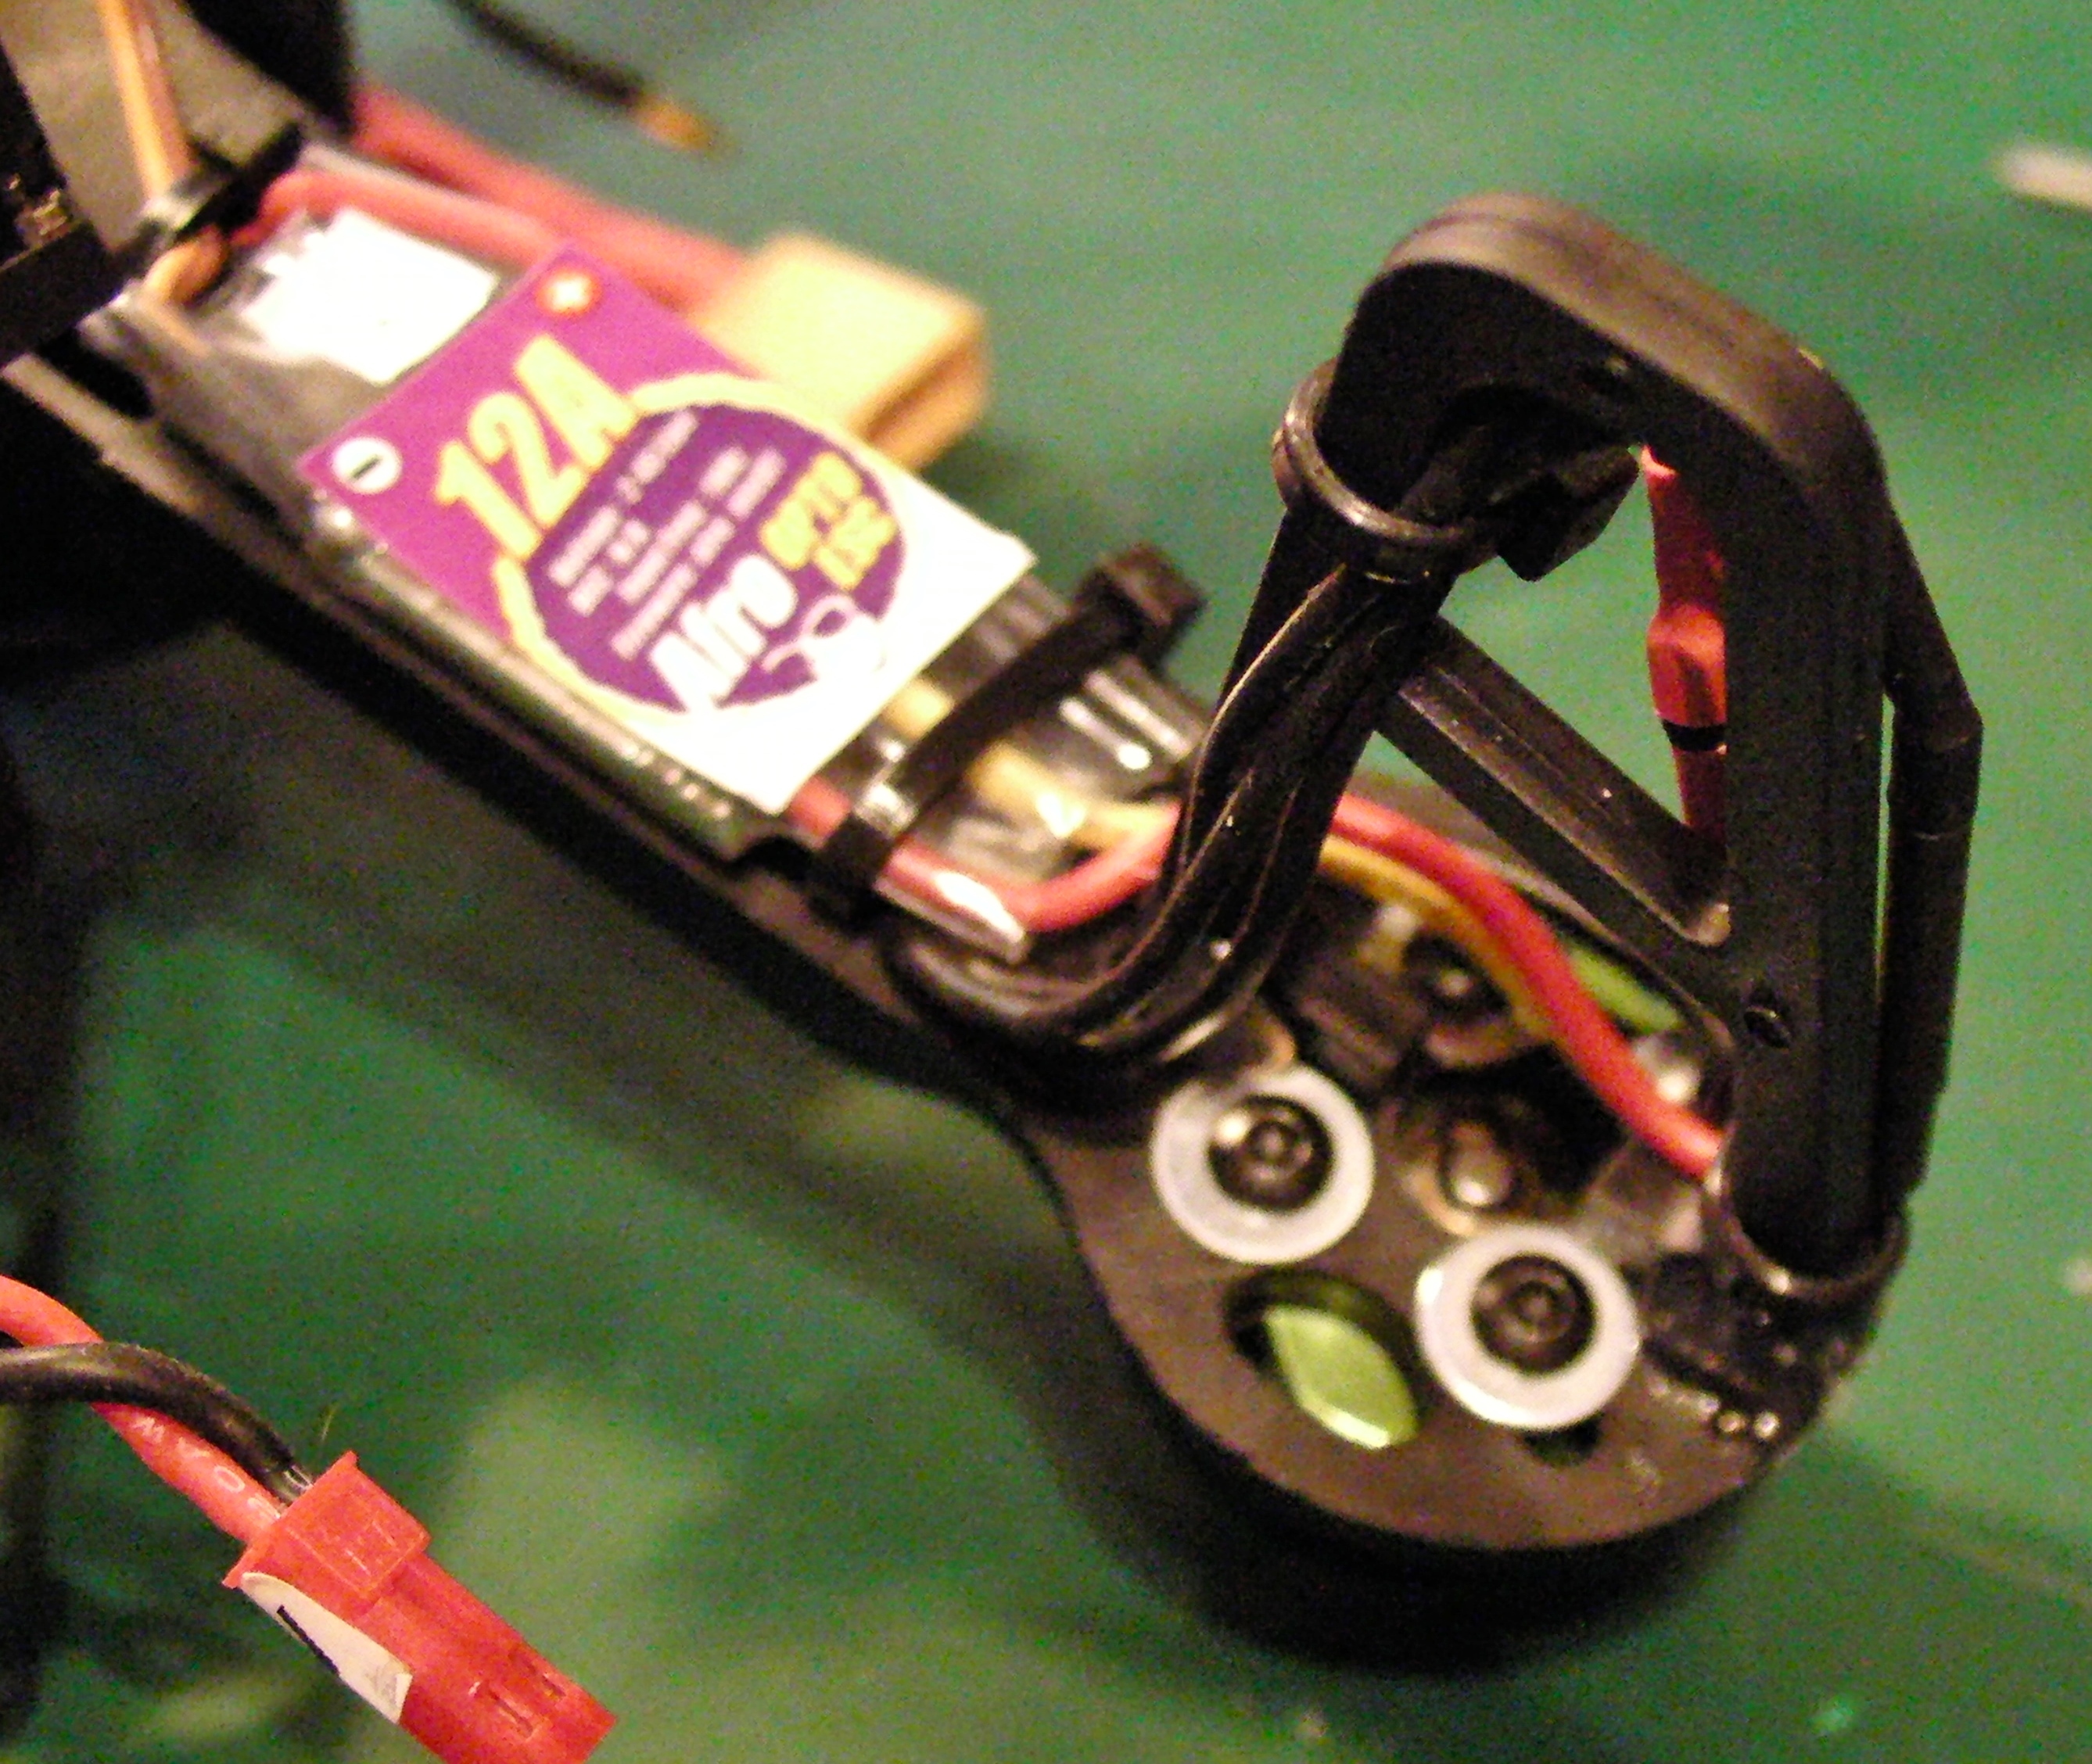
##Motor Mounts##
The M3 screws in the FPV250LH box are too long for the motors, they will touch the windings. Use a washer to space them back a bit. With the power off the motors should turn freely, just braked a bit by the magnets inside. If it’s stiff then you might have the screws too far in.
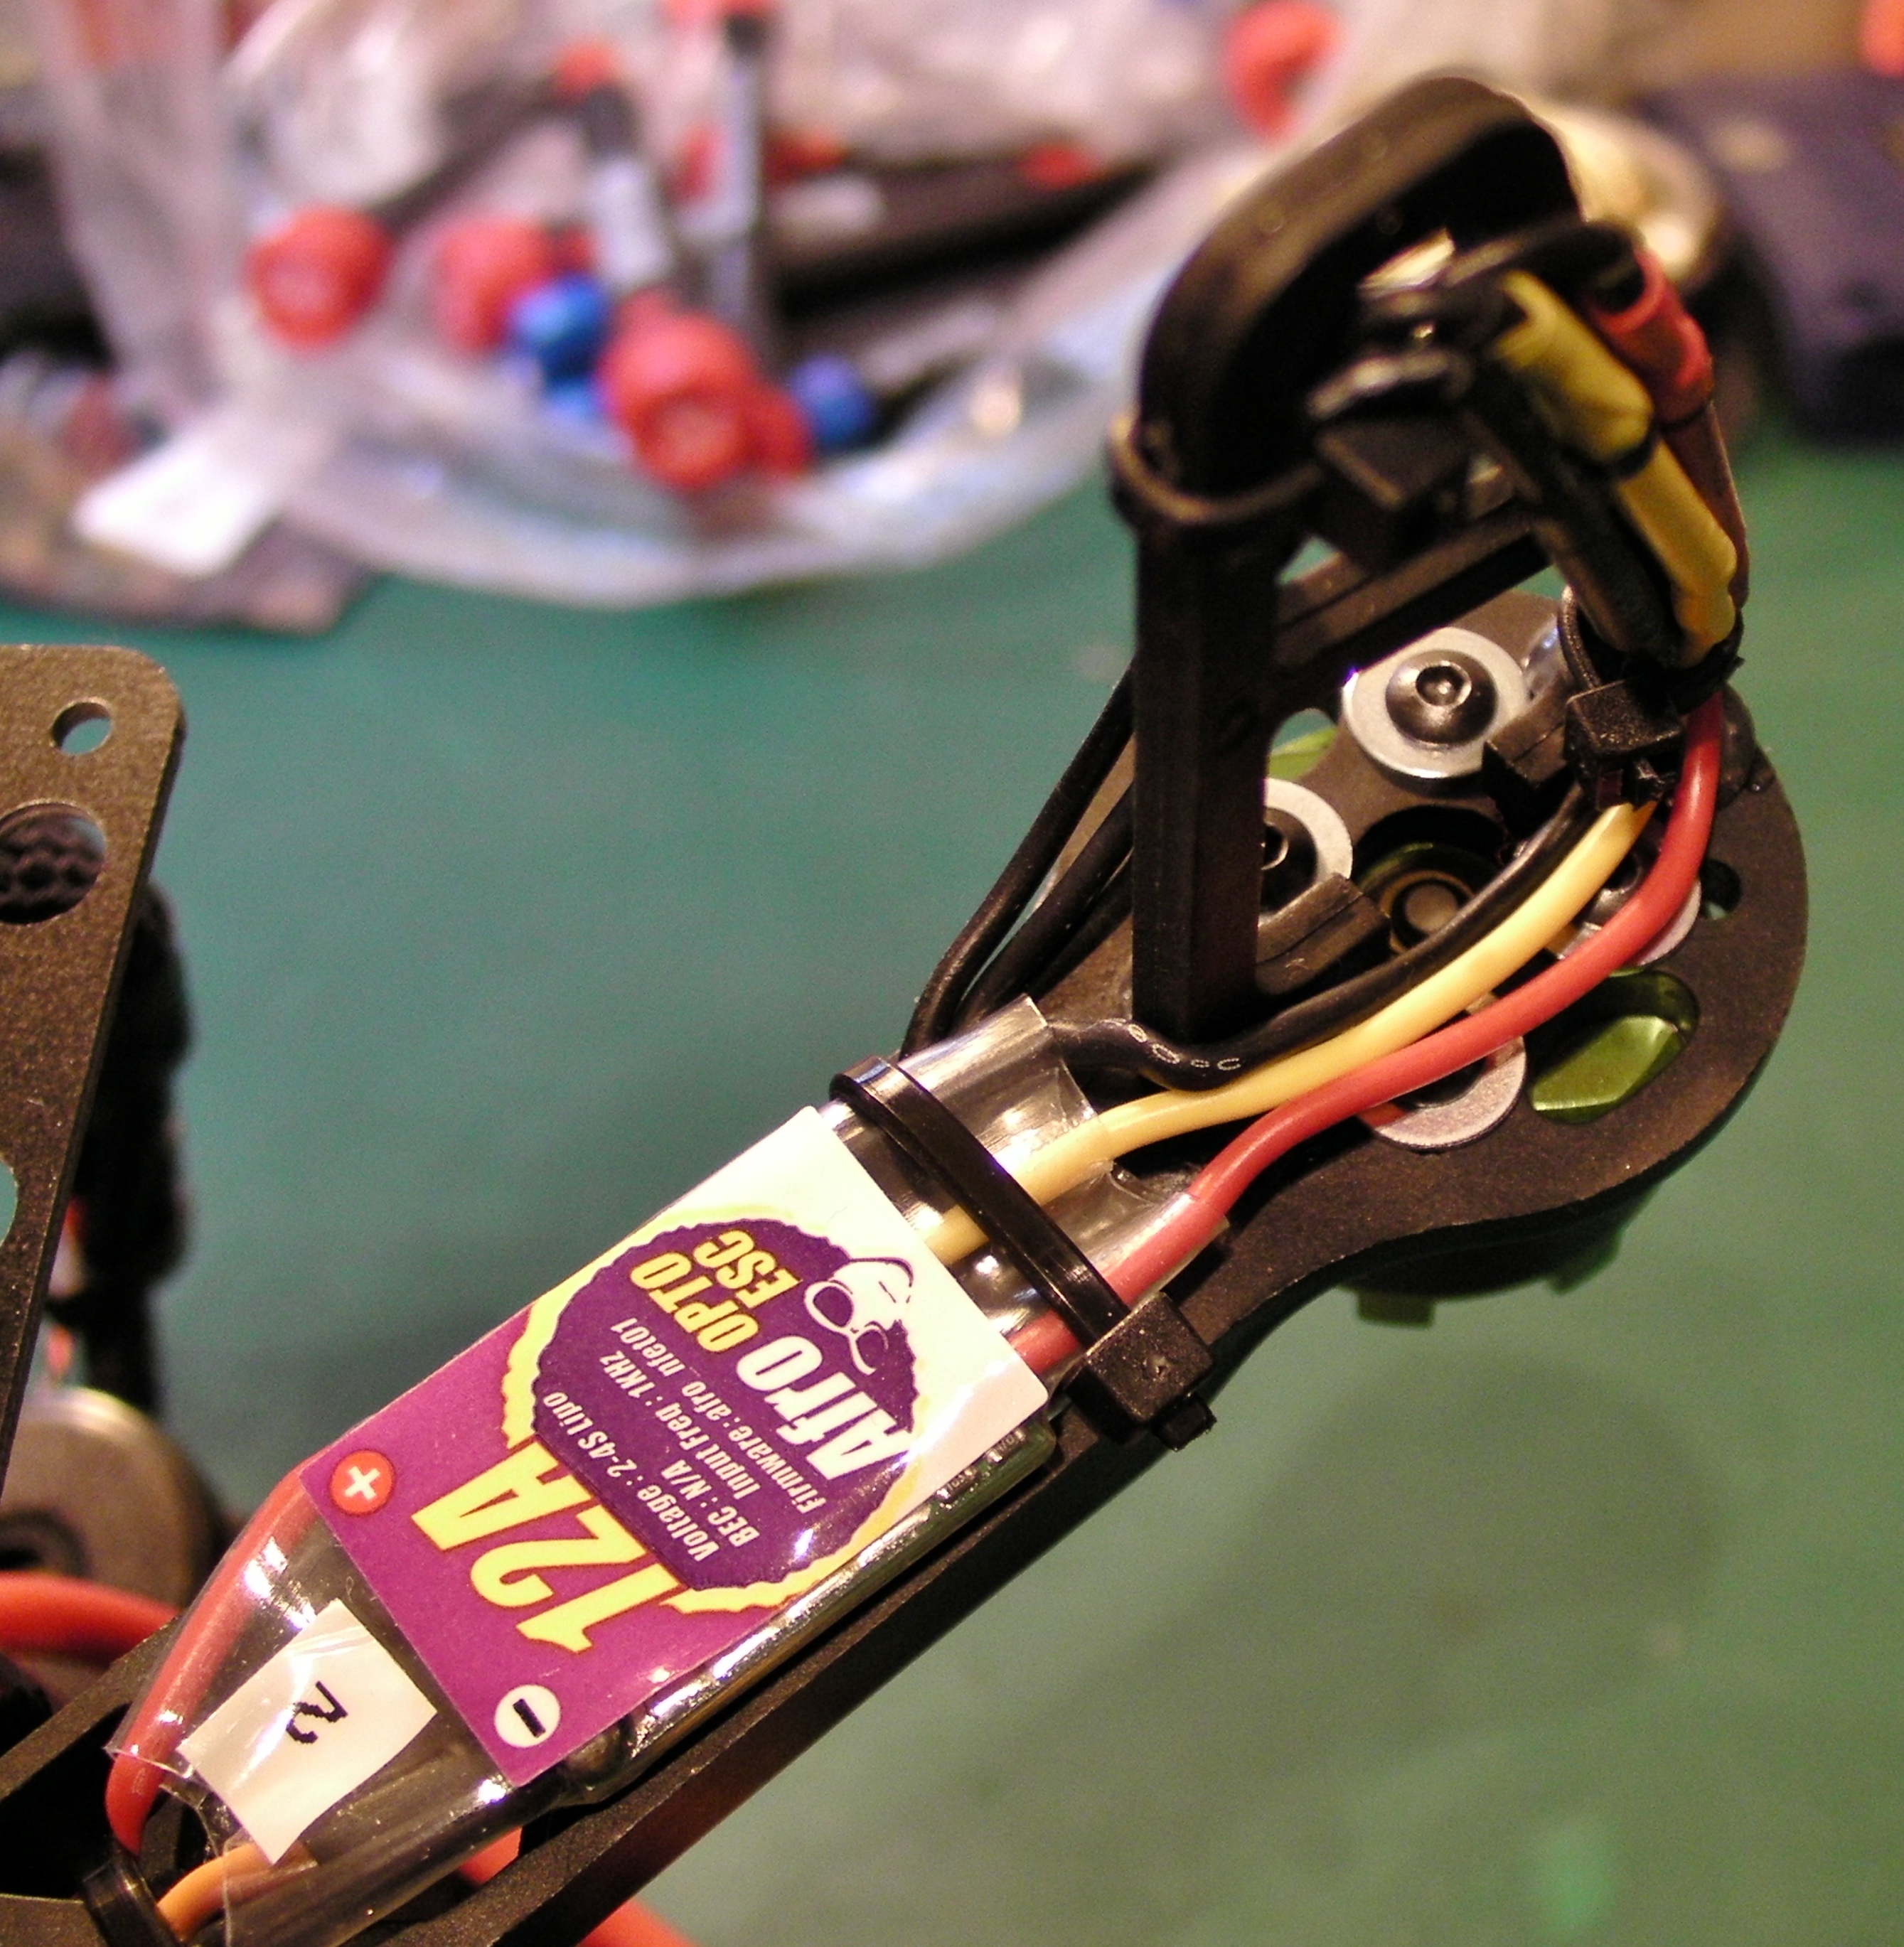
##Frame Legs##
To stop the legs falling off without using permanent glue, use something easier to remove like hot glue then mount the ESC wires around and through them like this:
Thank you for all the info and especially for the safety tips for handling the battery. I have ordered all the battery safety equipment and battery safe storage as well.
For the Mounting of the Navio+ i had seen the 3D design box , i have asked one of my friend who works in Product design to help with the 3D printing of the mounting box.
I now understand the Motors rotation configurations.
I can say that i am half way thru the drone assembling and i am still awaiting for more parts to arrive, i am sure that i will be having more questions as i approach my final assembly and software configurations.
The battery is not so sensitive to sunlight during normal RC/hobby usage. I guess the point of the warnings you read about sunlight was for storage, like fuel or anything else sensitive to overheating. If you lived in a hot country and the sun was focused through a window in your garage for example, the battery could overheat and catch fire. None of the outside temperatures would cause concern, not unless you leave somewhere like Death Valley
You have a Lipo safe so there is enough protection to start with, store it away from stuff which catches fire just in case. If a battery were to ignite the fireproof bag will contain the flames, but of course a lot of smoke and heat will be around the area until it burns out so you should position it somewhere sensible, or in something you don’t have to worry about (e.g. small garden shed which you could live without). Storing some sand with a shovel and a smothering fire extinguisher type would be super smart if you’re really worried about this. I guess a lot of people like me just stick the bag in a corner of a garage. I bought a metal tool case to put mine inside. I have a friend who uses an old ammunition storage box.
Drawing power from the battery also causes heat, but none of our tiny RC models will be overheating the battery though, not so long as we bought batteries with the correct C rating and don’t go beyond the burst rating when doing crazy flying. Anyway the quad is flying around in the air with four “fans” (propellers) right next to it so it would never overheat in the air. I imagine it could be important on industrial drones where many/larger batteries are packed inside would have to worry about battery cooling. Electrical faults and flying in rain would be exceptional cases of course. All of the advice I’ve heard about drones catching fire in the air was to do with ESC problems or power cables shorting across carbon fibre frames.
Best practice is just to check your batteries regularly and make sure you rotate their usage so you don’t forget to cycle them. I had one battery which was just left 1 day after 80% usage and one of the cells had already dropped dangerously low. I think this is because it’s left below the nominal 3.7 volts. The storage voltage is not fully charged by the way. Your charger probably has a storage mode, which will charge or discharge it down to a lower voltage than full (can’t remember the voltage but it’s probably something like the nominal voltage).
Regarding the landing gear , I plan to fix the low hung frame below the quad arms.(quad arms with motors on top, below is the low hung frame).
I plan to fit the battery and X8R receiver on the low hung frame, this configuration would provide a low clearance between the low hung frame and ground.
Do you have any suggestions for any other landing gear for such a configuration?, which can provide a good clearance between the low hung frame and ground.
Yes you have the right idea, the “low hung” is mounted below the arms. There is less than 1cm clearance. For that reason I 3D printed longer legs. Check-out my Thingiverse collections, I bookmarked almost all the useful stuff I could find on quadcopters into useful categories. There are enough people who have made legs and even complete replacement parts specifically for the FPV250 frame.
And here is my remix of the landing gear, stretched to 8cm:
Normally the battery won’t fit inside the lower frame because you’d have FPV gear up front, flight controller in the middle and radios at the back. With the Navio+ and Raspberry Pi camera we have more room, but I still would not expect the battery to fit. You won’t have much clearance on top because of 6 inch props and even 5 inch props are close to the middle. I wouldn’t fit the Navio+ on top because the whole point of this frame is to vibration isolate the flight controller, it makes a big difference.
To mount the battery you have two options. First as I described before, use additional spacers to create a cage around the centre piece and put your battery in there. That is also good because you have a balanced vertical weight distribution. The other option is to use my extended landing gear or a helicopter skid (I think that is better in the long run) and mount the battery below.
p.s. I plan to do a load of alternate builds and document them together with the flying characteristics. I’d expect the performance to be just as good with the battery below but a bit longer to turn corners and lumpy doing rolls/acrobatics.