Looks great! Yes an easy mistake to make. Some props can also be shaped so that it’s almost impossible to see from the design which way is up. Usually the writing should be on top (if it’s only on one side).
I settled with this 3x6045 propeller arrangement after finding out how bad the 2x5030 props were. With 3x6045 you should be hovering around 40% to 50%/“half-stick”. With 2x5030 props it would hardly lift off the ground.
As I was nearing the end of my initial bag of props I purchased when I first got my drone, I’ve purchased a few other prop types in the interim. I want to see if there is a better configuration before ordering my next batch. Maybe the 2x6045 gives enough thrust with less amps. I’ve got one of those Turnigy thrust stands to get test results, but also have to make test flights as the most efficient prop is not necessarily the most fun! I didn’t do that test yet because it means screaming motors and props in the house.
Maybe a few more seconds/minute of flight time could be squeezed out. But there’s always a trade off. I think we have something in “racing” mode with these props and that was fine for me so far. That was the goal for me anyway. It’s probably the smallest and fastest you can get with a full APM (next gen) flight controller (and even Pixhawk is similarly sized).
One outstanding improvement I wanted to make to this design is the addition of vibration isolation for the GPS mount, but it’s hard to find an M3 vibration stand-off (female to male M3 with about 1cm rubber block in the middle). As I never had issues with the GPS I’ve left it near the bottom of my to-do list.
Regarding hovering, some of the things which affect it are:
-
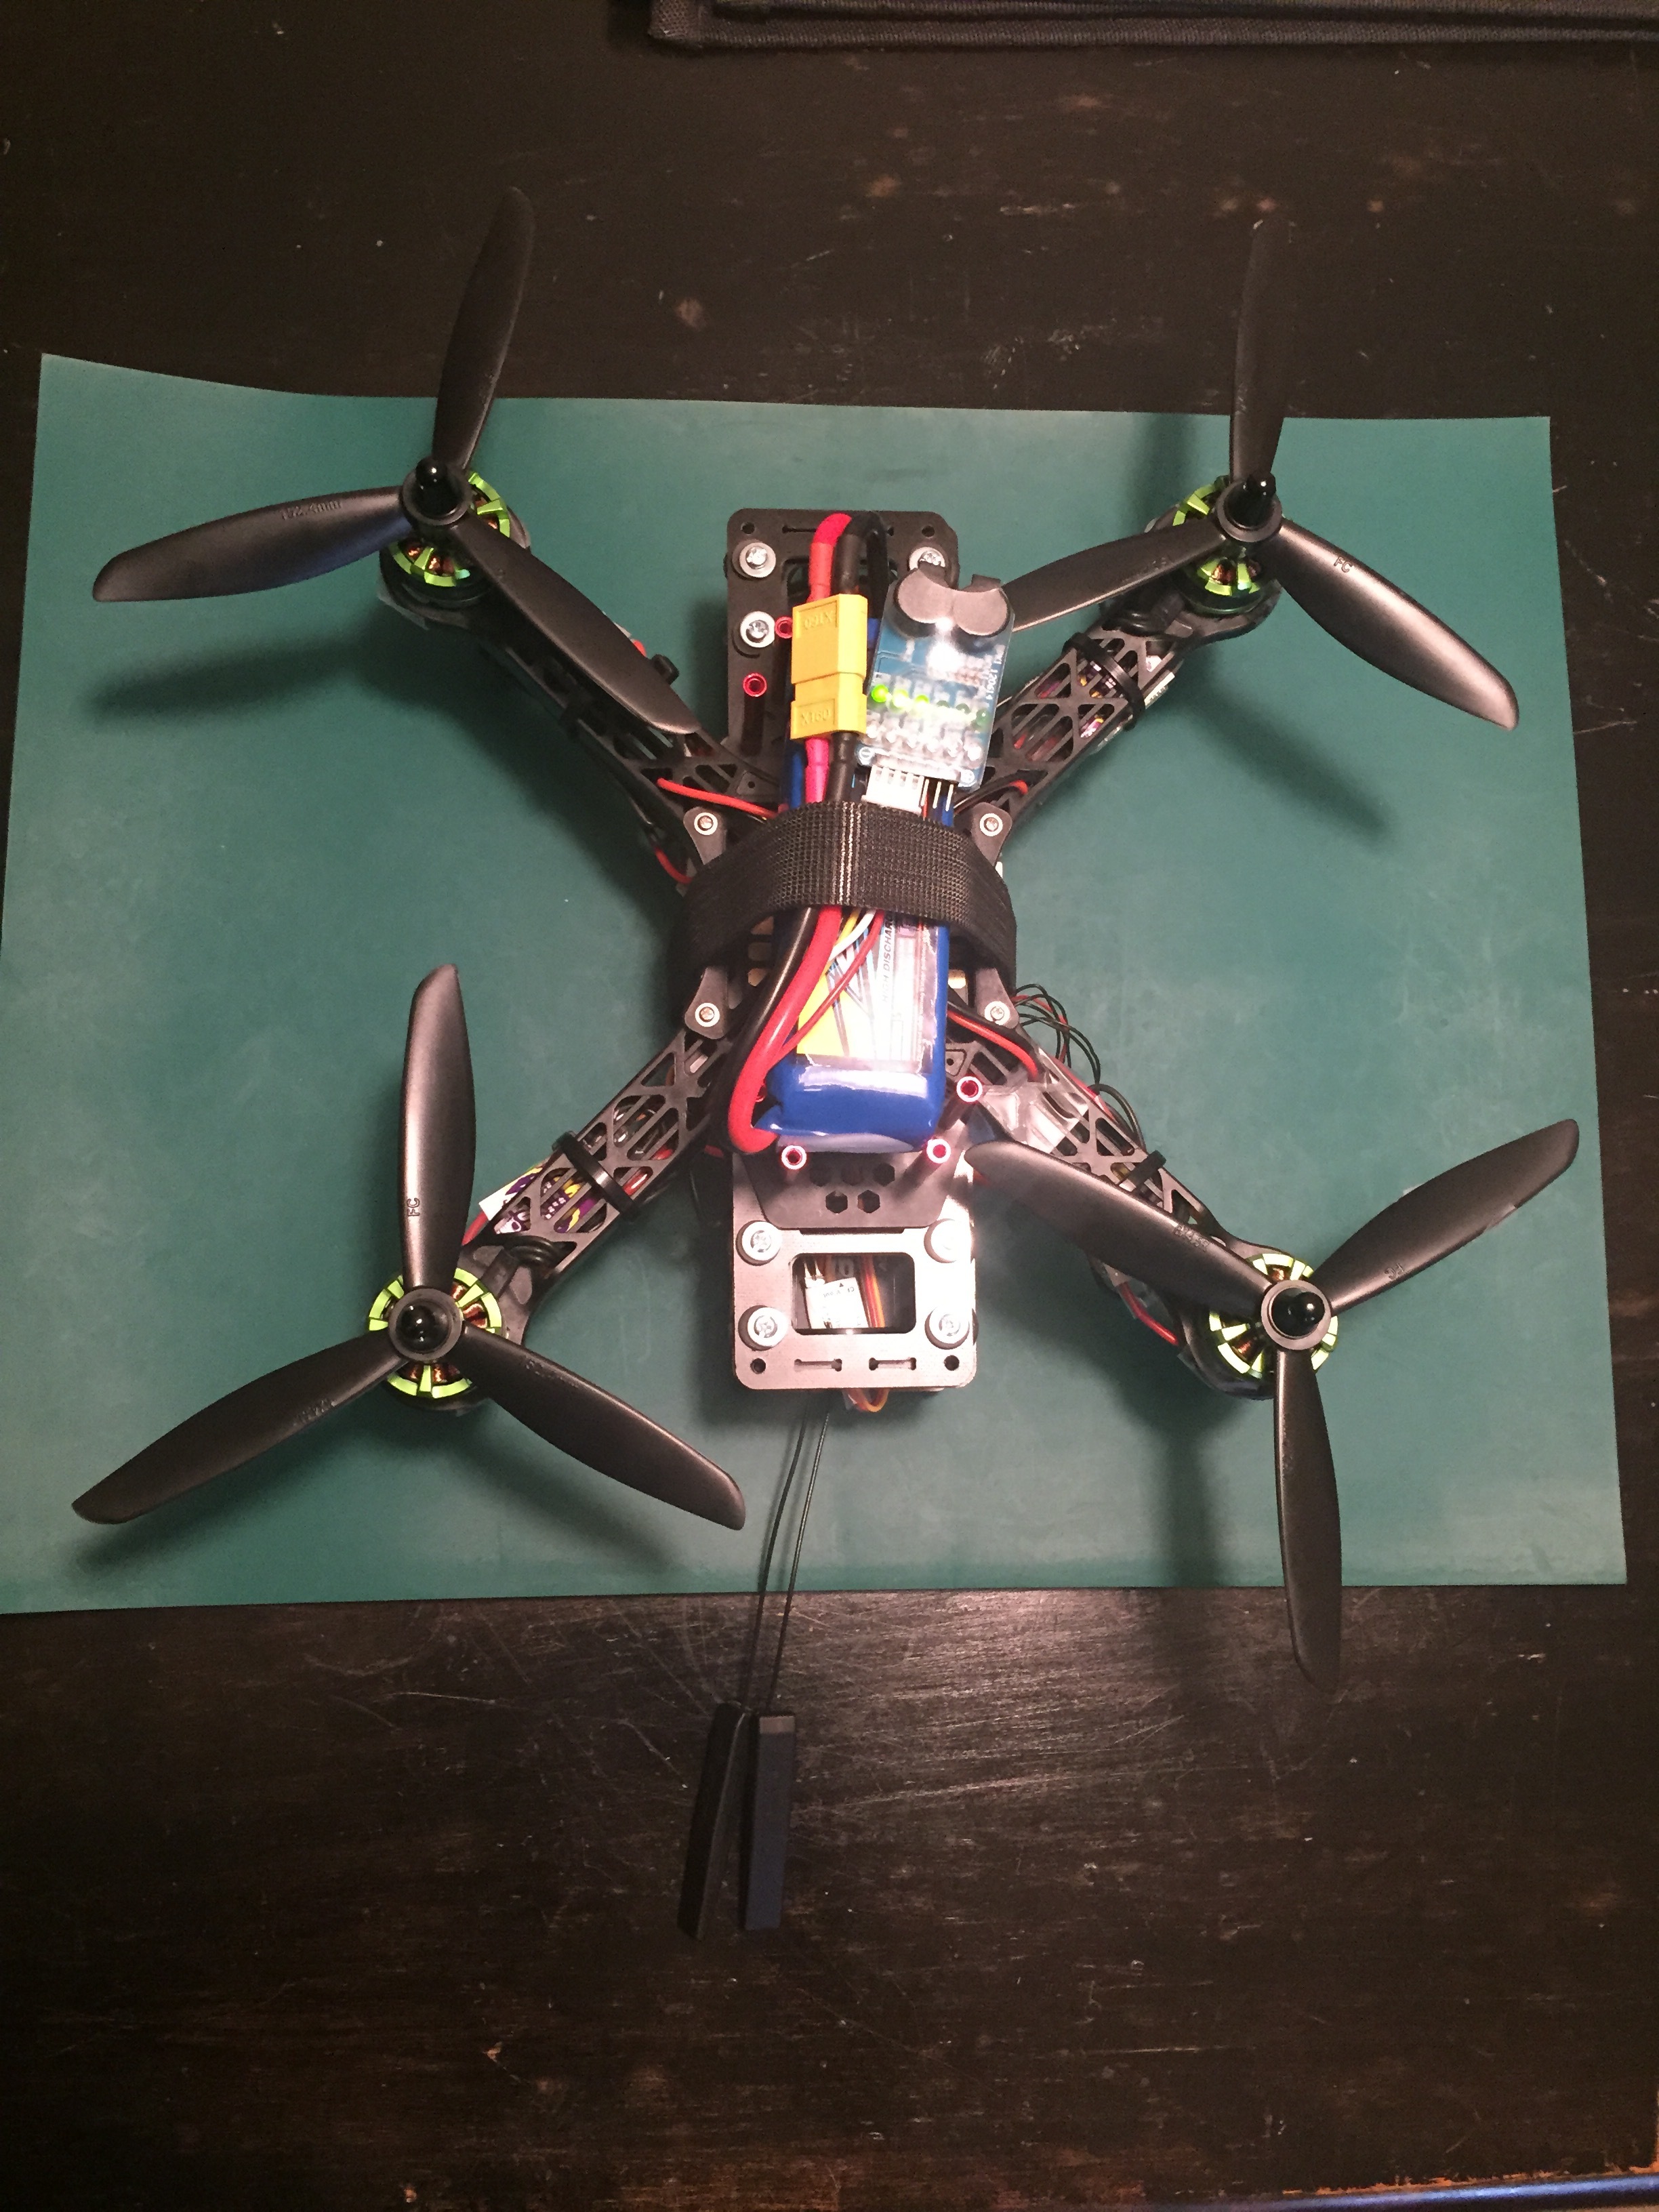
GPS signal quality and interference. I can’t see the GPS on your photo, presume it was removed for convenience. Then ensure the GPS is rock solid when mounted, because if it falls out of position the drone will get confused and drop out the sky like a dead fly.
-
Auto-tune. Set one of the swtiches to enable auto-tune mode and follow instructions (including videos) on the APM web site how to do that.
-
Test GPS hold/loiter with above. If you still have problems upload the telemetry logs to DIY Drones forum and somebody will usually analyze it for you.
What you should expect is drifting of a meter or so horizontally (normal GPS accuracy) and less vertically (normal barometer accuracy). You can get a perfect vertical hold with the addition of a sonar sensor (my next project) and horizontal with either optical flow or RTK GPS correction (something Emlid/Navio are leading with and is documented on this site).
However adding a load more tech/boxes/cables/weight into the drone is going over the top for an FPV racer. It’s touching on requirements for a larger educational/photographic (less exciting) drone. It’s all a balance of size/weight/complexity which decides what style of vehicle you will have to play with.
One more tip from looking your photo; you could cable-tie back the two RC receiver antennas to the sides of the lower frame (at the back). They fit nicely between the stand-offs and there are plenty of holes in the frame to tie through.
I also tested with the full 3D printed X receiver stand and although it was light, I decided it was too big for my liking. So if you do get a 3D printed mount for it, I suggest just printing the one which holds the two PCB antennas in a V-shape. I had no signal problems with them cable-tied to the sides, so it’s probably not necessary at all. Just don’t cable tie them to the arms of course, as that introduces vibration and increases the chance of damage from a crash.
Have fun with that! I’m working on some Windows 10 IoT software for the Navio and it’s looking good. That’s why I was absent for a while