


Hi! I thought I would share the progress of my current build. This will be my 4th quad using the NAVIO board. Any comments or ideas along the way are welcome! 
2 Likes
Some background…
A long time dream for me has been building a drone connected purely via internet over the mobile network, for both a real time videostream and the control link. The NAVIO was the missing piece in building this and I got very excited when I first read about it. It enabled a compact and all integrated solution at a reasonable weight and cost. The fact that APM runs on RPi was a big bonus too.
Build 1

The first build was a proof of concept. It all worked, but due to the CPU load, the quality of the stream was not very good. I also felt the layout of components on the quad could be better.
Link to thread…
Build 2
I decided to scratch build the “ultimate drone”. A big drone with super long flight time, HD camera,17 inch props etc, . In the end this quad did work, and had a very long flight time (more than 60 minutes), but it was very slow and not good at much else than hovering. In addition, I had a lot of problems with esc timings with the motors on 4S and I could never get a reliable stream from the Logitech c920 camera over 4G. Lastly, the arms were a little to springy and would resonate at certain rpms. (!!)
Link to thread…
Build 3
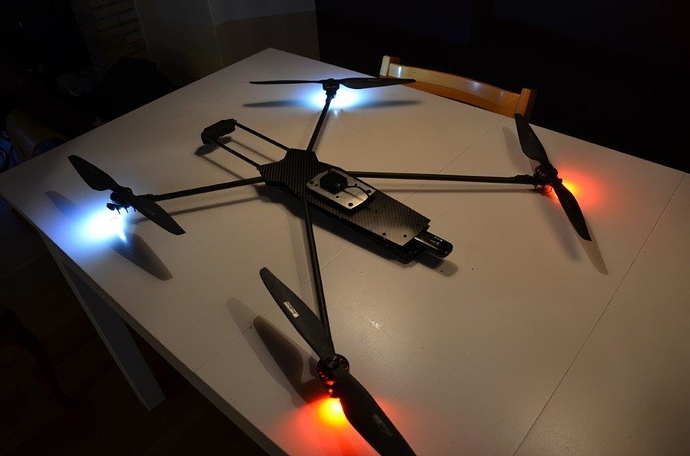
For build 3 I made a new design based on parts from build 2. I decided to try the RPi camera again and build a much faster and smaller quad at the sacrifice of some flight time ( it hovered for about 45 minutes ) (13 inch props) . The result was a big improvement, it flies extremely well and has a lot of power. I can highly recommend these motors on 6S, they are very light and powerful. With the addition of NAVIO 2 and RPI 3 the quality of the stream over 4G improved dramatically too. All in all, this quad pretty much fulfilled my initial dream!
Link to thread…
2 Likes
Build 4!
Ok, so what will the focus be on this build?
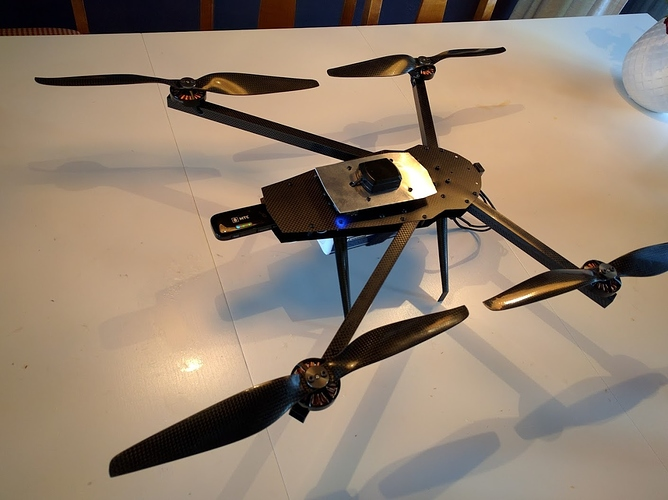
The slight problem I have with build 3 is its size and weight. This directly relates to safety, portability and cost. At a weight of about 2kg, it can cause a lot of damage and it’s also a little difficult to bring along on trips.
So I’ve set out to design a new quad with the focus on reducing size and weight. I still want it to be able to fly for at least 30 minutes, after all what is the point of an internet connected drone if you cannot fly for more than 5 minutes?
You can pretty much scale the size of motors, battery and frame any way you like. The things that are more fixed is the weight of the electronics, specifically the Rpi, Navio, Gps and the 4G Modem. So, basically it comes down to minimizing the weight of the needed electronics, then design the smallest and lightest possible quad around this that will be able to fly for more than 30 minutes.
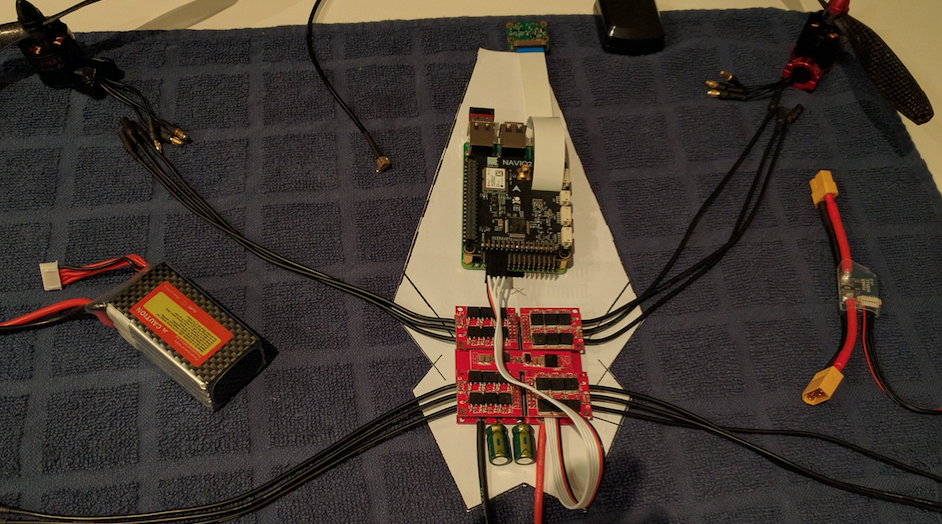
Starting with the electronics:
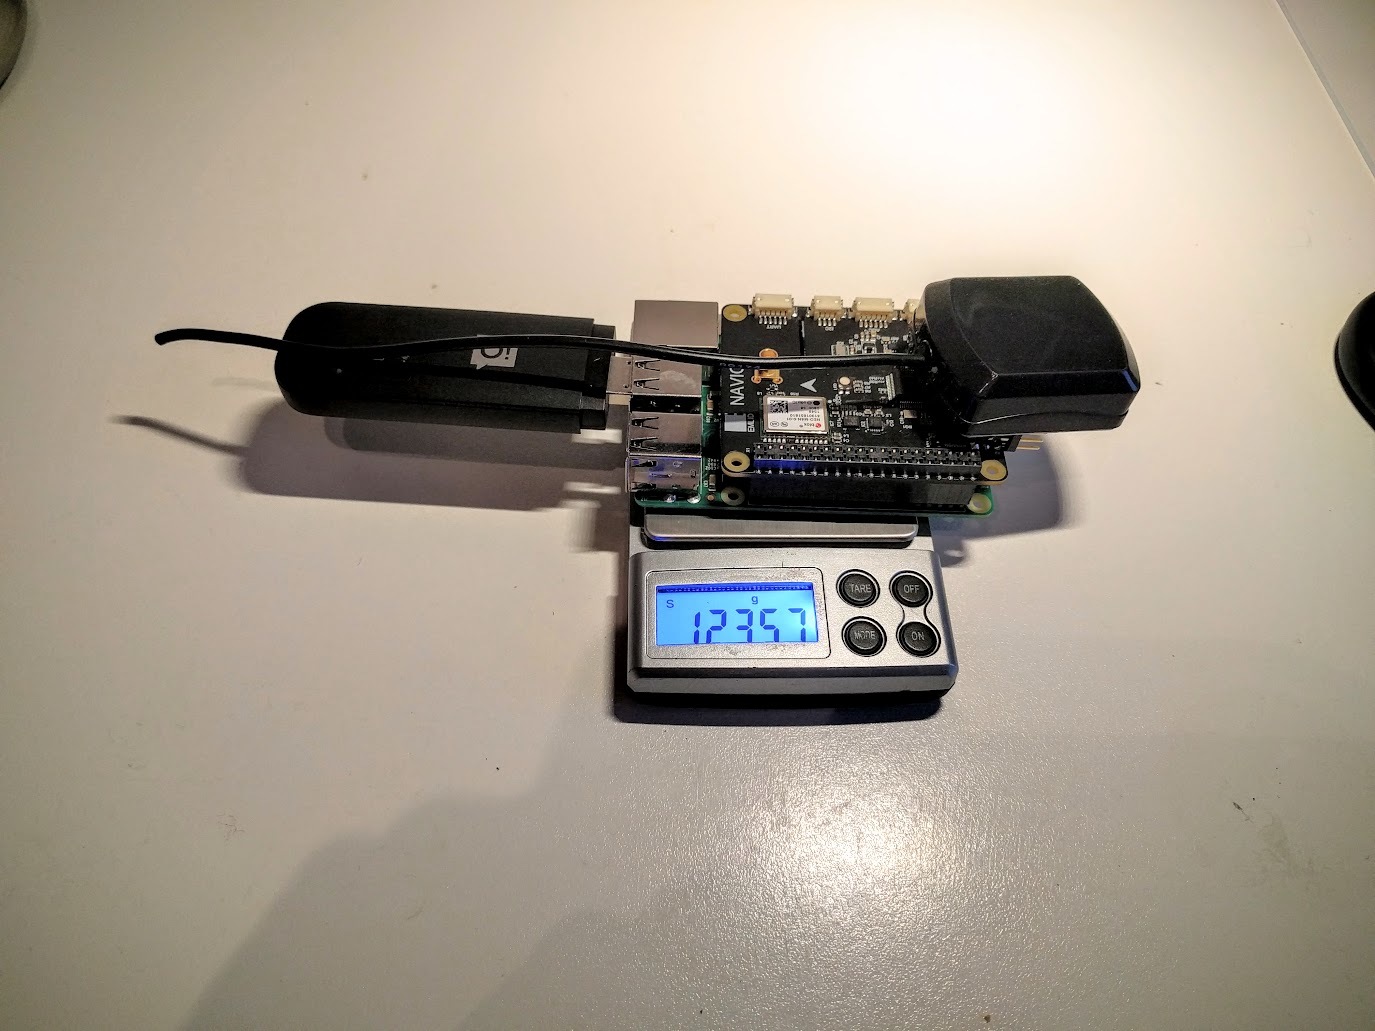
Ok, so we start at 124gr. That’s actually quite a lot. If each manufacturer focused on saving weight and it was all integrated into one unit I’m sure this could be reduced by 80%, but I do not have the resources to do that  . However, I’m sure we’ll get there at some point in the future!
For now, I’ll have to work on what I got at hand.
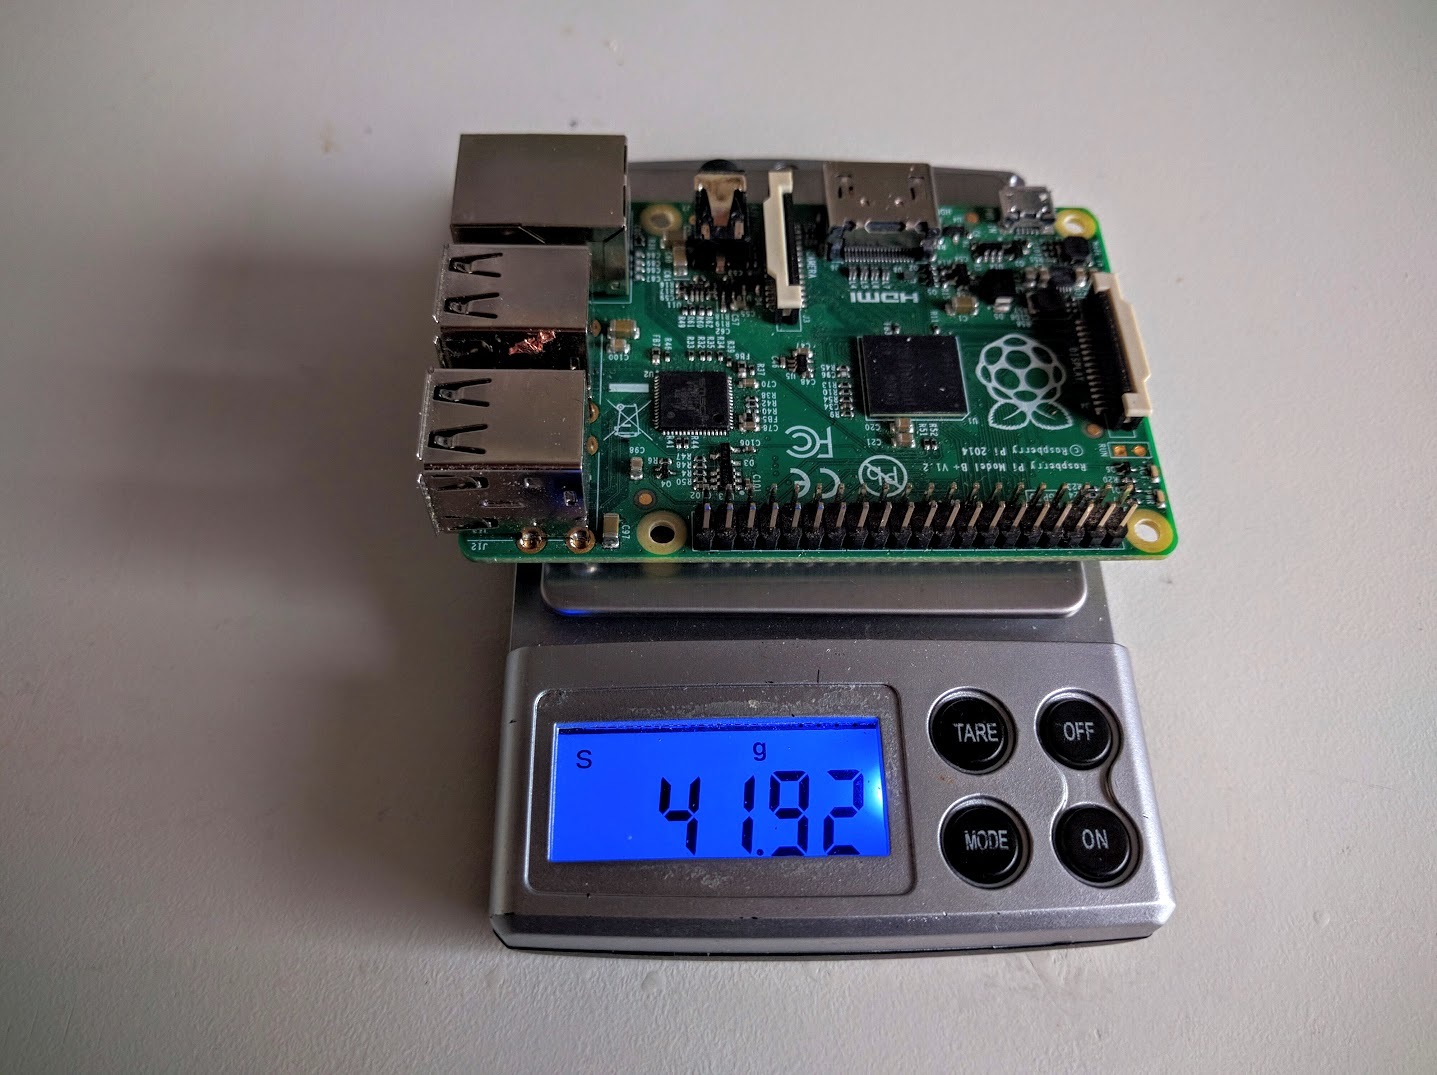
Starting with the RPi, I remove USB and network connectors, as the RPi3 has built in WiFi, next I trim the PCB a little and shorten the GPIO pins and remove the small plastic at the base of each pin.
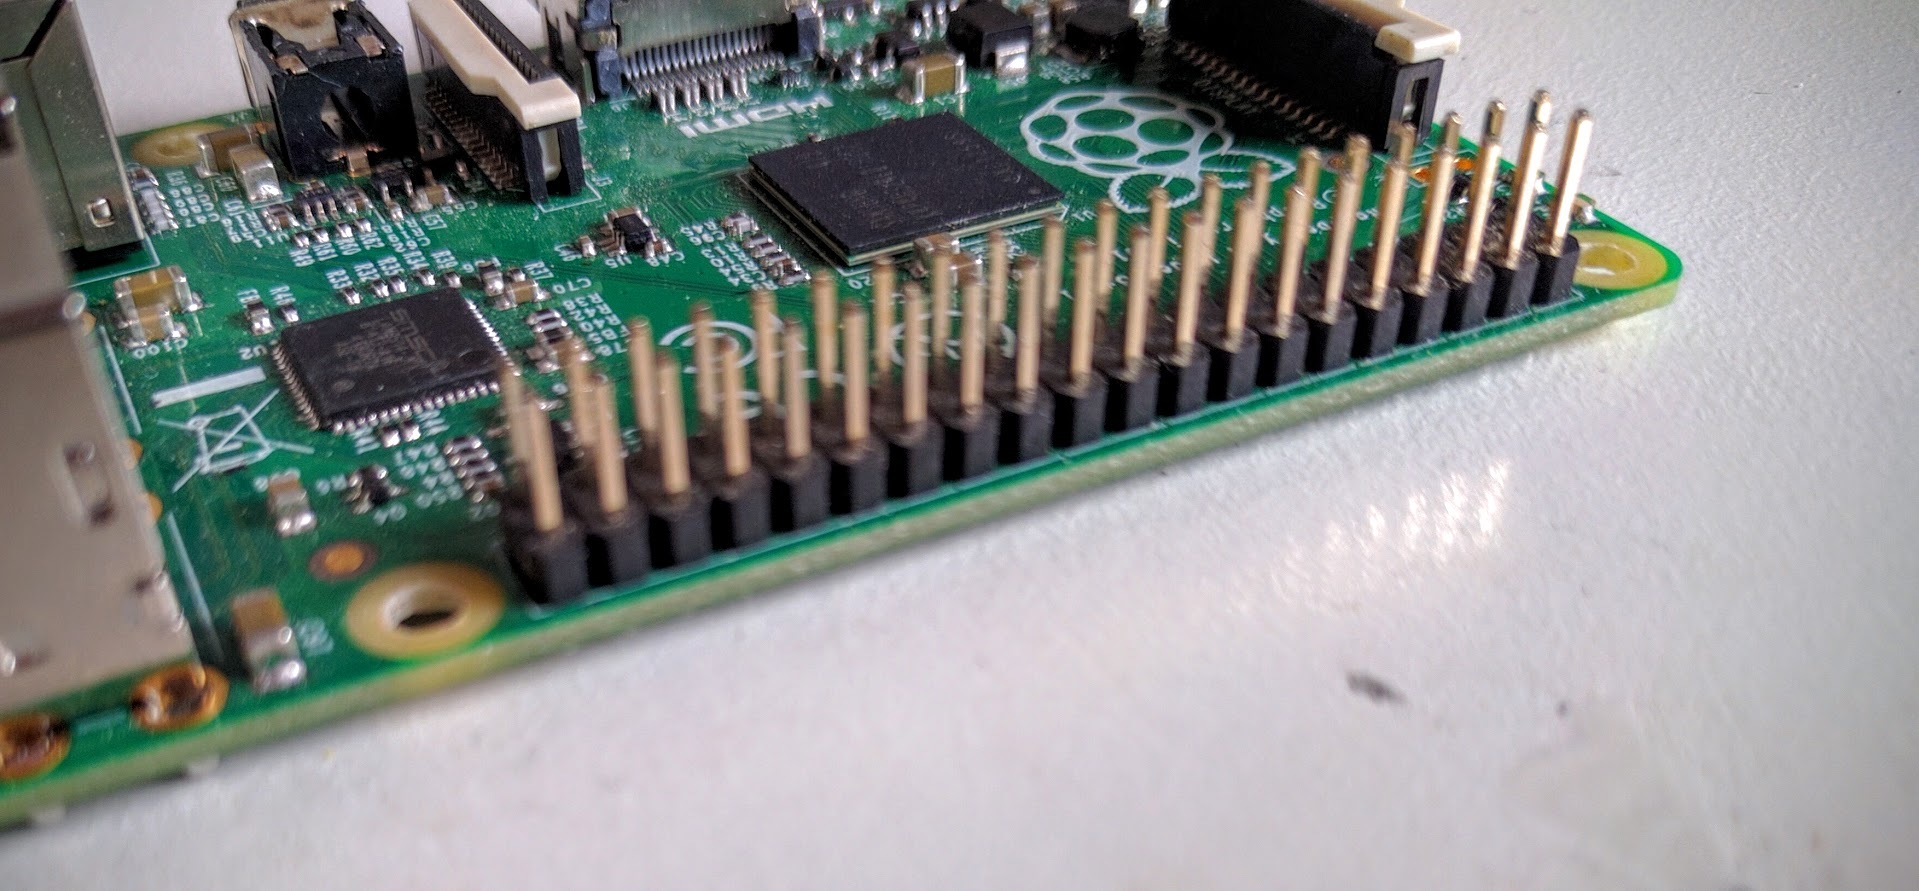

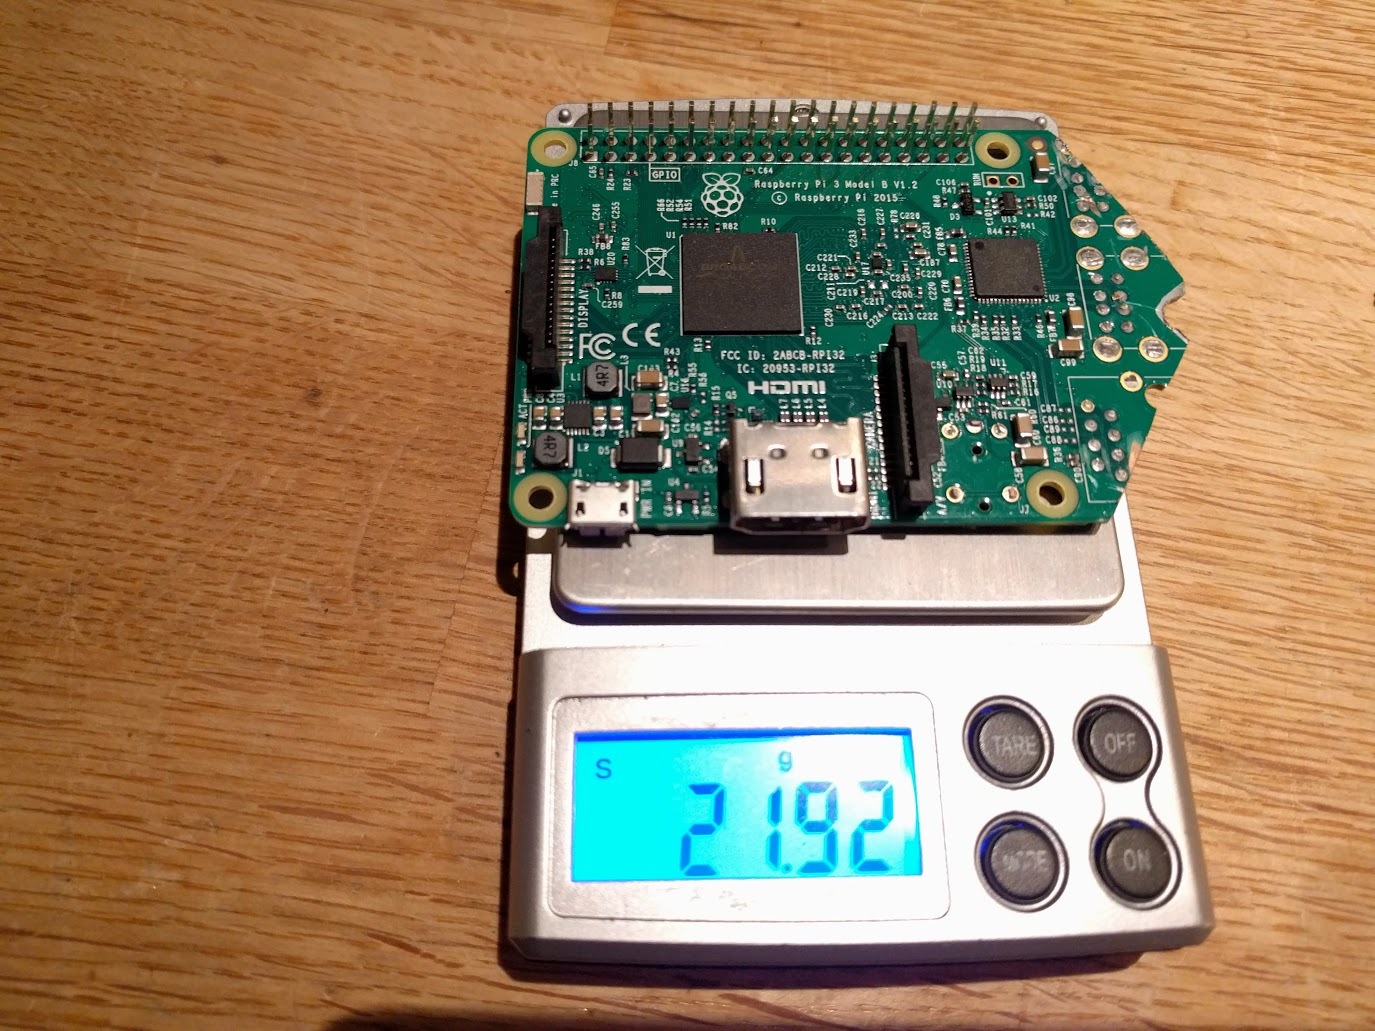
That reduces the RPi from 42 to 22gr. It also reduces the size a little, allowing for a more compact frame.
There is not much we can do with the RPi camera or the NAVIO board. However, the GPS antenna can be replaced by a smaller one:
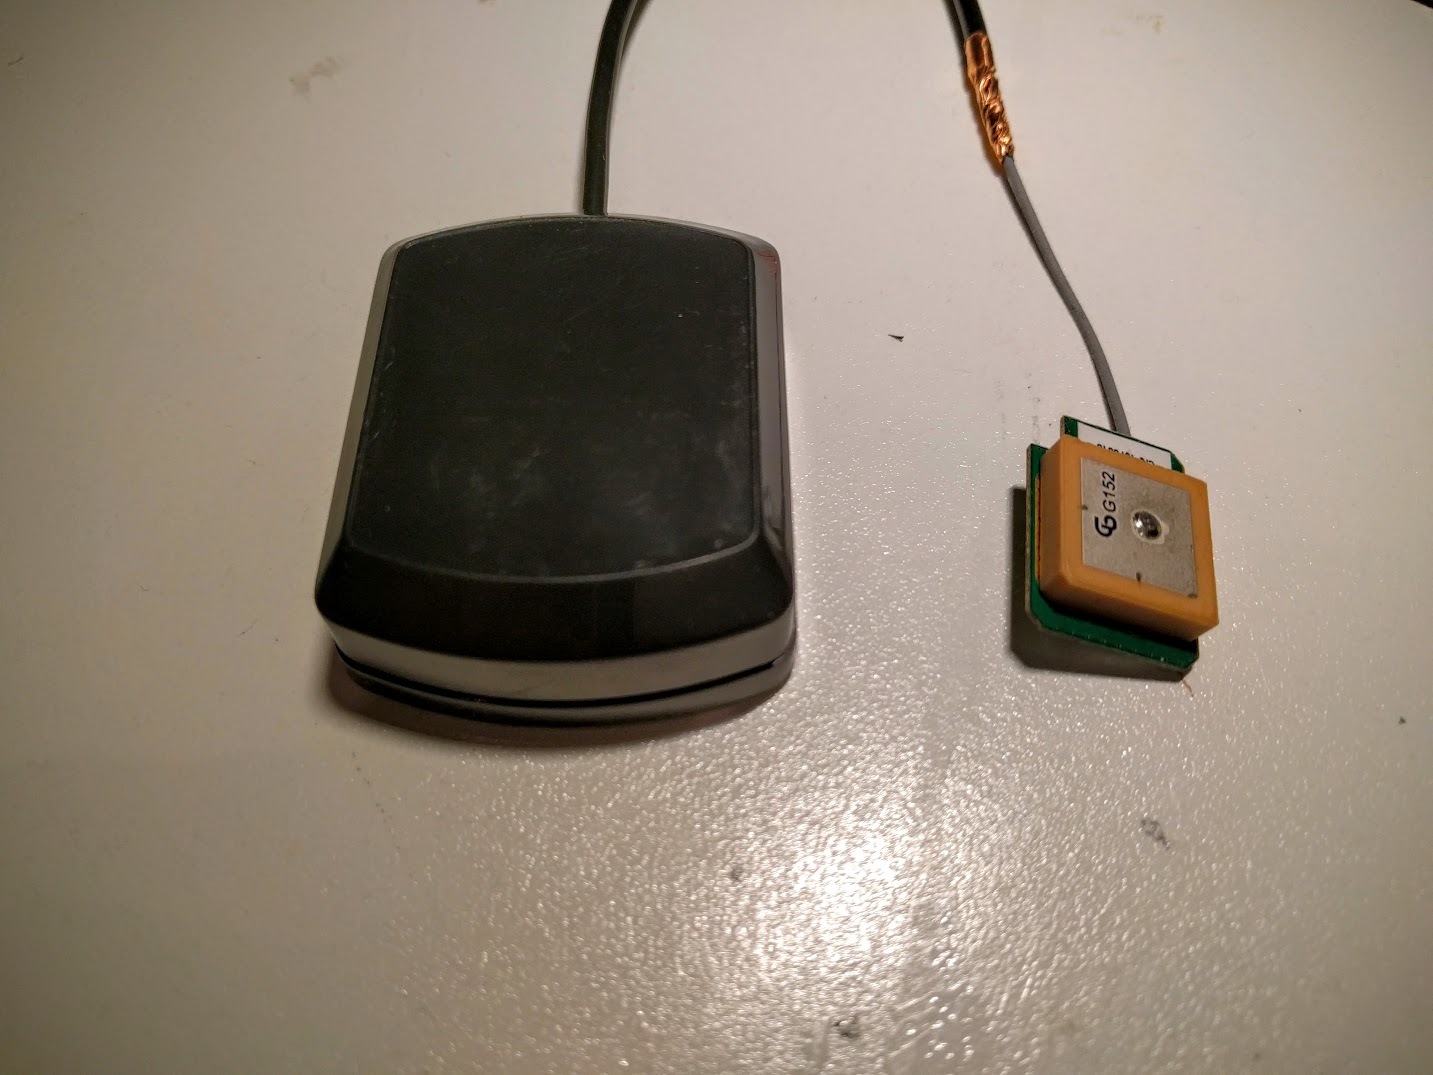
I’ll have to see if the performance is adequate, but it seemed to work fine when I tried it.
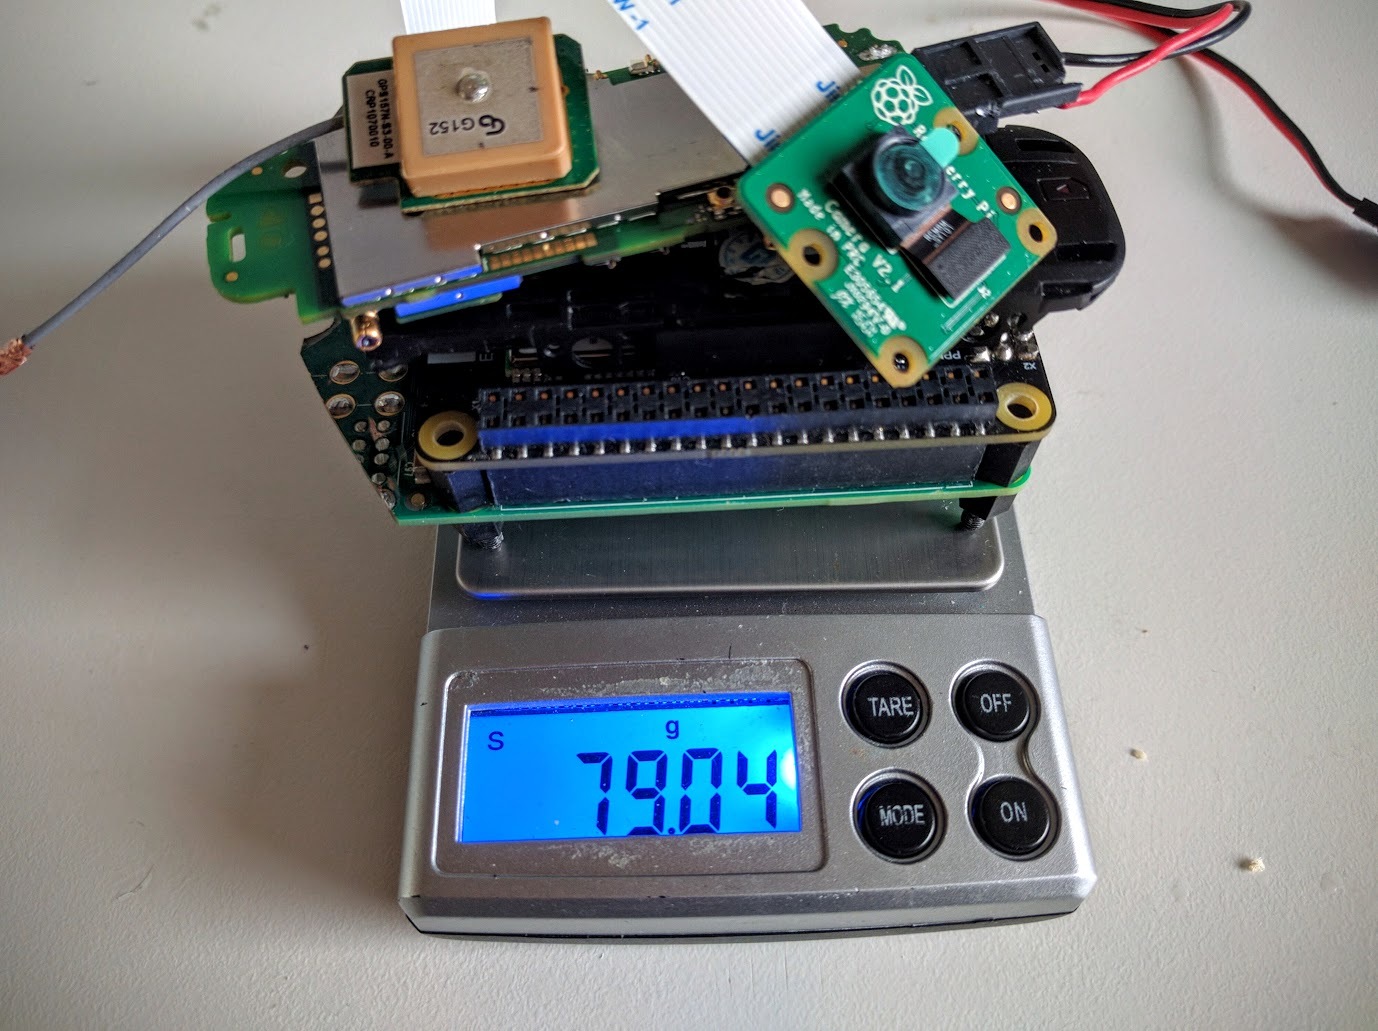
The sum of all this is a reduction from 124gr to 79gr, 45gr saved (36%). That will be the starting point for the rest of the design!
3 Likes
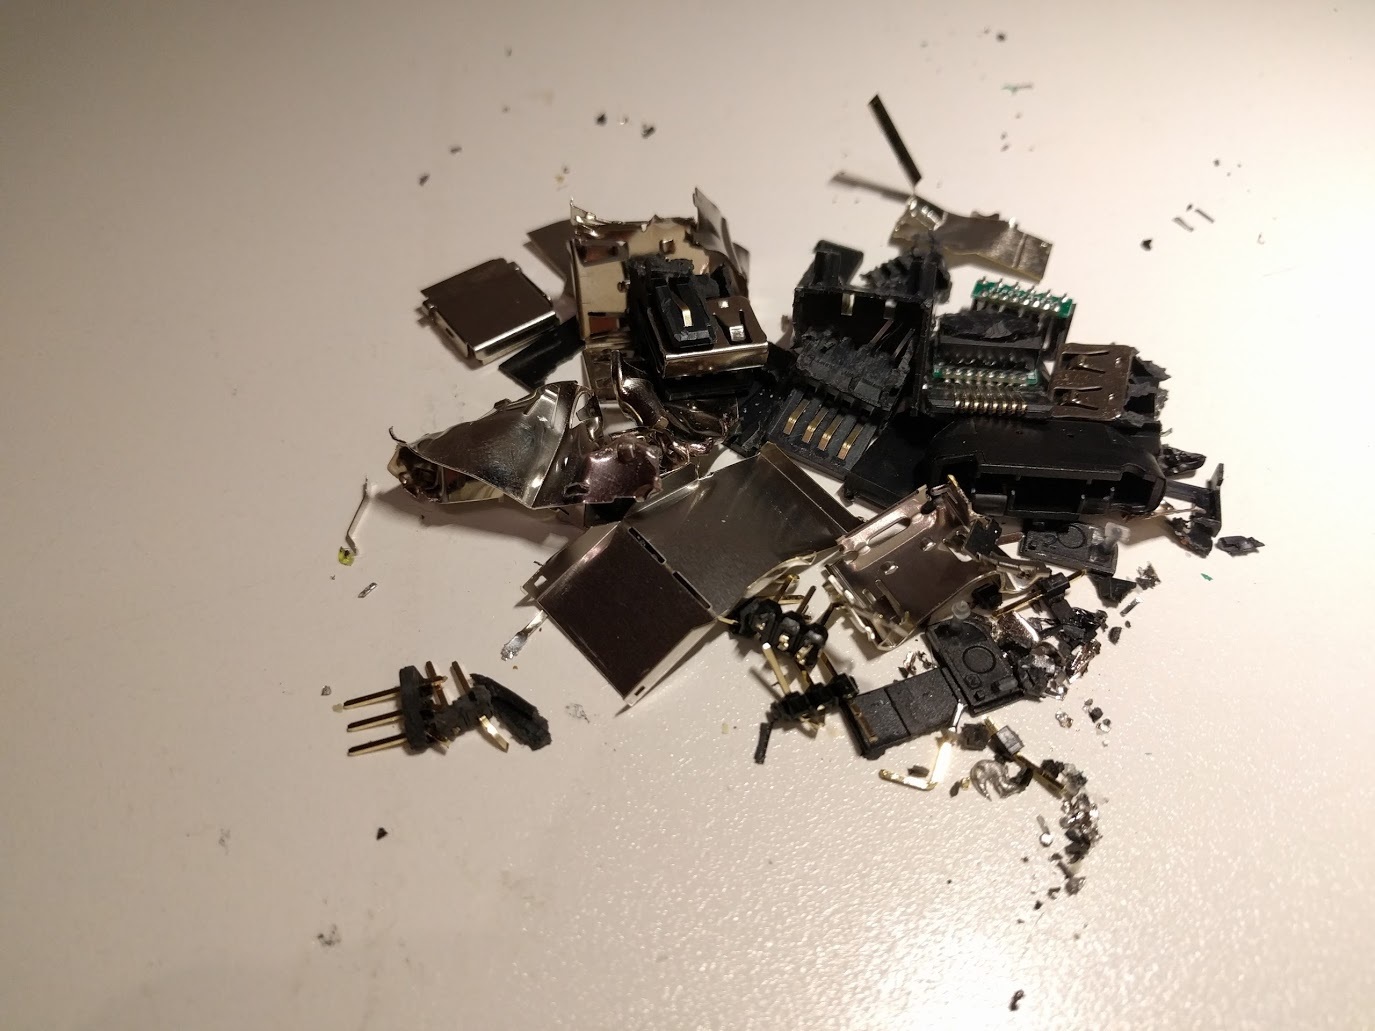
I would have probably just unsoldered the components.
Are you sure, this will still work reliably?
I tried that first, but I think it is lead free solder so it was quite difficult. I the end I got impatient and just used the Dremel. I’ve tested it and no probelmes so far… soaked the cut edge in superglue to protect it a little. time will tell it if holds up…
After playing with different combinations of motors, propellers and batteries, I decided to try:
2x2 18650 batteries, 2S 7000mah (Sanyo 10A)
4x Tiger MN1806, 2300kv
7x2.4 inch props
With an estimated frame weight of 40-50gr this should give me something similar to this:
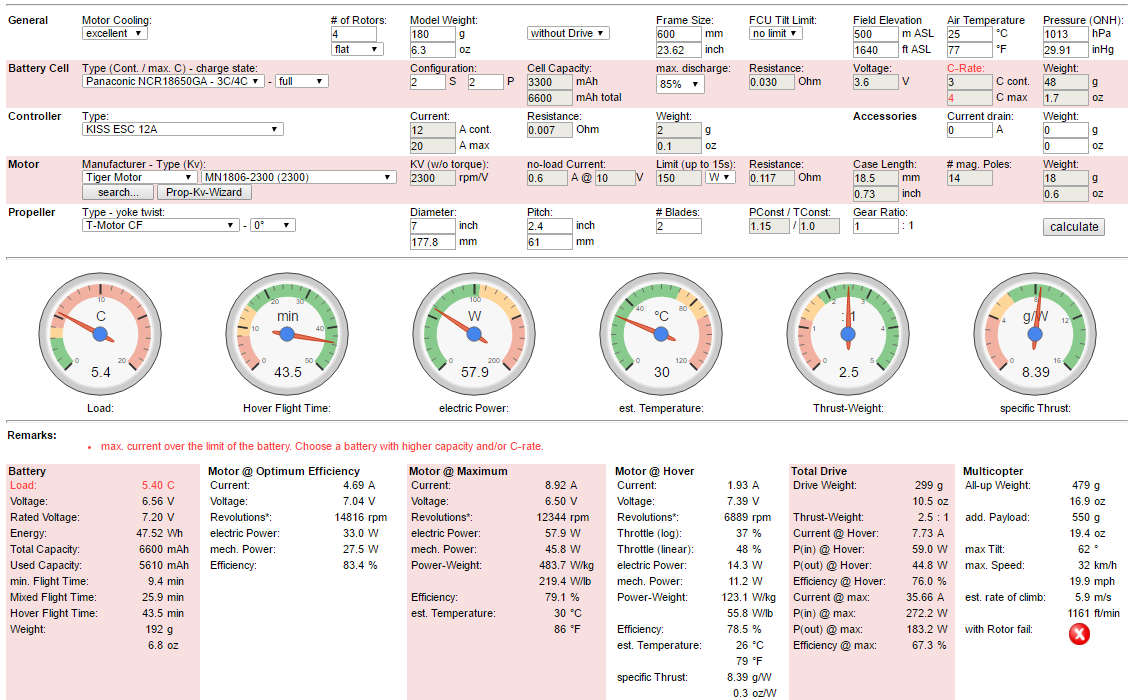
40+ minutes of hover, and a decent top speed with enough power (prop+kv) to keep it flying when the batteries are low.
2 Likes
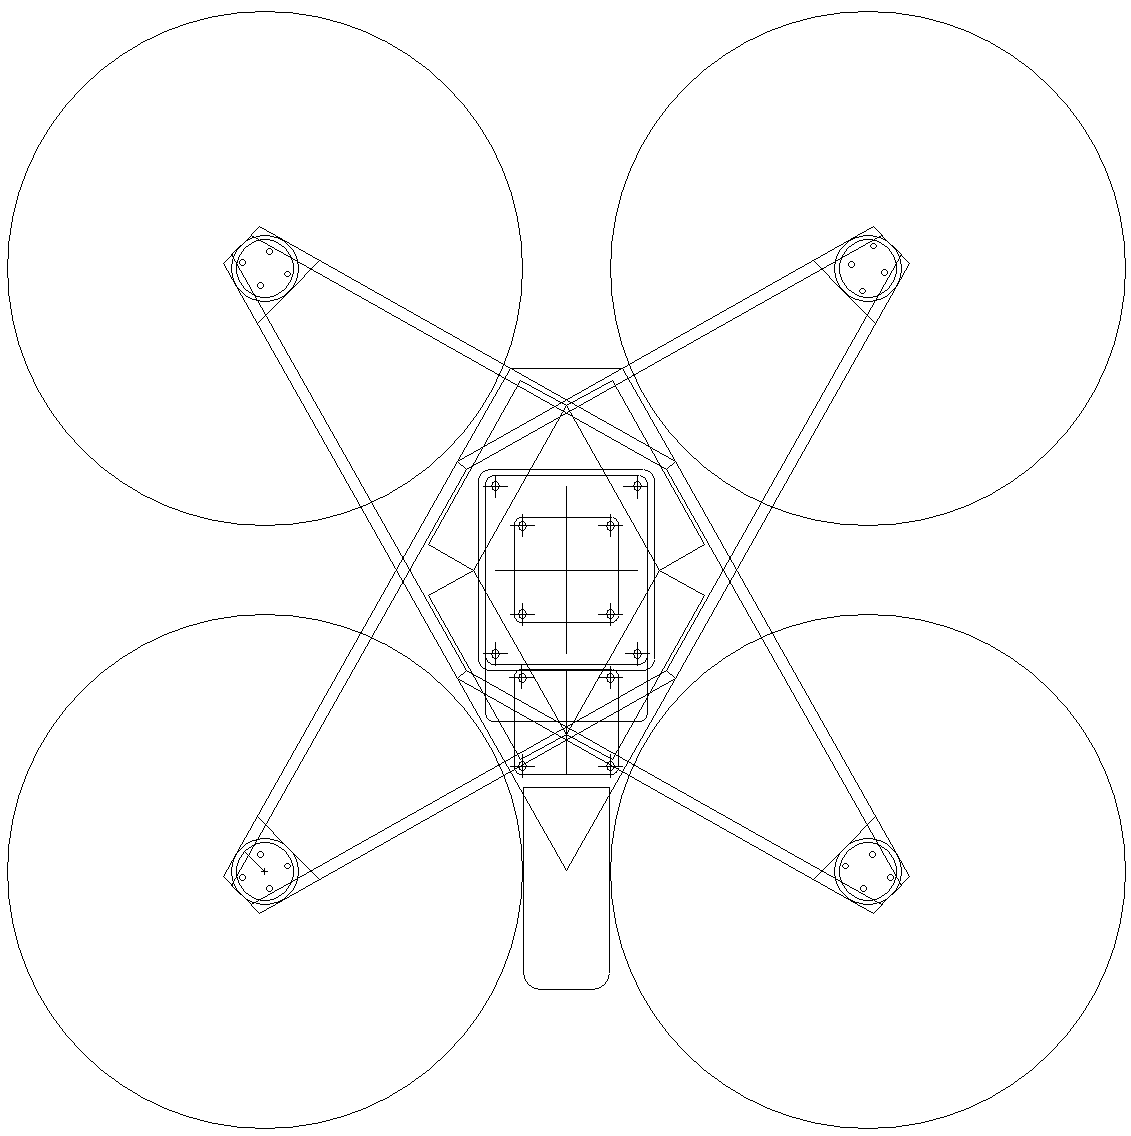
For the frame I will use 4x4mm square hollow extruded CF beams. I’ve used these before and they offer incredible bending strength for their weight. I’ll need two for each at an angle to make up for the lack of torsional stiffness:

3 Likes
Starting the build:
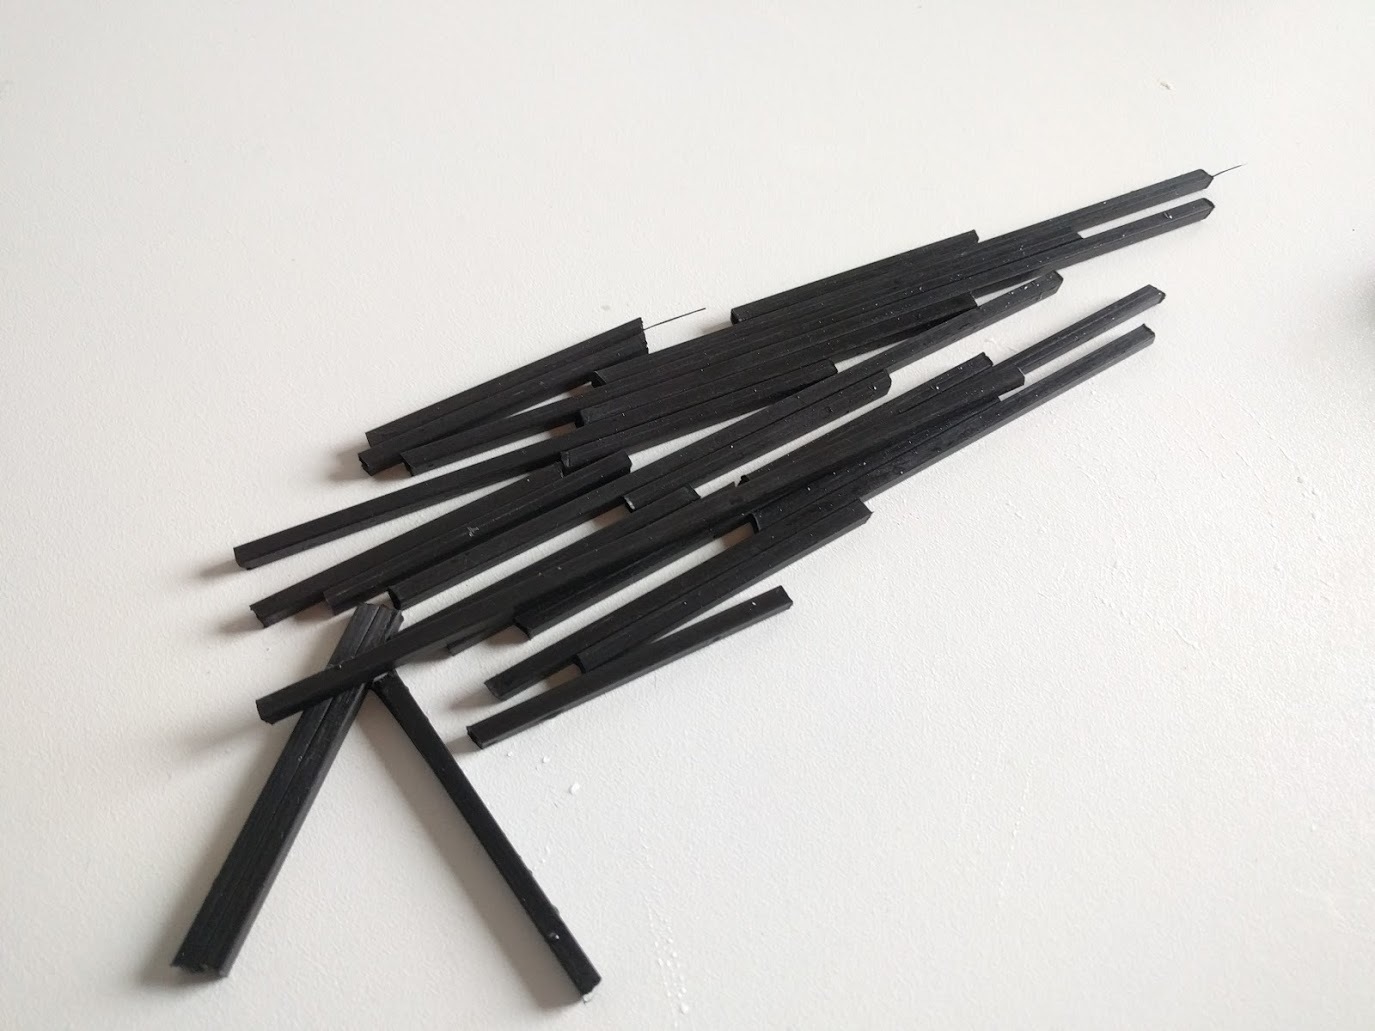
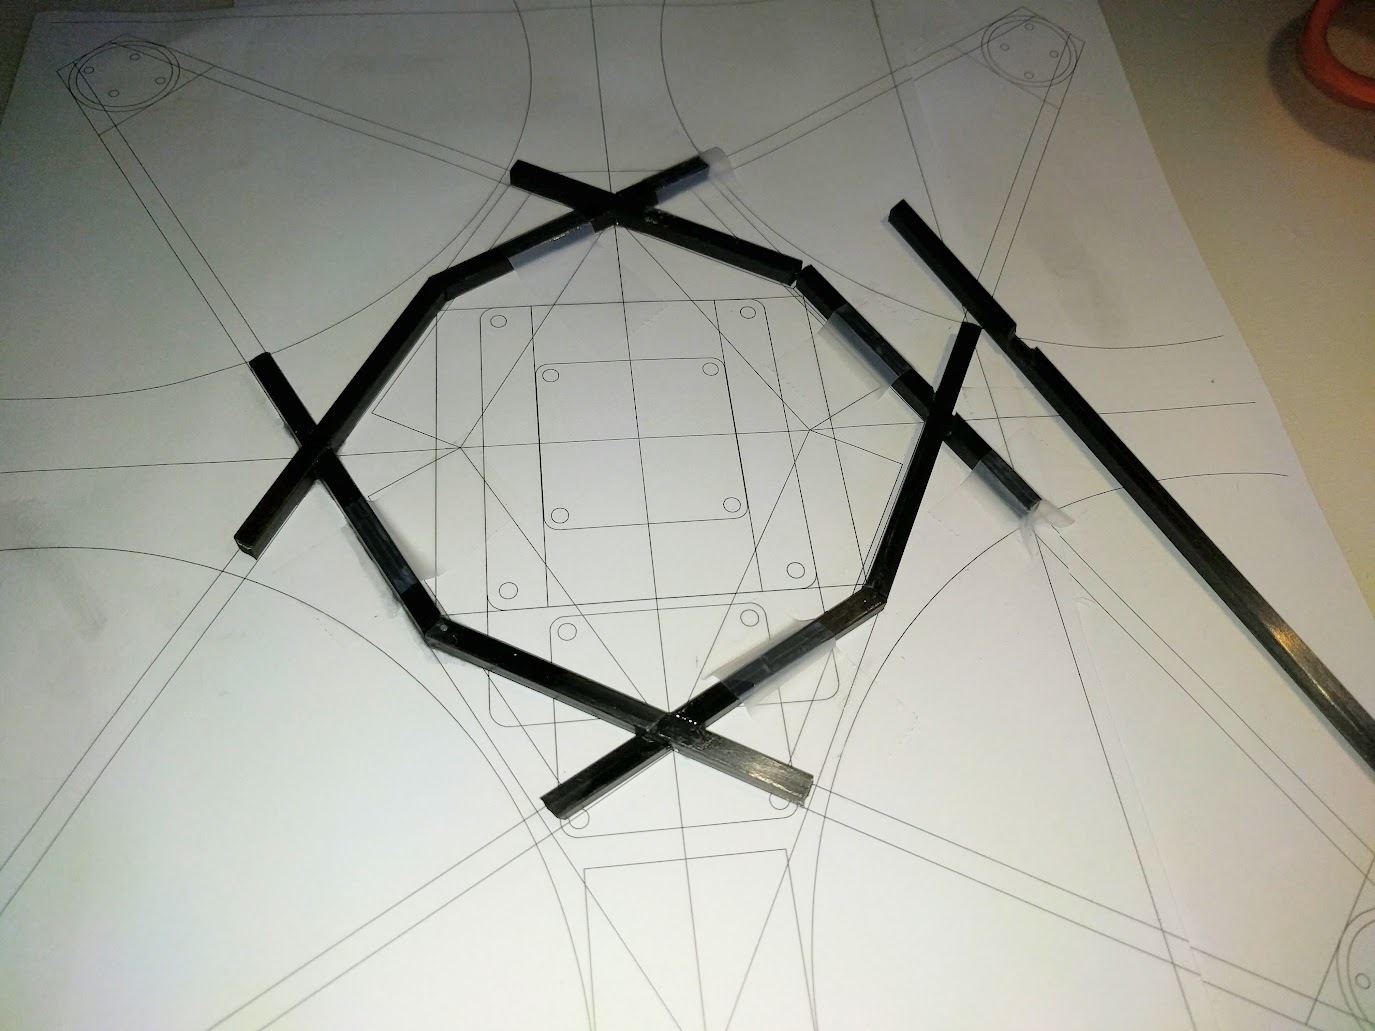
Cutting all the pieces

Using 0.5mm CF sheets, would have used thinner ones, if I knew where to get it.,
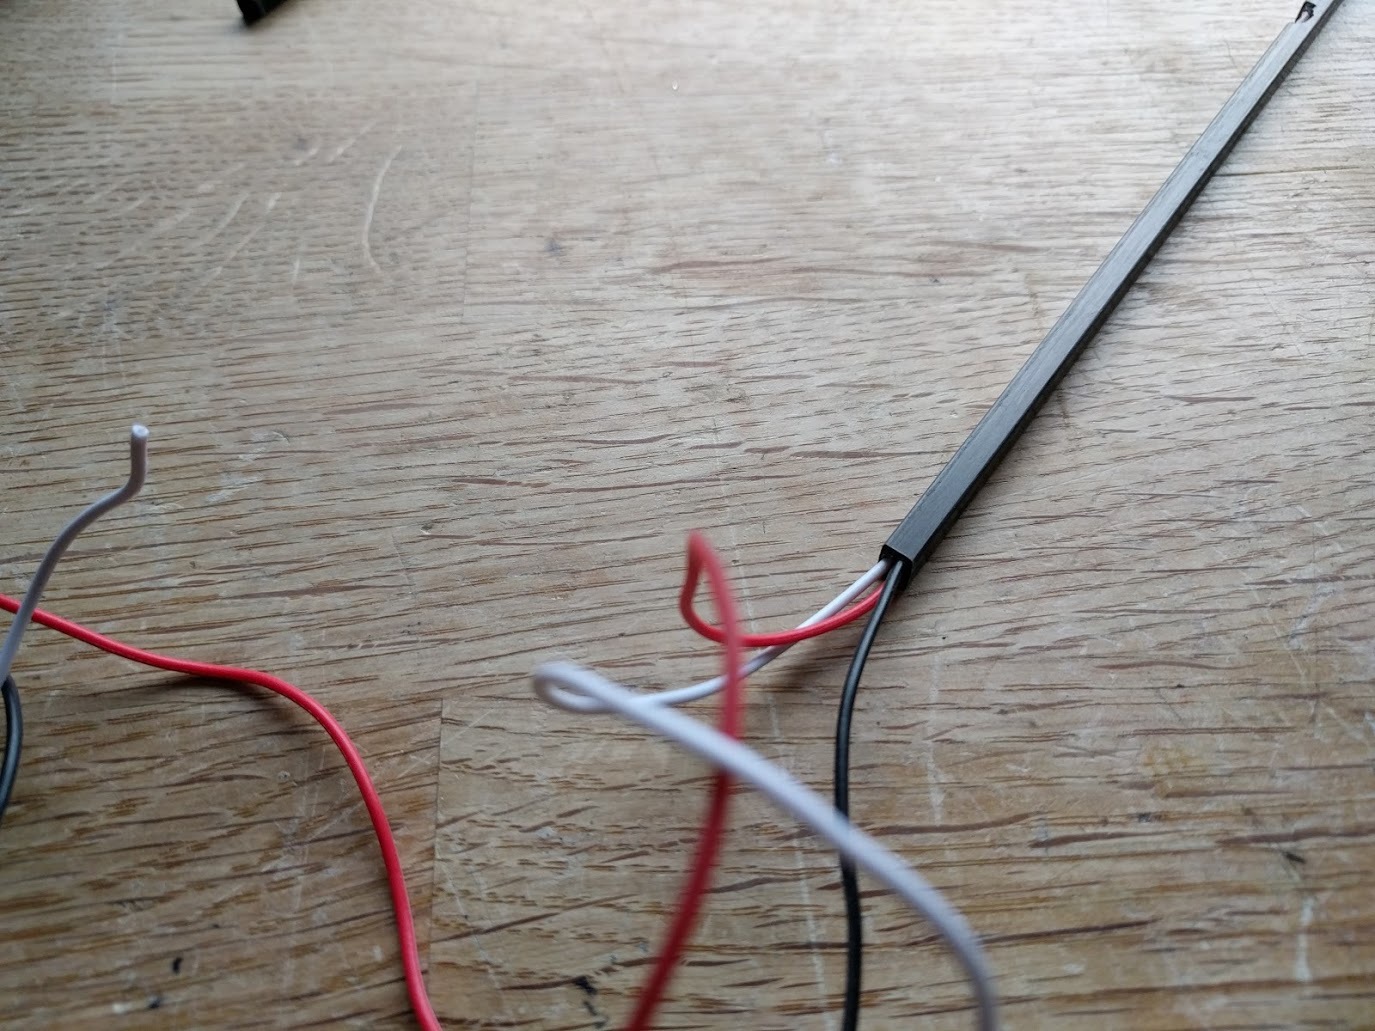
Threading motor wires into the booms:
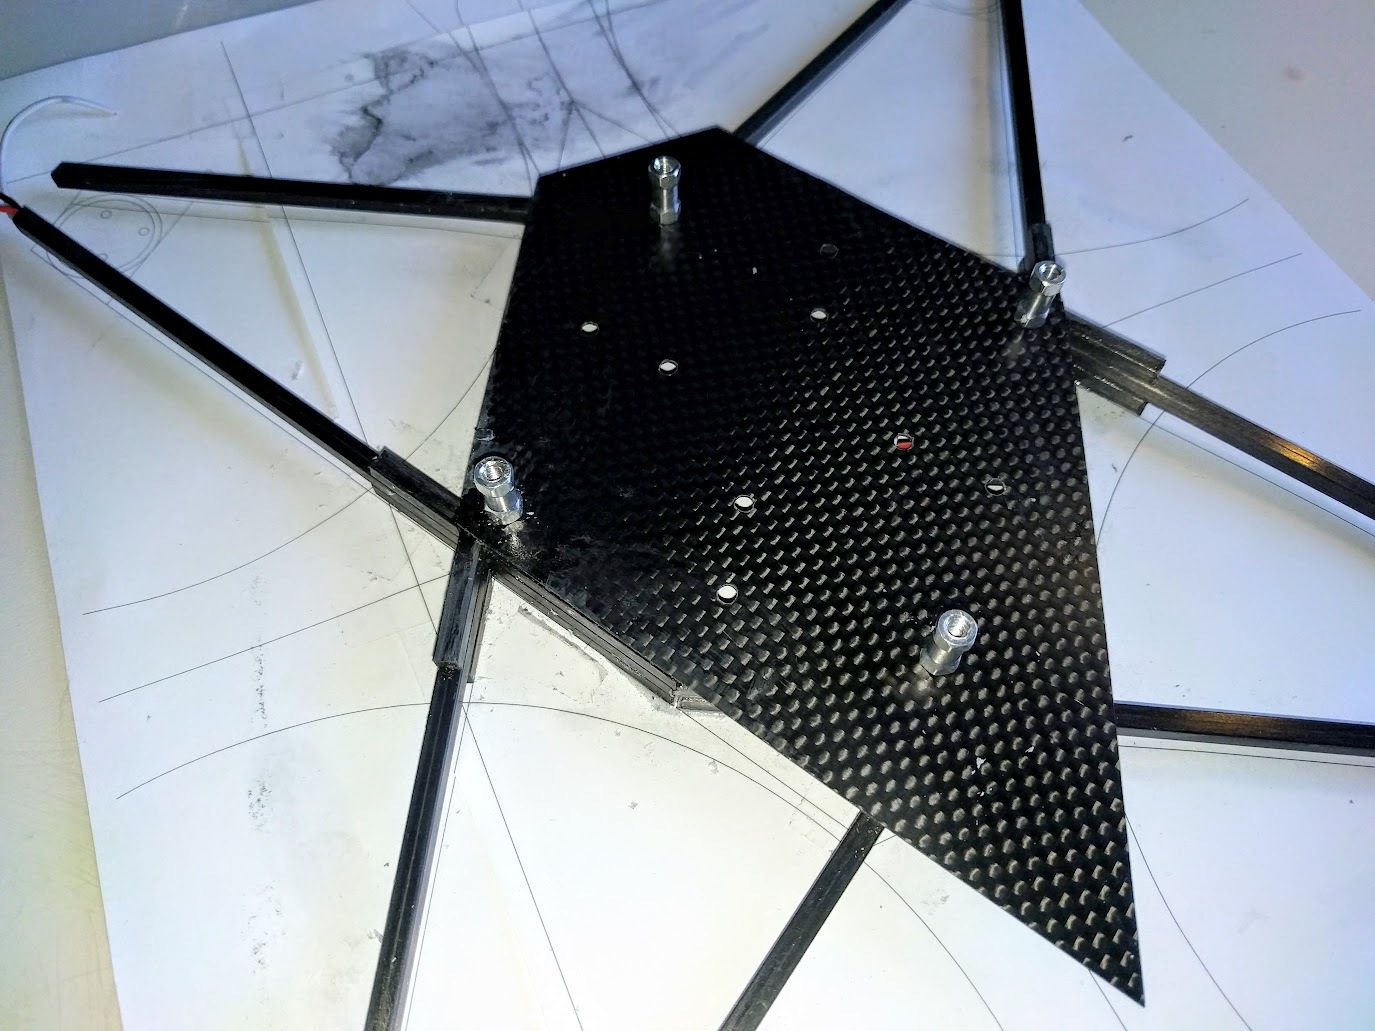
Fitting it all together, there beams are slotted to fit together and overlapping in three layers to keep strength and build a “box” for the electronics:
Using mostly CA glue and some epoxy to glue it:
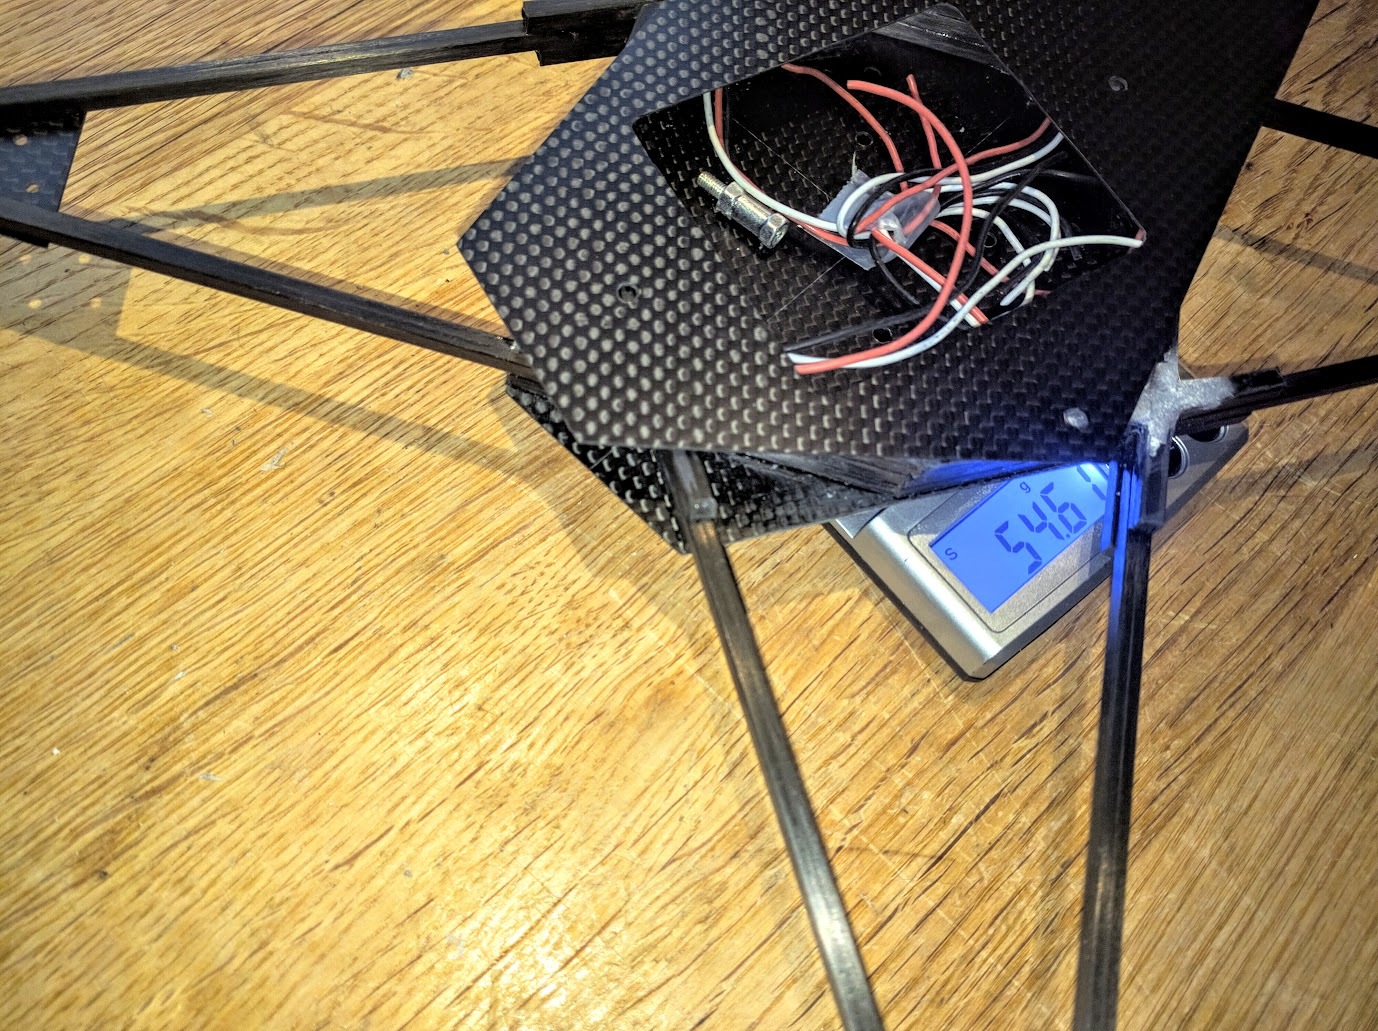
Ok, so the first part of the frame is done:
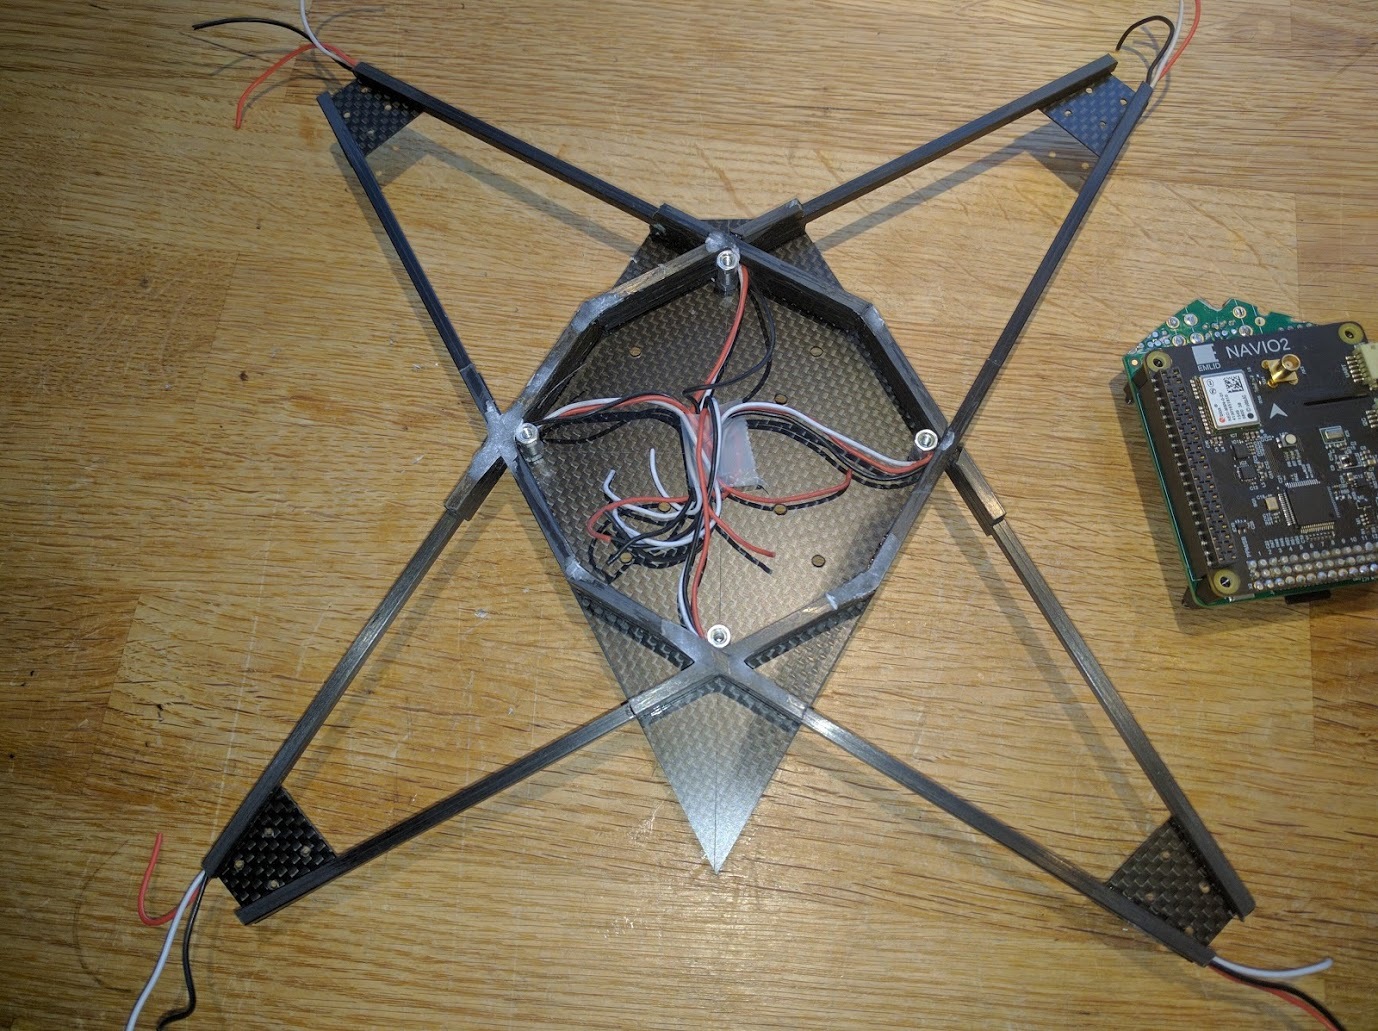
55gr for the whole frame including some bolts and motor wires, that have not been cut to length yet. Frame alone is 40gr. Migth cut some holes in bottom piece to save a few grams.
Batteries and the “4 in 1” ESC goes on the bottom: I hope the “circular” battery configuration is not going to cause magnetic interference with the compass. I’ll have to avoid making the current going in one full circle, some testing is needed.
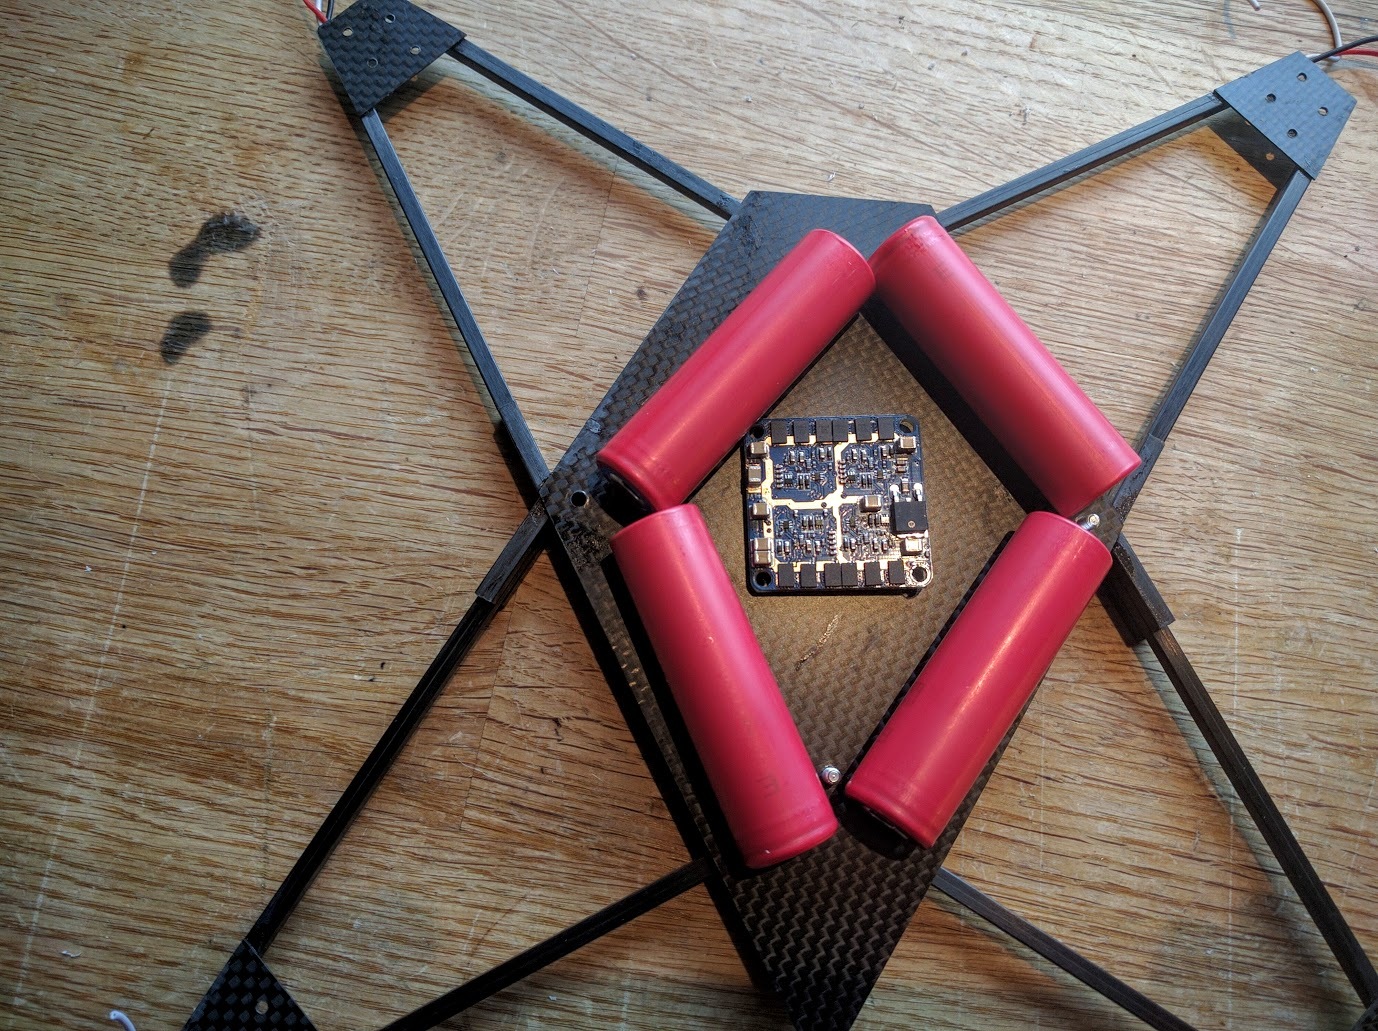
(motor mounts will be reinforced)
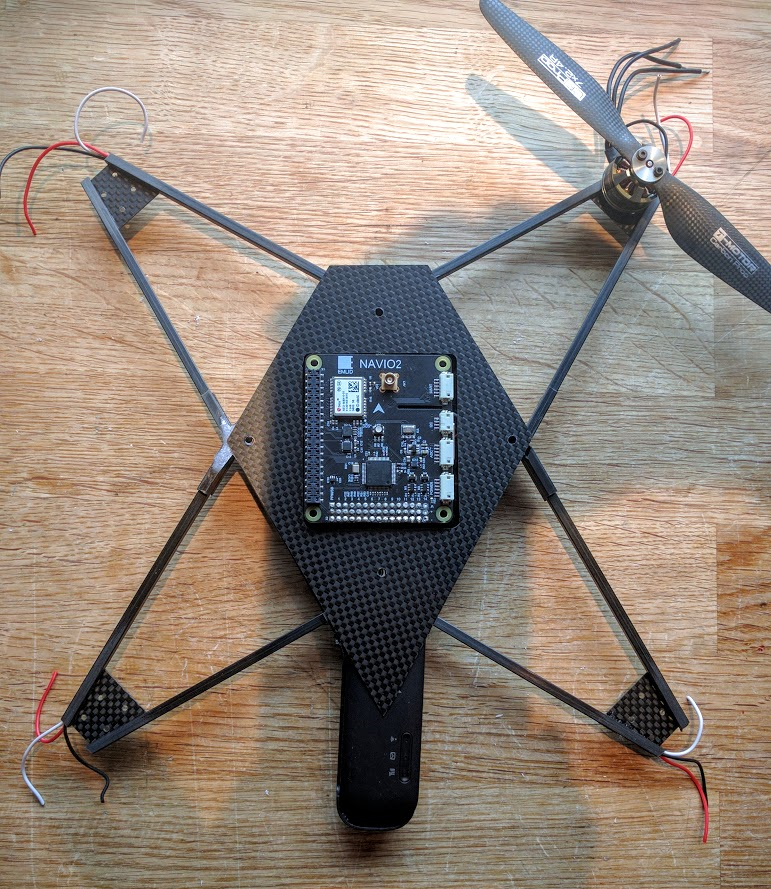
Next up is mounting camera tilt servo and fitting the electronics…
3 Likes
Hi Ole
Congratulations for your next project.
Can I ask you where can I buy this 4 in 1 ESC?
Also, what did you use to cut the carbon fiber?
Warm Regards.
Ronildo.
Hi Ronildo, you can get them several places, I found mine here: http://www.readytoflyquads.com/speed-controllers/4-in-1-escs It saves some weight by simplifying the wiring a little. I cut the sheets with sharp scissors and some sanding afterwards.
On the beams, i use a Dremel. (I do it outside, wearing a mask, CF dust is very harmful to you lungs.)
Hi Ole.
Thanks I got, although can you tell me which model did you get? I saw the options on the website and I really appreciate your help but the options looks a little bit different than your 4 in1 ESC. Honestly electronics is not my expertise so I just want to double check.
I bough this one below which works fine but is just too big, although is low price.
http://www.emaxmodel.com/esc/simonk-series/emax-multirotor-4in1-esc-4-25a.html
Also I was thinking about this one which is really tiny but is way too expensive.
http://www.helipal.com/product_info.php?currency=AUD&products_id=14580&gclid=Cj0KEQjw_qW9BRCcv-Xc5Jn-26gBEiQAM-iJhUKZU2XtQzj7-vZvwF-r4kWIPGFVoTsgZKJWCXvcUw0aAmCv8P8HAQ
I have been following you for awhile and I am really glad for your help and your posts, please see the drone I have been trying to build, is totally inspired in your projects. Also sorry for grammar since English is my second language.


Fun too see your quad build! ![]()
I got this one: http://www.readytoflyquads.com/rtf-mini-4-in-1-12-amp-35x35-hv-blheli
Its only rated for 12 amps per motor, so you must make sure that is ok with your motor/battery/prop combo
There are others in the shop that are rated for more. Make sure they can handle the voltage and the amp.
Have you looked at your setup with ecalc? If you give me details about motors, battery and props, I can look at it.
For the type of frame that your are building I would consider 4 separate ESC, which is what I did for mine, as there is room to place them inside the booms. It simplifies things.
Thanks mate, I really appreciate ![]() . Please see below my setup.
. Please see below my setup.
- Motor MT2213-920KV
- 8045 Carbon Fiber Propeller Props
- EMAX Multirotor 4IN1 ESC(4*25A)
- FLOUREON 4S 14.8V 1500mAh 45C Lipo Battery
- http://www.emaxmodel.com/brushless-motor/multi-copter-motor-mt2213-920kv.html
- http://www.ebay.com.au/itm/151819935257?_trksid=p2057872.m2749.l2649&ssPageName=STRK%3AMEBIDX%3AIT
- http://www.emaxmodel.com/emax-multirotor-4in1-esc-4-25a.html
- http://www.ebay.com.au/itm/361571162820?_trksid=p2057872.m2749.l2649&ssPageName=STRK%3AMEBIDX%3AIT
Hello Ole/Ronildo,
Yours projects looks pretty good. Congratulations!
I have one question, how you work with carbon fiber plates (technique for design and cutting with precision).
Thanks in advance and sorry for my English.
Regards,
Andres
Hi Ronildo, that should fly!
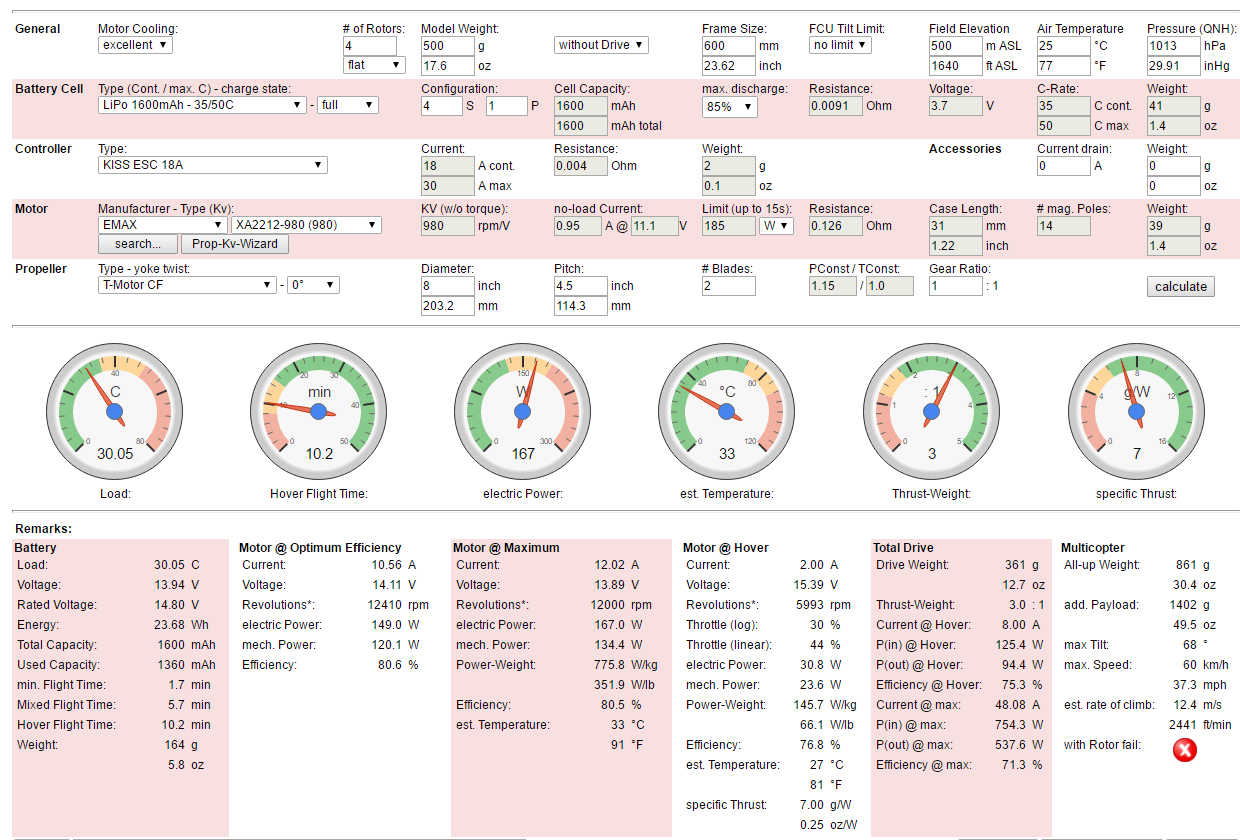
The specific motor you got was not in the ecalc database, but I selected one that was similar. If you get the weight of the quad without motors and battery (but with all electronics) at 500gr, it will have pleny of power to fly around quite well. Thrust/Weight at 3 which is plenty,.
A 20amp ESC should be best. 10A is too little. 12 is on the limit…
Something like this should be fine: Racerstar RS20A 20A BLHELI_S OPTO 2-4S ESC Ondersteuning Oneshot42 Multishot voor FPV R Uitverkoop - Banggood Nederlands-arrival notice-arrival notice
However, I would consider a bigger battery. Lower C rating and higher Ah. A 4S with 10C-20C and 4000mah would be better and should double your flight time without any other change. You can try the battery you have first, and get a new one later. The one you have will give a hover around max 10 minutes…
BTW: I glued the motor arms to the CF sheets with silicone. The bolts alone was not enough. (It is easy to remove the silicone if you need to open it again)
I glued a laser printout to the sheets and cut with scissors and some light sanding afterwards. This only works on up to 0.5mm sheets with a pair of strong quality scissors, like these http://www.fiskars.no/produkter/sakser. For thicker sheets, use a saw or Dremel. CF is actually pretty easy to work with. (BTW,: always use a mask, CF dust is very bad for you…)
Hi Adres.
My CF is 1mm thick so I have been using the Dremel. Honestly is quite hard to use the Dremel because my hand shake a lot and it is hard to cut straight lines. I reckon 0.5mm is better, it is strong enough and you can use scissors like Ole said.
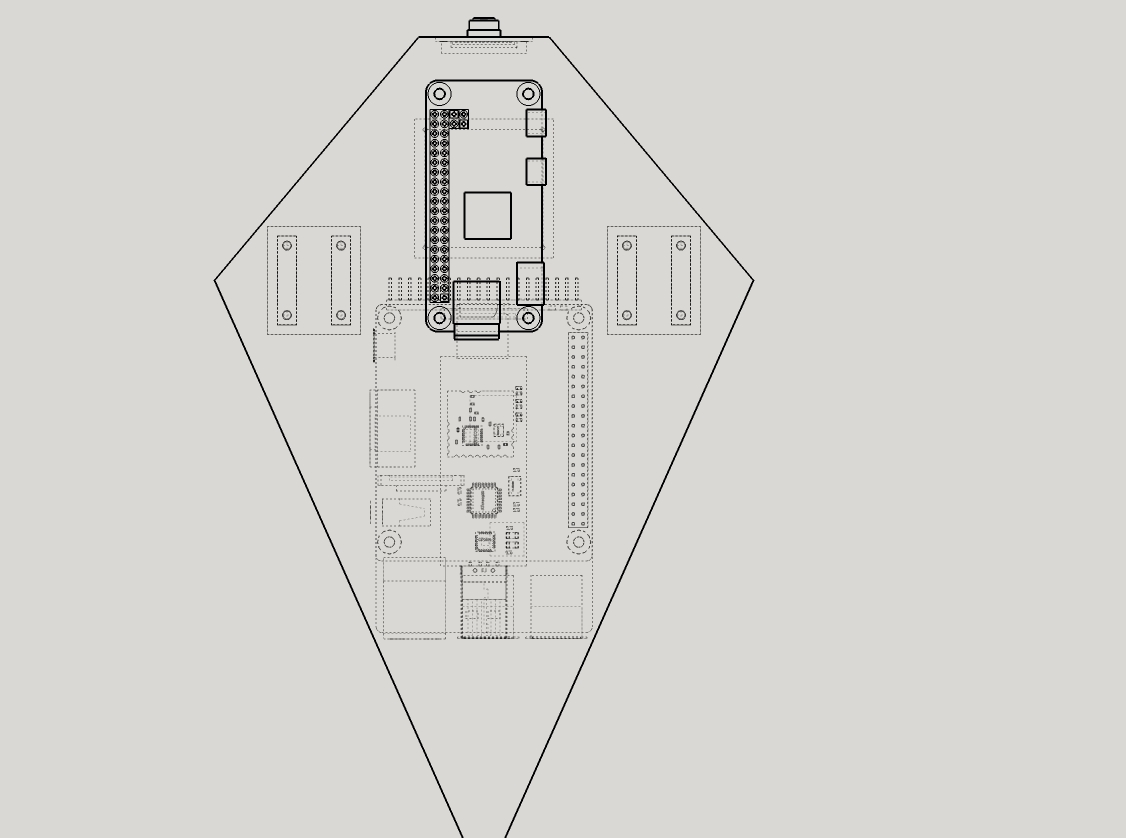
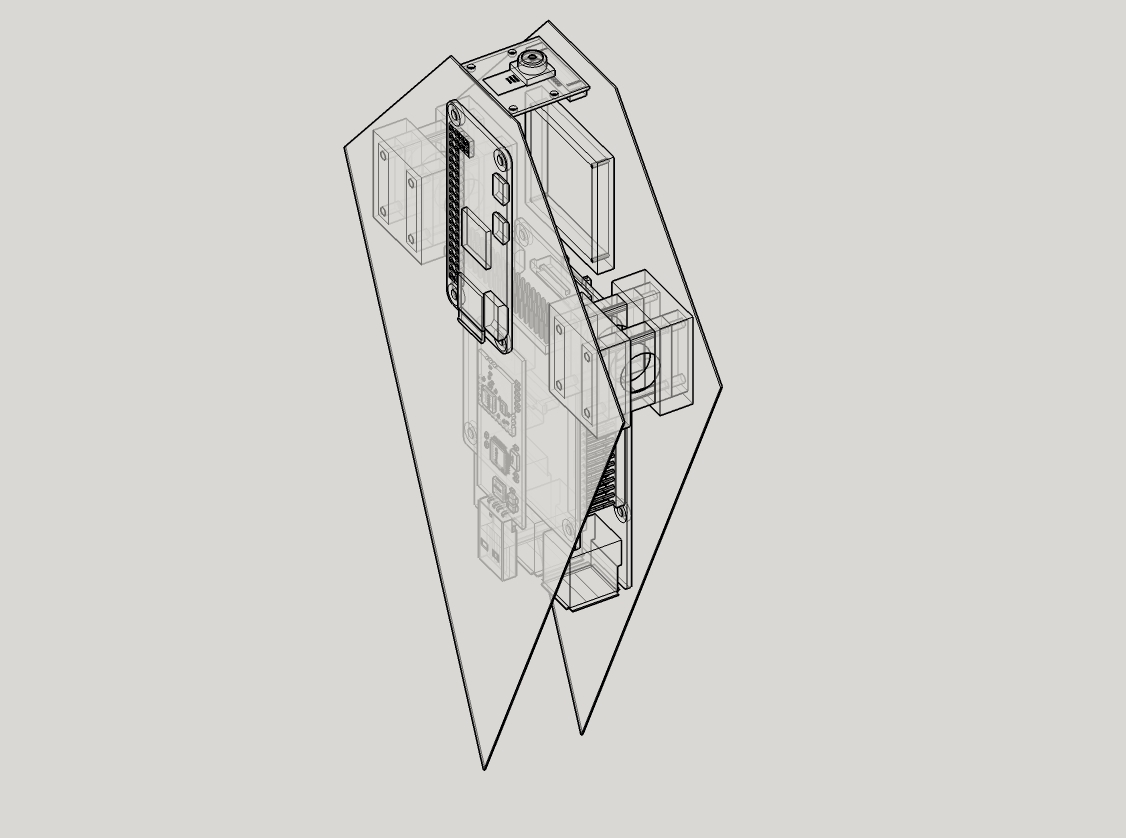
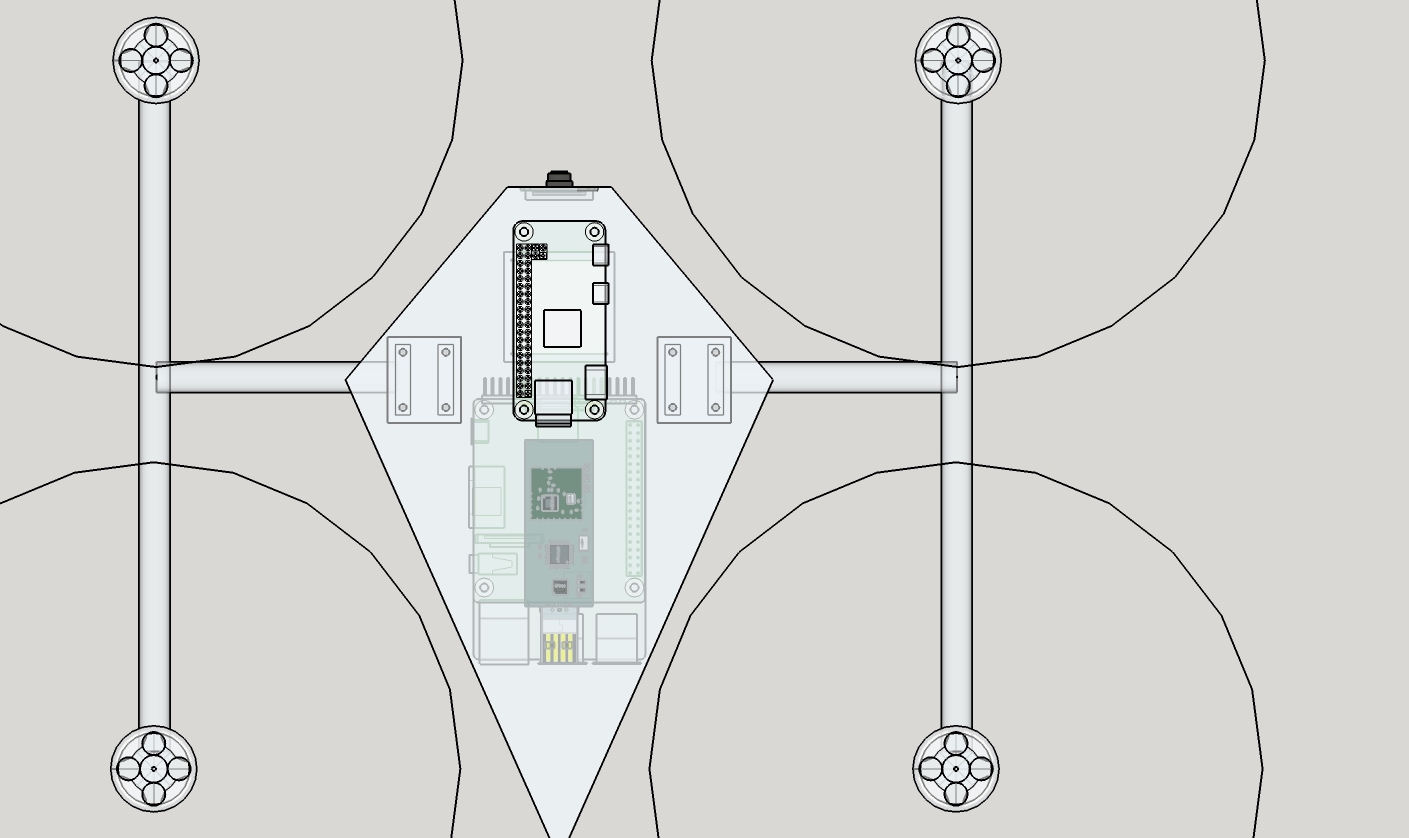
This is my first project so I was just following Ole’s design, although now I am really keen to make my own design so I have been using Sketchup . This is my new project that I have been thinking, again it is strongly based on Ole’s design ![]() well maybe one day I can design something unique, at moment I just want to make it fly at least
well maybe one day I can design something unique, at moment I just want to make it fly at least ![]()
Hi Ole/Ronildo,
thanks a lot for your help.
I will follow your advice.
Your projects are awesome.
Regards
Andres
Nice drawings!
Some thoughts on your frame layout: You might struggle to get this frame rigid enough. There is going to be a lot of stress (and torsion) on the central clamps for the tubes. Also, making a light and ridgid T joint is not easy, unless you find some standard parts. All in all you might find you end up with a heavier frame to get it stiff enough. The key reason Inspire has a similar config is to facilitate the boom lifting mechanism and they use a custom designed part for the T joint. I would at least go for booms with a high diameter (30-25mm) with the thinnest wall you can find… Or use square beams, they are better suited in my mind. (but also more expensive)
A note on CF sheets for the central part. It makes a big difference whether the beams are glued in or just clamped. Clamping them is convenient as it is easy to take apart, but gluing is a lot stronger as the load is spread out over a much bigger area. Use 0.5 sheets when gluing and 1mm if clamping.
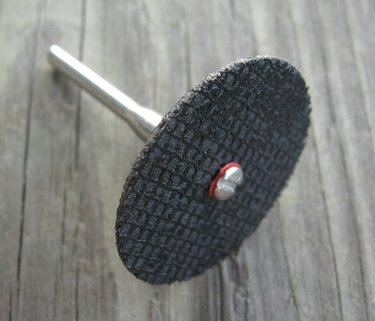
Regarding use of dremel, I use this tool for cutting, cuts CF like butter  :
: 
1 Like