


Last time, we learned how to set up the antenna height for RTK. If you haven’t read this yet, we highly recommend doing that: it explains some terms we use in this post, too. Today, we will talk about obtaining correct elevations for measured points in PPK.
Even though post-processing is usually performed in the office, all the main steps to achieve right heights for both base and rover should be carried out in the field. Let’s dive right into the workflow.
In Emlid Flow
General workflow
This workflow refers to the Logging tab interface starting from the 30 Beta 1 Firmware. For all the field jobs, we recommend using the latest stable firmware. But if you happen to test our new beta, we’d love to hear your feedback!
- Go to the Logging tab and tap Settings in the Raw data section.
- Choose the RINEX format. Tap Edit in the Antenna height field.
- Measure survey pole or tripod height and enter it as the measured height to the bottom of the receiver.

Reach antenna type will be added to the RINEX Header automatically. Spoiler alert: this way, you don’t need to bother about the antenna phase center offset in post-processing. Emlid Studio will apply it on its own.
Stop & Go workflow
If you work with Stop & Go workflow, the rover height values will be taken from the CSV file. So in the Logging tab you need to specify the antenna height for the base only.
For the rover, don’t forget to add measured survey pole height in the Emlid Flow project, as you usually do in RTK. Emlid Flow will also add the antenna offset based on the device type.
In Emlid Studio
General workflow
Drag and drop your RINEX to the Base or Rover section in Emlid Studio.
That’s all. No more steps. Emlid Studio will apply all the needed values: antenna type and measured height. By the way, Emlid Studio recognizes the antenna type of 3rd-party receivers as well.
If you missed the Emlid Flow step
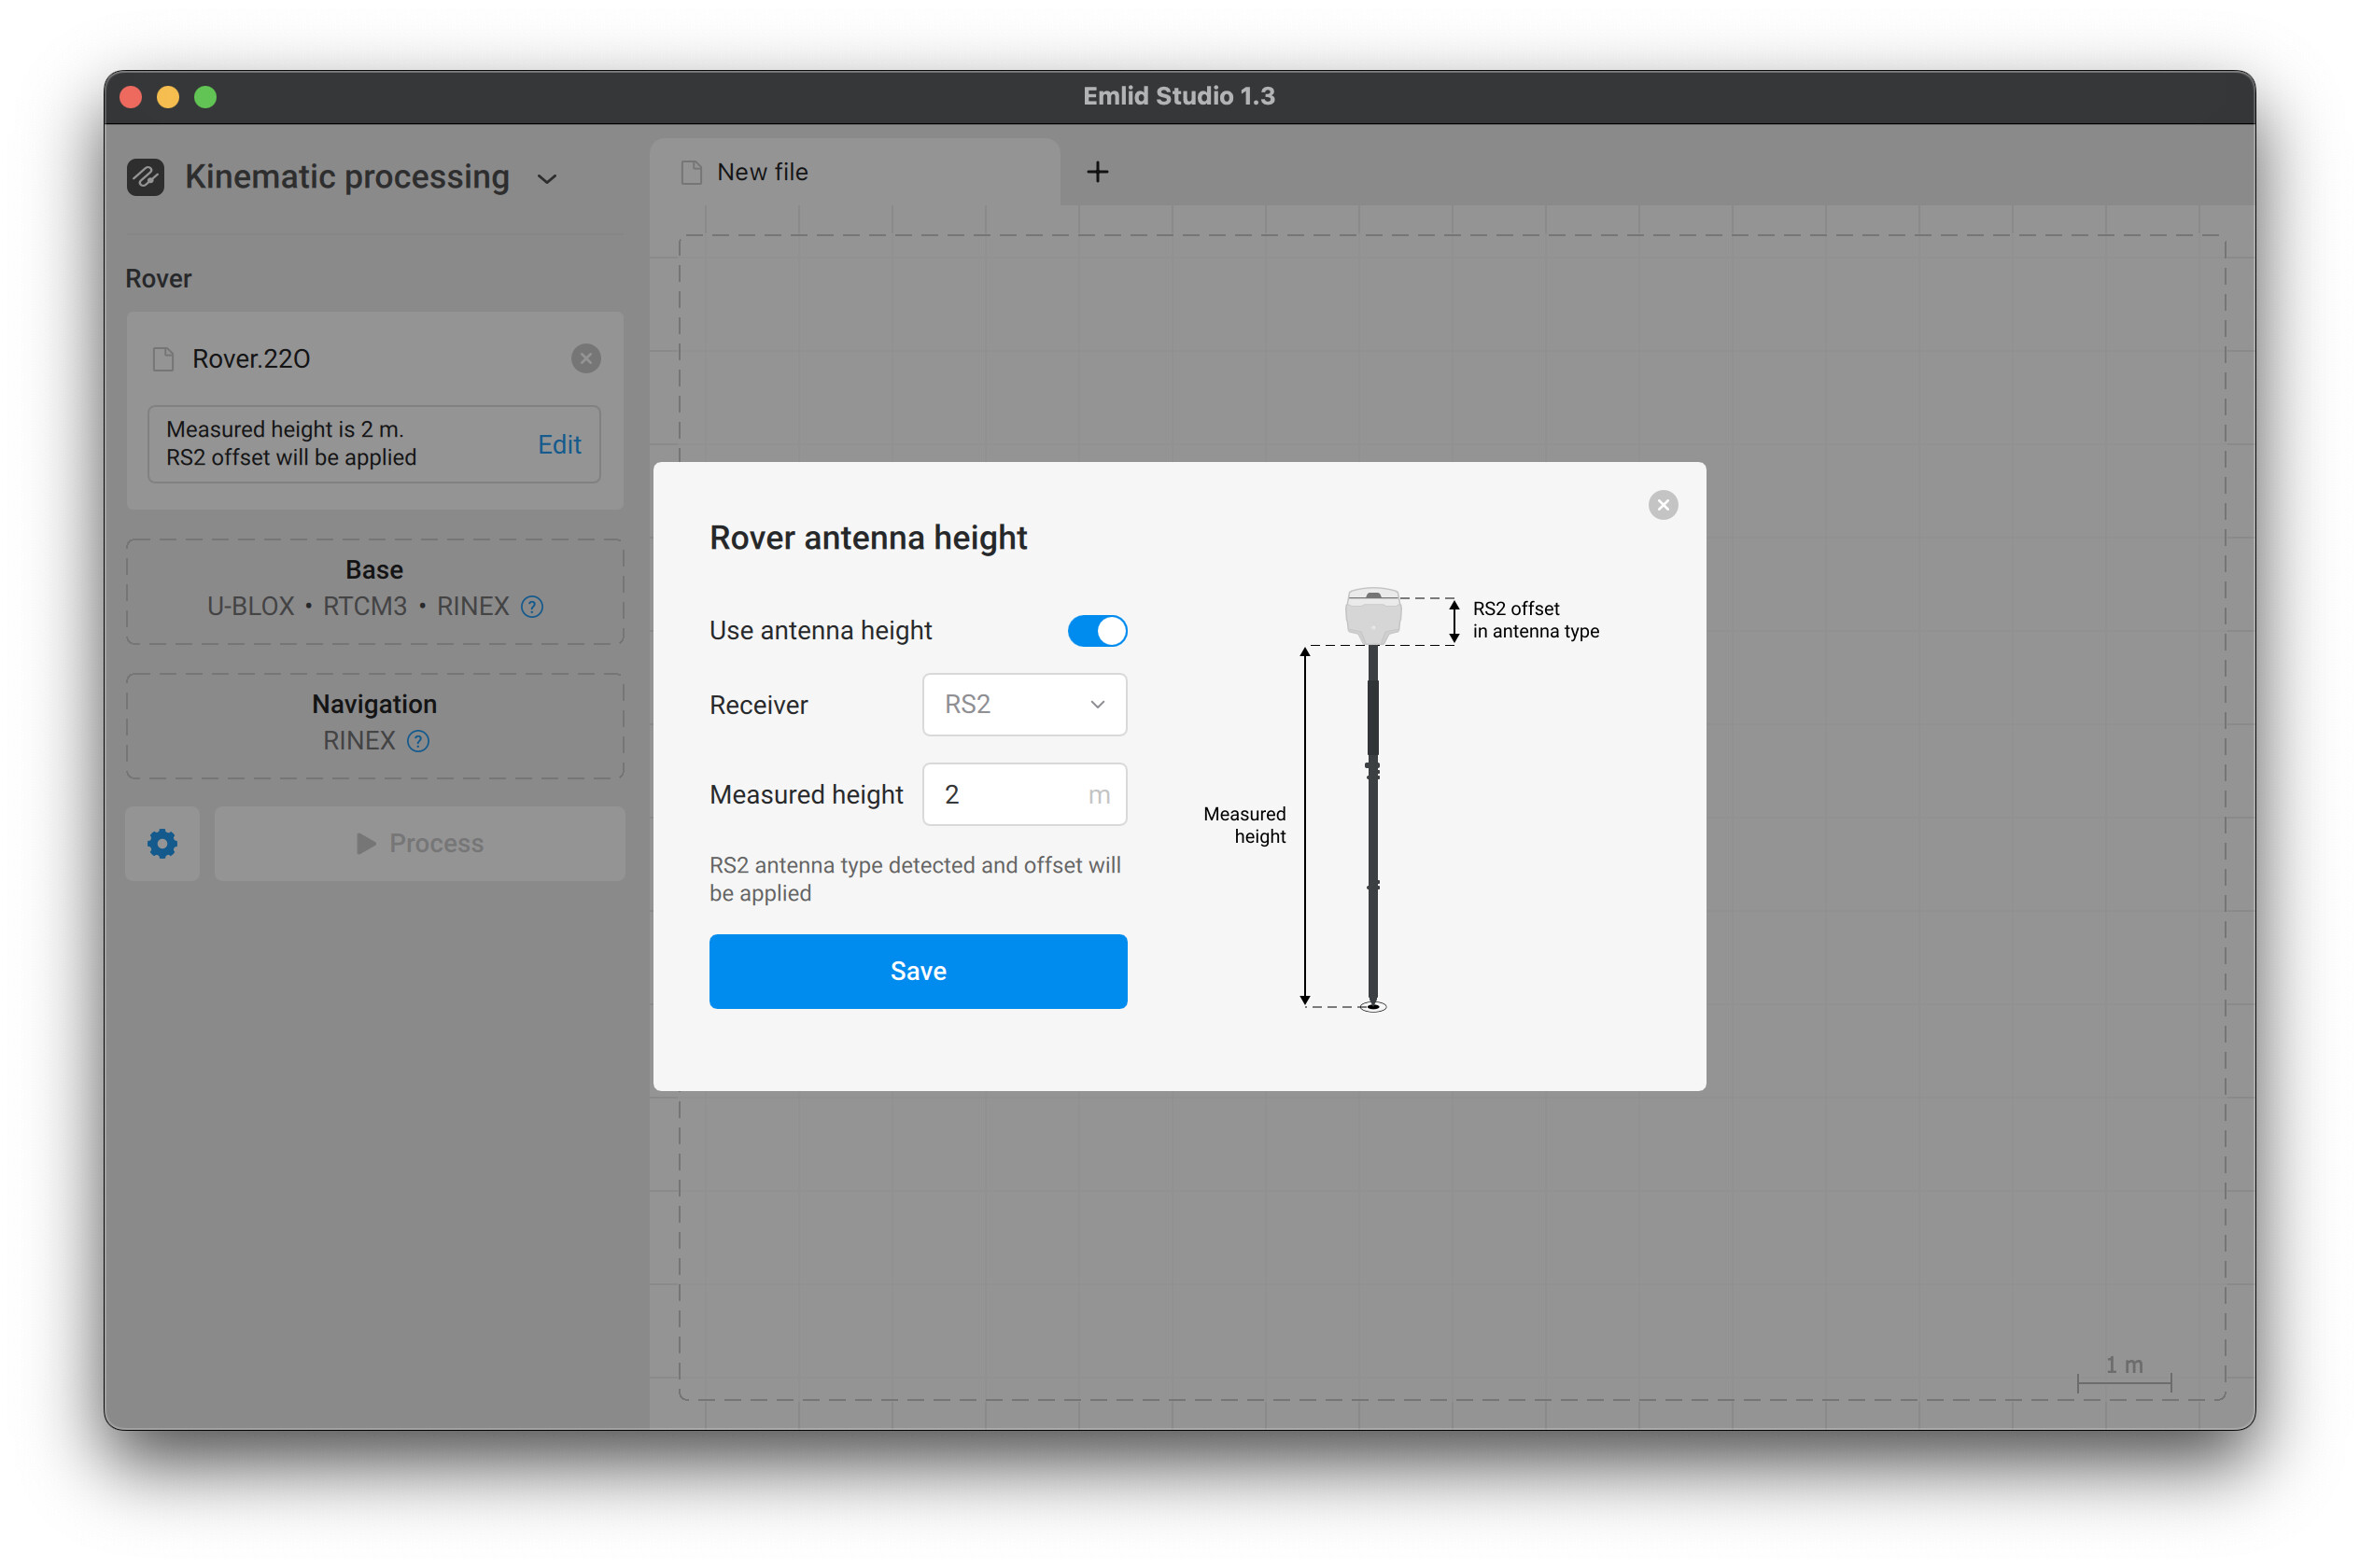
If you recorded UBX or accidentally forgot to set the antenna height in the Logging tab, you can specify it manually in Emlid Studio. Just hit the Edit button in the rover or base section. It will open the following menu with all the required settings:
If there are any remaining questions, post them in the comments!