


In Emlid Flow, when you connect your Reach to a new Wi-Fi network, you can apply automatic or manual IP settings.
With automatic IP settings, your Reach gets a dynamic IP address that can change each time you connect to the same Wi-Fi network. If needed, you can manually set a fixed IP address for your Reach—assign a static IP address. This can be useful in cases where you need a permanent IP address assigned to your Reach on a particular network.
Let’s see how to set a static IP address in a Wi-Fi network for your Reach using the Emlid Flow app. Follow the steps below:
-
On the Receivers screen, tap Wi-Fi and set your Reach to Hotspot mode.
-
Go to your phone’s Wi-Fi settings.
-
Connect to your Reach network. It appears as reach:XX:XX, the password: emlidreach.
-
Open Emlid Flow, find your Reach in the list of available devices, and connect to it. If there is only one available device, Emlid Flow will automatically connect to it.
-
Go to Wi-Fi, tap the Wi-Fi network you want to connect to.
-
Enter the network password.
-
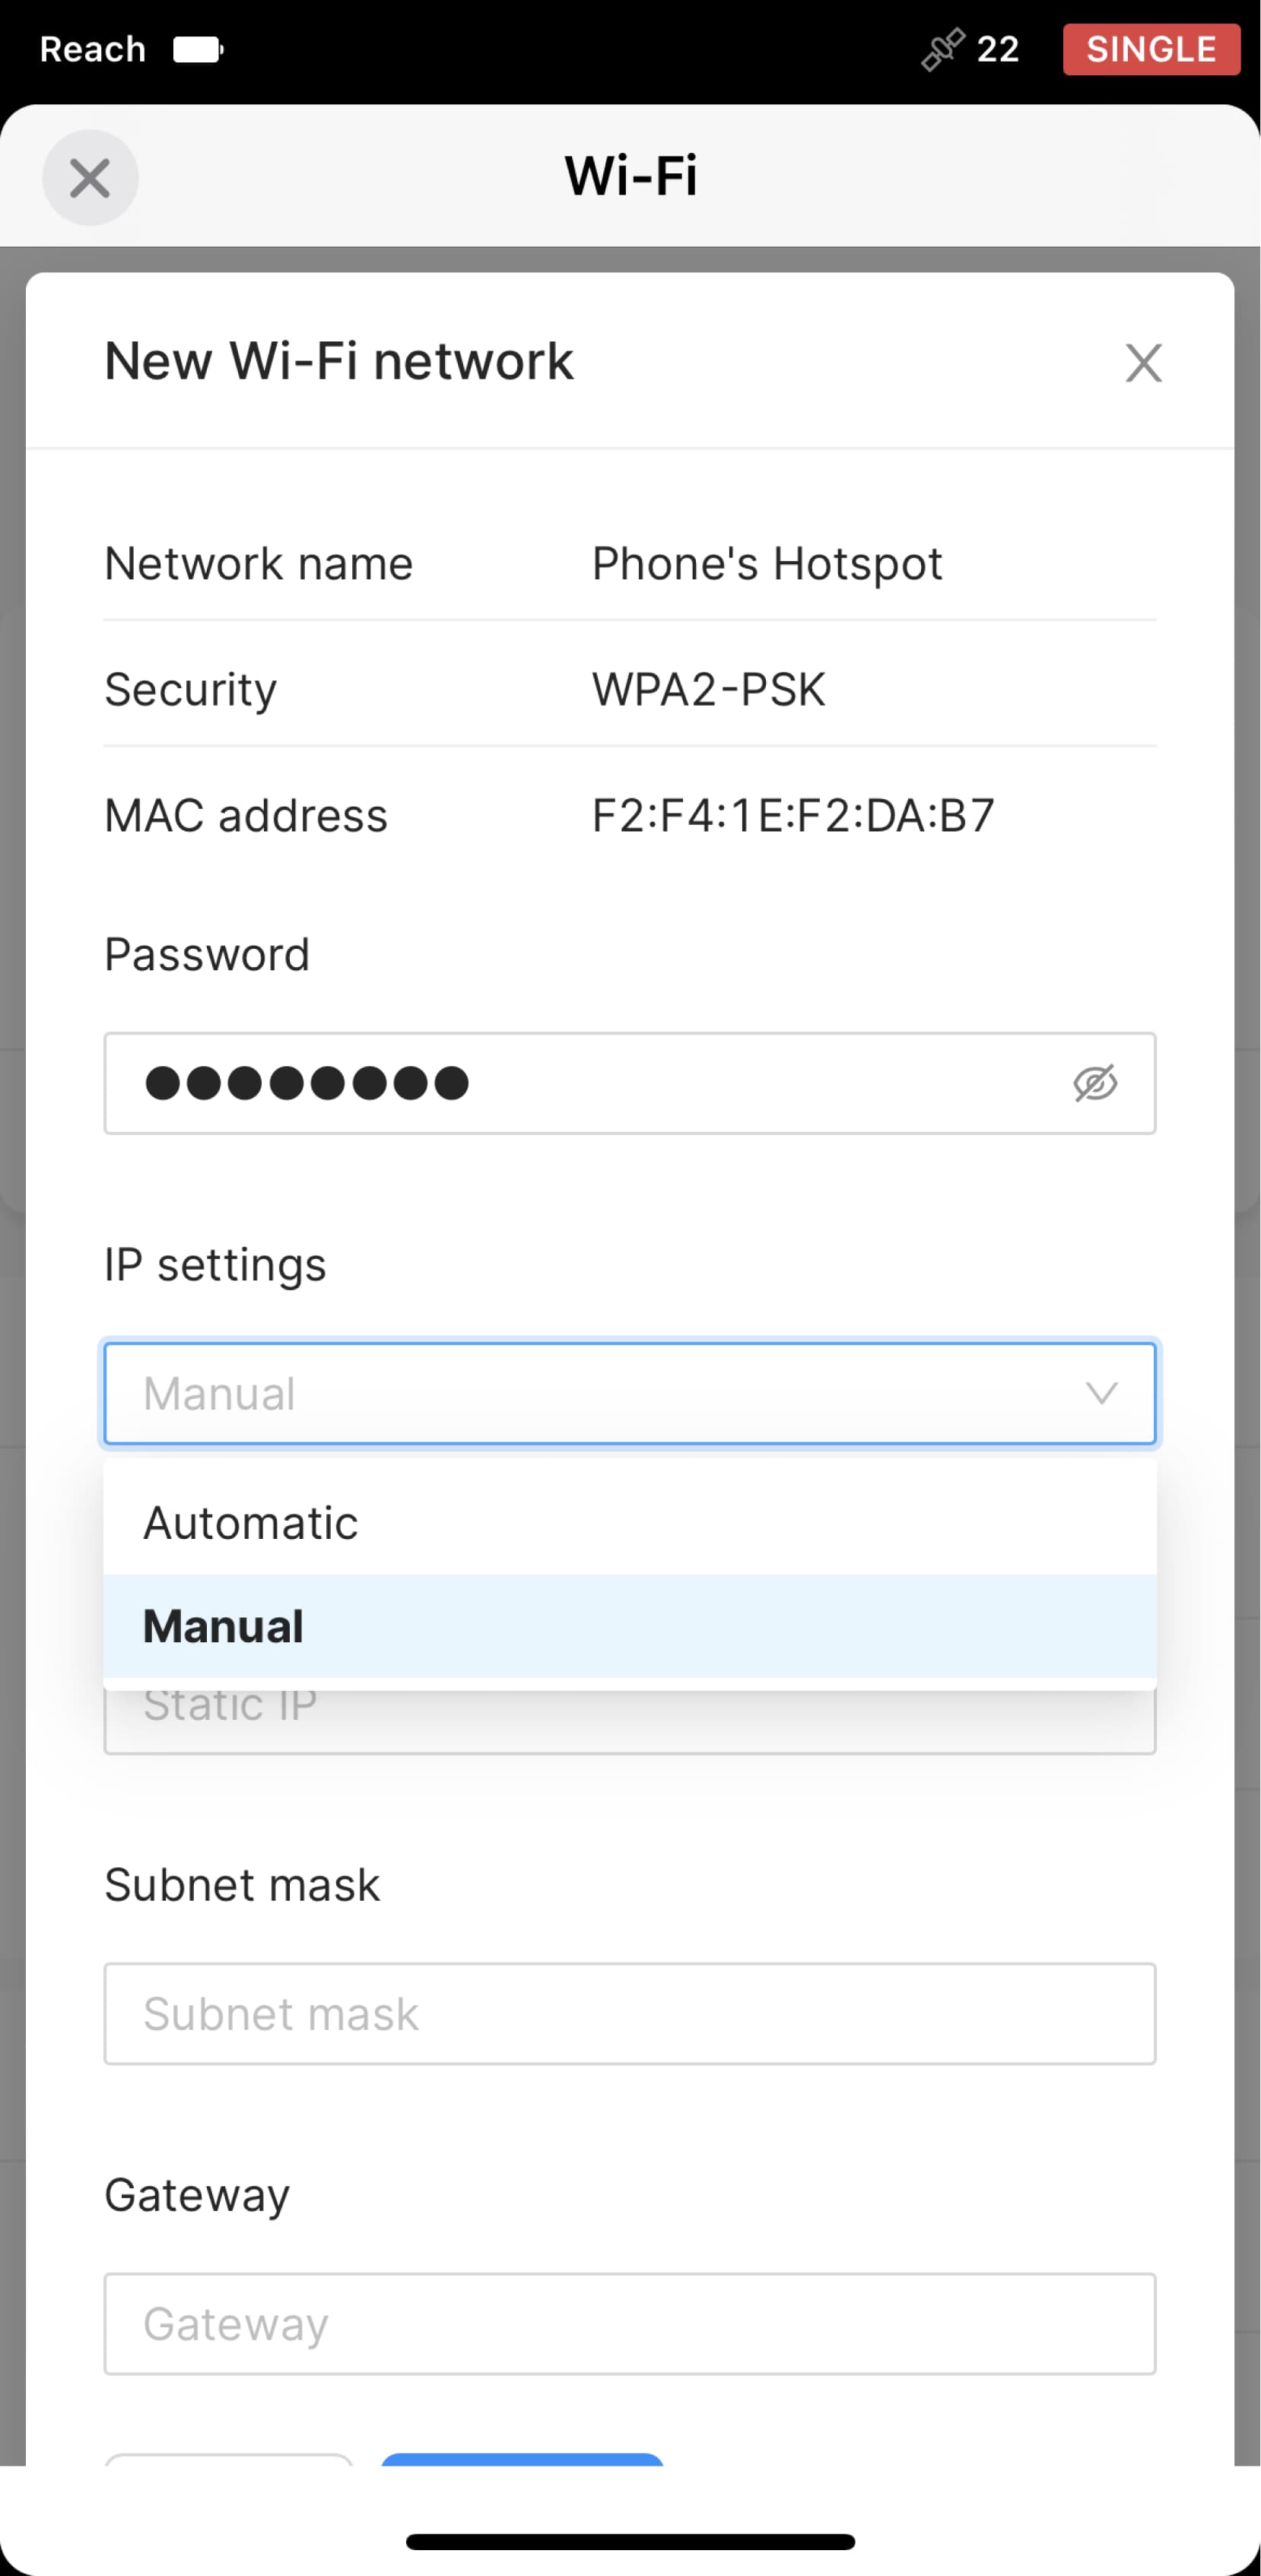
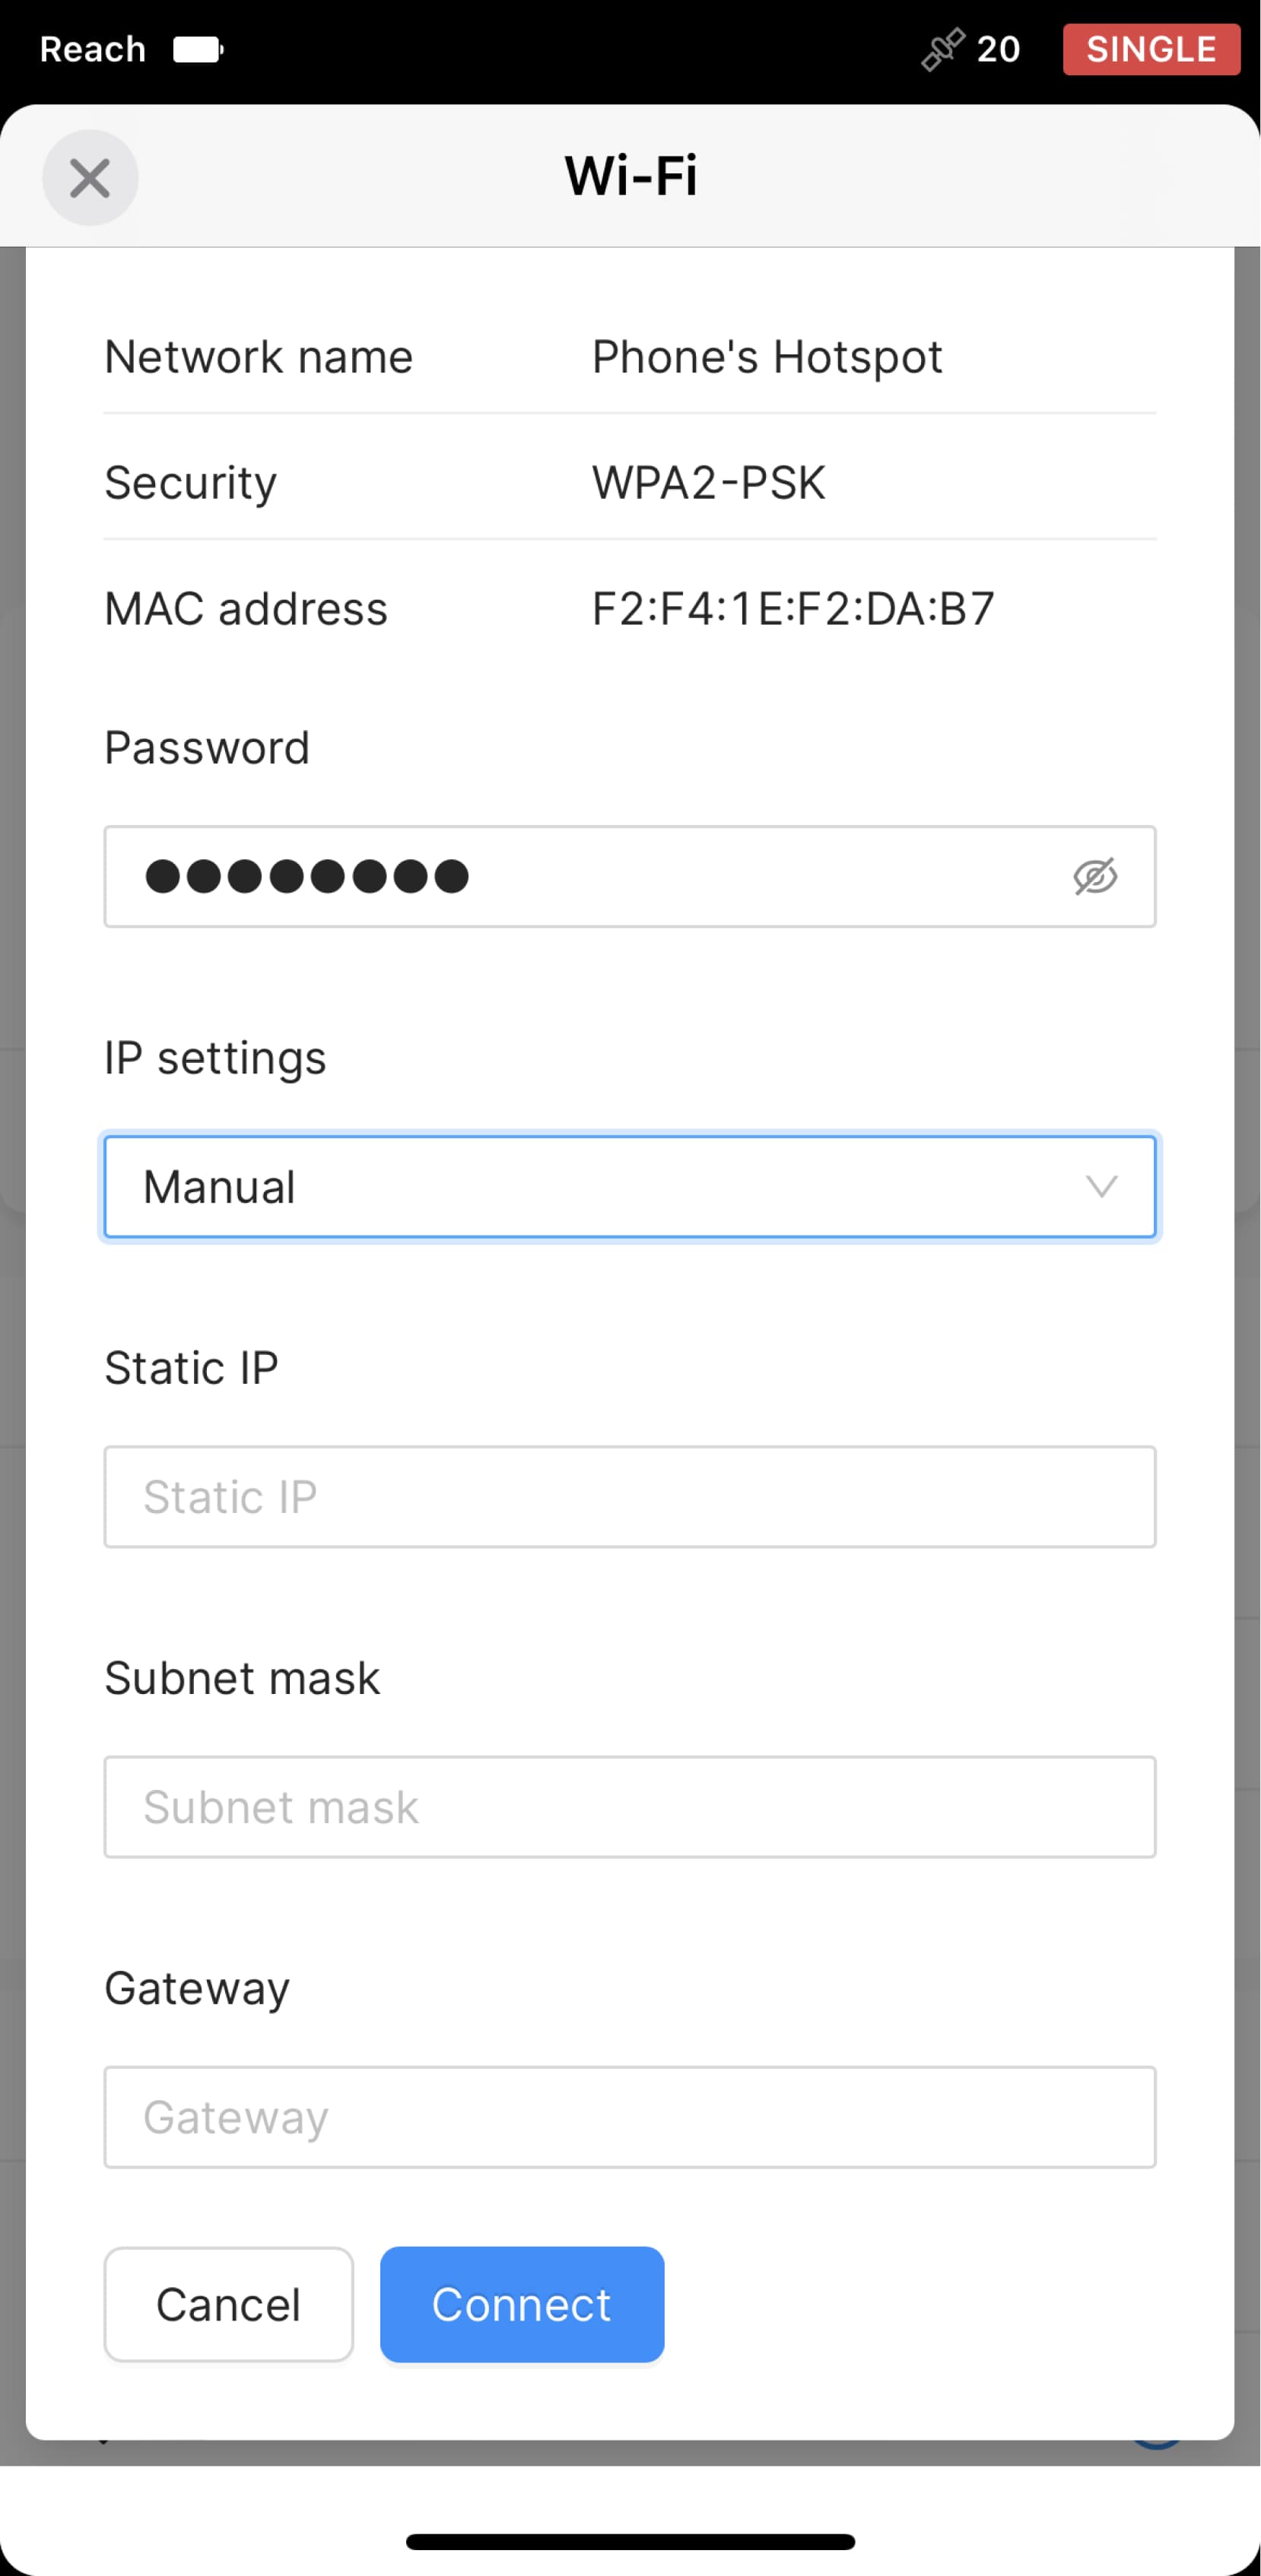
Under IP Settings, select Manual from the drop-down menu.
-
Enter the static IP address, subnet mask, and gateway.
-
Tap Connect.
Now, your Reach has its static IP address in the Wi-Fi network you specified. You can type it in the address bar of your browser to launch the Reach Panel.
P.S. Check our previous post about the reasons for a coordinate mismatch and how to fix it.