Today we want to share some news on ReachView 3. Thanks to your feedback and shared use-case scenarios, the app’s latest update to version 7.10 brings a redesigned receiver’s settings view. Let’s have a closer look!
Set up RTK connection without effort
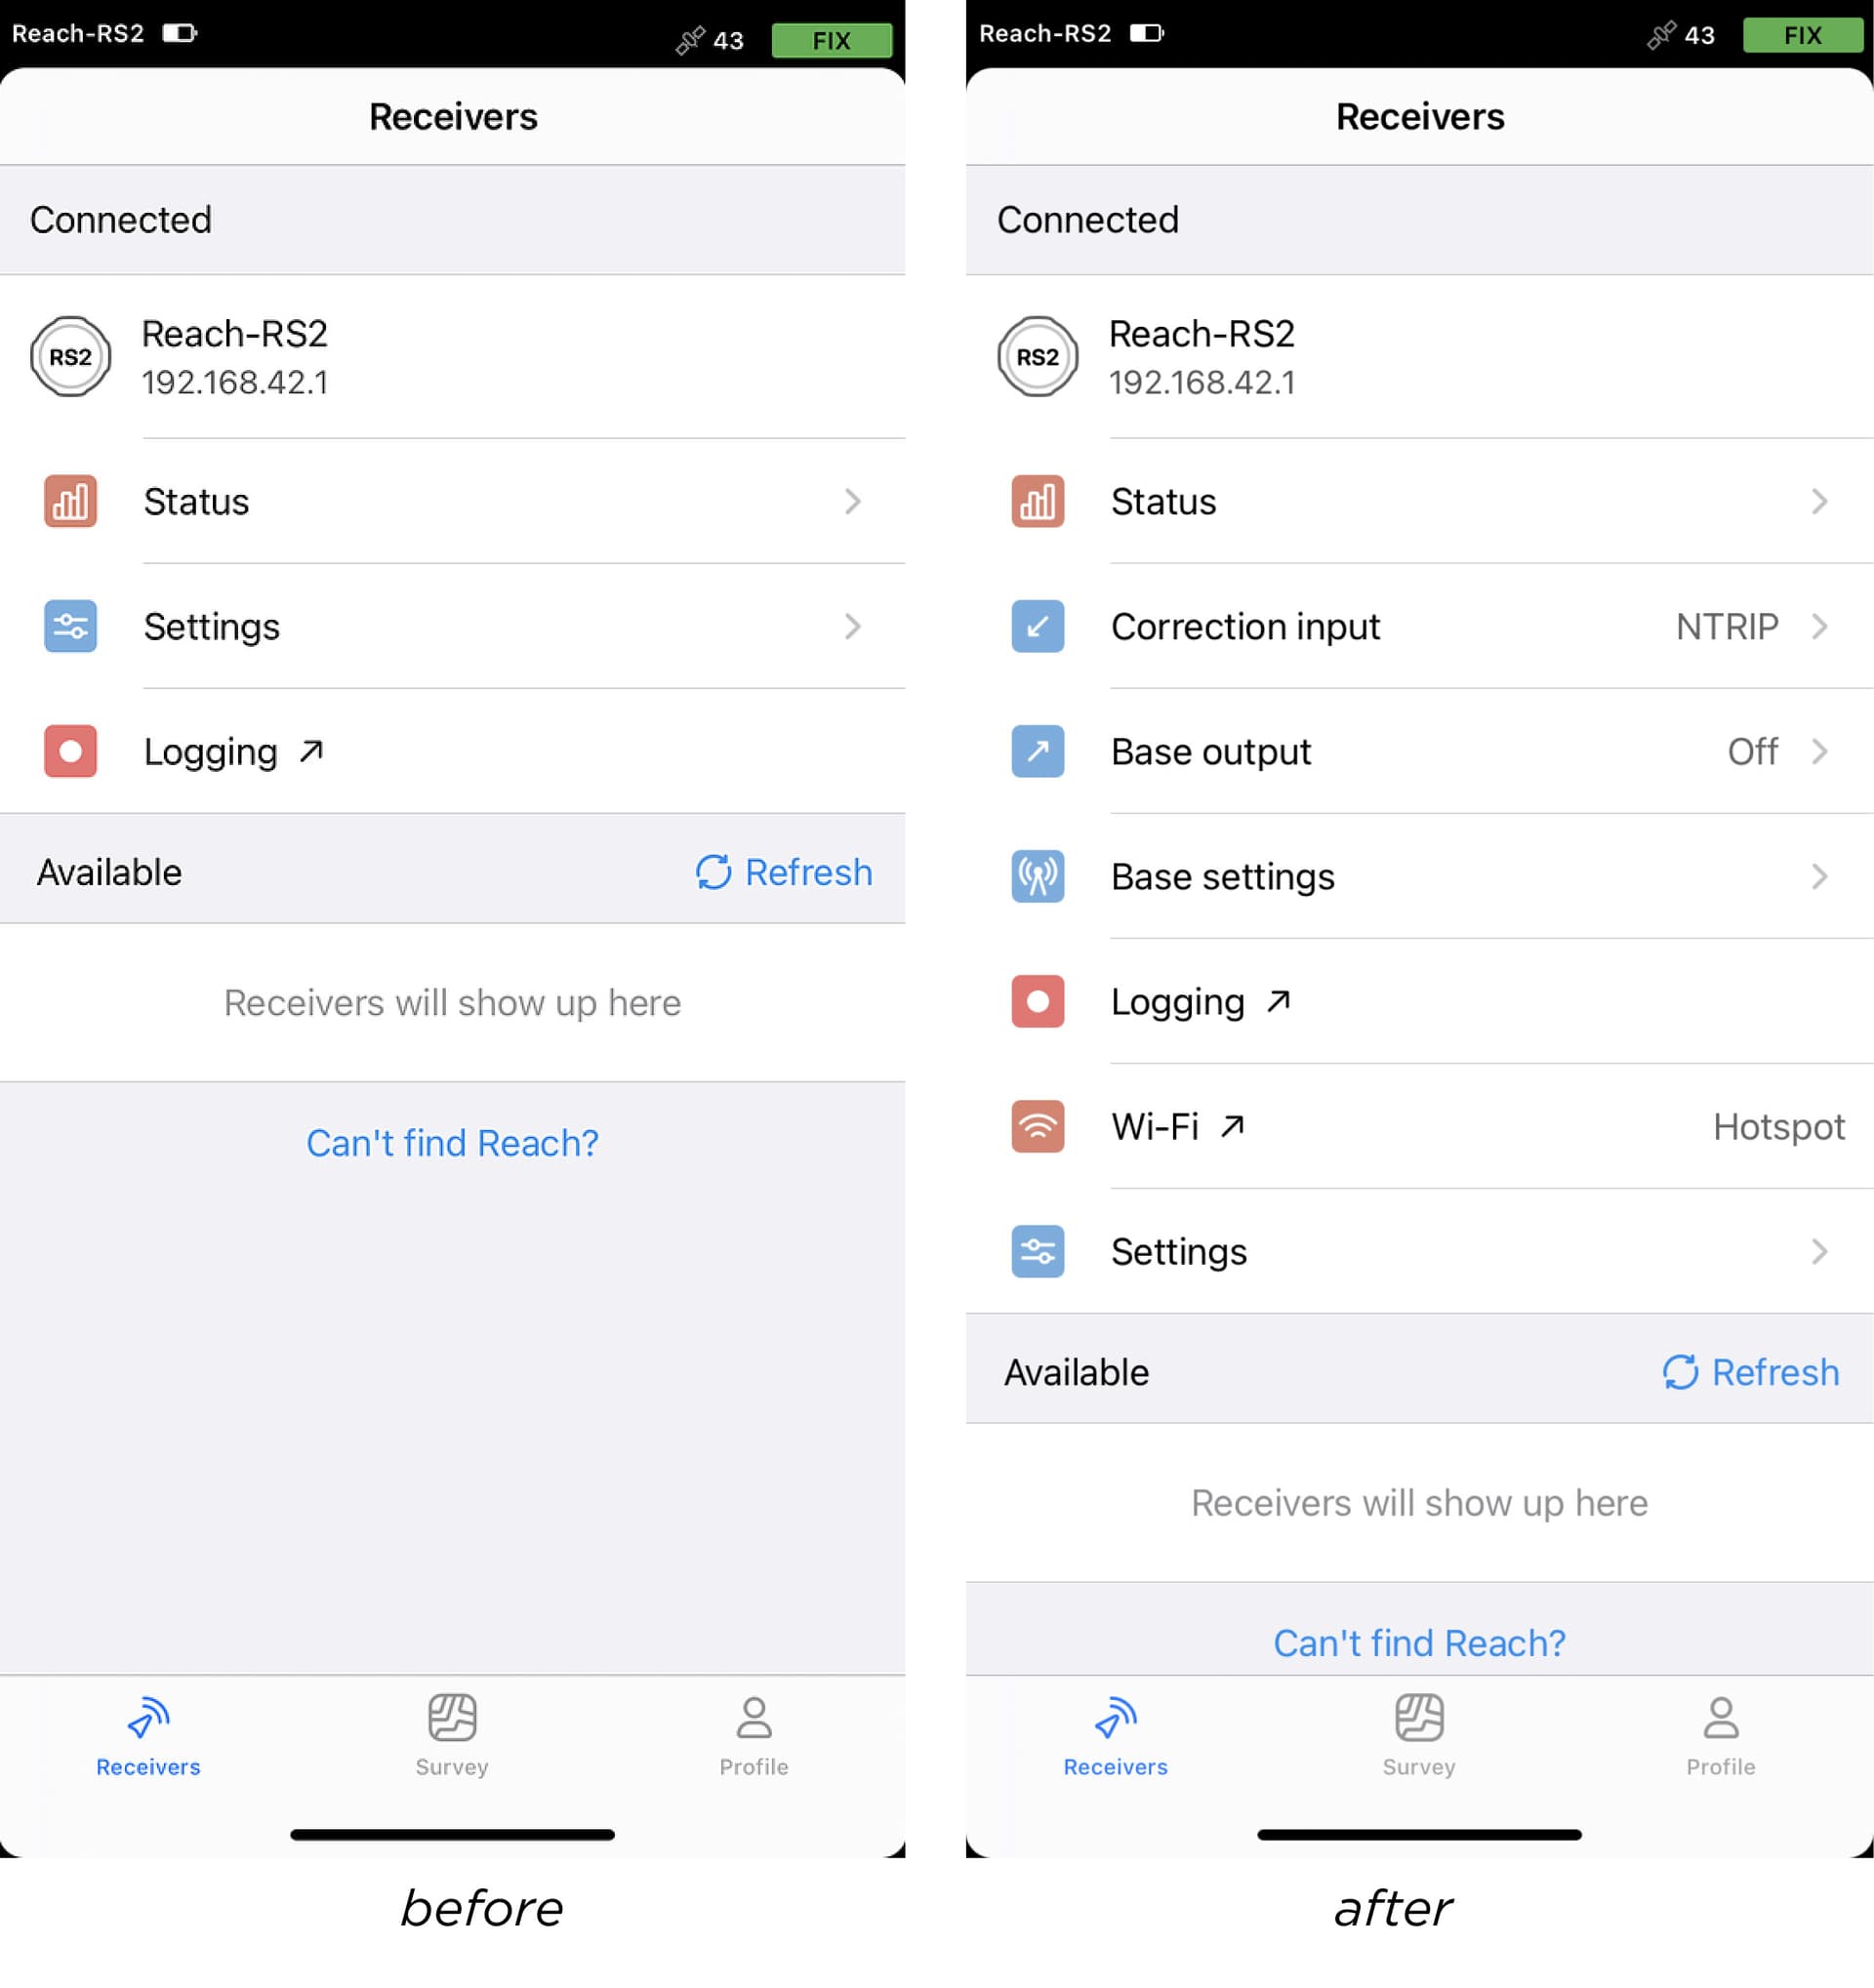
To make the interaction process with the app even more intuitive, we put the most frequently used settings right on the Receivers screen under the cell with the connected Reach. What’s more, we’ve renamed the Correction output section to ‘Base output’ and the Base mode section to ‘Base settings’.
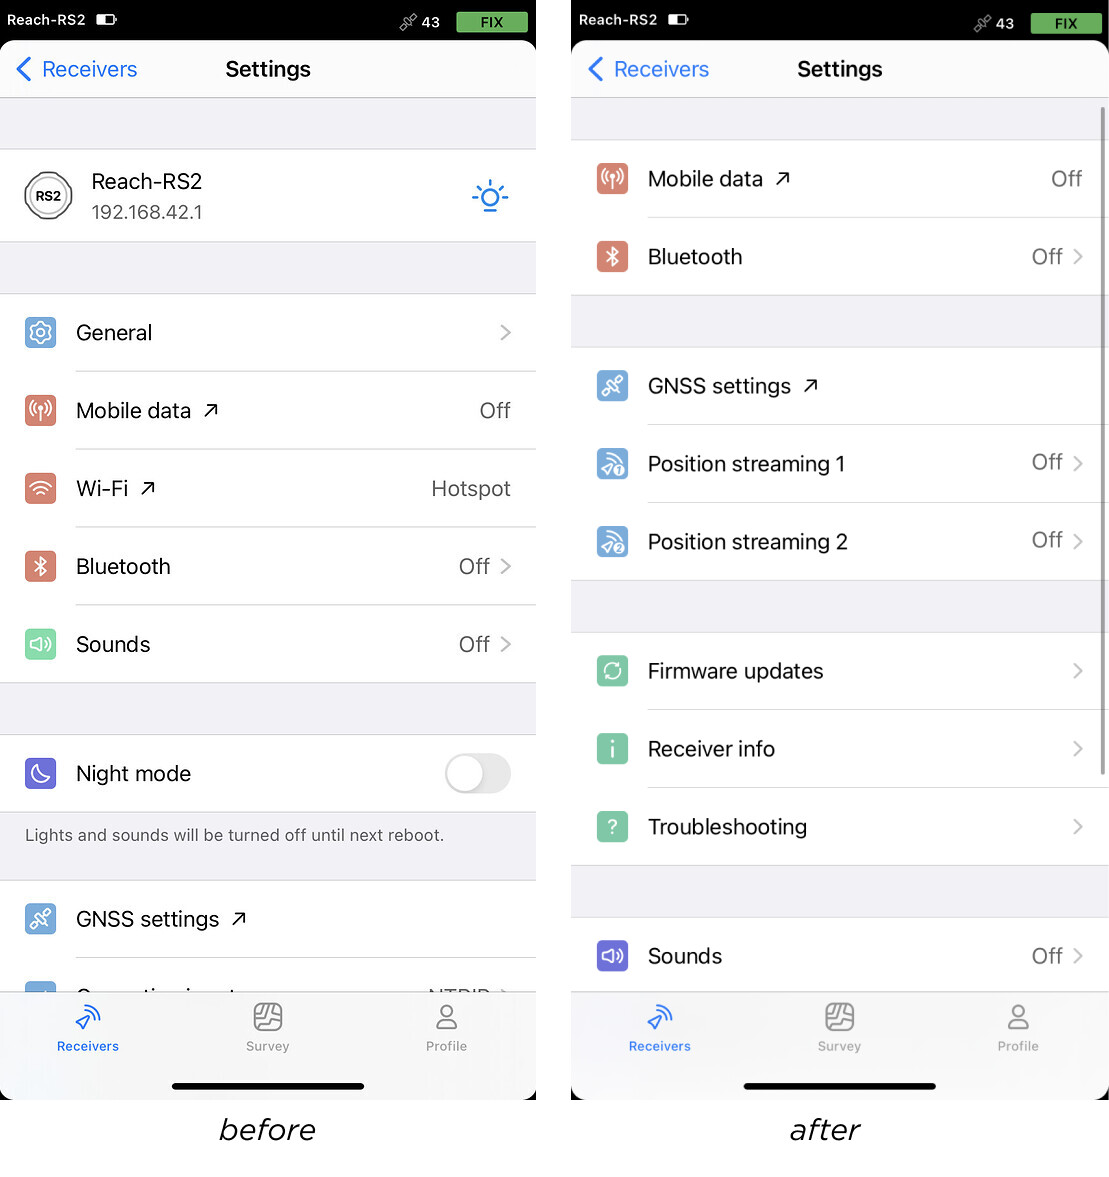
The Settings screen was also rearranged to save time searching for the required option. Now, the Receiver info section includes not only the data about your receiver, but also Receiver and hotspot name. As to the Restore initial settings option, you can find it in the Troubleshooting section.
Identify your receiver immediately upon connection
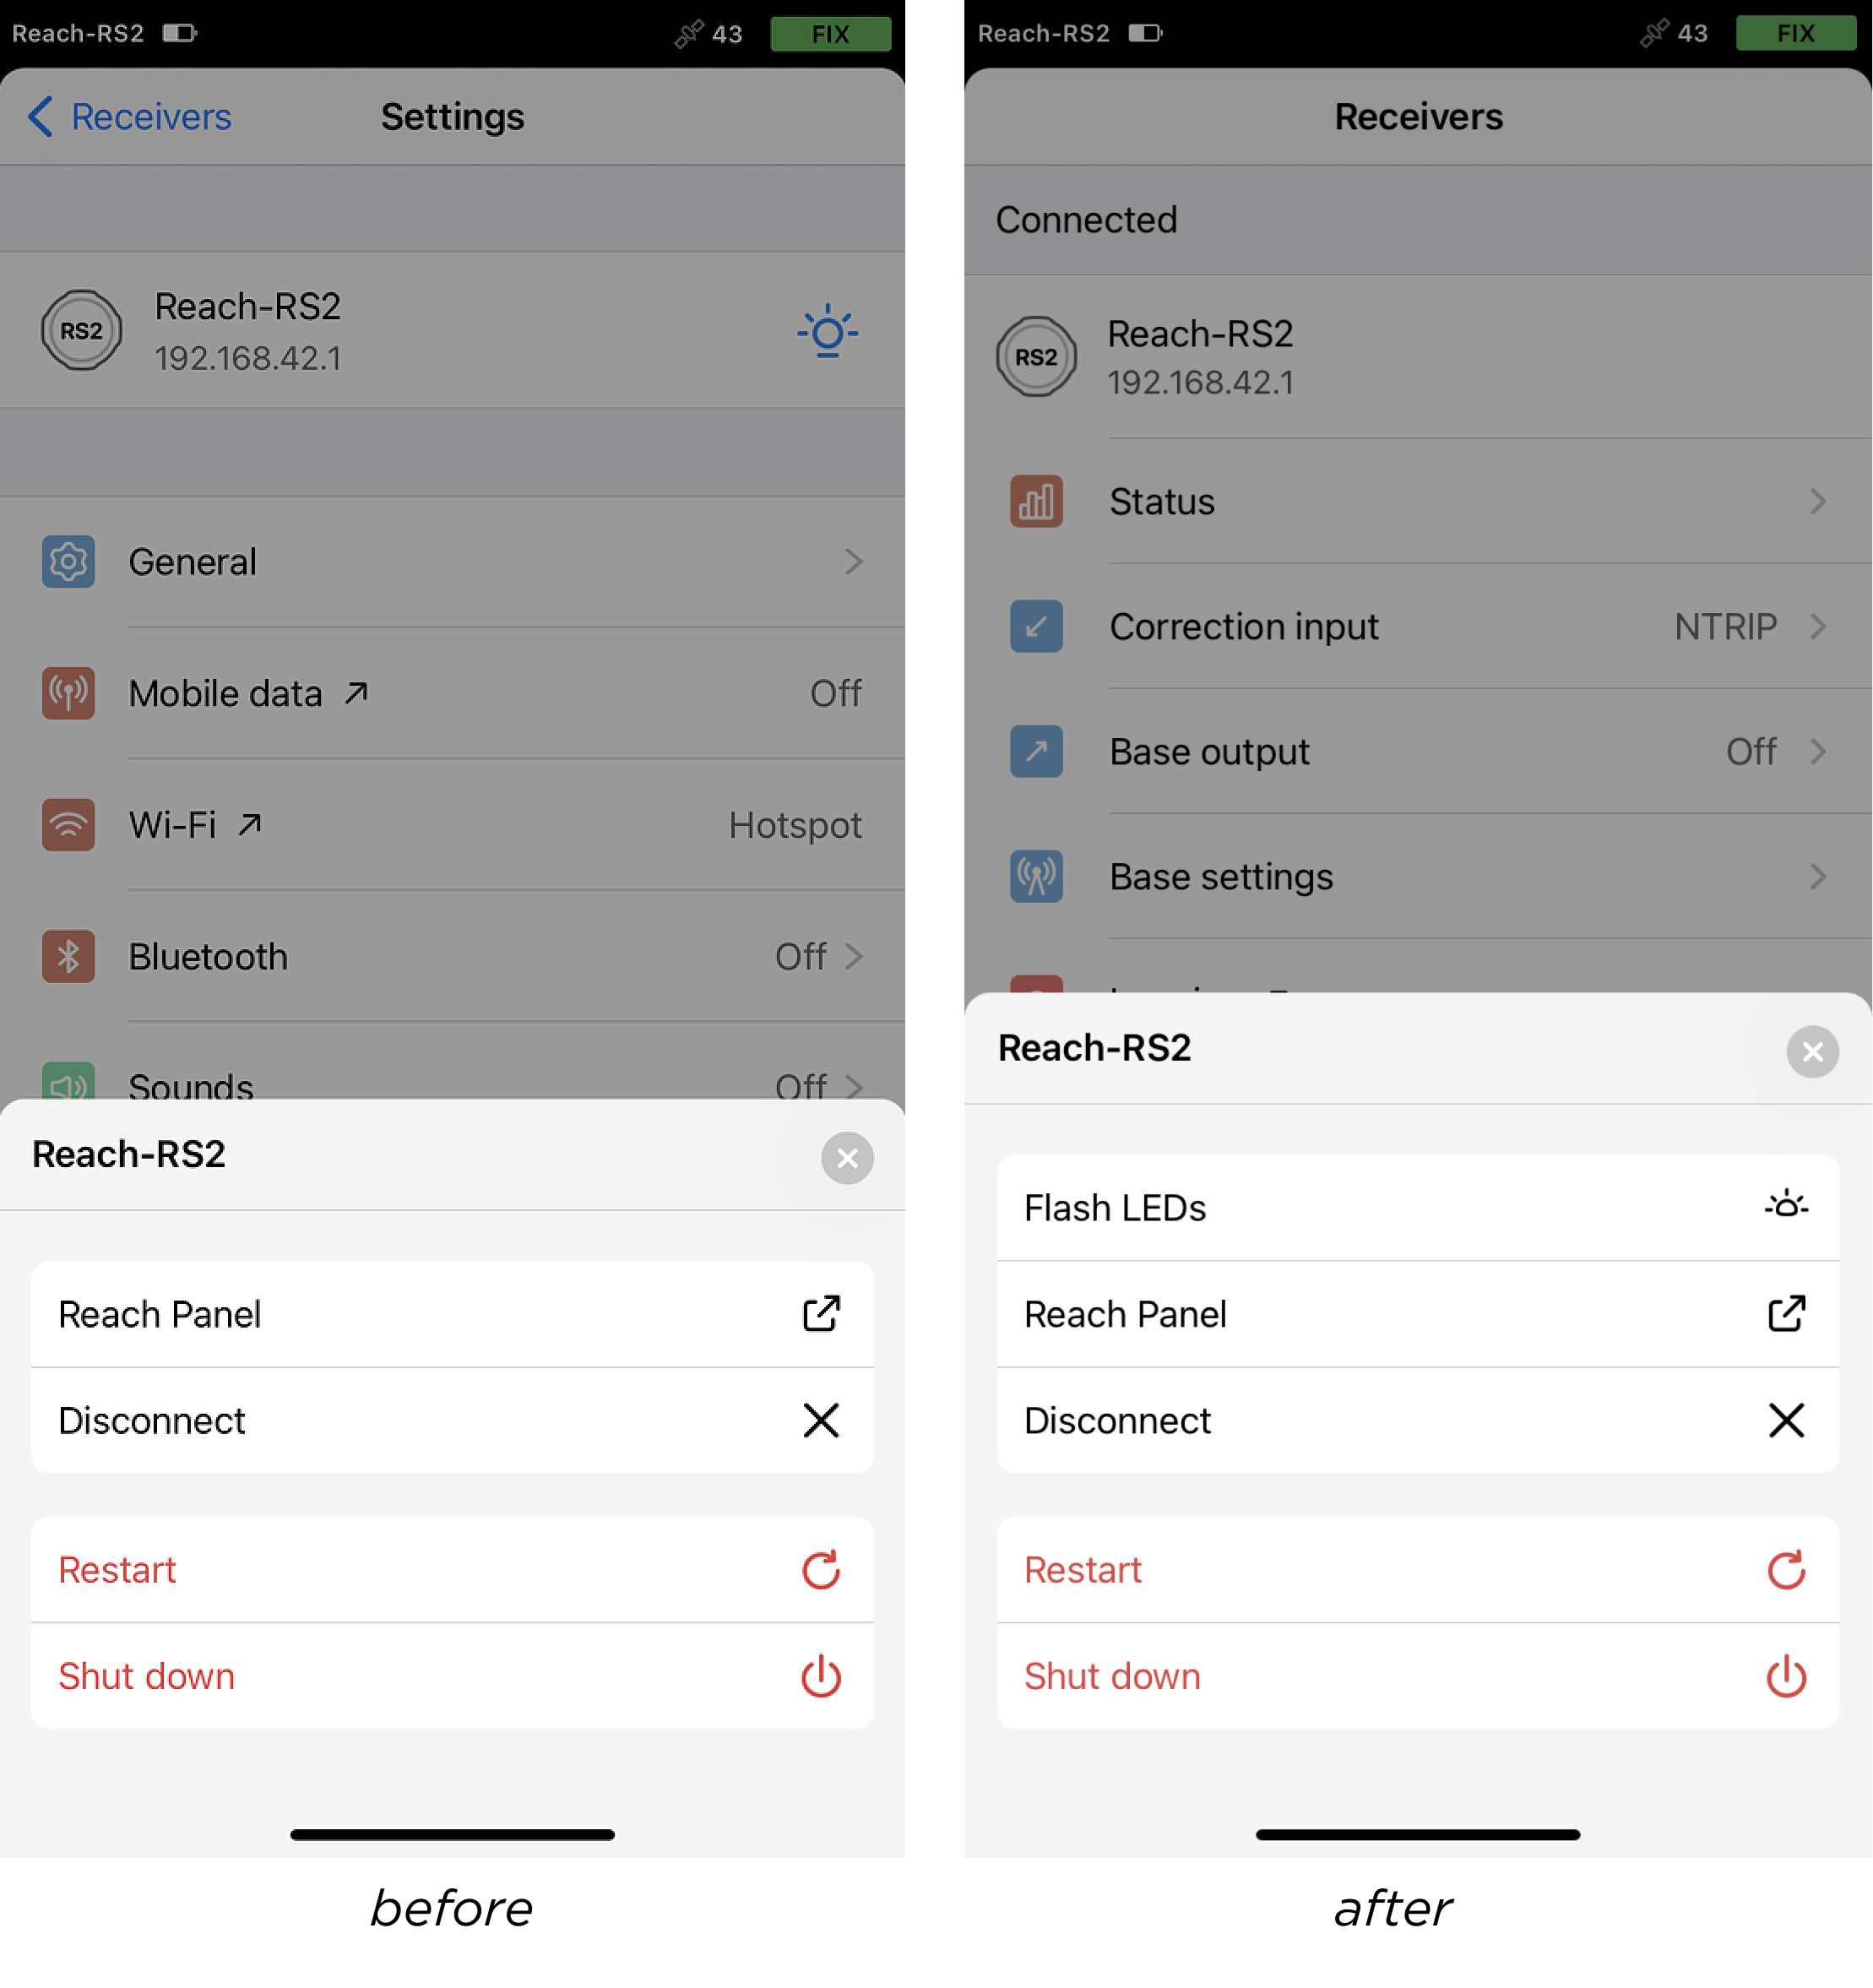
And the cherry on the cake, now the receiver blinks every time you connect to it. If you need to flash LEDs during a survey—tap the cell with your receiver’s name on the Receivers screen and get access to the Flash LEDs button.
By the way, recently we also redesigned the survey tools and updated them based on users’ feedback:
Now, ReachView 3 shows the total distance value next to the rover icon on the map during the stakeout process.
It is possible to scroll the buttons above the Collector tool to the right to check the real-time coordinates of the receiver.
We also added new search options to the list of coordinate systems for your convenience. Now, ReachView 3 has a list of verified coordinate systems and new search options by country and name of the coordinate system.
That’s it! Don’t forget to update your ReachView 3 and share feedback about your experience
Hi Adrian.
RS+ do not have speaker.
It’s the collector that gives the sound like during collection after reaching the set time for measuring a sound is emitted.
It might be possible for Emlid to program a sound when it fixes also during setting or layout:thinking: