But I couldn’t put the drone in the air.
This is because the drone did not fly and fell leaning forward or sideways.
I set it up after watching the link above, various sites, and YouTube videos.
But I couldn’t fly a drone.
When flying with a controller, when flying with GCS, it tilts forward or sideways and falls.
Can’t you balance it automatically using navio2?
I don’t want anything difficult, I just want a hoverable drone.
There might be a site I couldn’t find, so I’d appreciate it if you could link it to a well-organized site.
Hello
I want to use rpi and navio2 to float drones in the air.
We have confirmed that the drone assembly, GCS, and the controller are connected properly.
However, ESC Calibration is not possible as the question title suggests.
I am using the flysky fs-i6 controller and the fs-ia6b receiver.
First, the throttle of the pilot was raised to the top and the drone was powered up.
And I checked that various light came out of navio2.
Finally, after unplugging and reconnecting the power, I checked that various lights came out from navio2 and the motor heard beep sound.
And after lowering the throttle of the controller to the bottom, I checked that the motor made a sound.
This was the end of what I checked on the Internet, and if you raise the throttle of the controller slightly up in this state, the motor went the same way.
But I checked that the motors were running differently.
In this case, there is a stability problem, so I repeated the above method several times, but I couldn’t properly ESC calibration.
Is there anything I’m doing wrong?
I have been conducting esc calibration for 2 days.
I’m tired of continuous attempts.
I checked that it was a problem with esc and motor and replaced them all with new ones.
But it’s the same.
If it’s the same, the motor starts to spin first in front of the left side and then the back of the left side starts to spin.
And if you raise it a little bit more, the motors on the front and back of the right turn.
The above information does not change even if you proceed with esc calibration.
I don’t know if I’m doing the esc calibration wrong or if the parts I bought are weird.
Please help me.
I tried to fly a drone several times, but it leaned forward and sideways.
So we are proceeding with ESC calibration.
I tried to fly it with a controller, but I failed, and I tried to fly it with a gcs (mission planner), but I failed.
Do I have to measure the height of the takeoff high when I take a waypoint?
I measured the altitude low and flew it in case the drone fell and the propeller or navaio2 was broken or injured.
The altitude value I entered is 2.
What is the minimum value that should be entered here?
I’m asking because there are no details on the Internet.
I never used the FC ESC calibration.
I always calibrated the ESCs by connecting them to the receiver via 1 to 4 connector I made and calibrated them that way.
If you could tell us which make and model of ESC you are using, it would make helping easier. Doing the calibration over and over again without knowing if it works is time wasted.
I don’t know exactly what the calibration mode is.
However, if you proceed as it is shown on the Internet, the motor makes a different sound. (It’s the same as I saw on the Internet.)
When flying drones using navio2, which ones should be calibrated?
And what is the minimum takeoff altitude to enter when automatically turning the waypoint?
I proceeded with acceleration correction, compass correction, and controller correction.
And I did the same direction of motor rotation and propeller wings.
But drones don’t fly, they lean forward or sideways.
It’s not leaning in the air.
When the motor starts a high-speed rotation to float in the air, it tilts and sticks a propeller into the ground.
So I wonder what I’m doing wrong.
Sorry, it is sometimes hard to understand what you mean.
If you say, you proceeded with acceleration correction, compass correction etc. Do you say you did not do it before trying to fly your copter?
It seems difficult to understand using a translator. I’m sorry. I’ve done everything I can correct. It’s because that’s what we did on the website above. Can you explain the process that you have to do when flying a drone? I beg you.
I guess the difficulty with the translations goes in both directions.
I can try to write down the steps.
REMOVE THE PROPS!!!
Make sure the ESCs/motors are connected to the right autopilot outputs. The order is important!
Calibrate all ESCs. Either with arducopters calibration function (did not seem to work for you), or by connecting them to the receiver.
One after the other, per 1 to 4 cable, or by programming a new model in the transmitter, which outputs the throttle signal on 4 receiver outputs. Check with the motor test feature in Missionplanner if all motors start with the same throttle setting.
Do all the calibration steps under “mandatory hardware” in Missionplaner.
Do the calibration steps under “optional hardware” in Missionplanner, as your copter requires ( battery monitor for example)
Make sure the horizon in Missionplanners HUD moves in the right direction:
Nose down, more green.
Nose up, more blue.
Roll left, more green on the left side.
Roll right, more green on the right side.
Arm your copter (indoors set Arming_check to 0) in stabilize mode (without props!!!).
Pick it up and throttle up a bit Observe if the front motors throttle up, if you tip the nose down.
Same for all other direction. Motors that move down should throttle up.
Do the same for stick inputs. Pitch stick forward, rear motors power up, front motors slow down.
Roll stick right, left motors power up, right motors slow down.
To make it easier to see the motor rotation, you can stick a strip of white adhesive tape on them.
Check the balance of the copter. CoG should be in the center.
Put the props back on.
Arming_check to 1.
Try to fly the copter in stabilize mode. If you have an experienced pilot at hand, let him do it.
If all goes well, the copter should fly, but will most likely need tuning. You can tune by hand or use the autotune feature. Do this only at a wide open field with no people around!
Thank you for always explaining it thoroughly.
But I copied what you said, but I couldn’t fly a drone.
The parts I used are as follows.
raspberry pi
navio2
ZD550 Quadcopter Fodable Frame Kit with Carbon-fiber Landing Skid
Hobbywing X-Rotor 40A 2-6S OPTO ESC with no BEC
RTS 3508 580KV Brushless Motor
Carbon Fiber Propeller 12x6
Rhino 6200mAh 4S 50C Lipo Pack w/XT90
FS-i6 and Receiver FS-iA6B
We proceeded with the purchase according to the recommended configuration that was written when purchasing the frame.
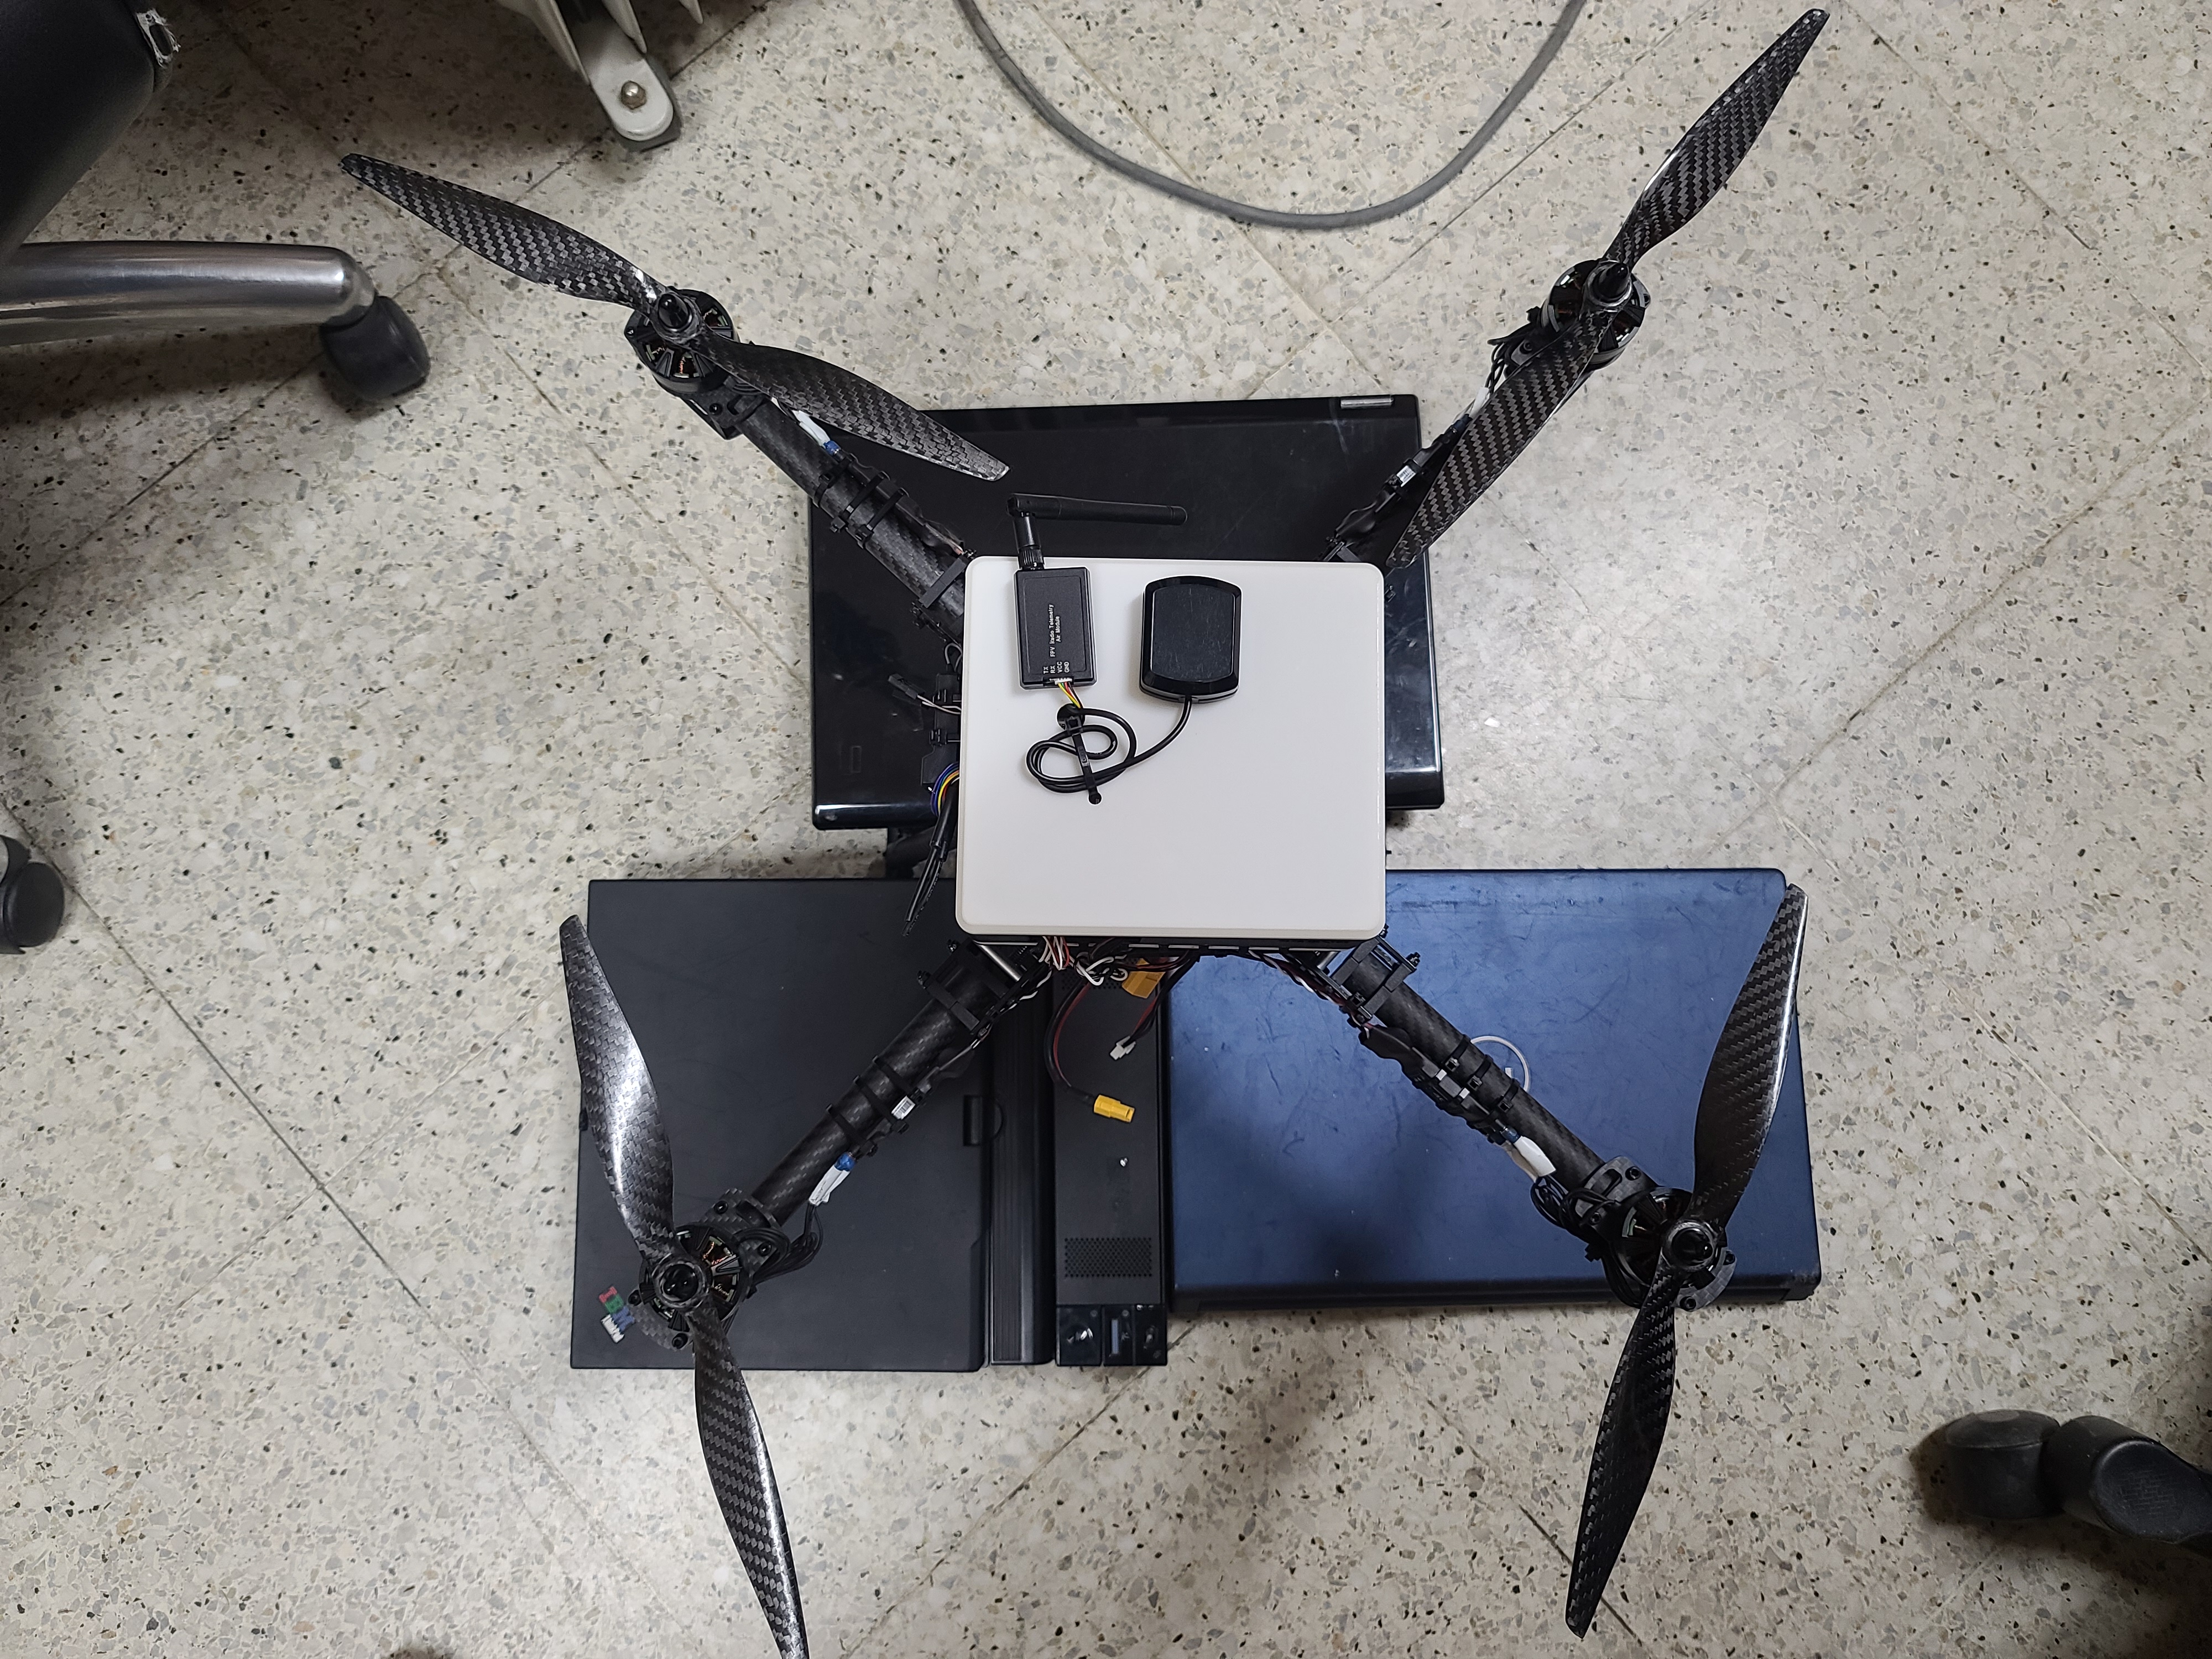
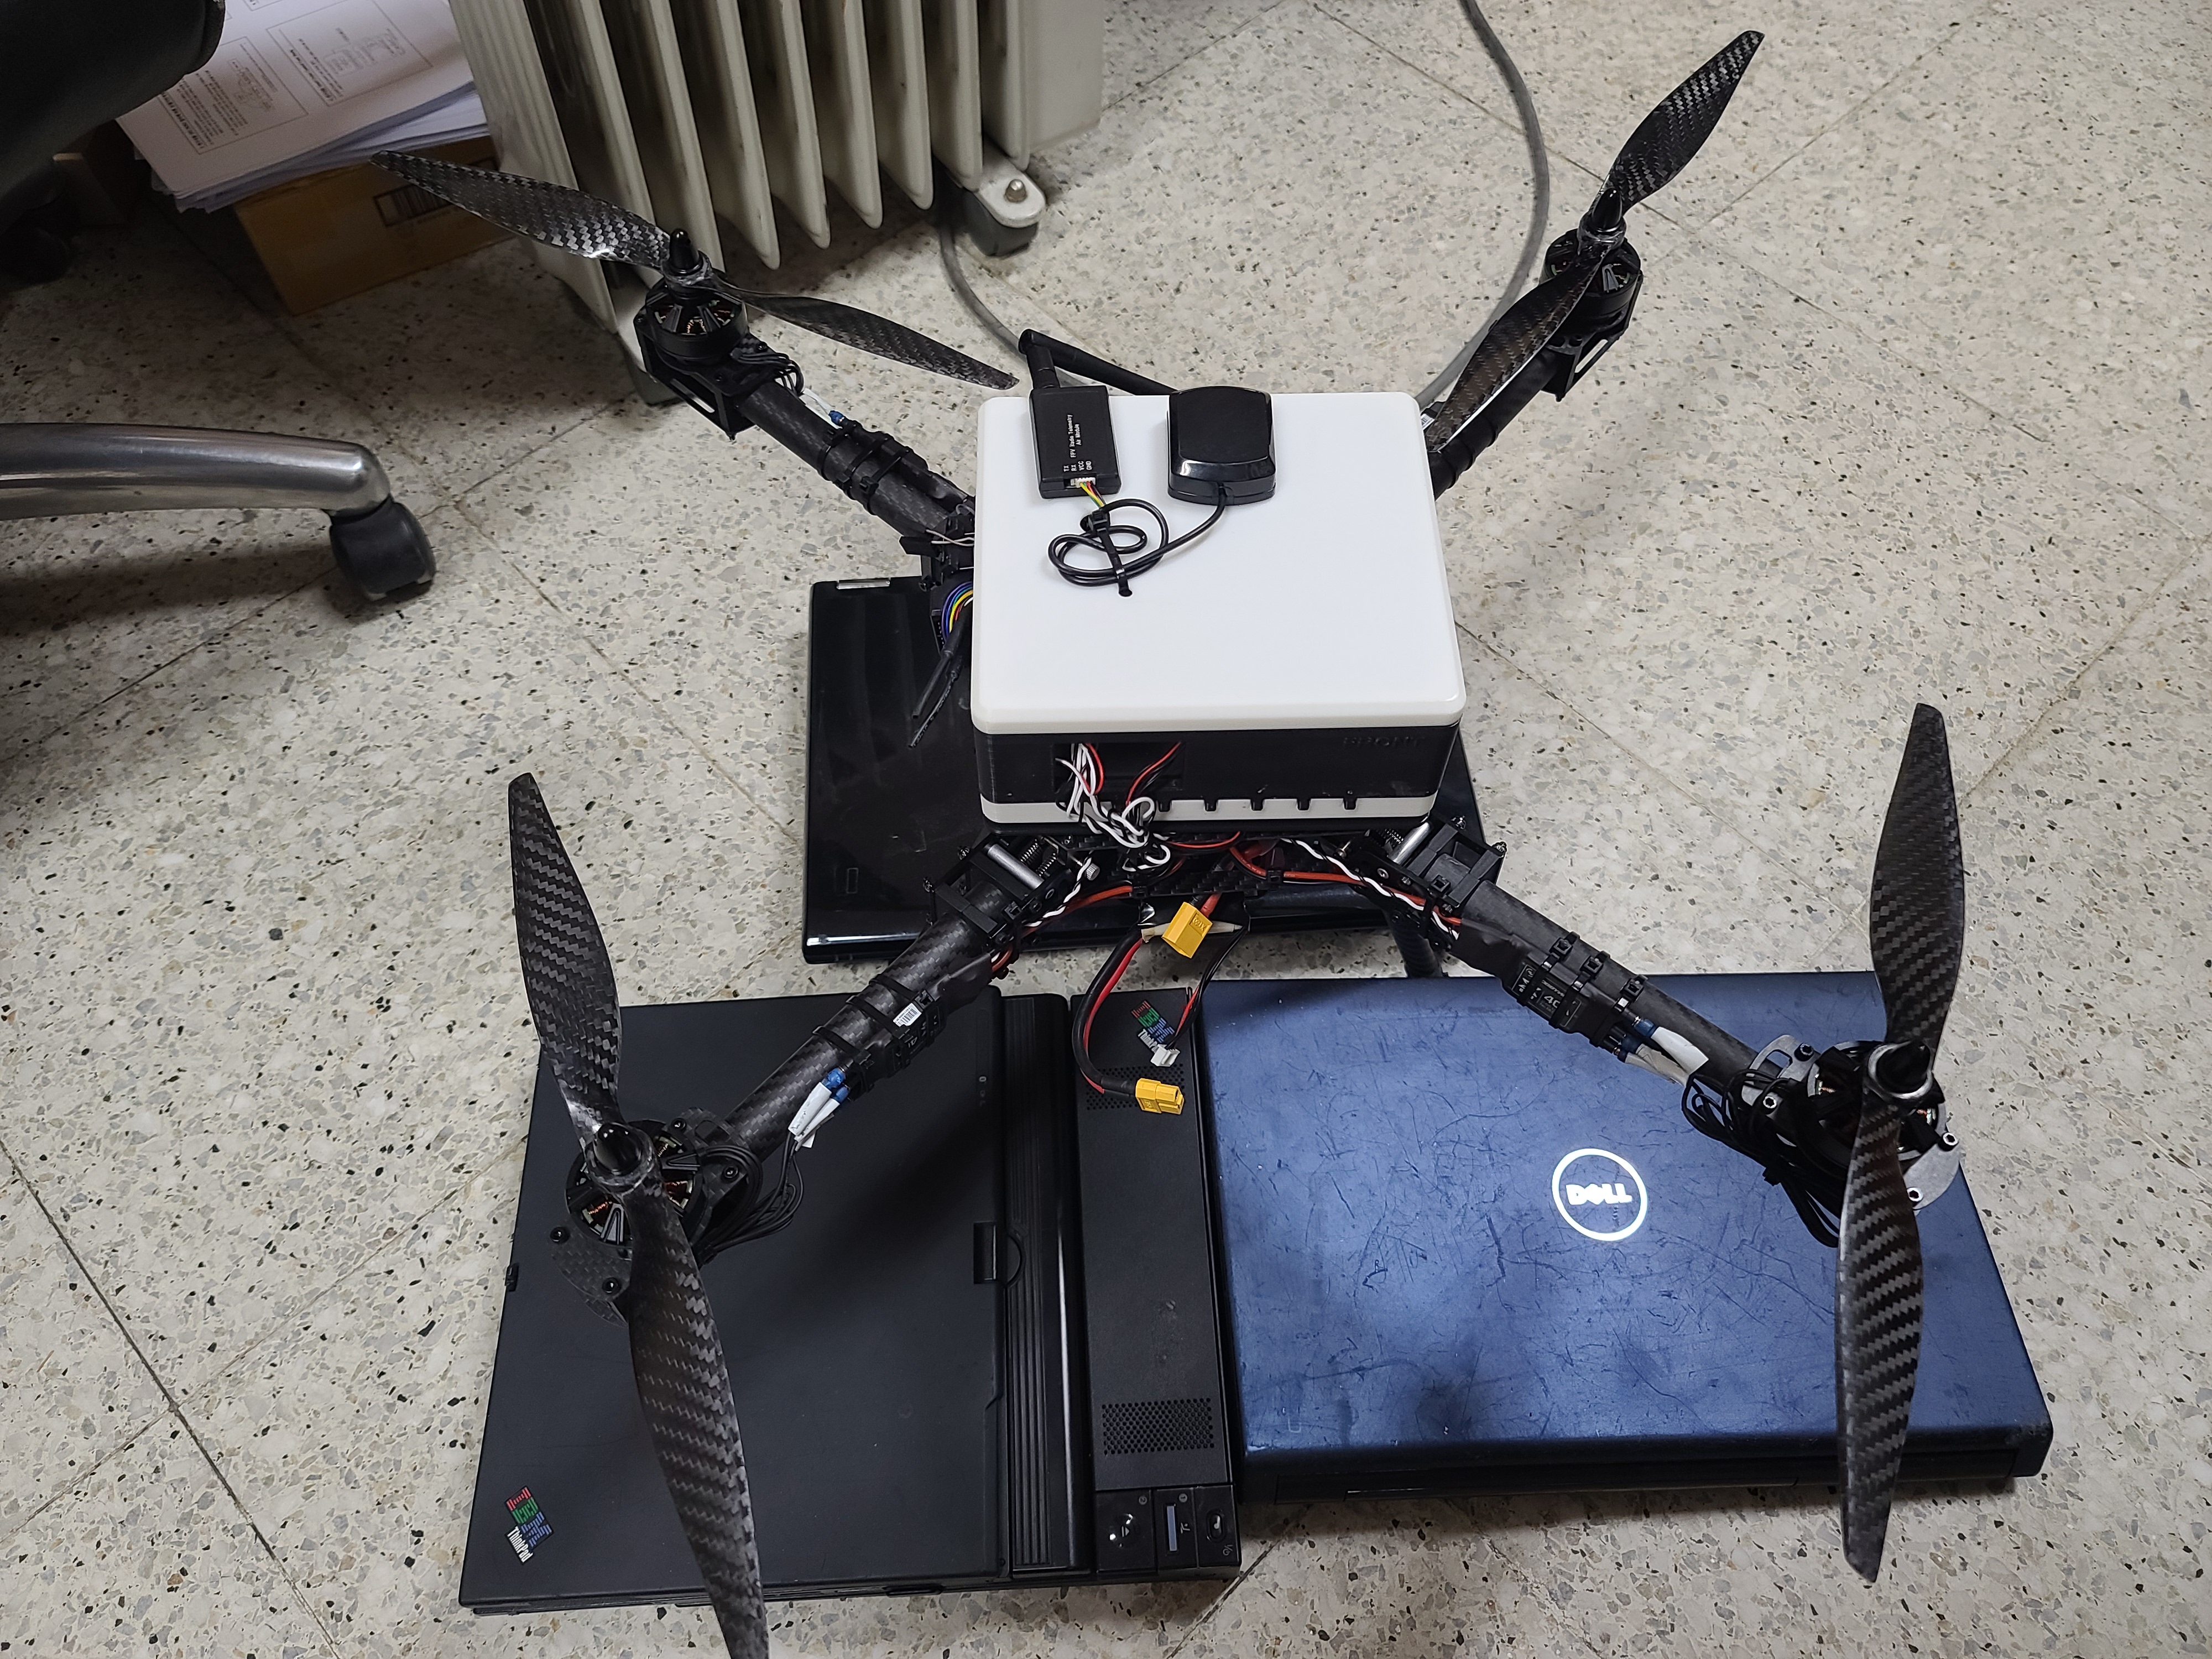
And as shown in the picture above, we made and installed a large frame that can protect raspberry pi and navio2 using a 3D printer.
The log file is virtually empty. The compass does fail the prearm check and because of that the copter does not arm. Either resolve the compass issue (redo calibration, try to fly where no metal/electricity is around) or disable the arming checks for short testflights.
Hi there,
I had a quick look at your .bin file and noticed two things:
a) appears radio calibration hasn’t been done - hence you wouldn’t be able to control drone well
b) Your GPS had bad value of 1.2 and above. It should be below 1 for good signal reception.
I also noticed you have a telemetry unit right next to your GPS antenna…Bad idea. This explains your poor GPS value as the signal from your telemetry unit is sent right into the GPS antenna and causing interference.
The telemetry unit should be kept away from flight controller and GPS antenna. It is fine to have telemetry antenna facing down, but try to mount it away.
In regards to GPS antenna would recommend to mount it higher so it is not affected by interference from motors, ESC and power distribution board, if you have one.
In regards to your first remarks, you have to understand that such project is aimed for people who want to understand and use the full technology in regards to drones and have the flexibility of setting it up as they personally prefer matching their own project.
But if you want just a “plug and play” arrangement you are better off with a ready made drone package which requires no or only very little setup and configuration.
I’m sure if you just are willing to follow all the steps and recommendations you will soon have a very enjoyable flying experience.
We will install the telemetry device away from GPS and flight controller.
Thank you for your advice.
By the way, how do you calibrate your radio?
I conducted radio calibration at the mission planner.
I referred to the blog and video on the Internet.
Did I do something wrong?
I’d appreciate it if you could attach a link with a way to set it up.
Lastly, you told me that the GPS value is 1.2, will it be lowered if I install the telemetry device somewhere else?
Or do I have to change the price arbitrarily?
Hi,
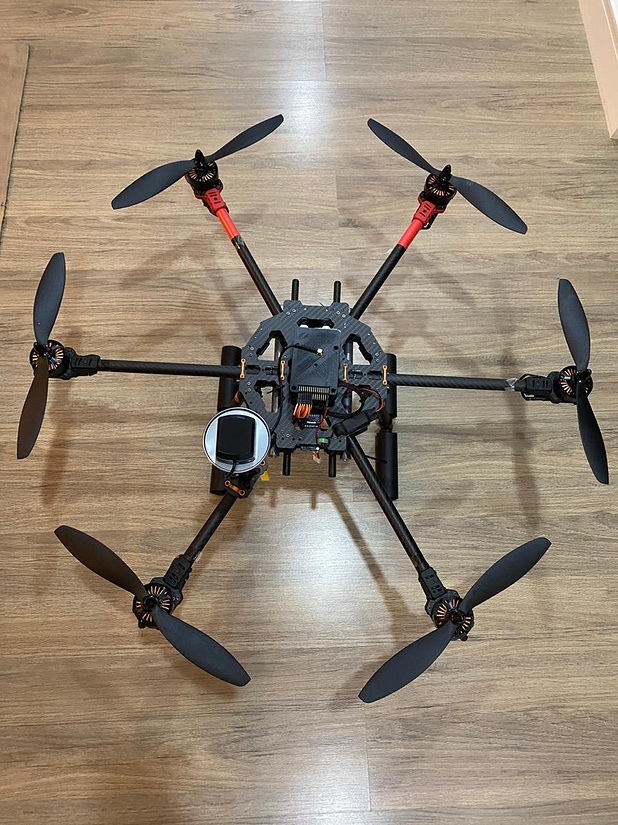
yes, once you ensure there is no interference with GPS antenna the signal quality will improve. It is sometimes also recommended to have a small metal plate under the antenna in order to reduce interference even further.
Here is an example of a GPS antenna installation with a metal plate underneath (lid of a can) and higher up / away from everything else.
I didn’t mention before that I also noticed the flight mode suddenly changing to auto. Not sure why, but I haven’t checked file further if that was done by you or somehow triggered.
Anyway, the auto function should not be used until all basic steps are done and drone is flying as expected. The Auto function also requires good GPS signal or else drone could fly away or crash.