Hey everyone! My name’s Logan Steiner, and I’m a new high school Engineering teacher. I’ve been working a lot with VEX robotics at the high school level, but I want to push my more experienced students a little further with a project that revolves around drones. First off, let it be known that I have no experience creating drones, so this will be a learning experience for myself as well. My idea is to create a step-by-step video tutorial that helps students create their own RC drones. Mostly, I would like them to create their own bodies for the parts to go on, but we’ll tackle that when we get there.
Here are the very basic materials that we will be using for our drones:
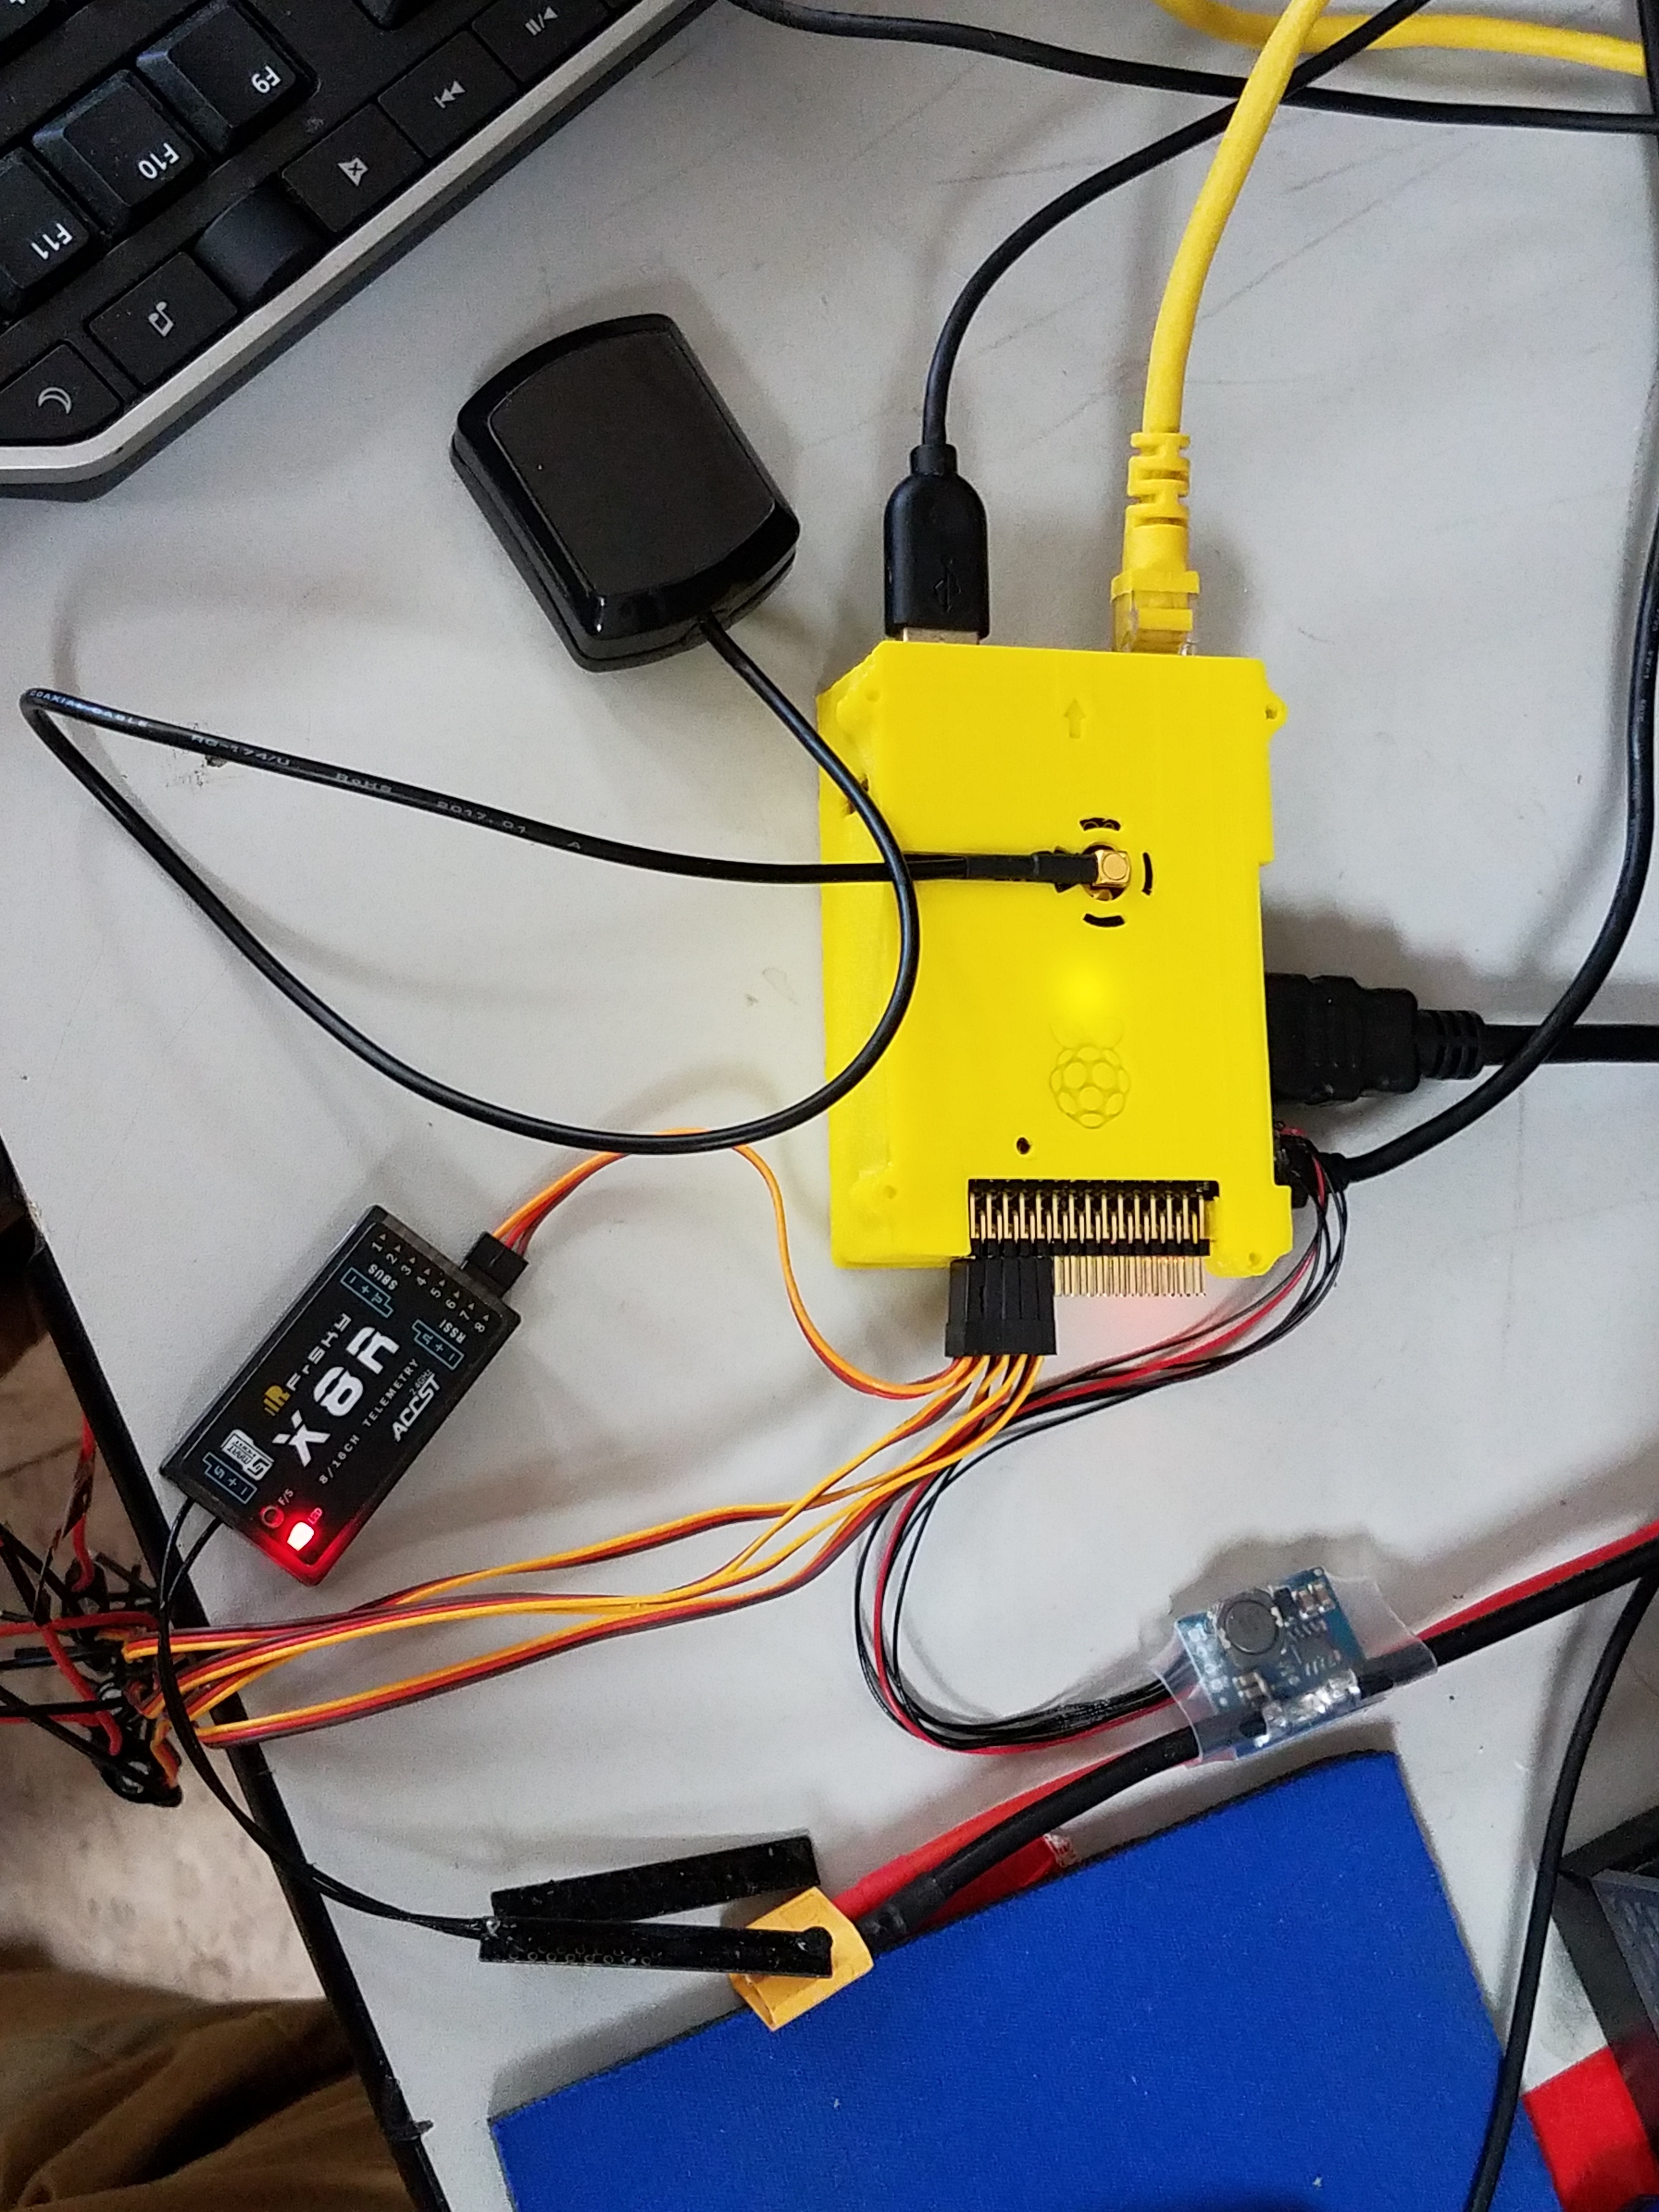
-Raspberry Pi 3
-Navio2
-Turnigy 9XR Pro radio control system
-FrSky 8XR telemetry
Again, my main goal is to more-so create a drone that is simply controlled by the Turnigy radio control system (because the school’s wifi most likely will give us problems).
Starting off, I have found a lot of useful guides online, but I’m still struggling when it comes to setting up the software and raspberry pi with the proper Arducopter-quad build. I have my Navio2 connected to the internet via ethernet cable, and I am able to successfully go through this step:
sudo apt-get update && sudo apt-get dist-upgrade
But after this, I’m lost. I realize I need to connect to my Ground Control Station (Mission Planner) in order to flash the Arducopter-quad onto the Navio2, but when I try to connect the two, it times out due to no connection detected. Both the Navio2 and the computer with Mission Planner are connected to the school’s internet via ethernet, so shouldn’t that be working?
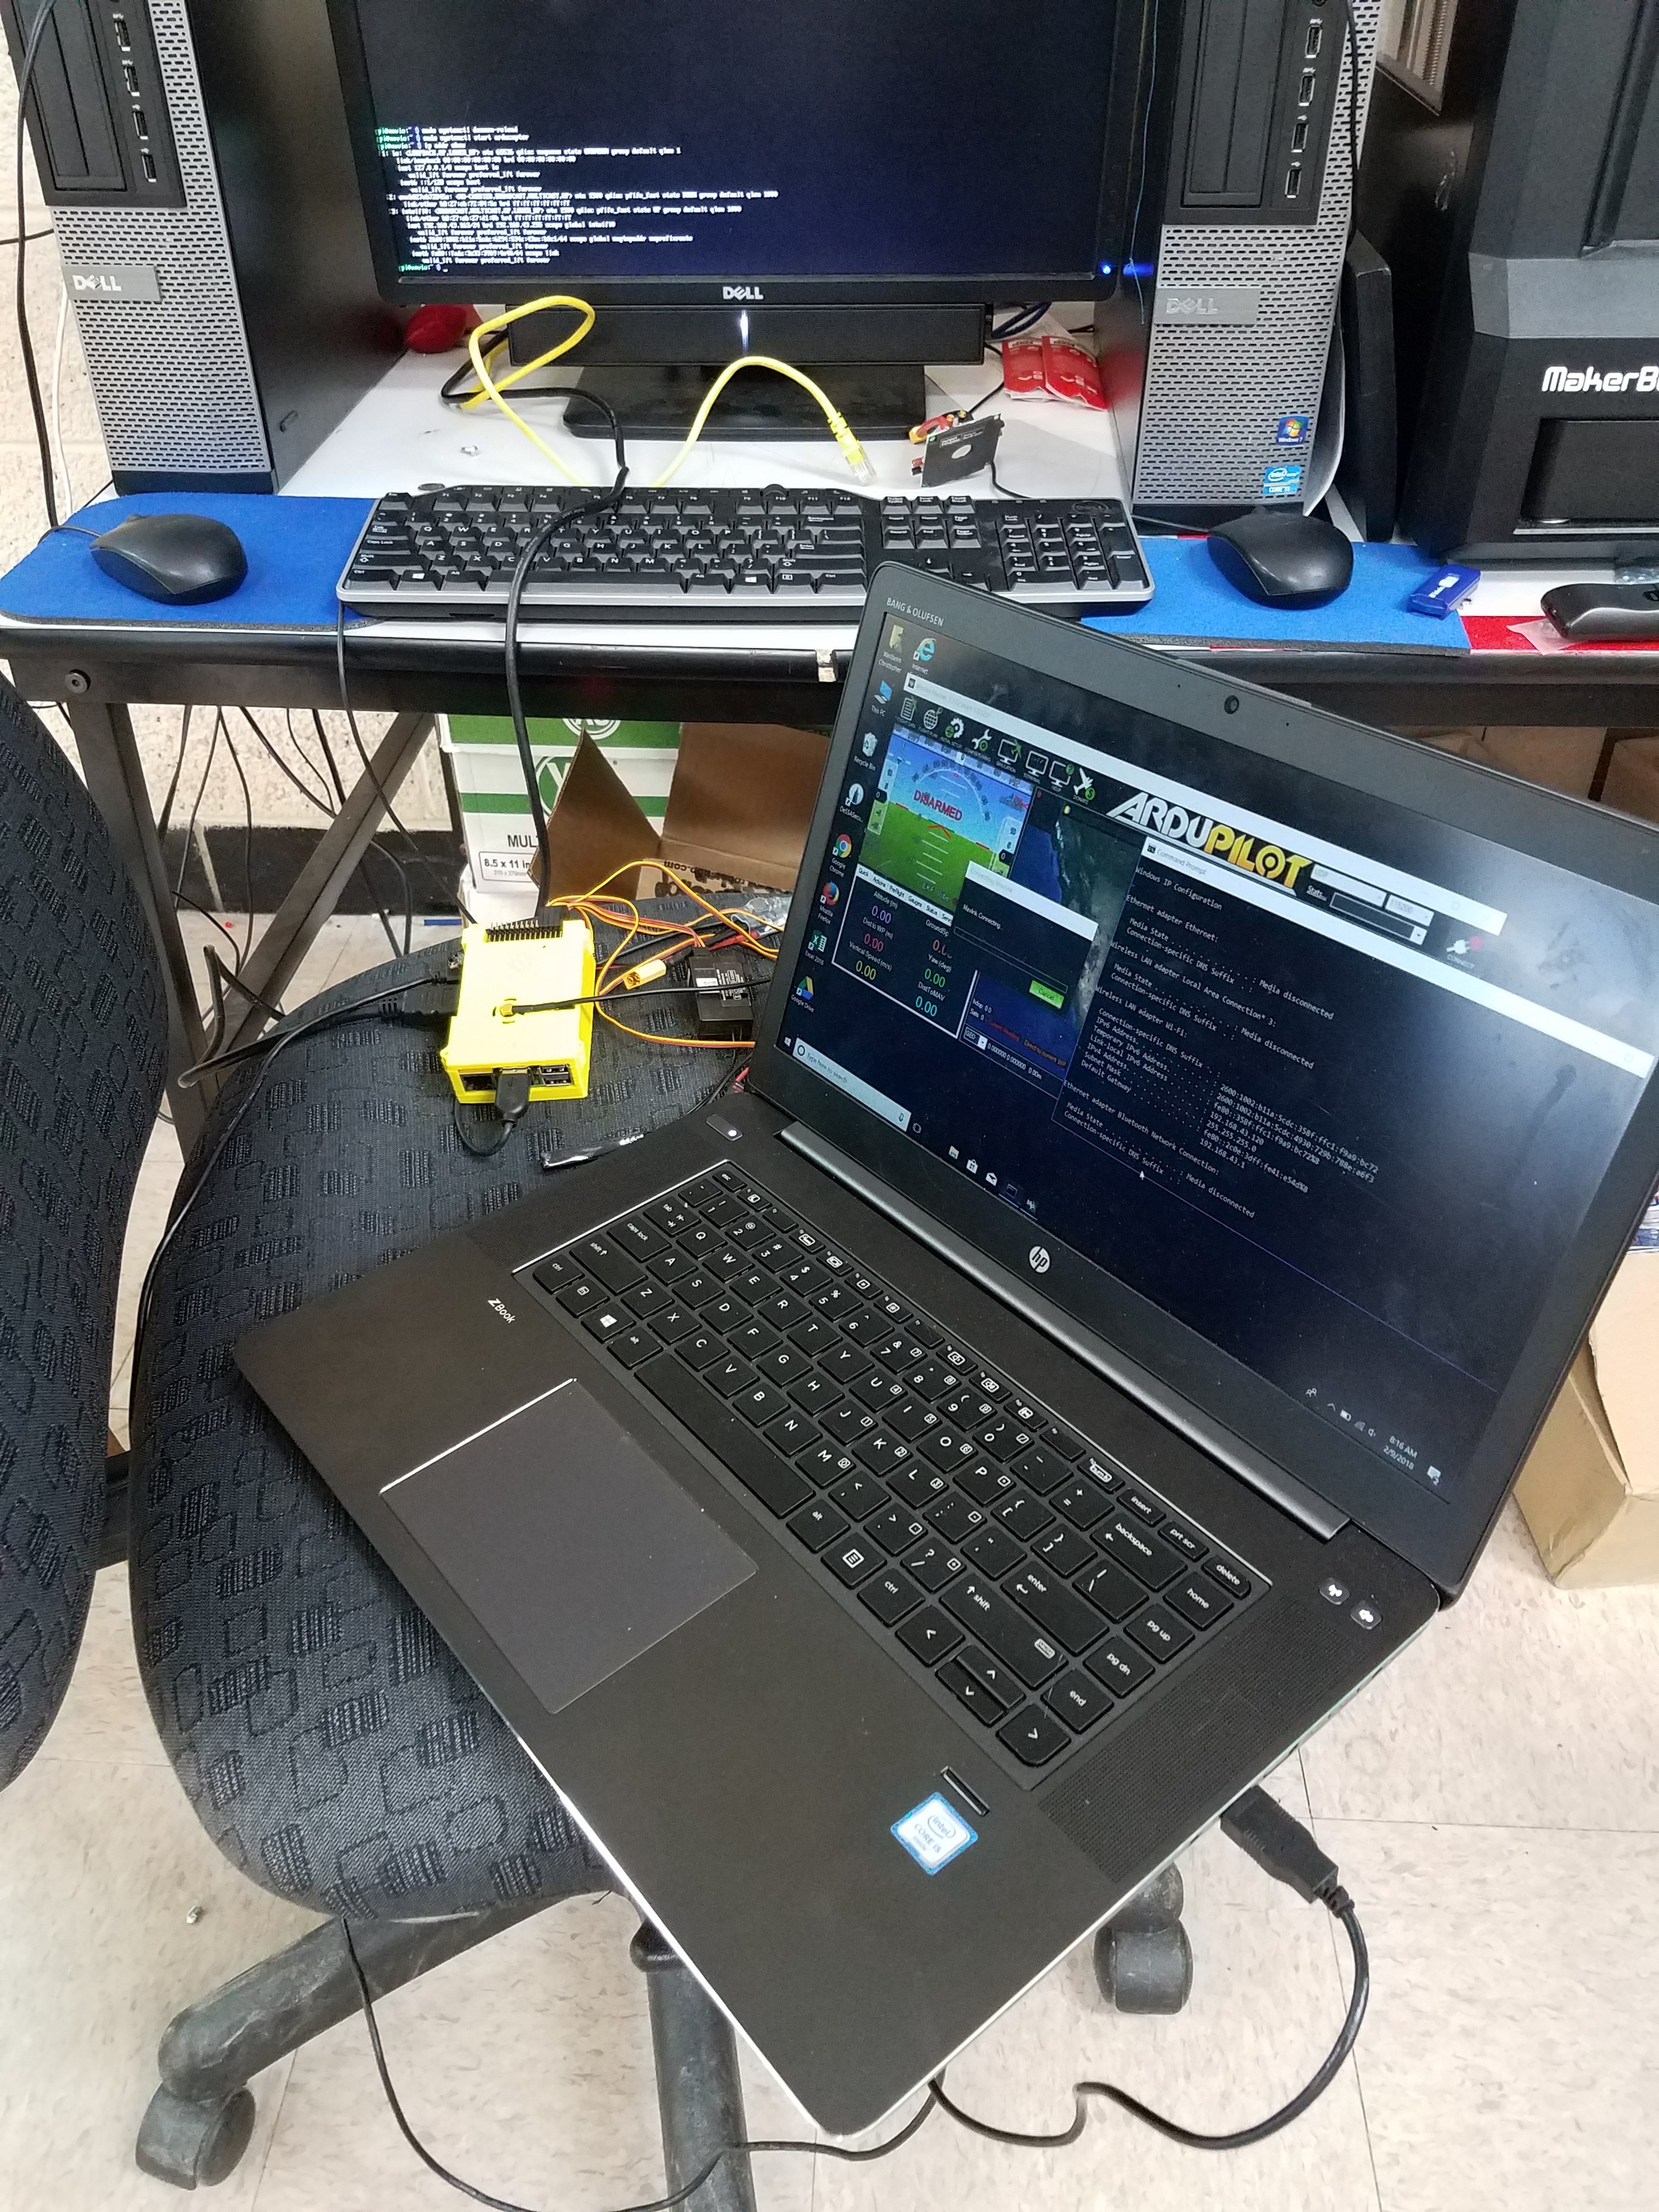
I appreciate any and all help with this project of mine. If you need any pictures of my setup or anything at all, please feel free to ask.
first thing you should do is read through docs.emlid.com, let it sink in and read again.
If you flashed the emlid raspbian image onto the RPis SD-card, you also already have the various ardupilot firmwares. They run as a executable on linux. Flashing through the GCS is only for MCU based flightcontrollers.
Thank you for you prompt feedback, I really appreciate it. I’ve given the docs.emlid.com instructions a good read (for the 5th time or so), and I’ve been having difficulties with executing the various arudpilot firmwares. I think the following lines of code might be what’s causing the problem, but I’m not sure. Could you help me out?
I login using pi and raspberry as my username and password, and at the bottom of the NAVIO startup, it says the following:
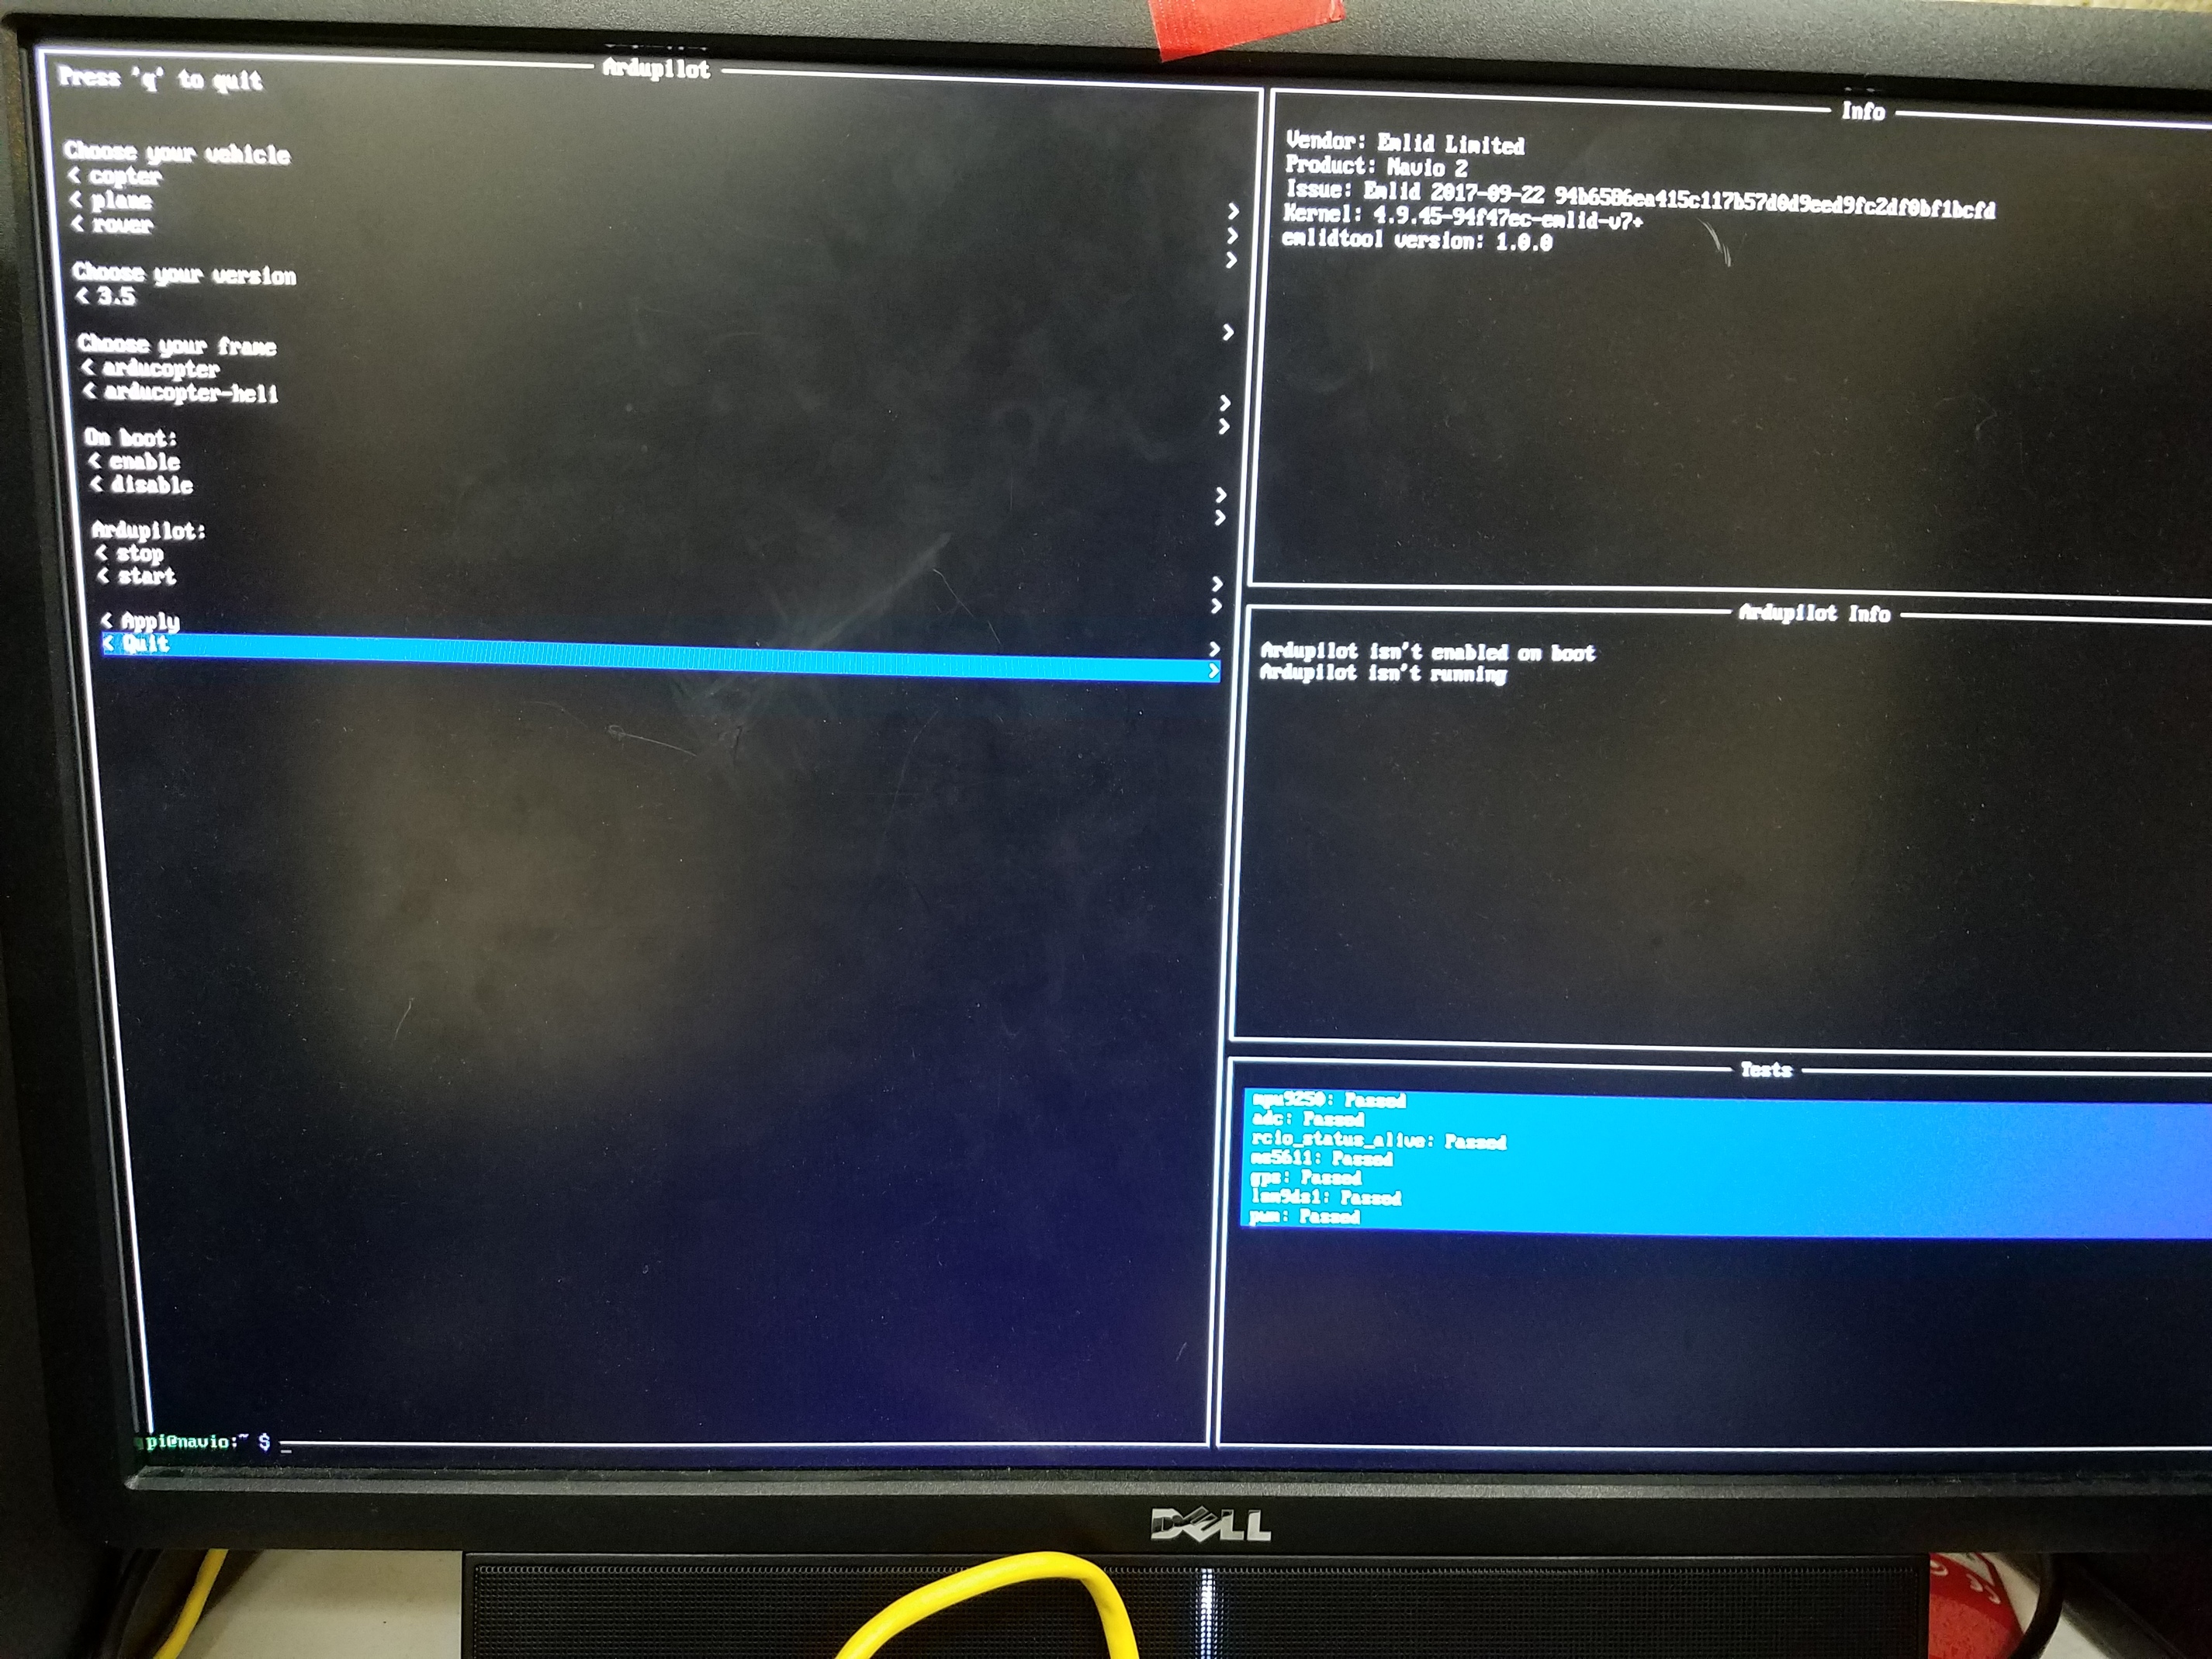
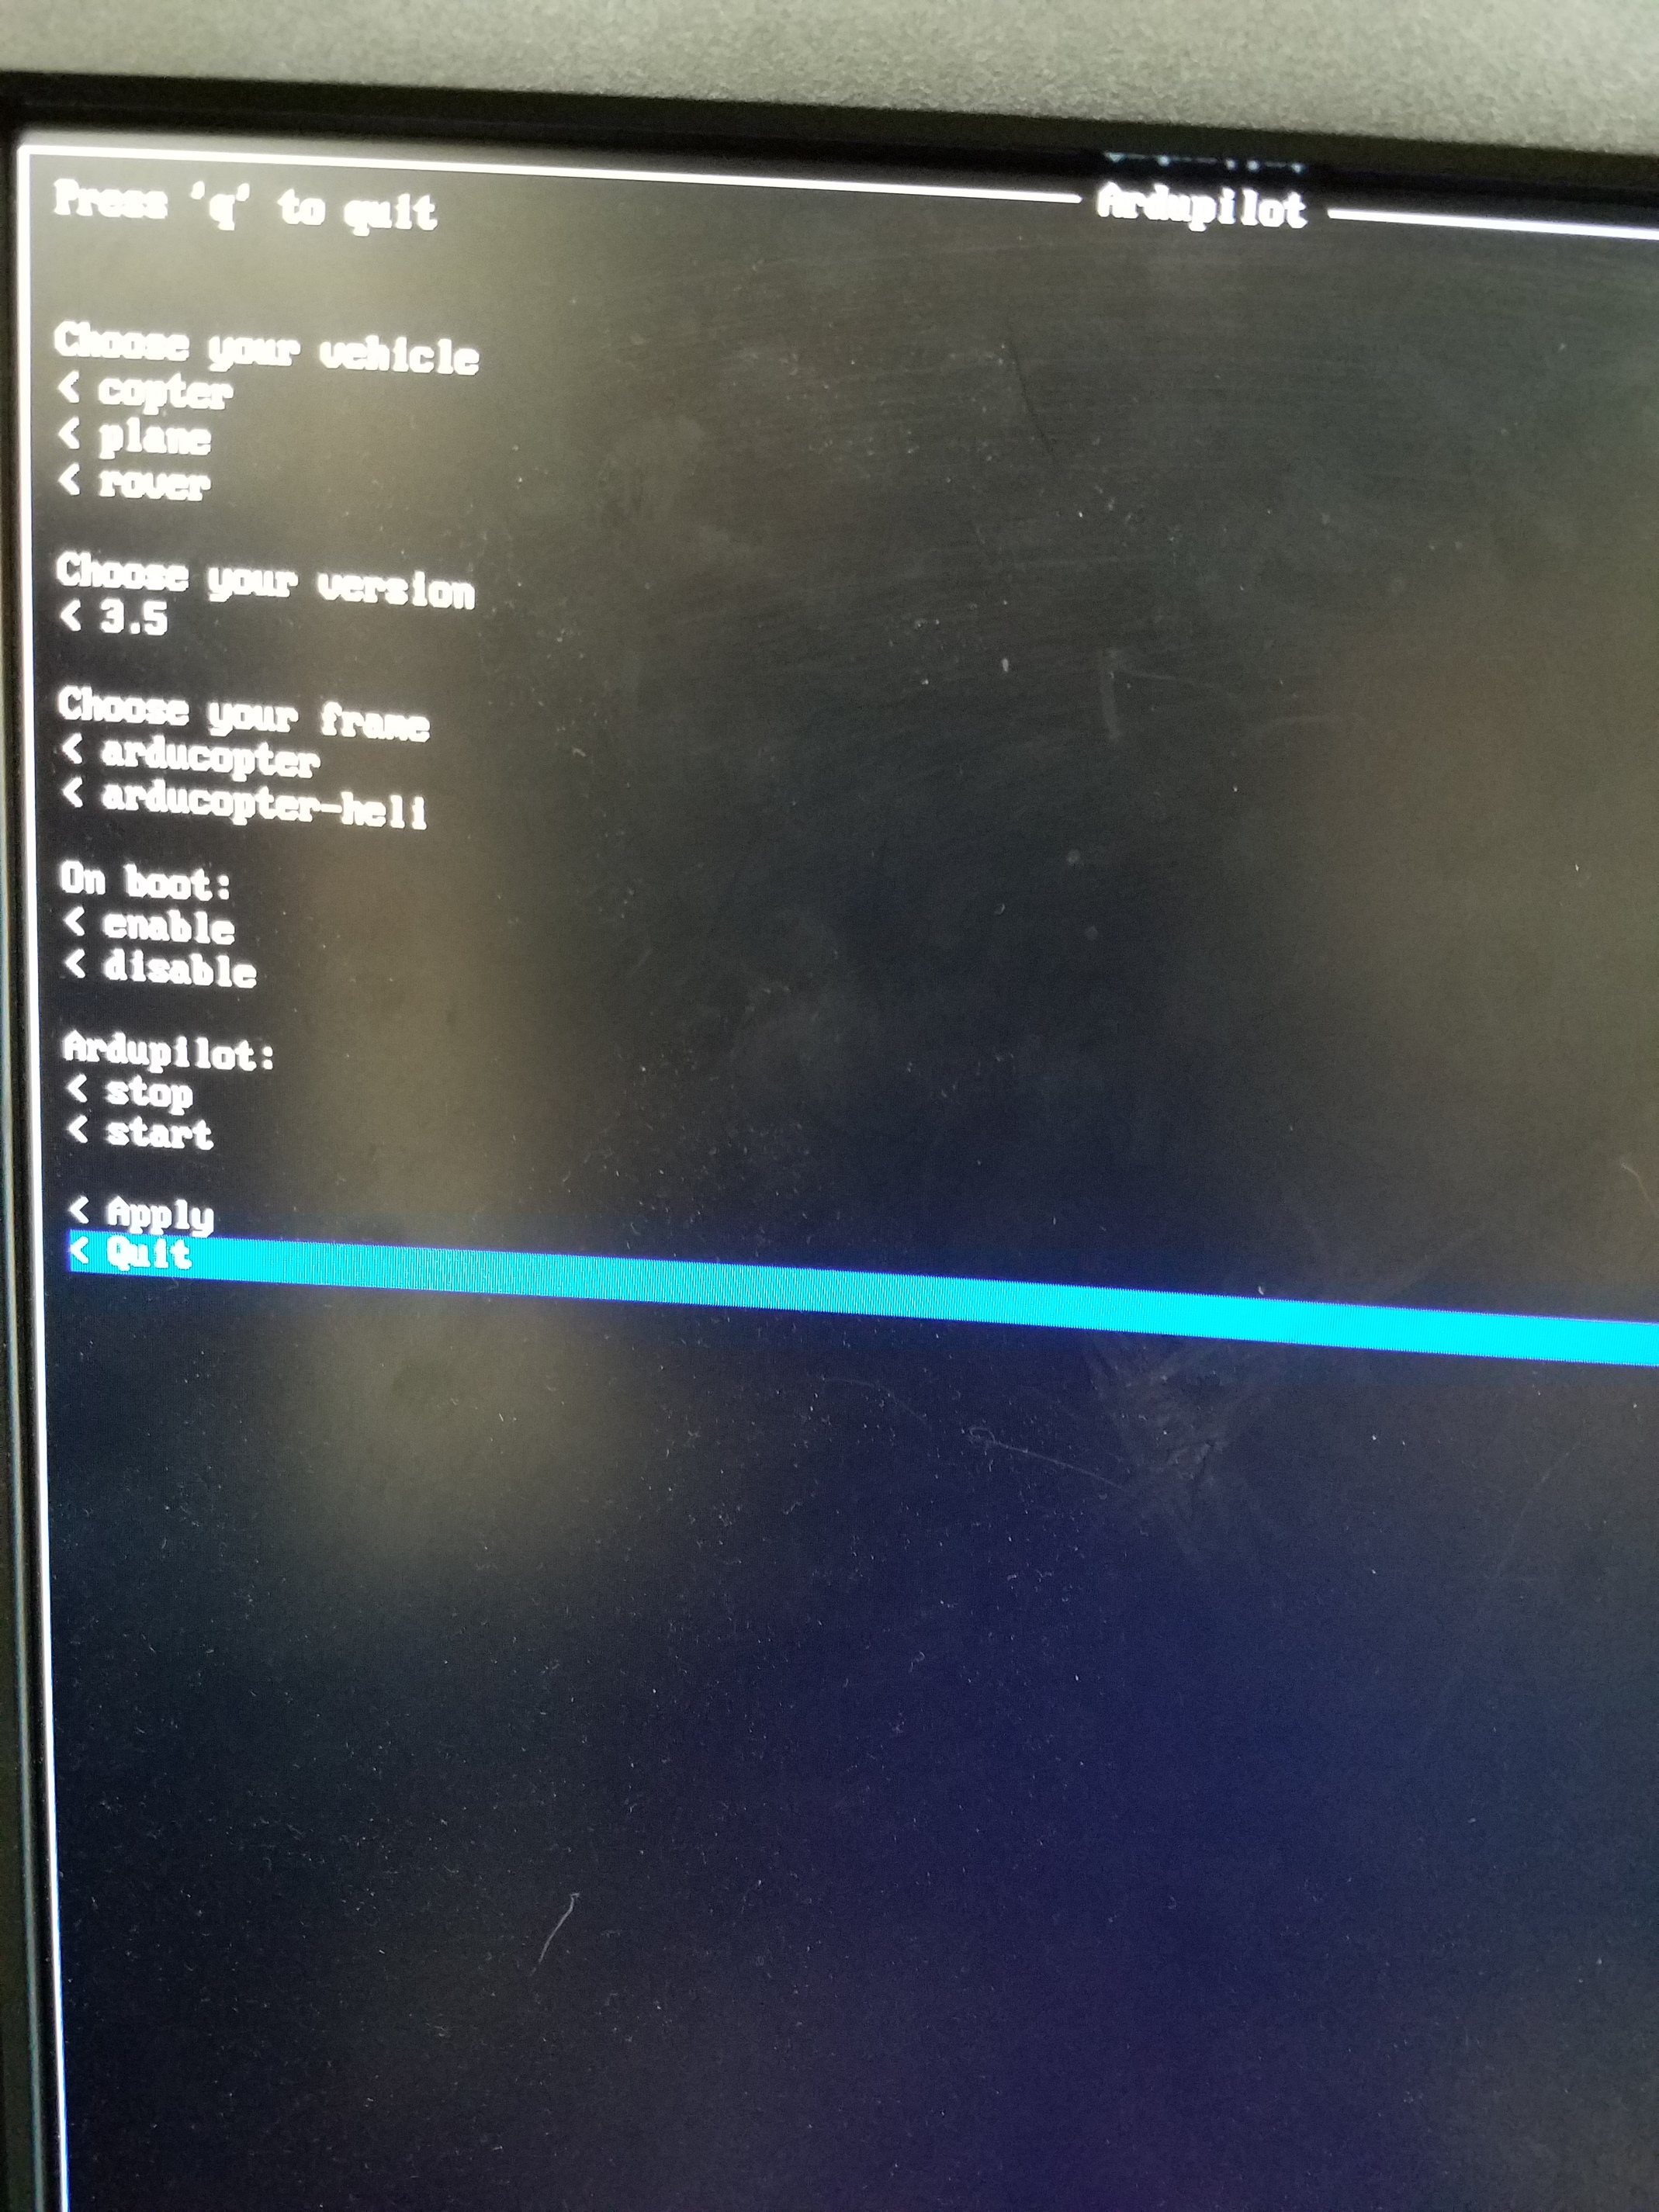
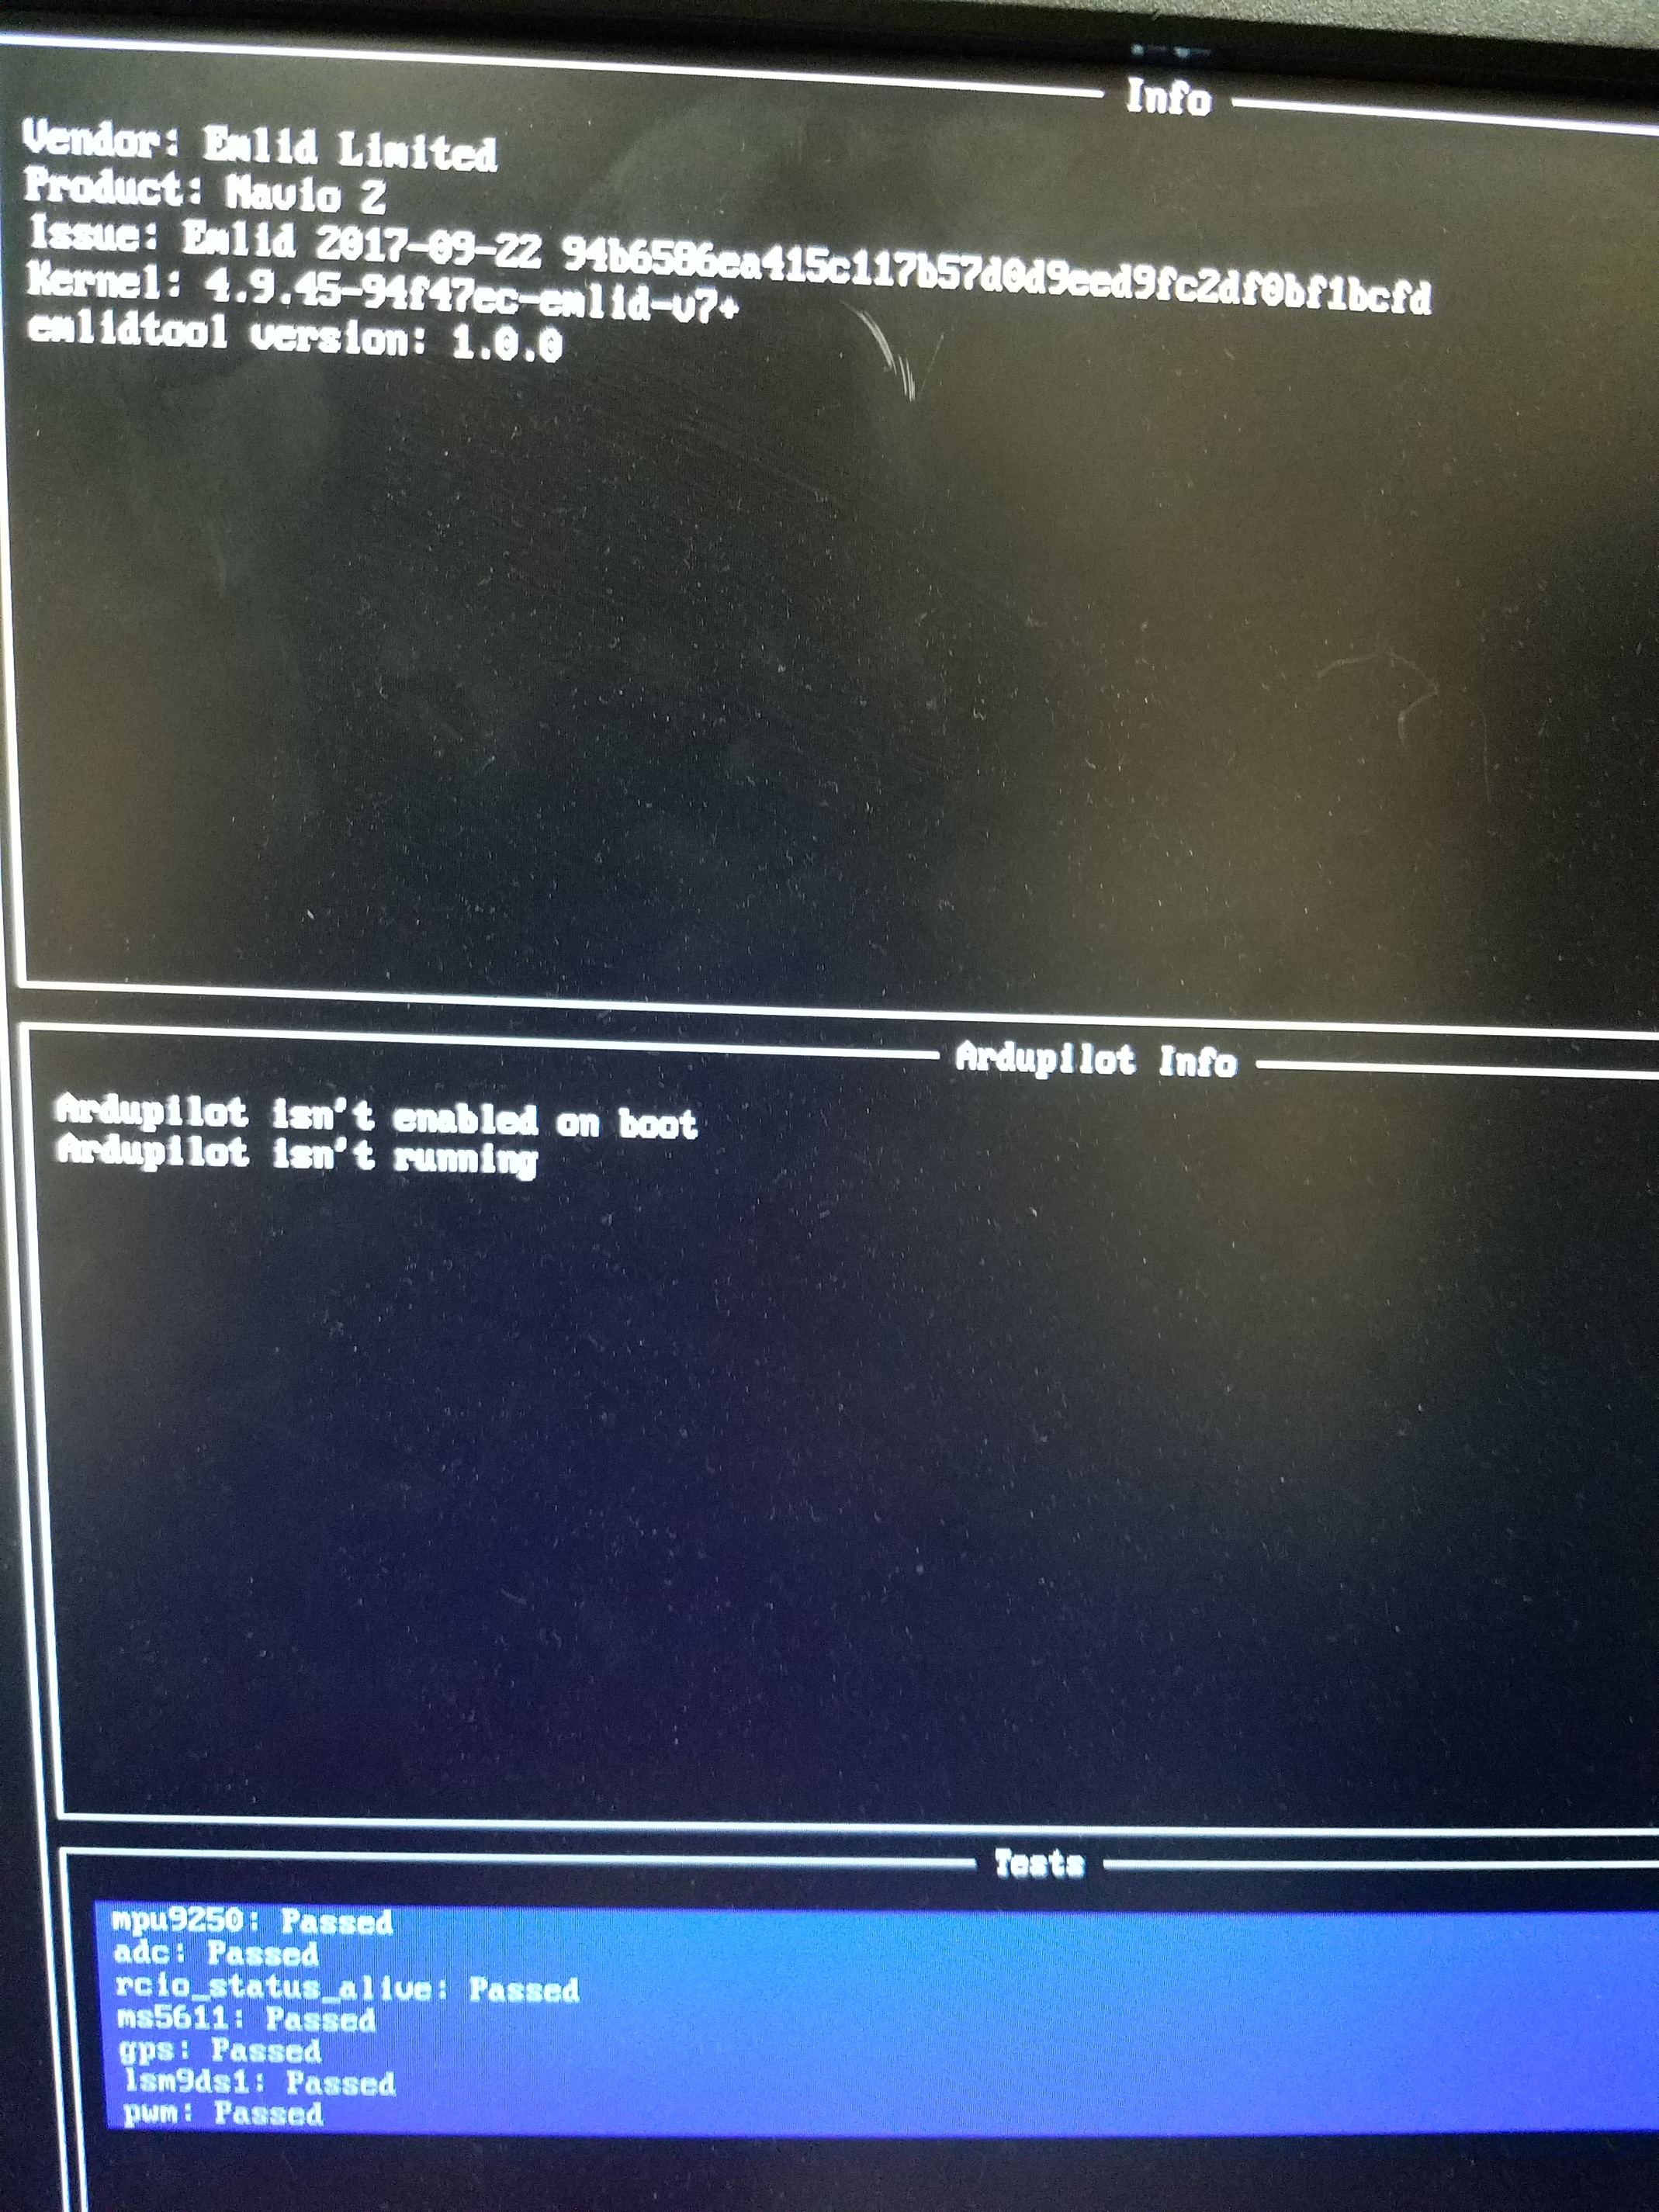
I followed the page of documents that you suggested again, but I am still having troubles choosing the arducopter-quad frame after starting ardupilot. The following pictures are images of my screen while in ardupilot.
Ok this Is one simple issue That nearly all new users have conecting and may help you. Just changing the usb lead! Silly but true the pixhawk has this issue and sometimes takes days to work out its just because the usb that was sent with it is a cheap one with not enough power or bablt wired.
I am no expert in this board but this is the advice given when trying to flash any new firm ware.
I am waiting for mine to arrive to attach to a PI3 foe long distant gsm 3/4g flights. The students are lucky to have a teacher to be intrested enough to go leaen new technology like this for the well done sir.
You did everything right. You need to select to autostart arducopter on boot or at least start it once. Then you connect your GCS on your PC to the arducopter instance running on the RPi and do the frame type selection from there. It is no longer necessary to start different versions of arducopter for different frame types.
Thank you Angus and Sebastian for your feedback. Angus, I believe Sebastian is correct here, as I actually didn’t receive a USB lead with my Navio2, I am using my own USB and power source.
Sebastian,
Is there a way to connect to my GCS via ethernet connection? The school’s wifi has a protected password that I cannot have access to, but I am still able to connect to the internet via ethernet connection. I currently have my Navio2 and GCS plugged into the internet that way, but I am struggling to “Connect” on my Mission Planner. Any tips/suggestions? I can send some screenshots and pictures of my setup if that helps.
Thank you for your feedback, I appreciate any and all help.
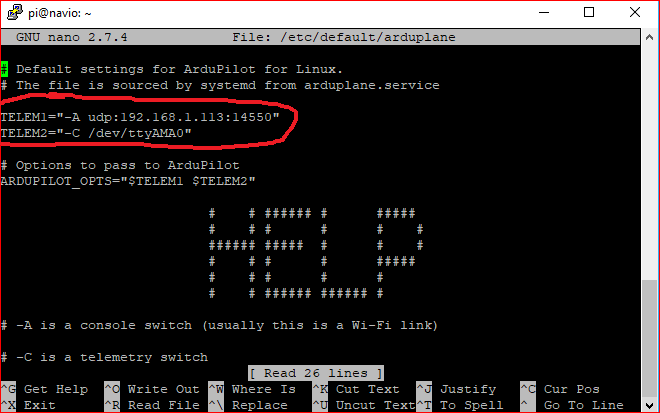
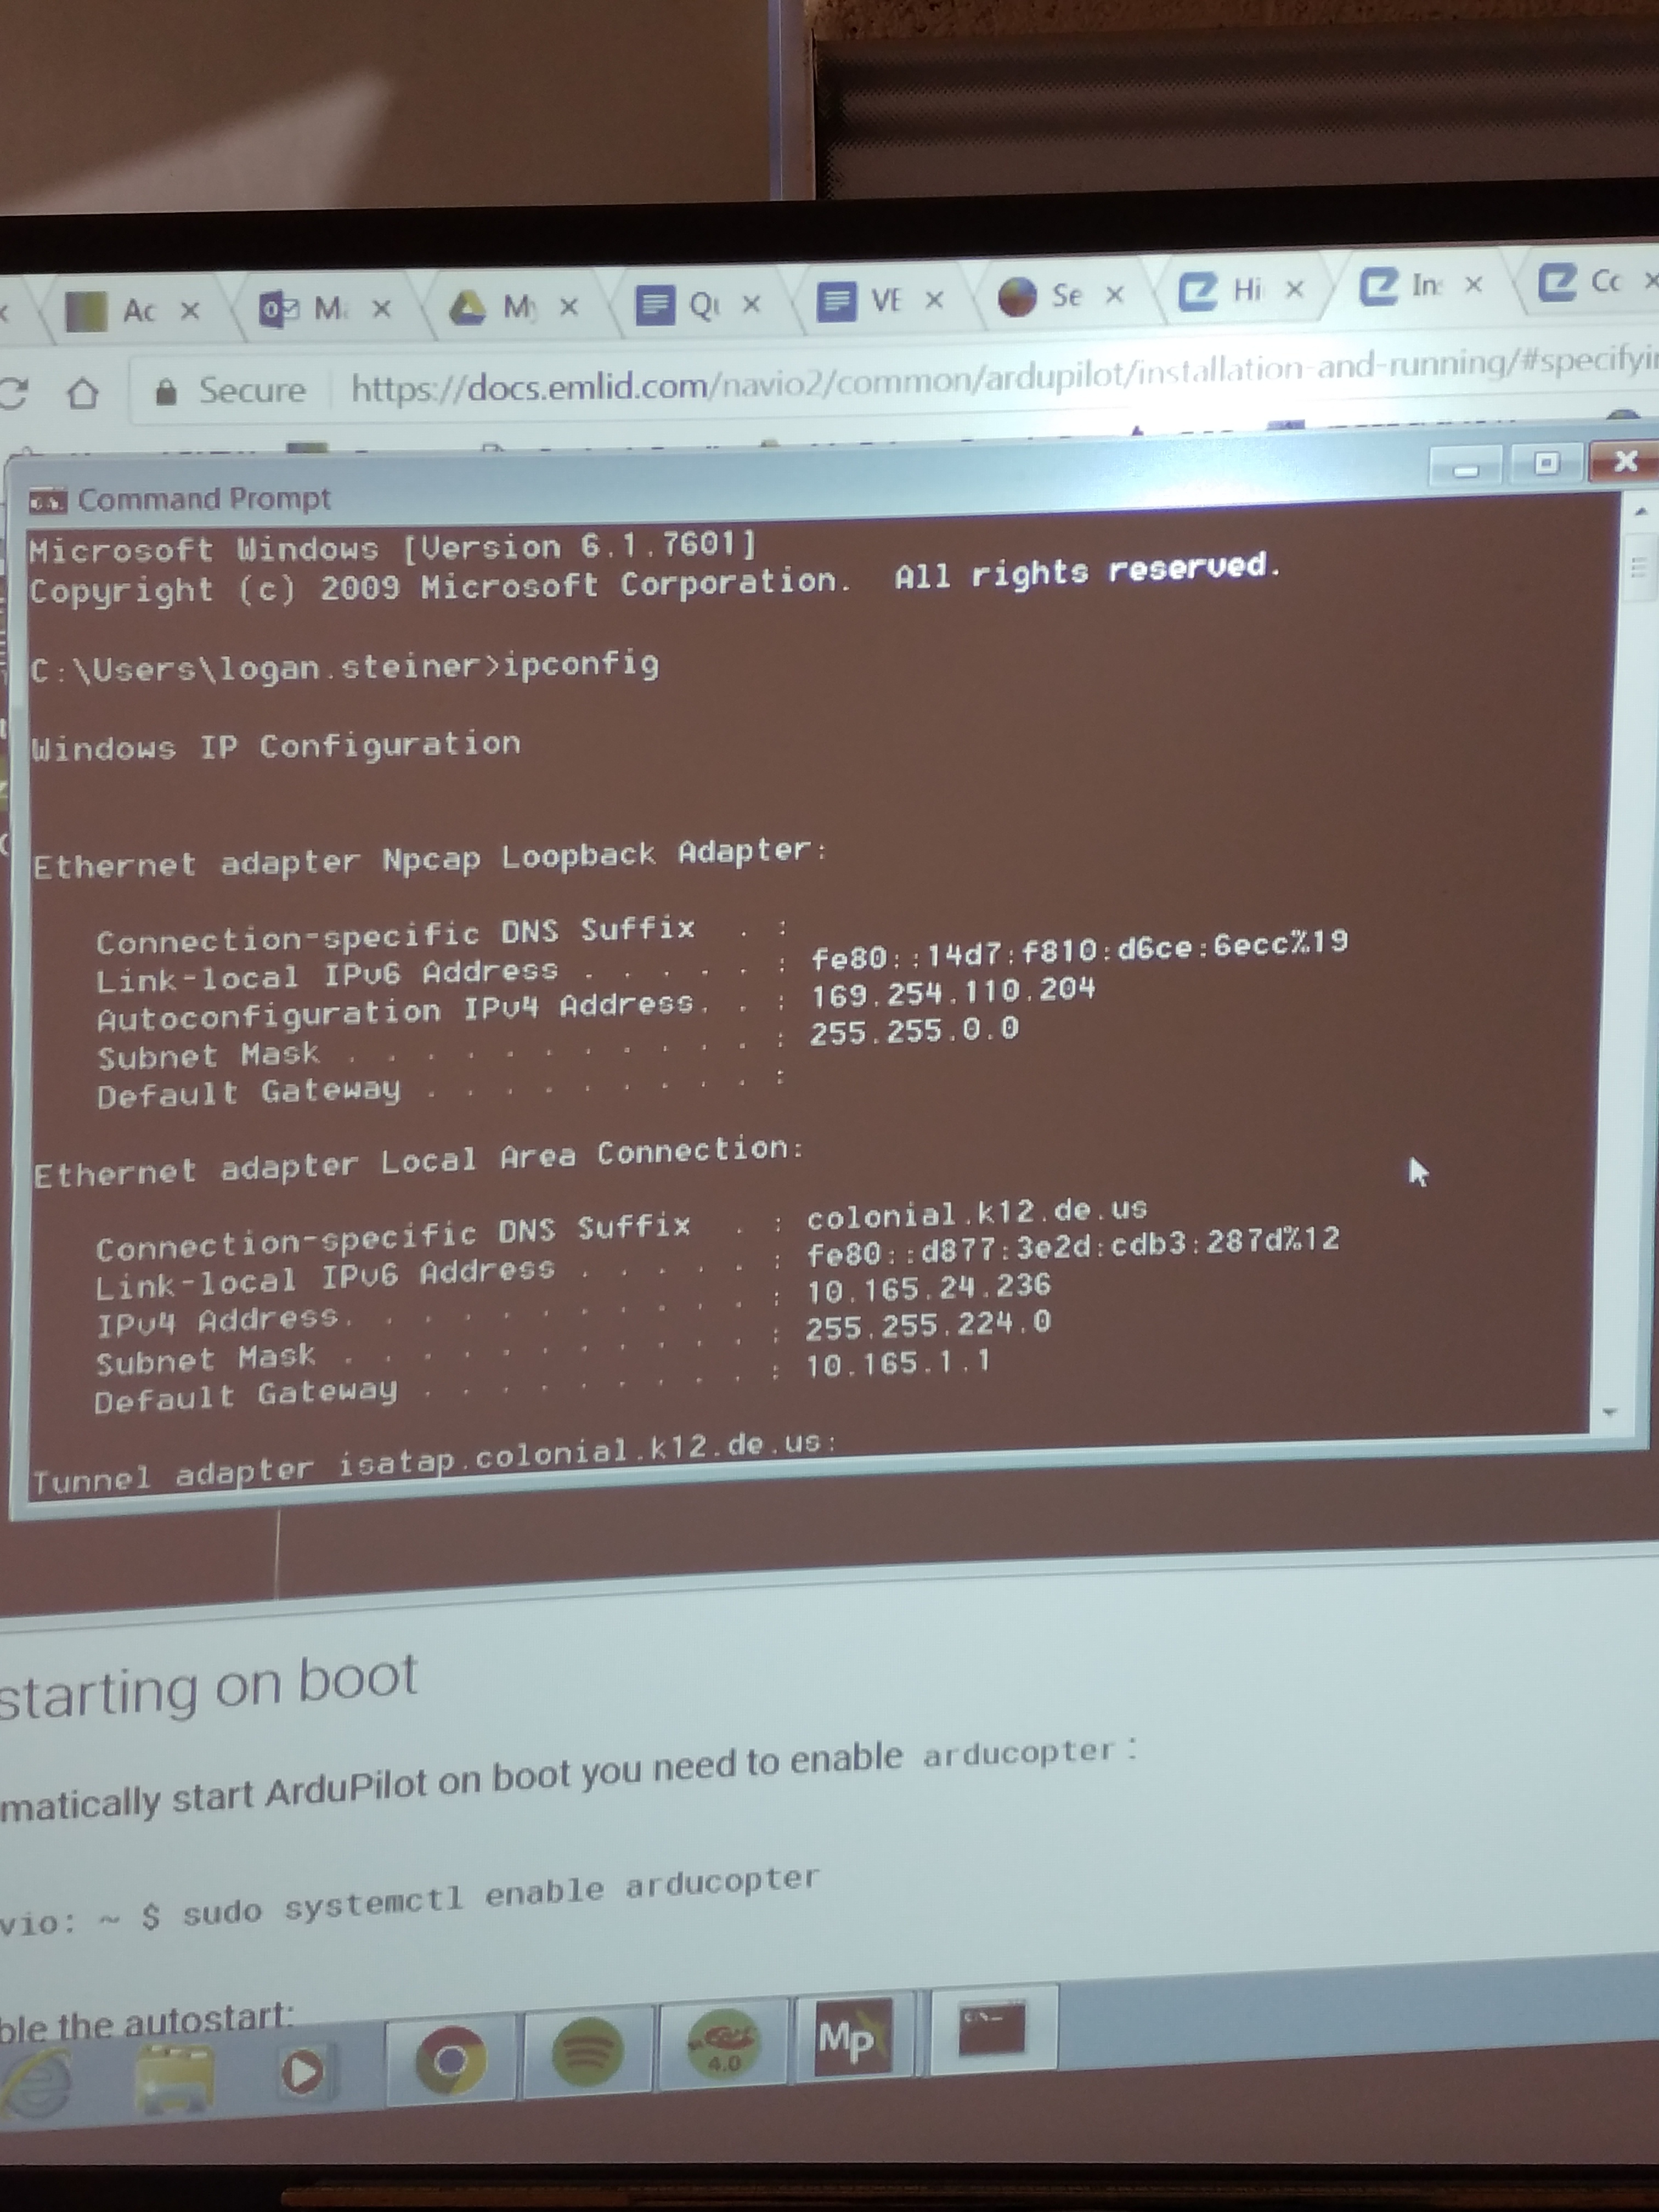
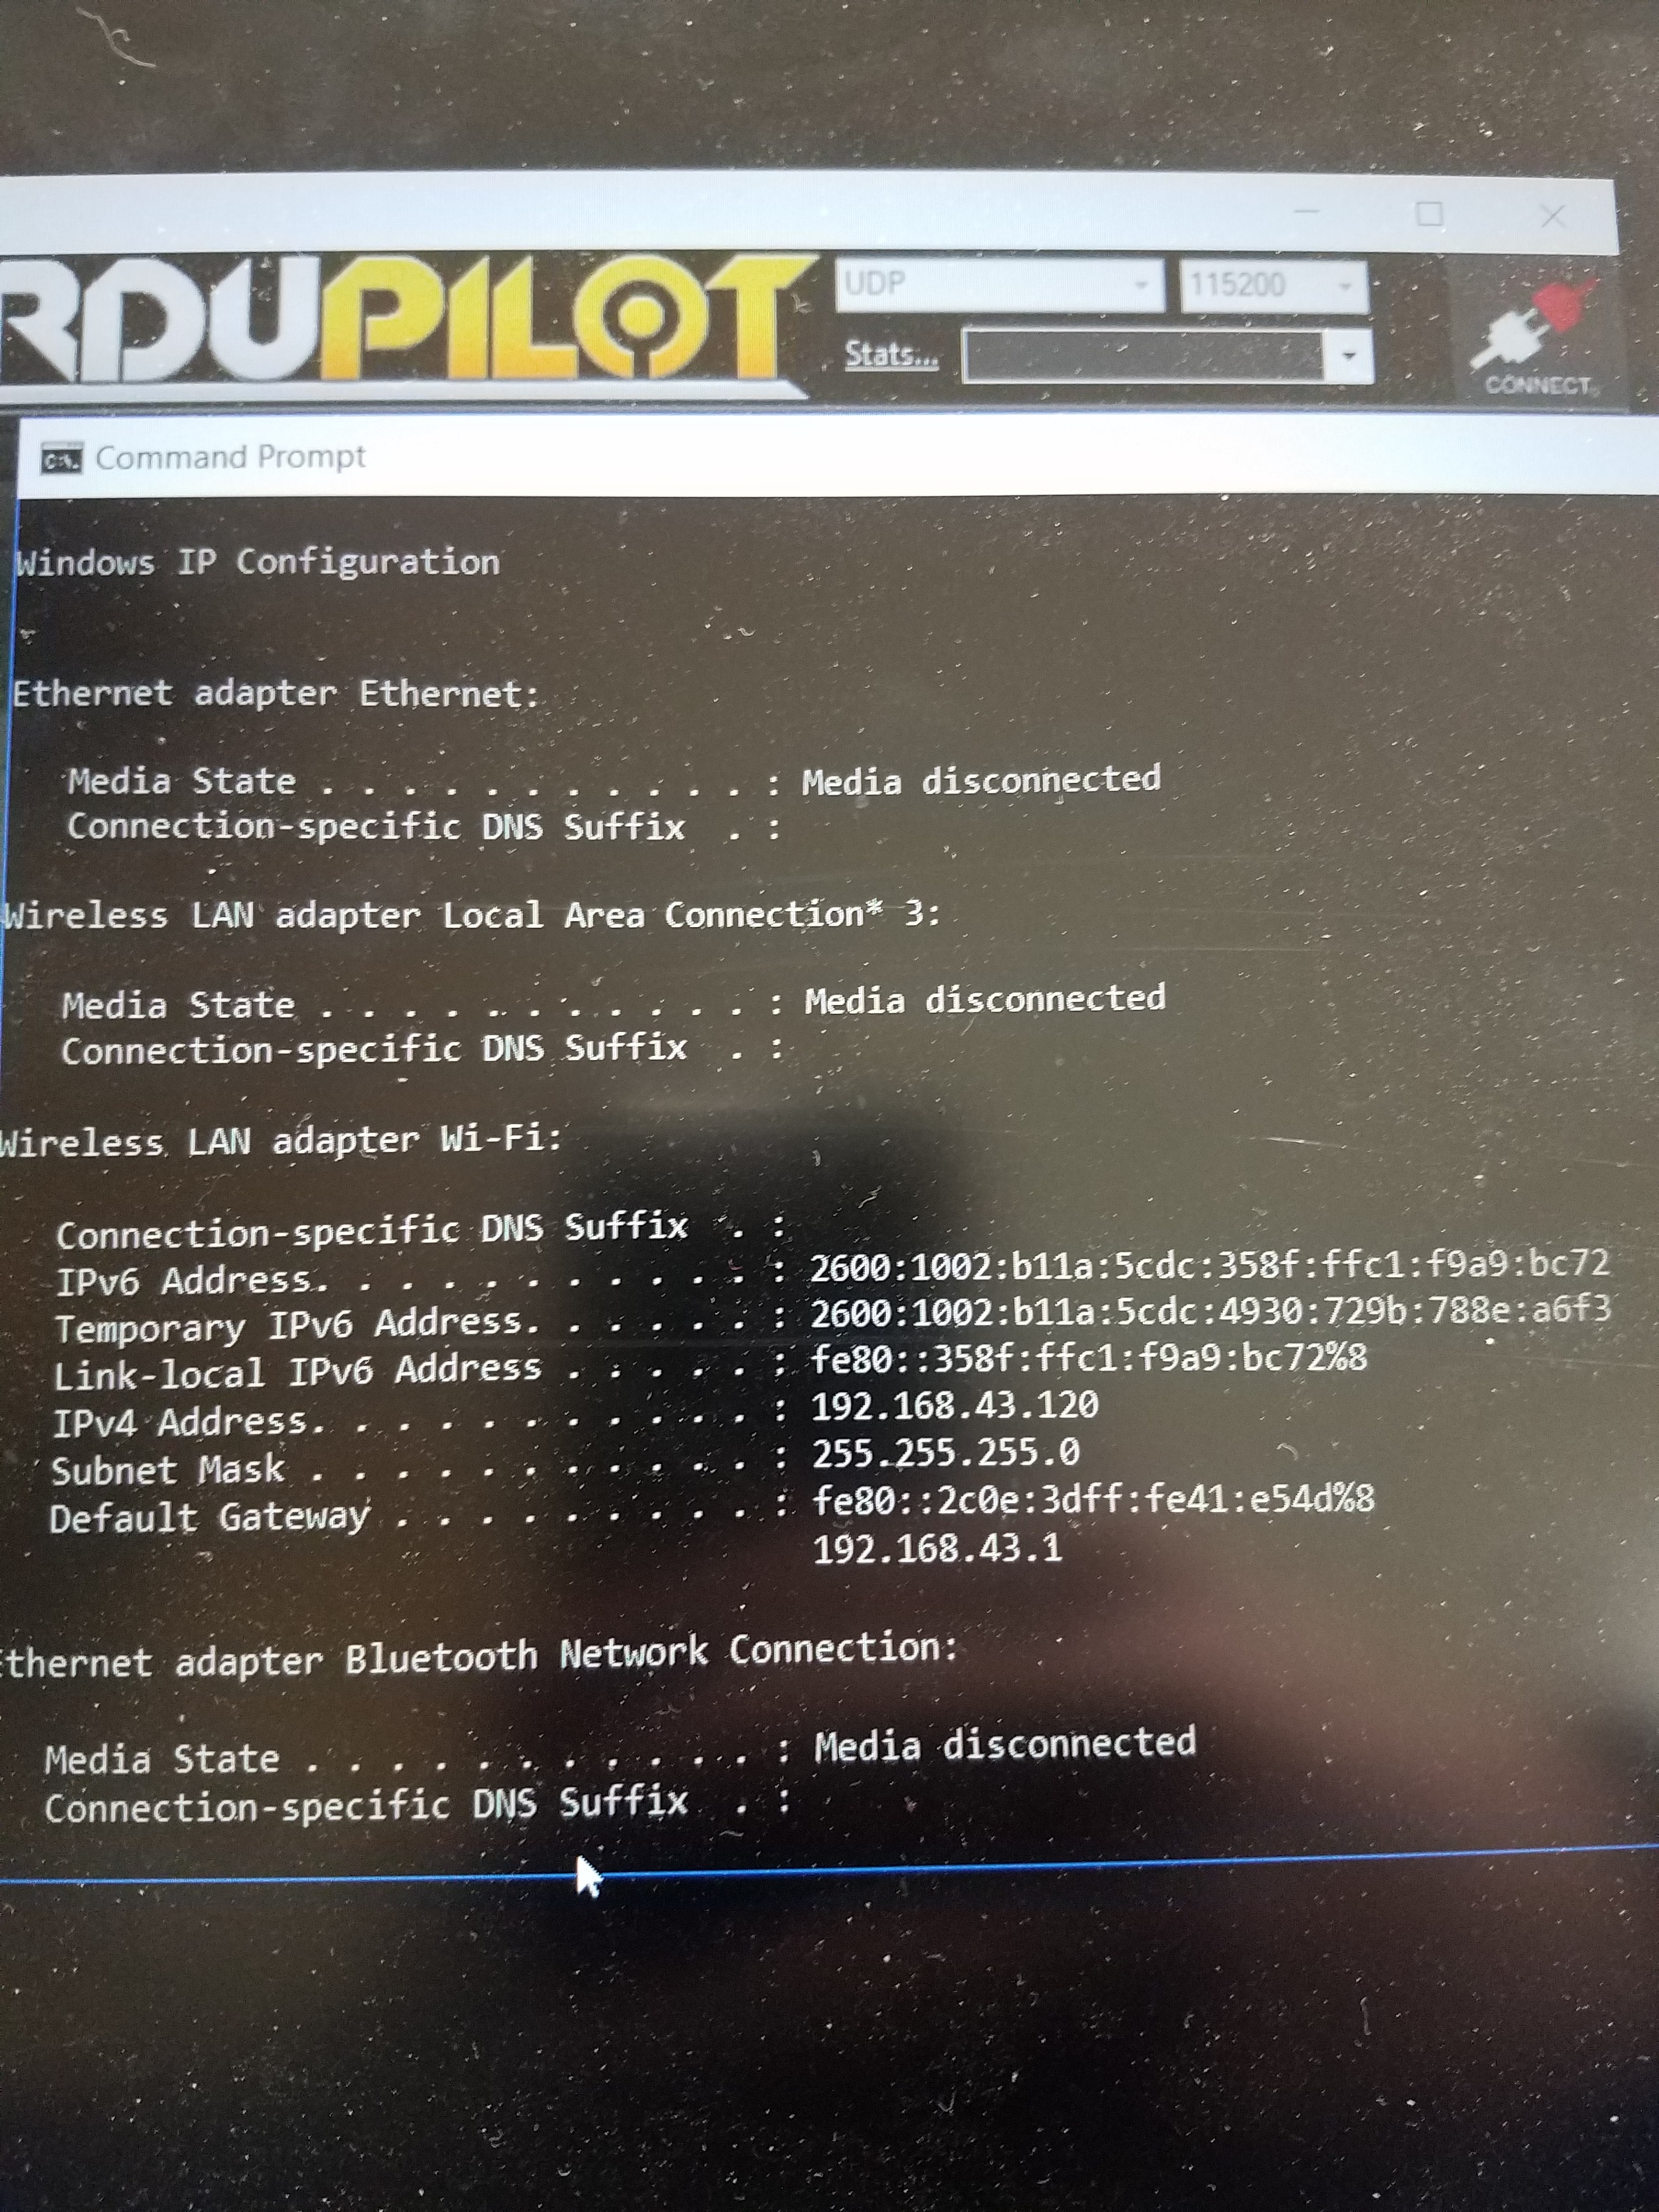
I have followed the step you provided, but I still cannot detect my Navio2. I have attached some pictures of my IP information and how I entered it in under the sudo nano /etc/default/arducopter file, but I feel as though I did it incorrectly. My IP address appears different from most, and I think that’s due to everything being connected via ethernet.
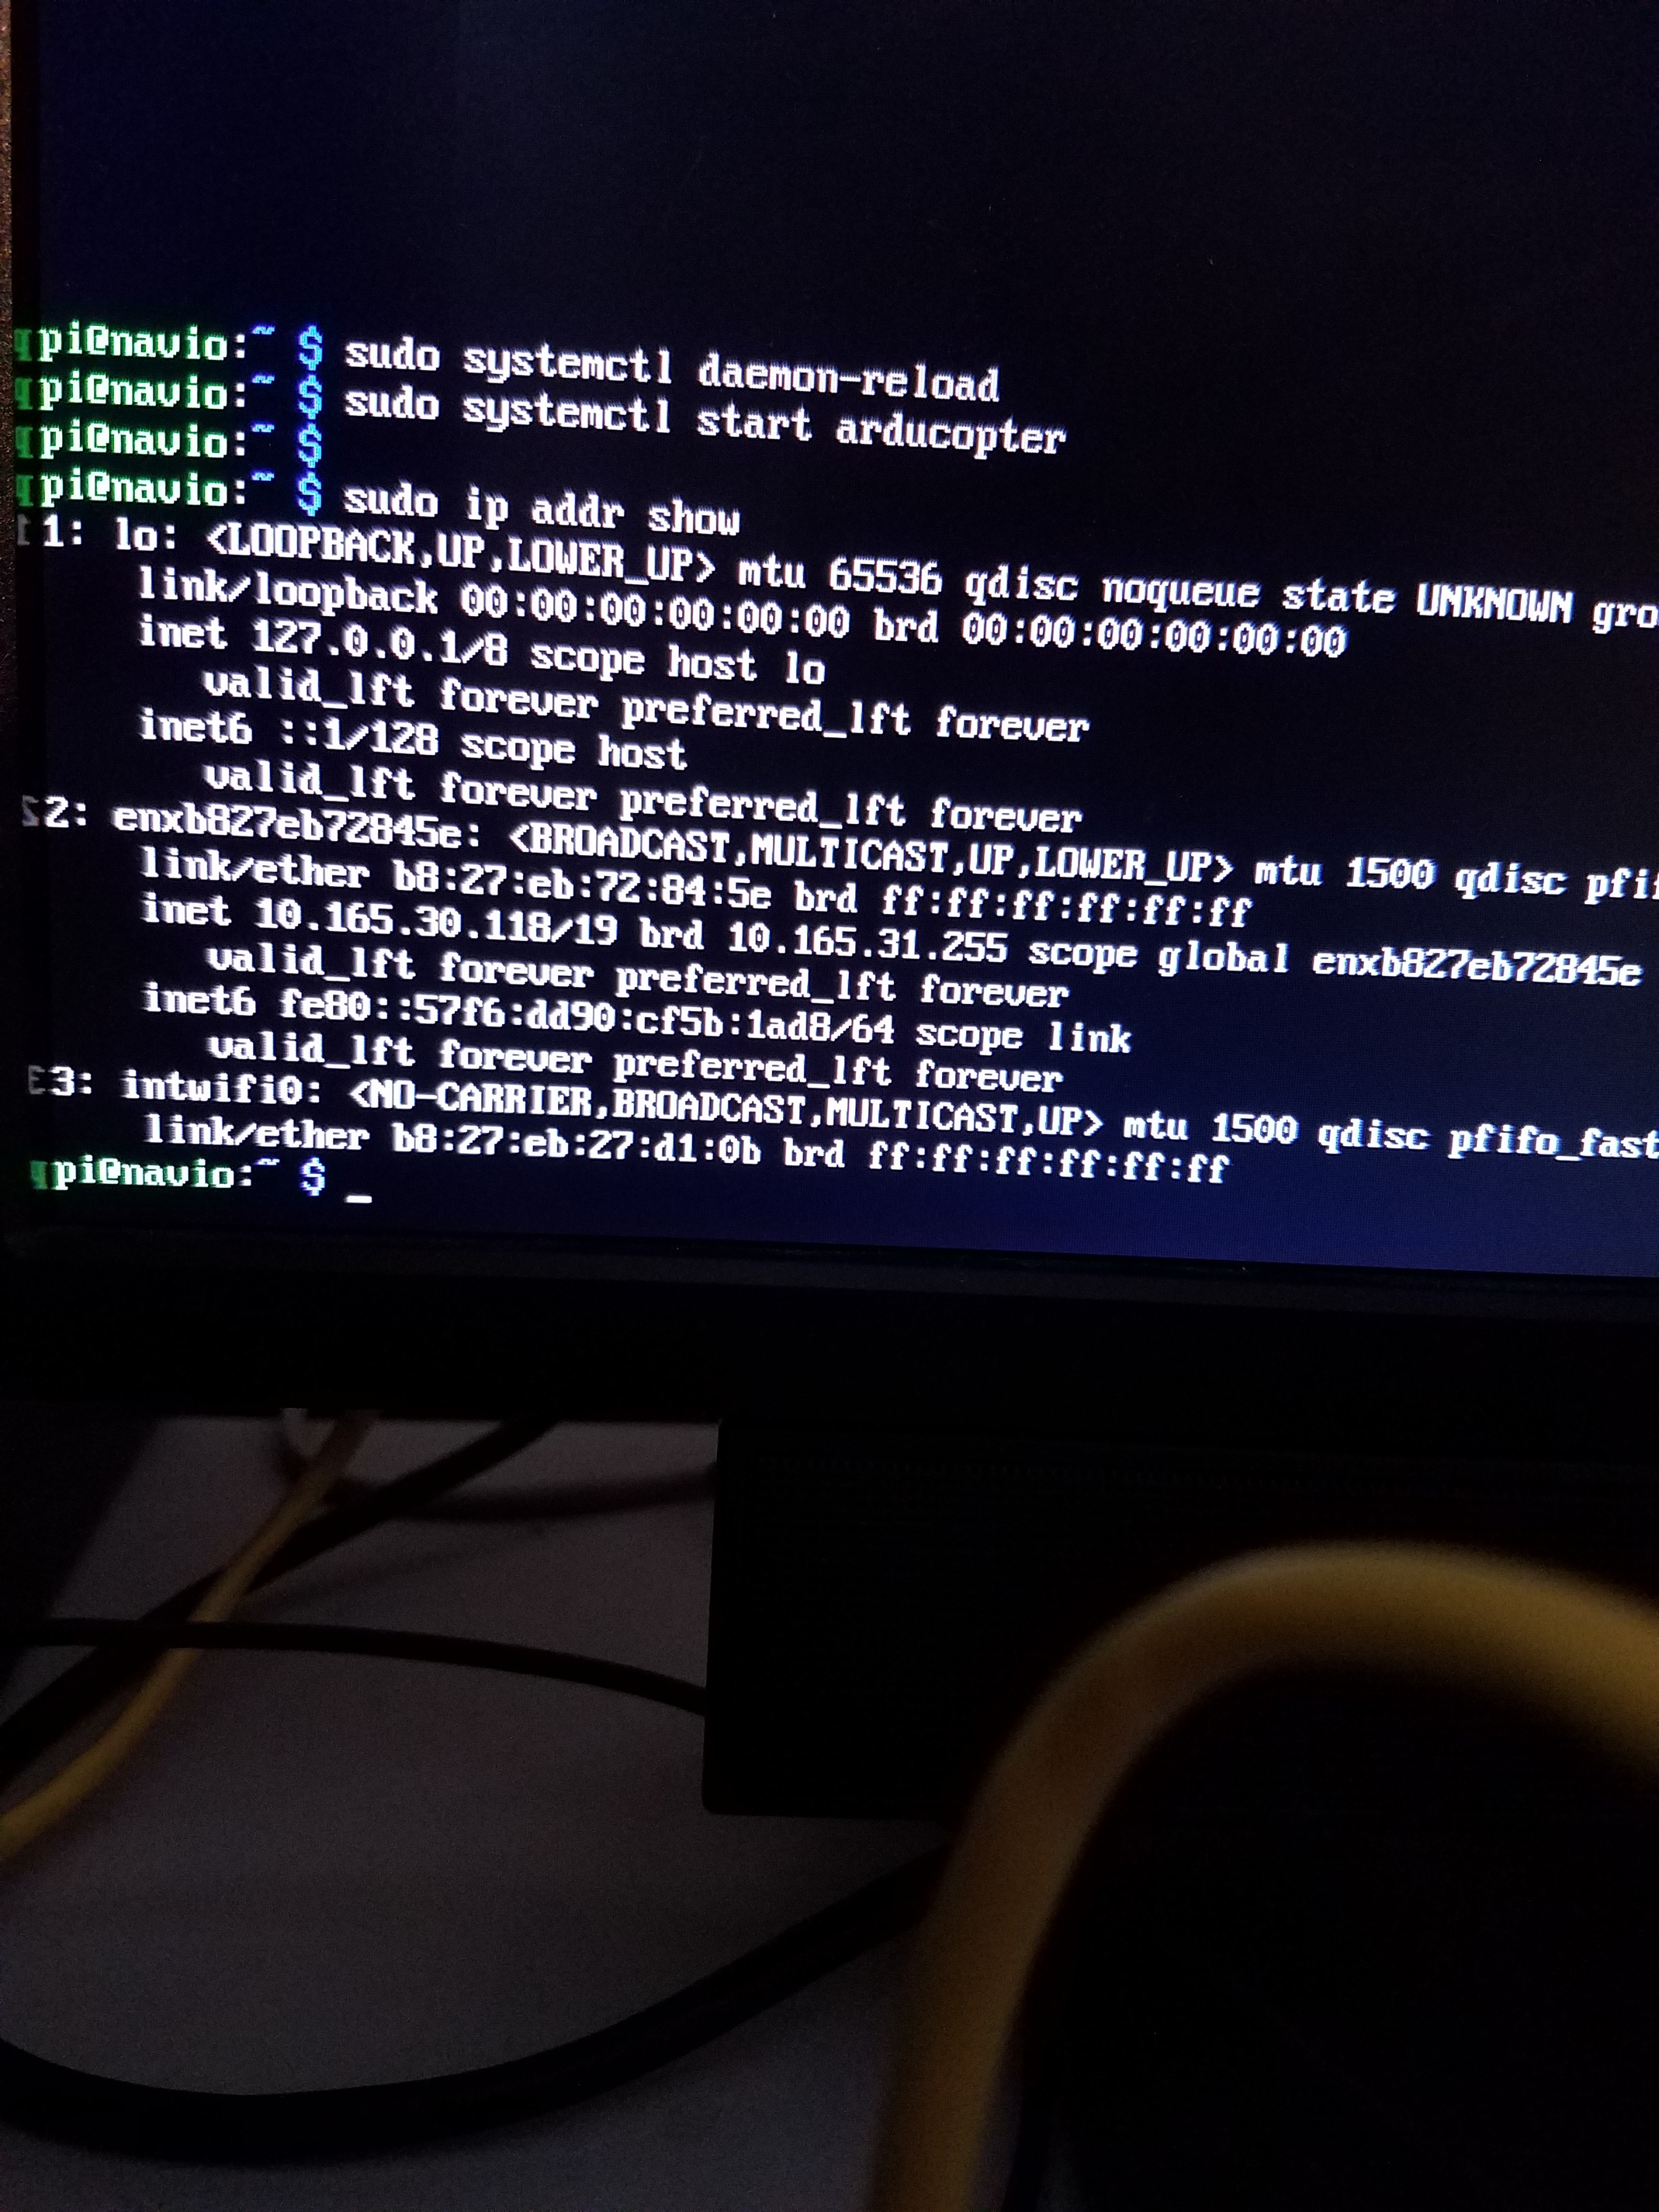
I have the ethernet cables plugged into the same location in the wall, but I don’t know if that means they are on the same sub net. I have included a picture of what pops up when I type sudo ip addr show.
Navio is 10.165.30.118 and on another subnet. I think that would cause connection problem.
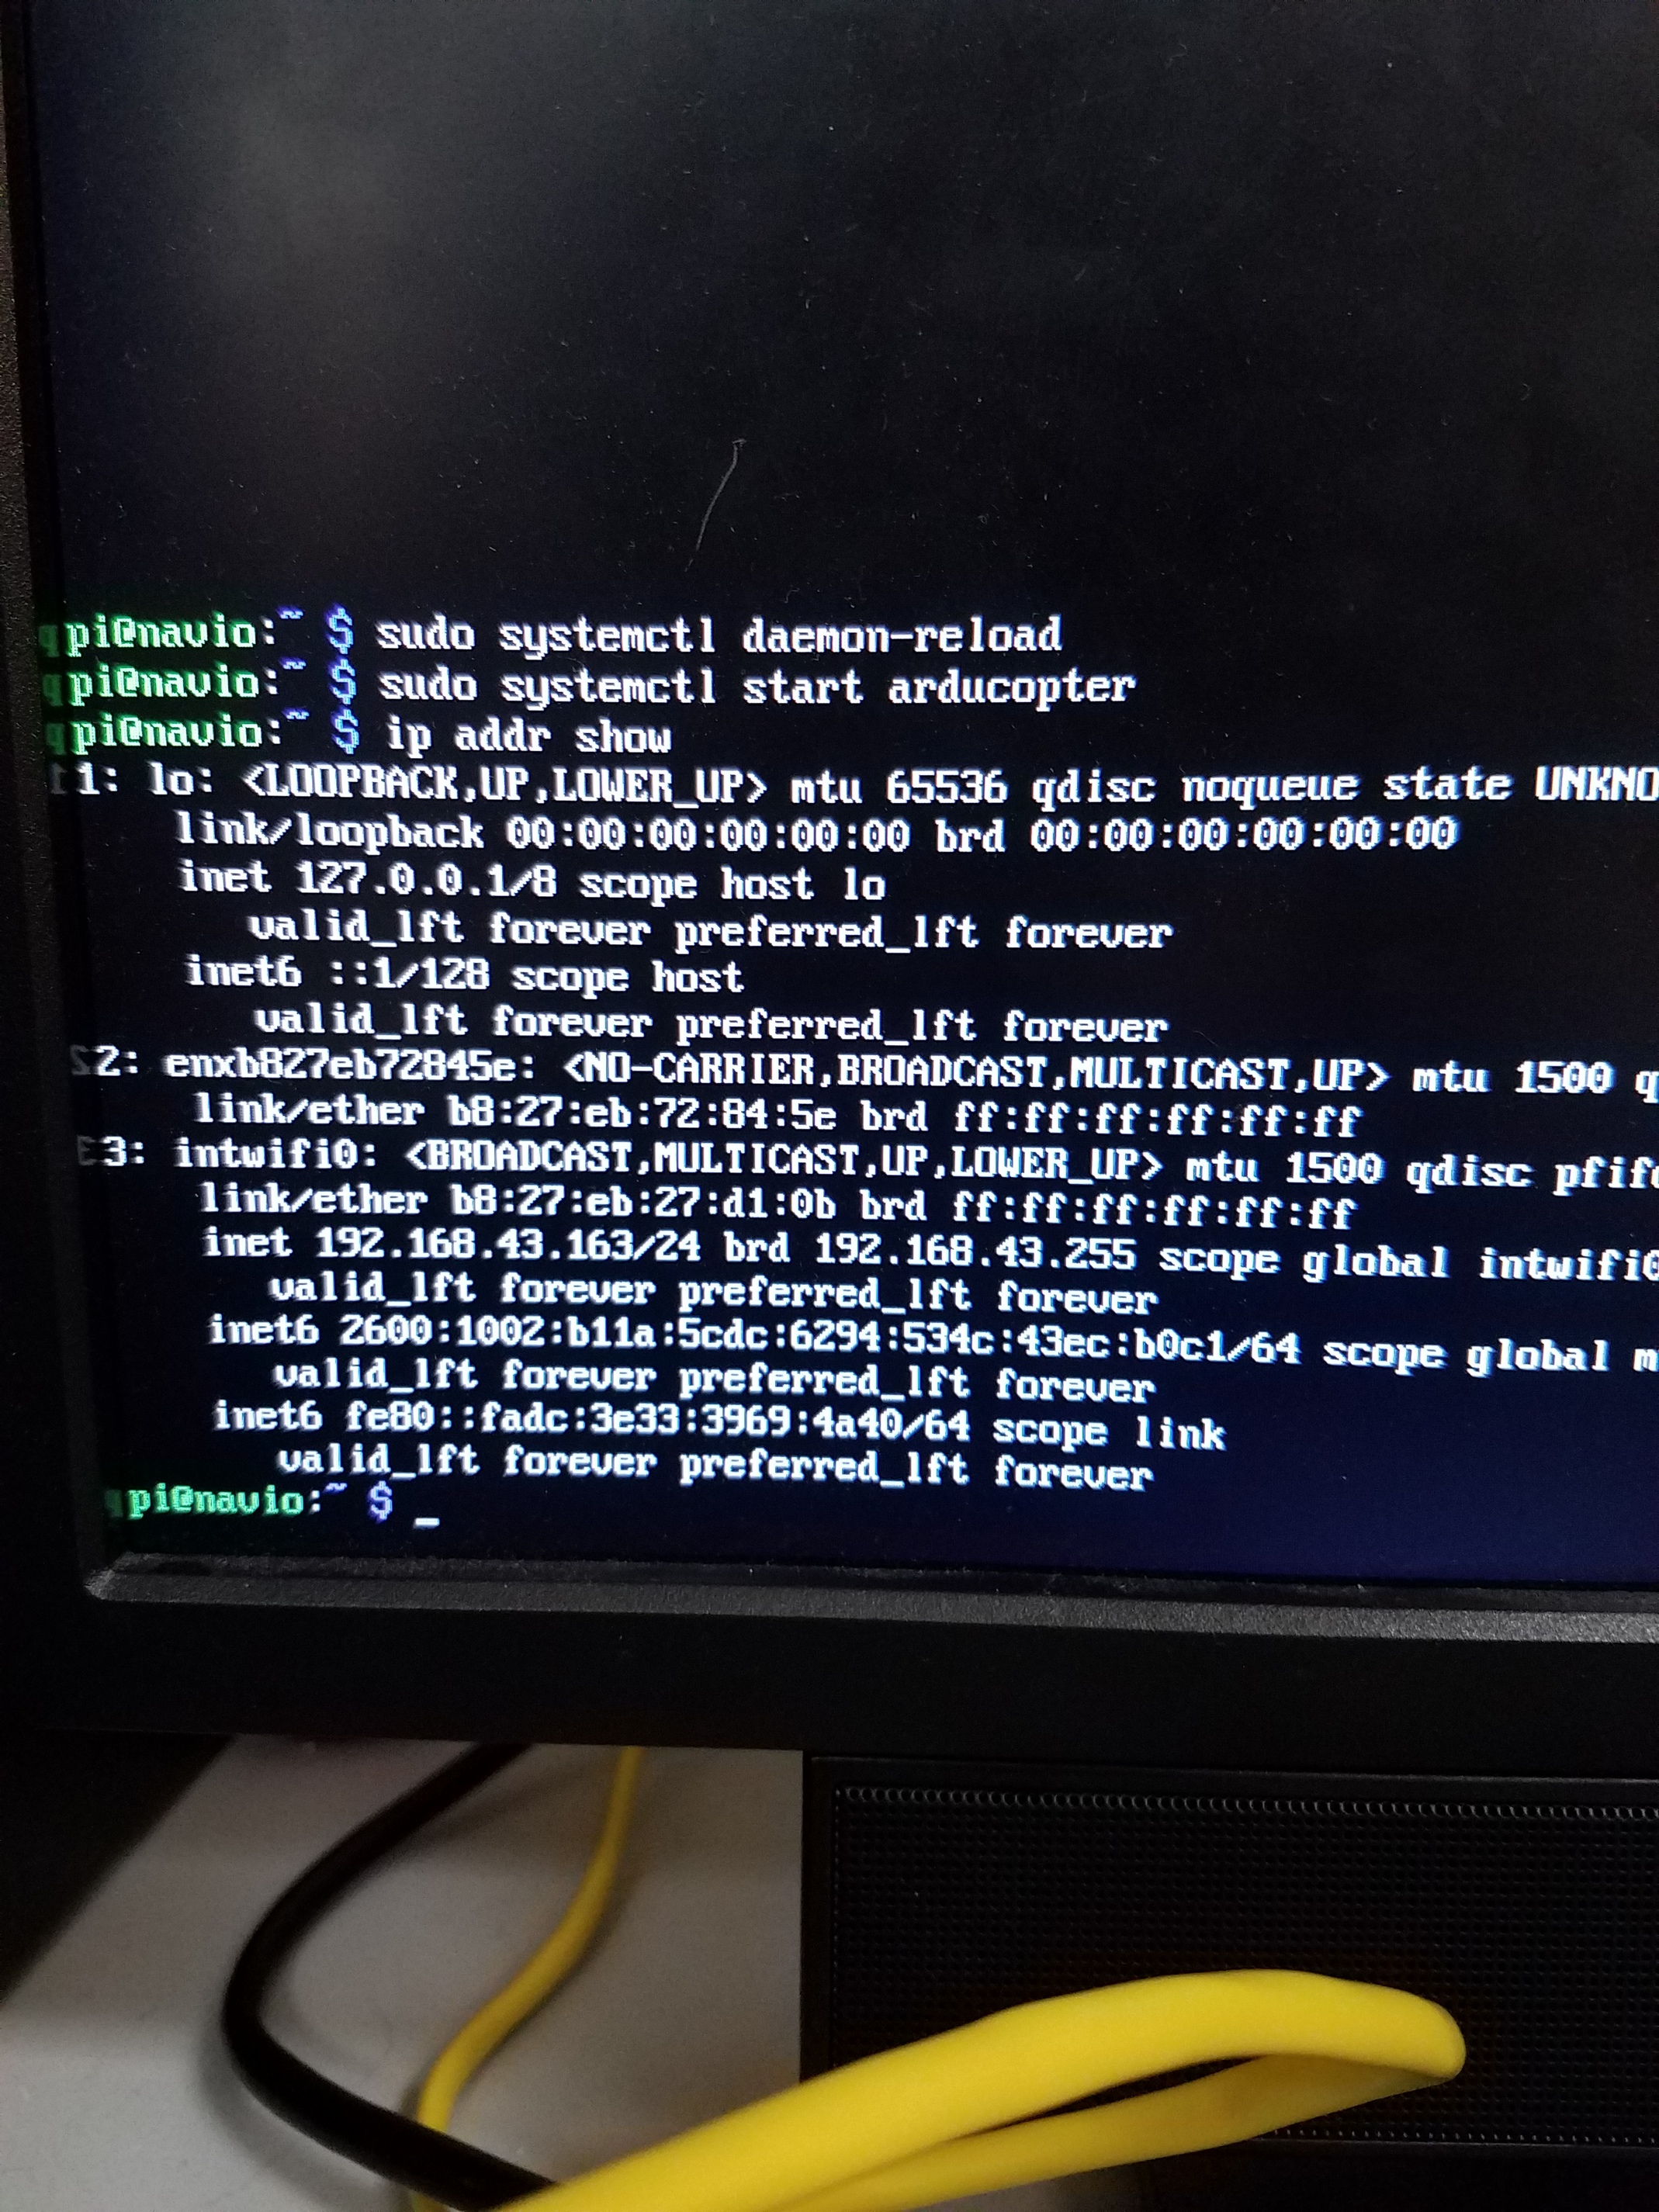
If you dont have your own router or AP, you might use your smart phone as hotspot to connect computer and navio together
Addresses starting with 169.x.x.x are APIPA addresses. Windows falls bac k to such addresses if a cable is connected and DHCP is configured for the interface, but no DHCP server can be reached. You should use the second address shown under Ethernet adapter local area network.
Sebastian, I tried to change the IP address to the one you suggested, but I still was unable to form a connection with Mission Planner.
TB_RTK, I took your advice and used my smart phone as a hotspot to form the connection, and it worked! Unfortunately the desktop computer that I was using initially was unable to connect to any wifi, so I had to install and run Mission Planner on a school’s laptop instead, but that’s all okay! Thank you for the help!
I’m now approaching the construction stage where I’m going to attempt to 3D print a body for my drone. After I have all of my physical components (ESCs, motors, batteries, etc) on my drone, I will probably need help setting up the remote control aspect.
Thank you guys for helping me out so far, I greatly appreciate it!
LOGAN please keep us up to date. I would love to try using this instead of pixhawk and PI for ultra long range missions. Im in Australia and while we have strict LOS rules there are many farms with no flight paths over them that are 1000s of km large. Giving us the opportunity to fly for miles without any issues. Well just as long as you dont post the video on youtube! That issue has caused many pilots problems now switching to I think its called venom or making them private and sharing just with fellow pilots. I know heard all the reasons why its wrong but we only use 5% of the land the rest is farm or arid bush/desert so we do it safely and love the freedom.
I am new to this board and must admit had it confused with a diffrent setup. Thanls to everyone for not ripping my head off.
Anyway I look forward to you progress and hope the students get into to it.
All the best Gus