That’s a wonderful idea! I definitely agree with starting smaller with a whoop drone, in the future. I’d like to keep working with my current drone idea due to the more complex capabilities that it may have compared to a whoop drone (and also I’ve already come so far ), but I’m really thankful for your advice!
As for why I am moving from VEX to drones, students were able to create and program their own robotic designs (and vehicles for a fun project), so I thought I would bring them out of ROBOTC and VEX because those components and programming language are specifically for high school, not anything really past that. Plus this project would give them the opportunity to use their previous learned skills on Autodesk Inventor to make the 3D model of their drone rather than buying pre-made components. With the Makerbot Replicator Z18 we have, it only takes a day to 3D print each drone body.
If you have any further suggestions for the direction I should go with my students, please don’t hesitate to share your thoughts! This is my first year teaching Engineering, and I appreciate any and all help!
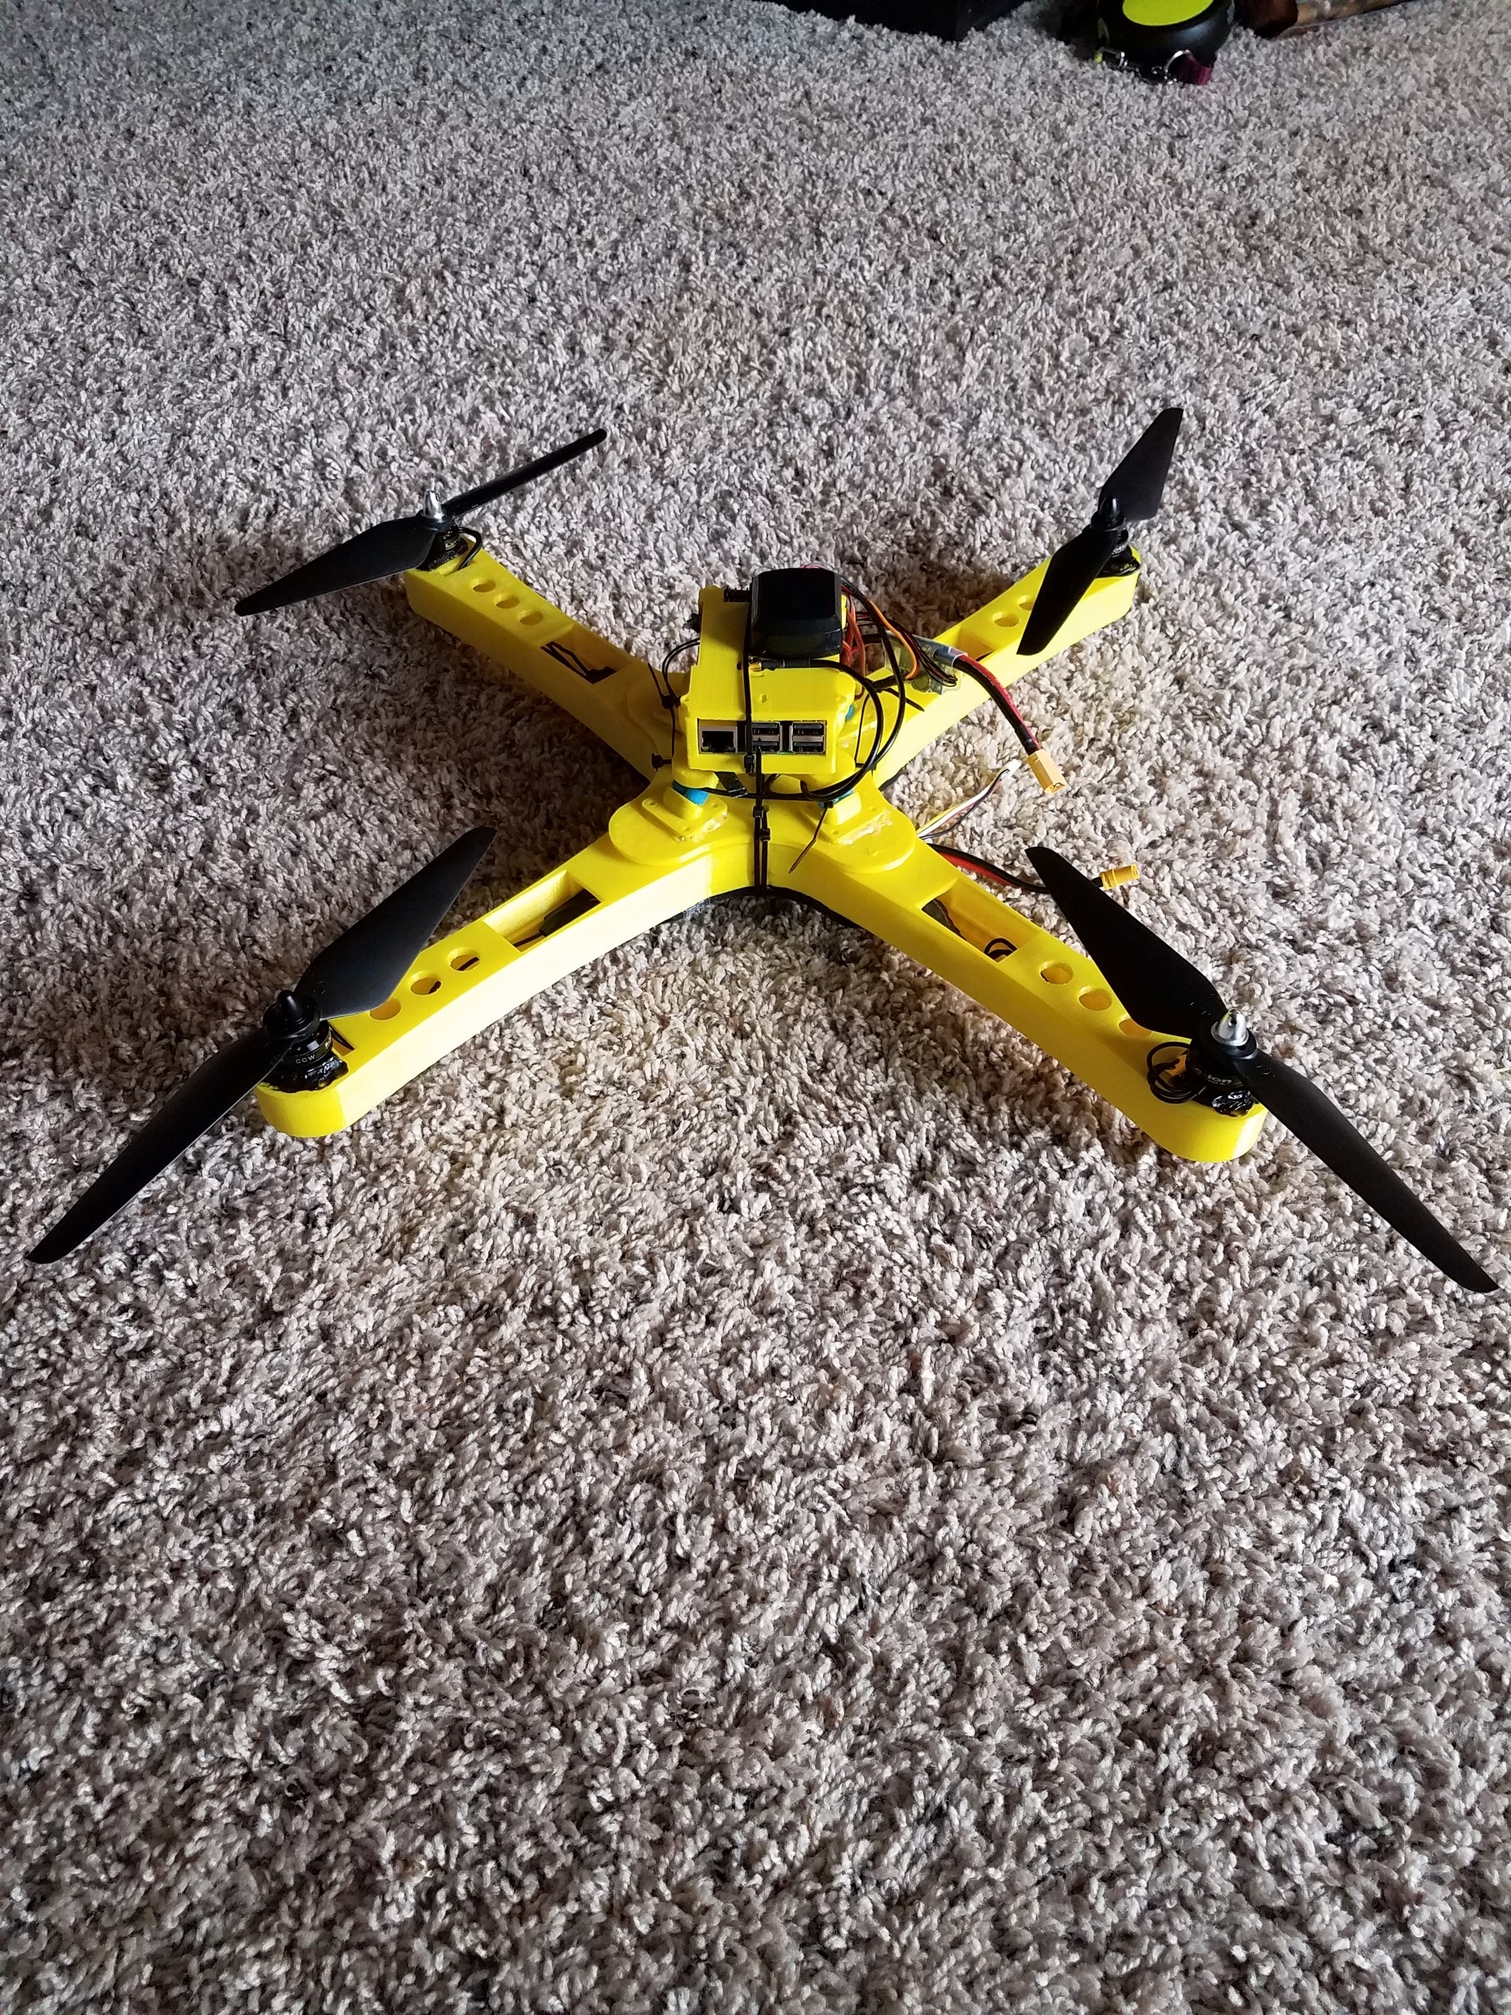
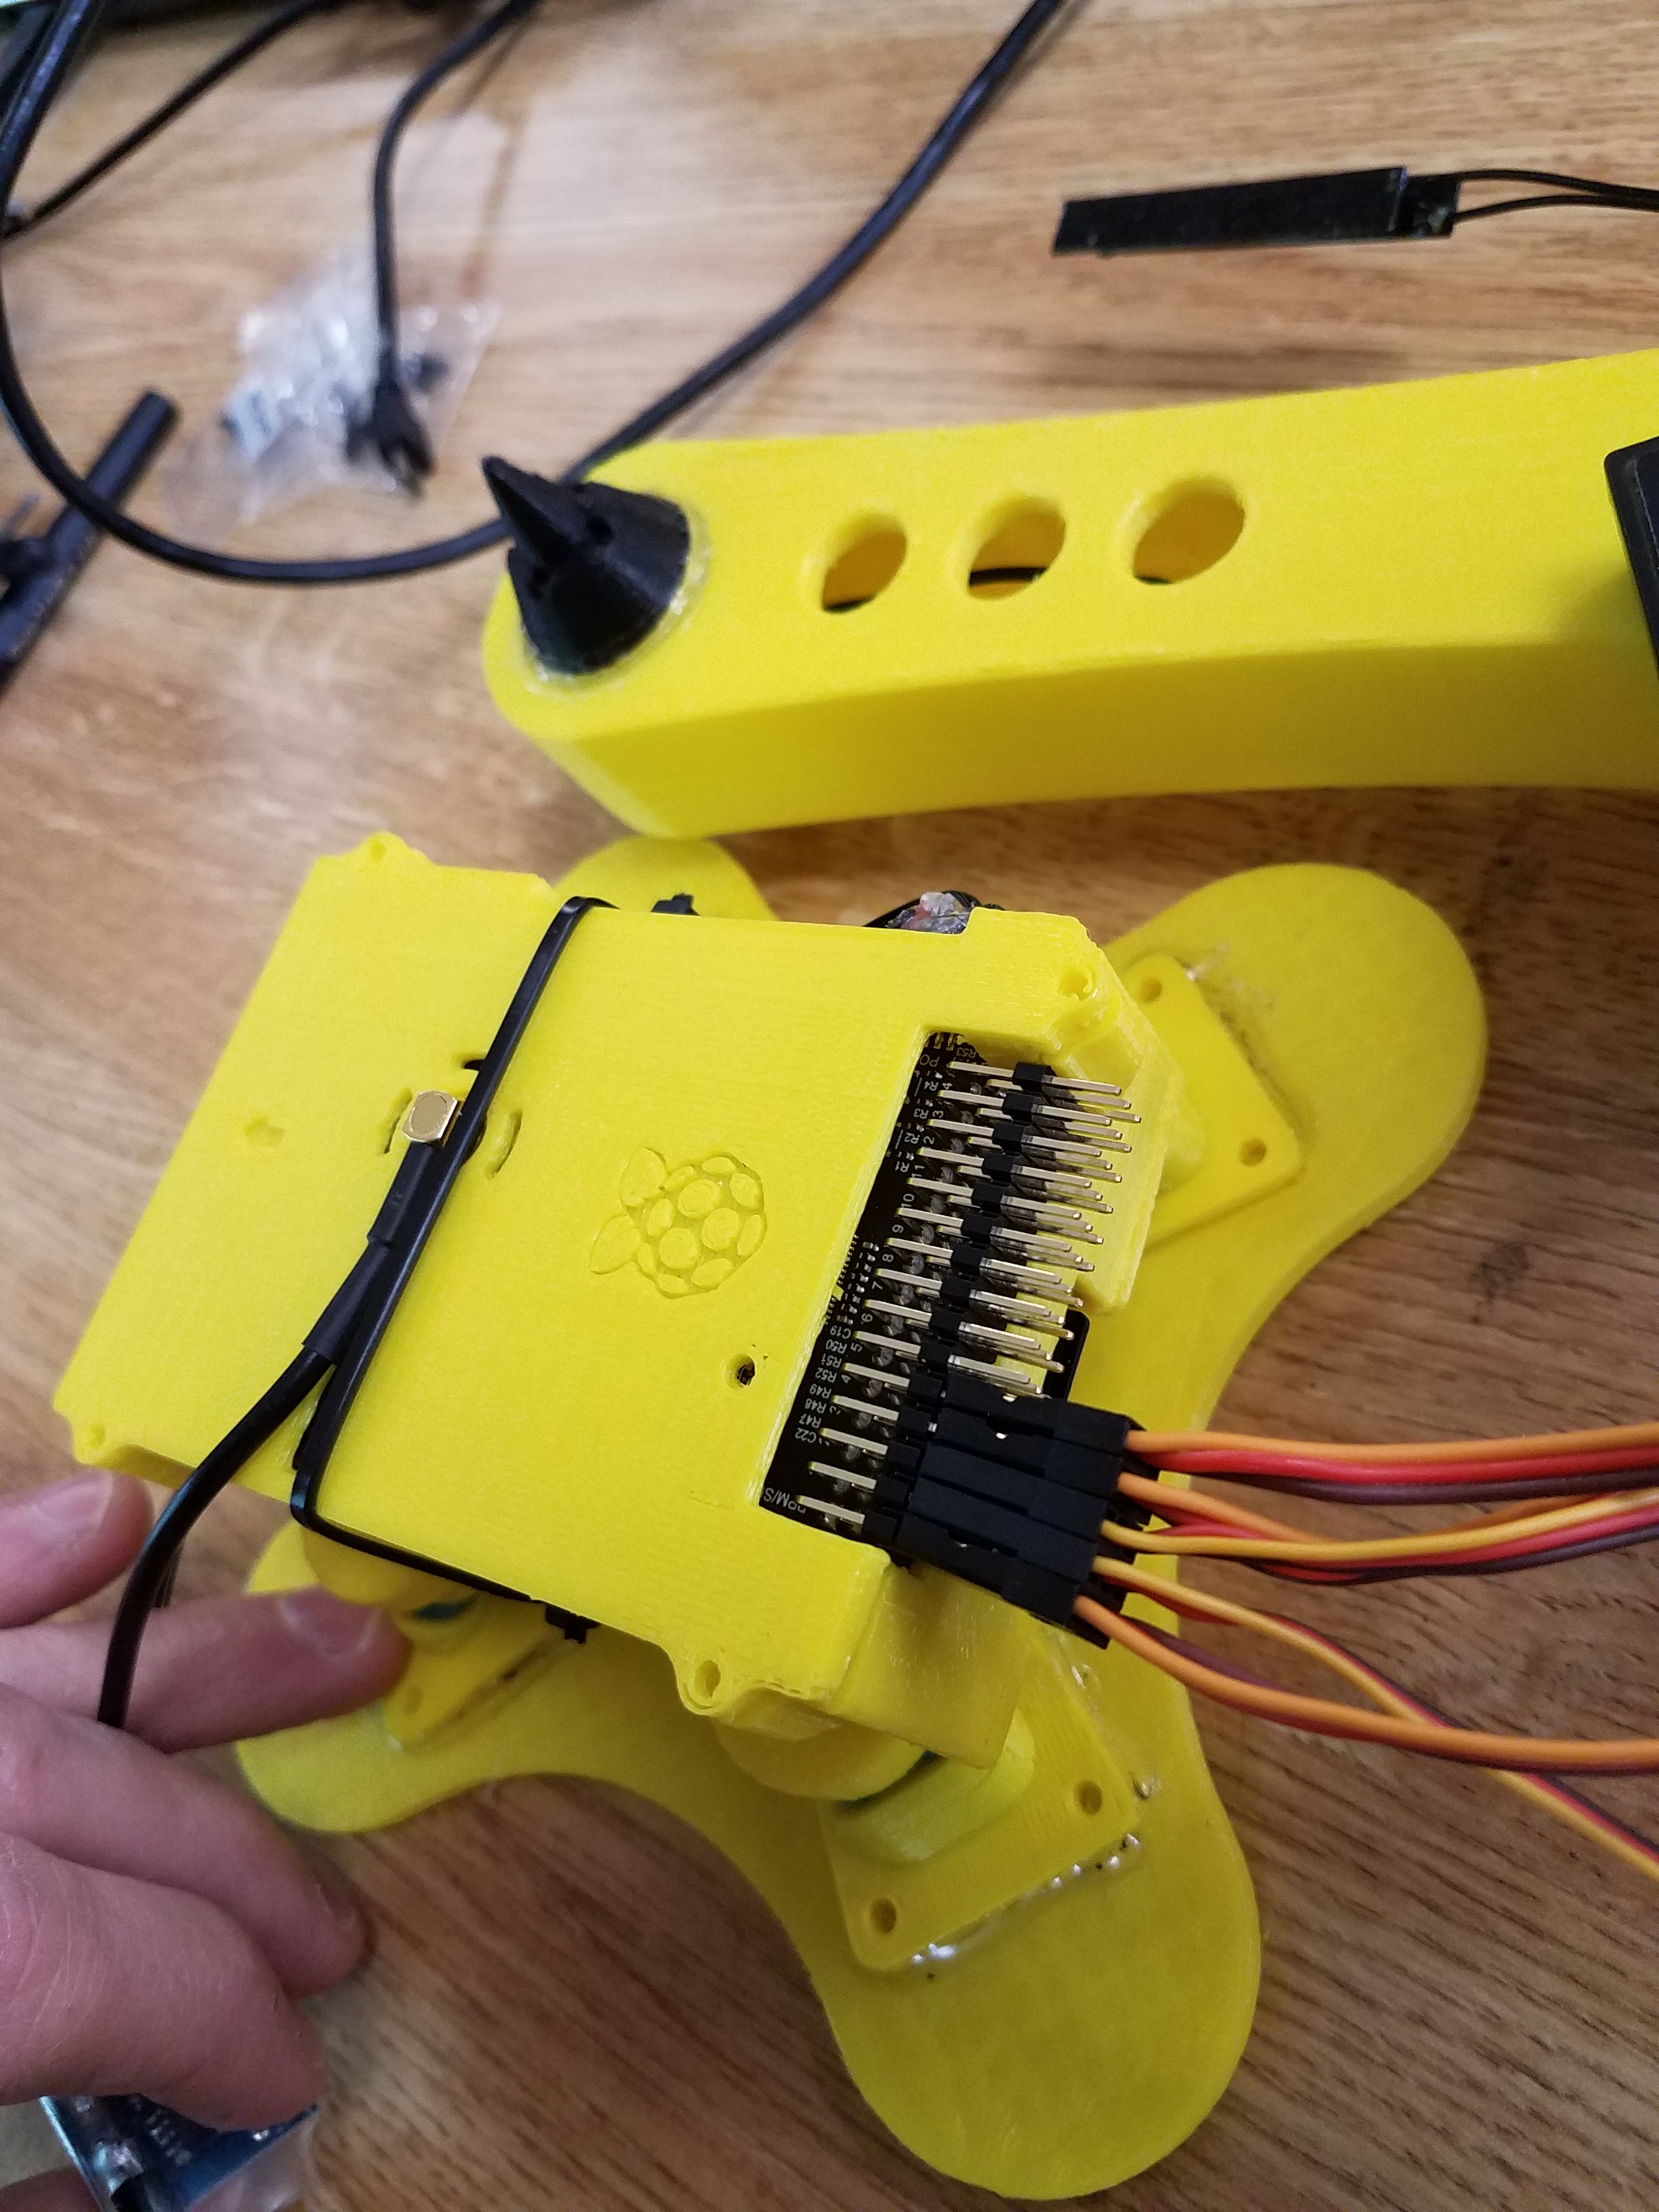
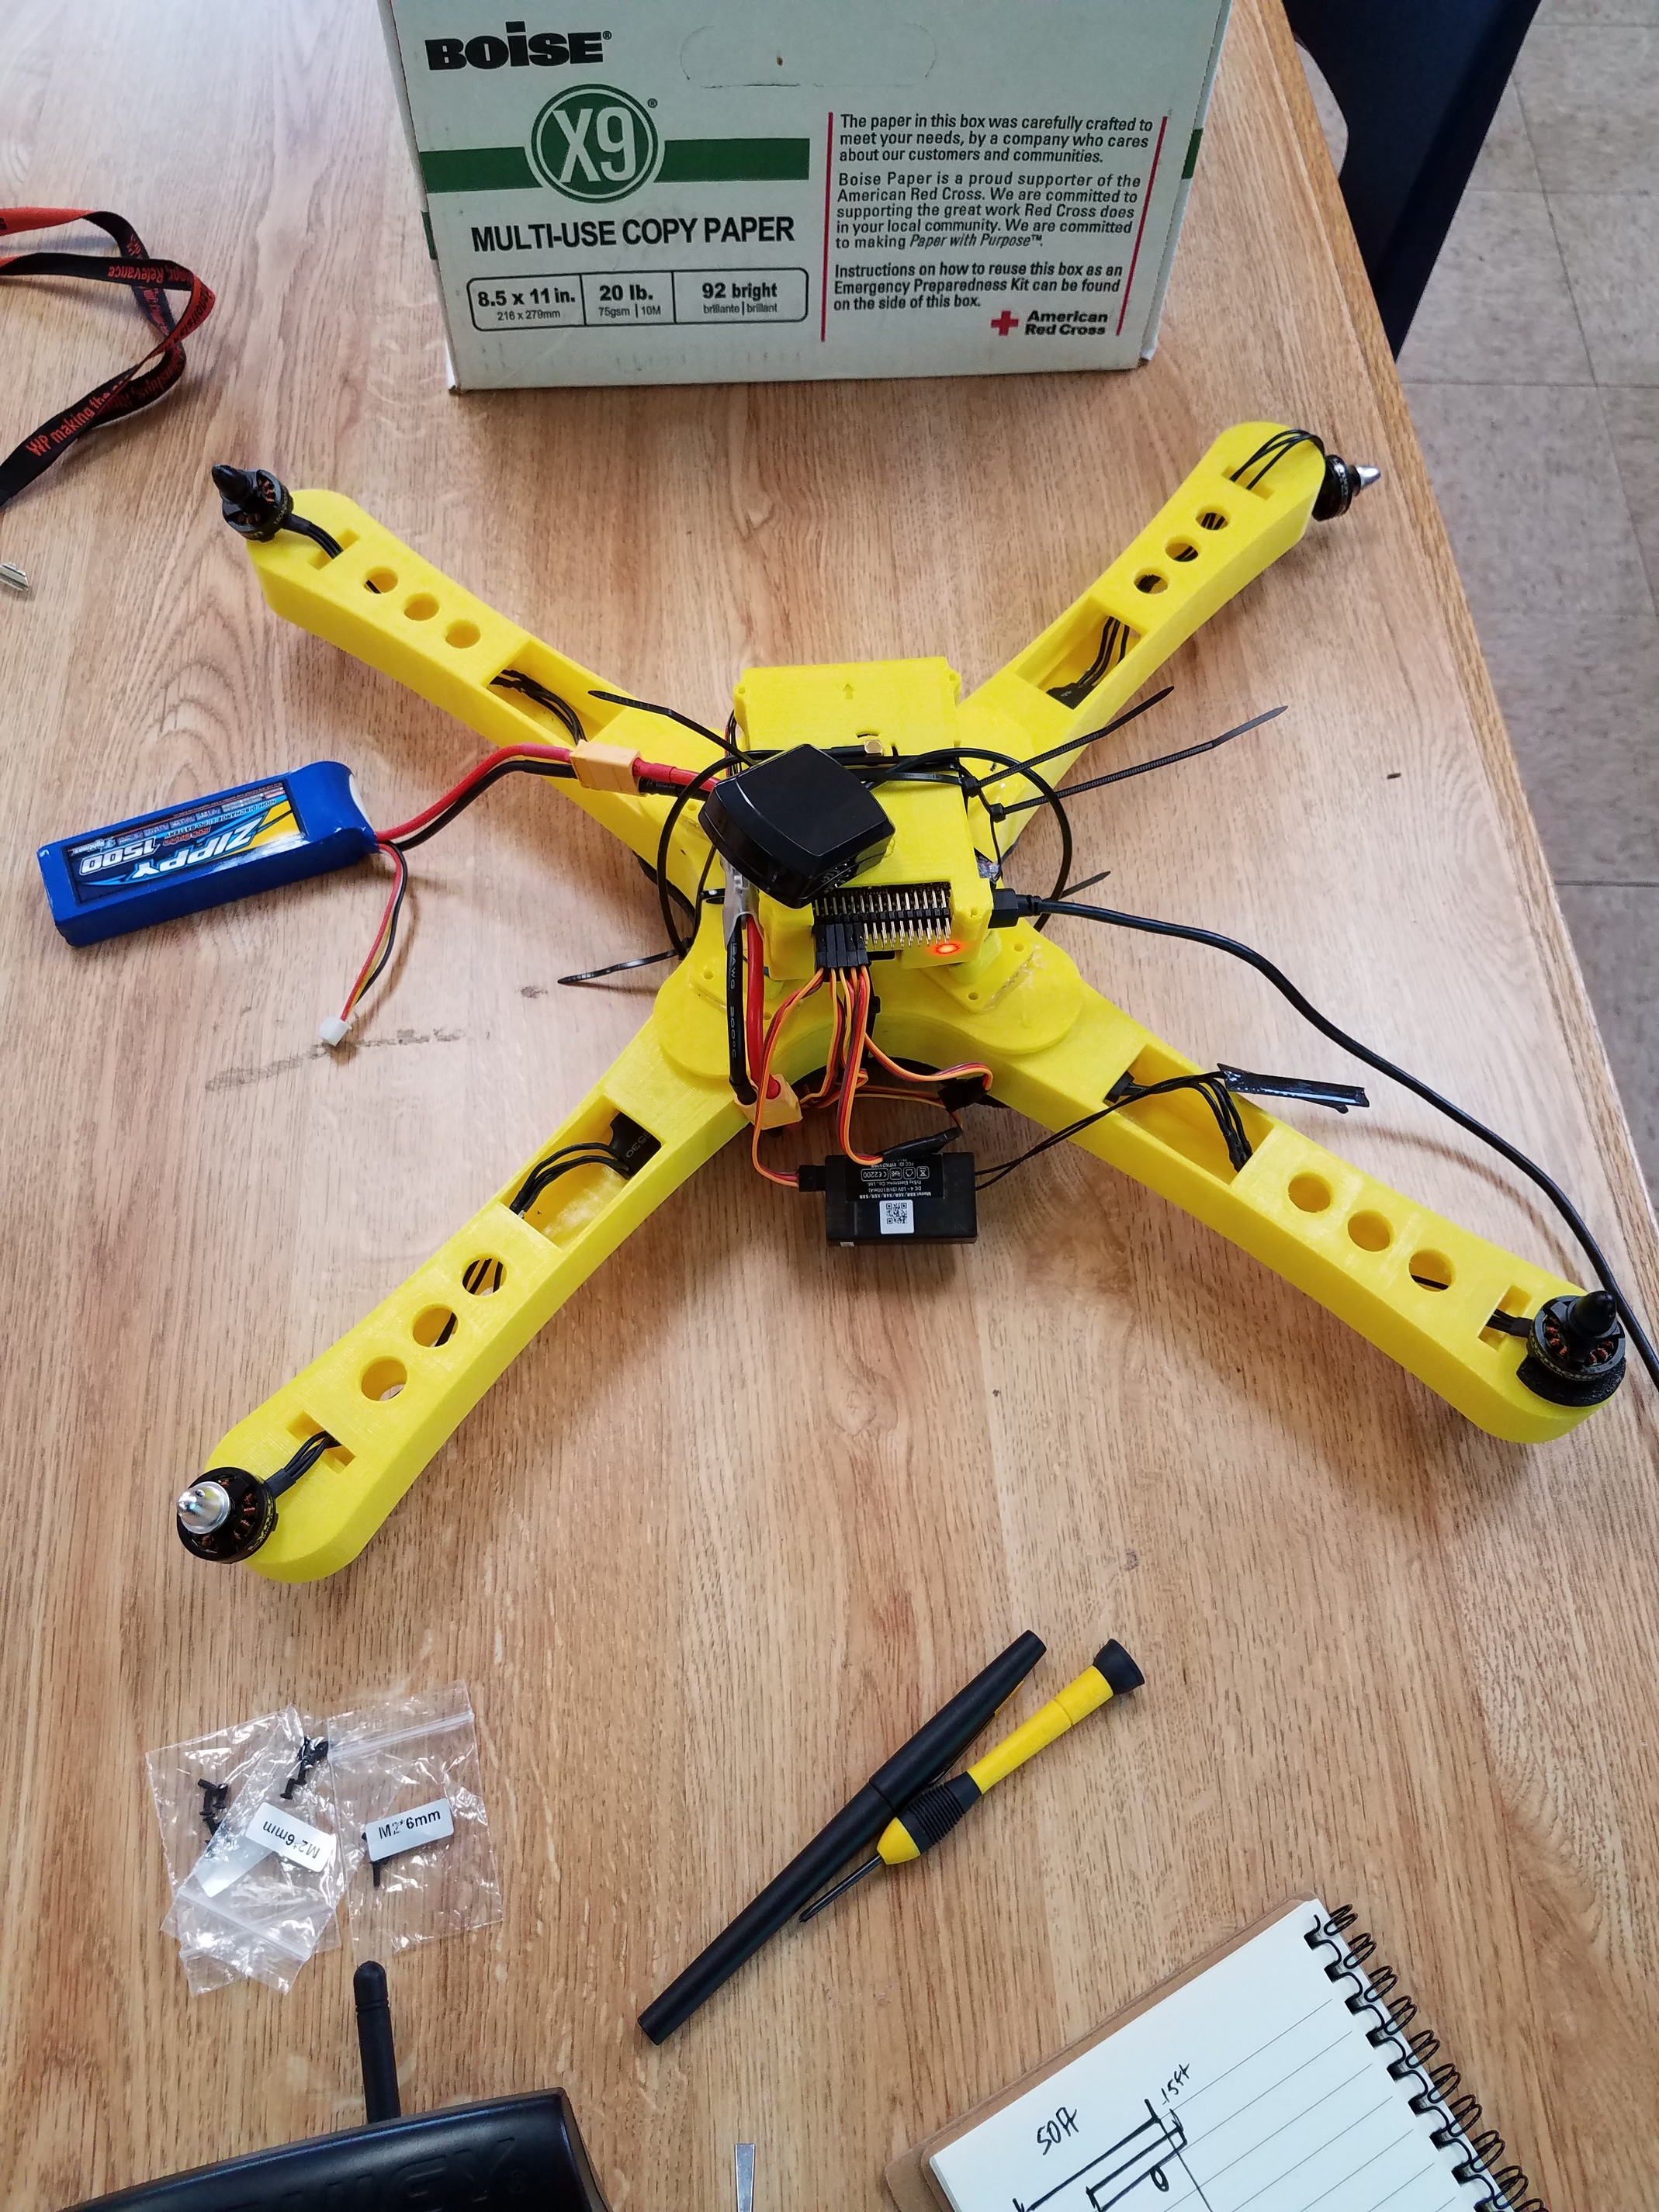
Alright! So, after a few days, I was actually able to create the physical structure of my drone on Autodesk Inventor and then 3D print it out. After putting the pieces together and mounting the motors, ESCs, and power distribution board, I arrived at this:
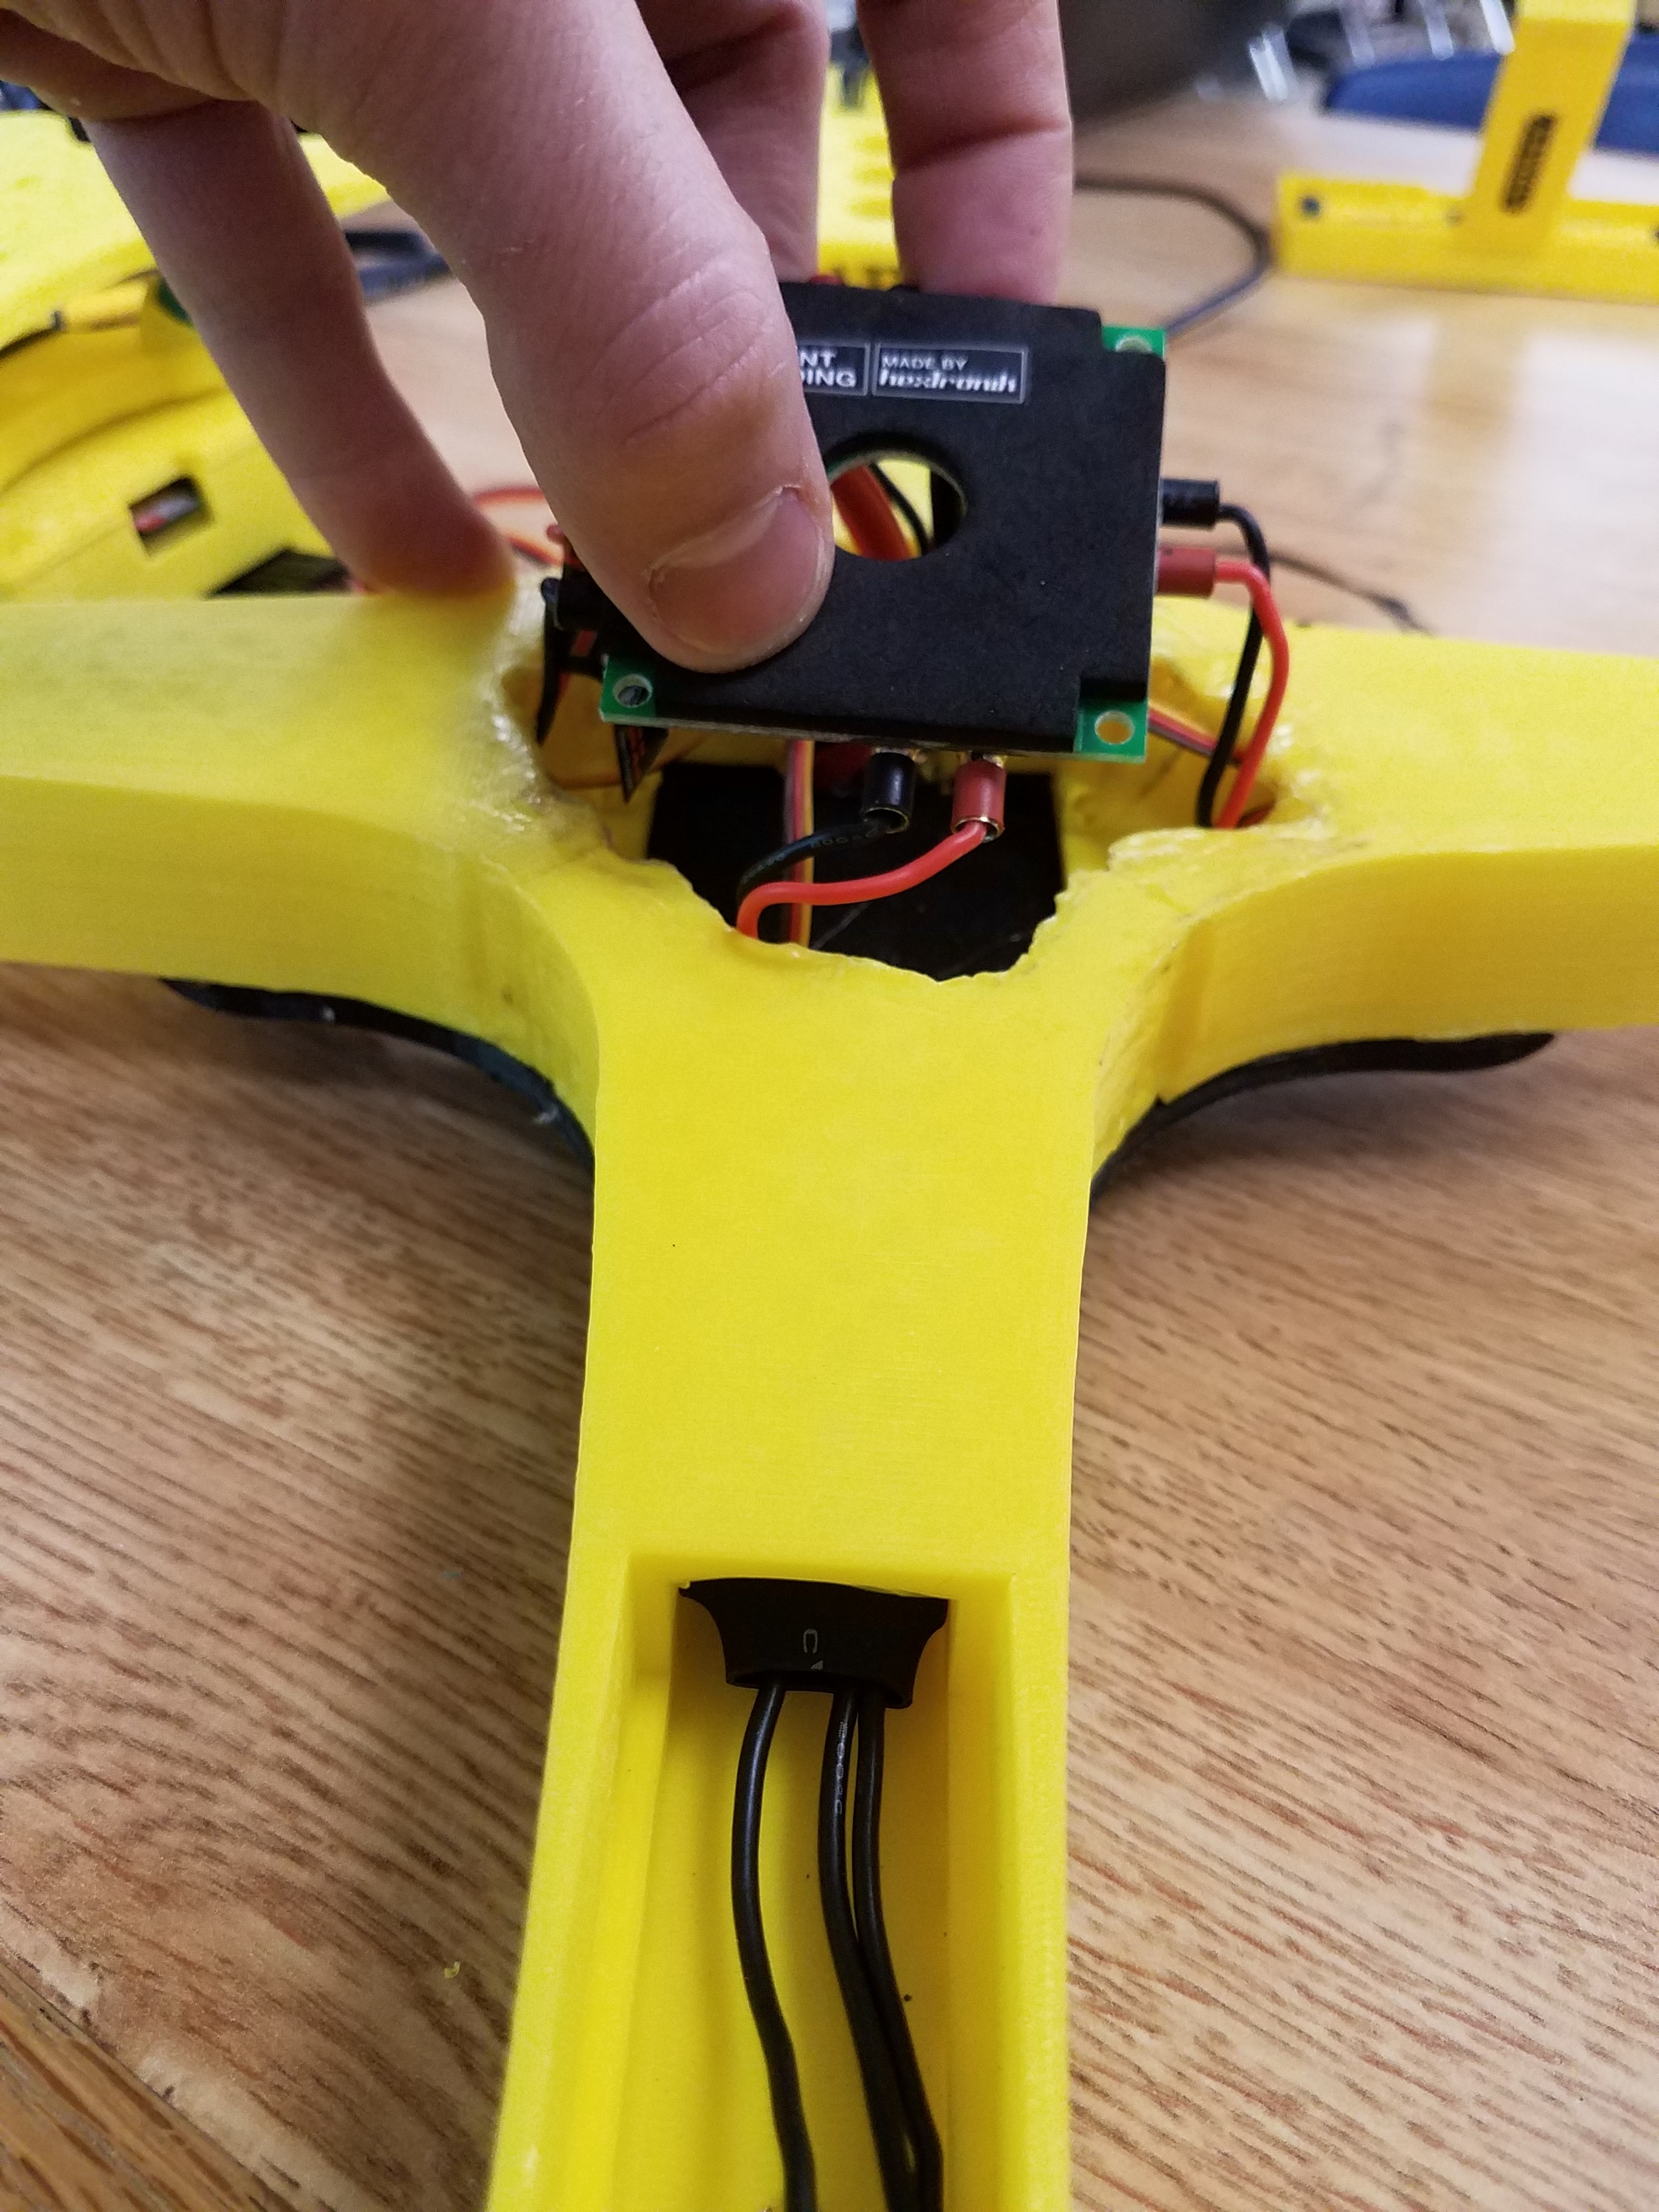
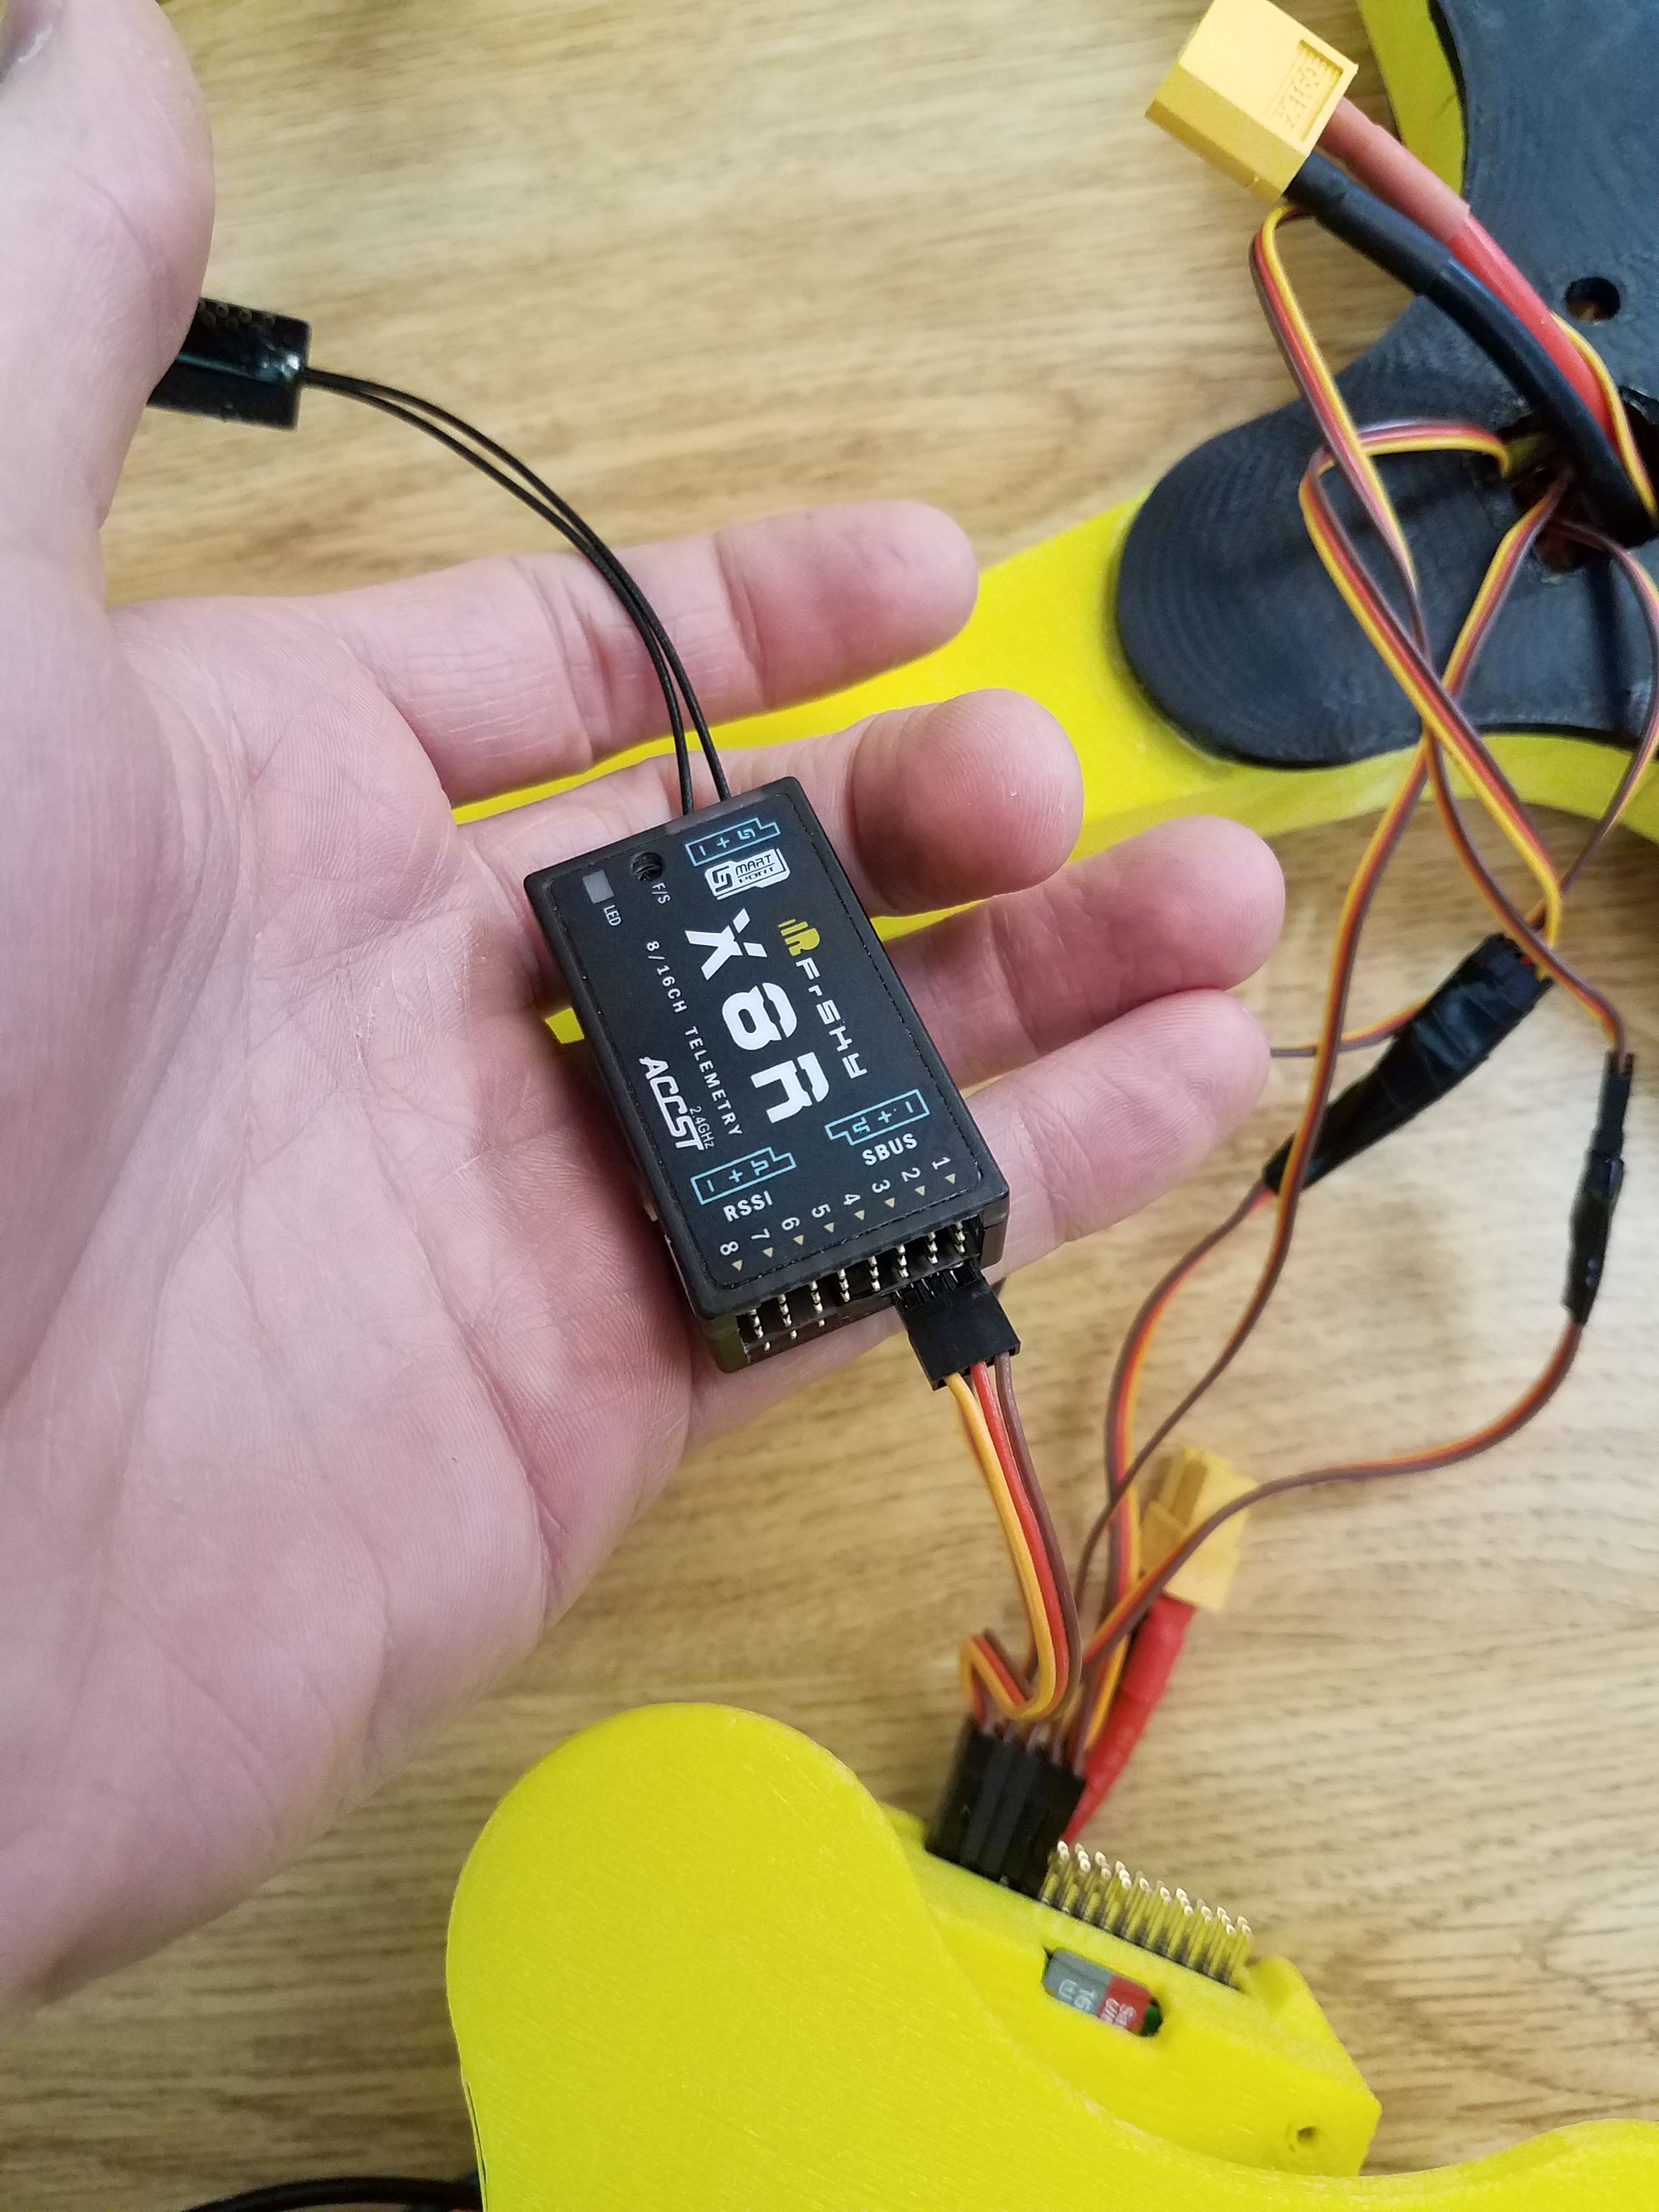
After those were connected, I wired them to the navio2 that I placed inside an anti-vibration mount (which was also 3D printed). Finally, I connected the X8R receiver to the navio2 and put everything almost all together for the final assembly:
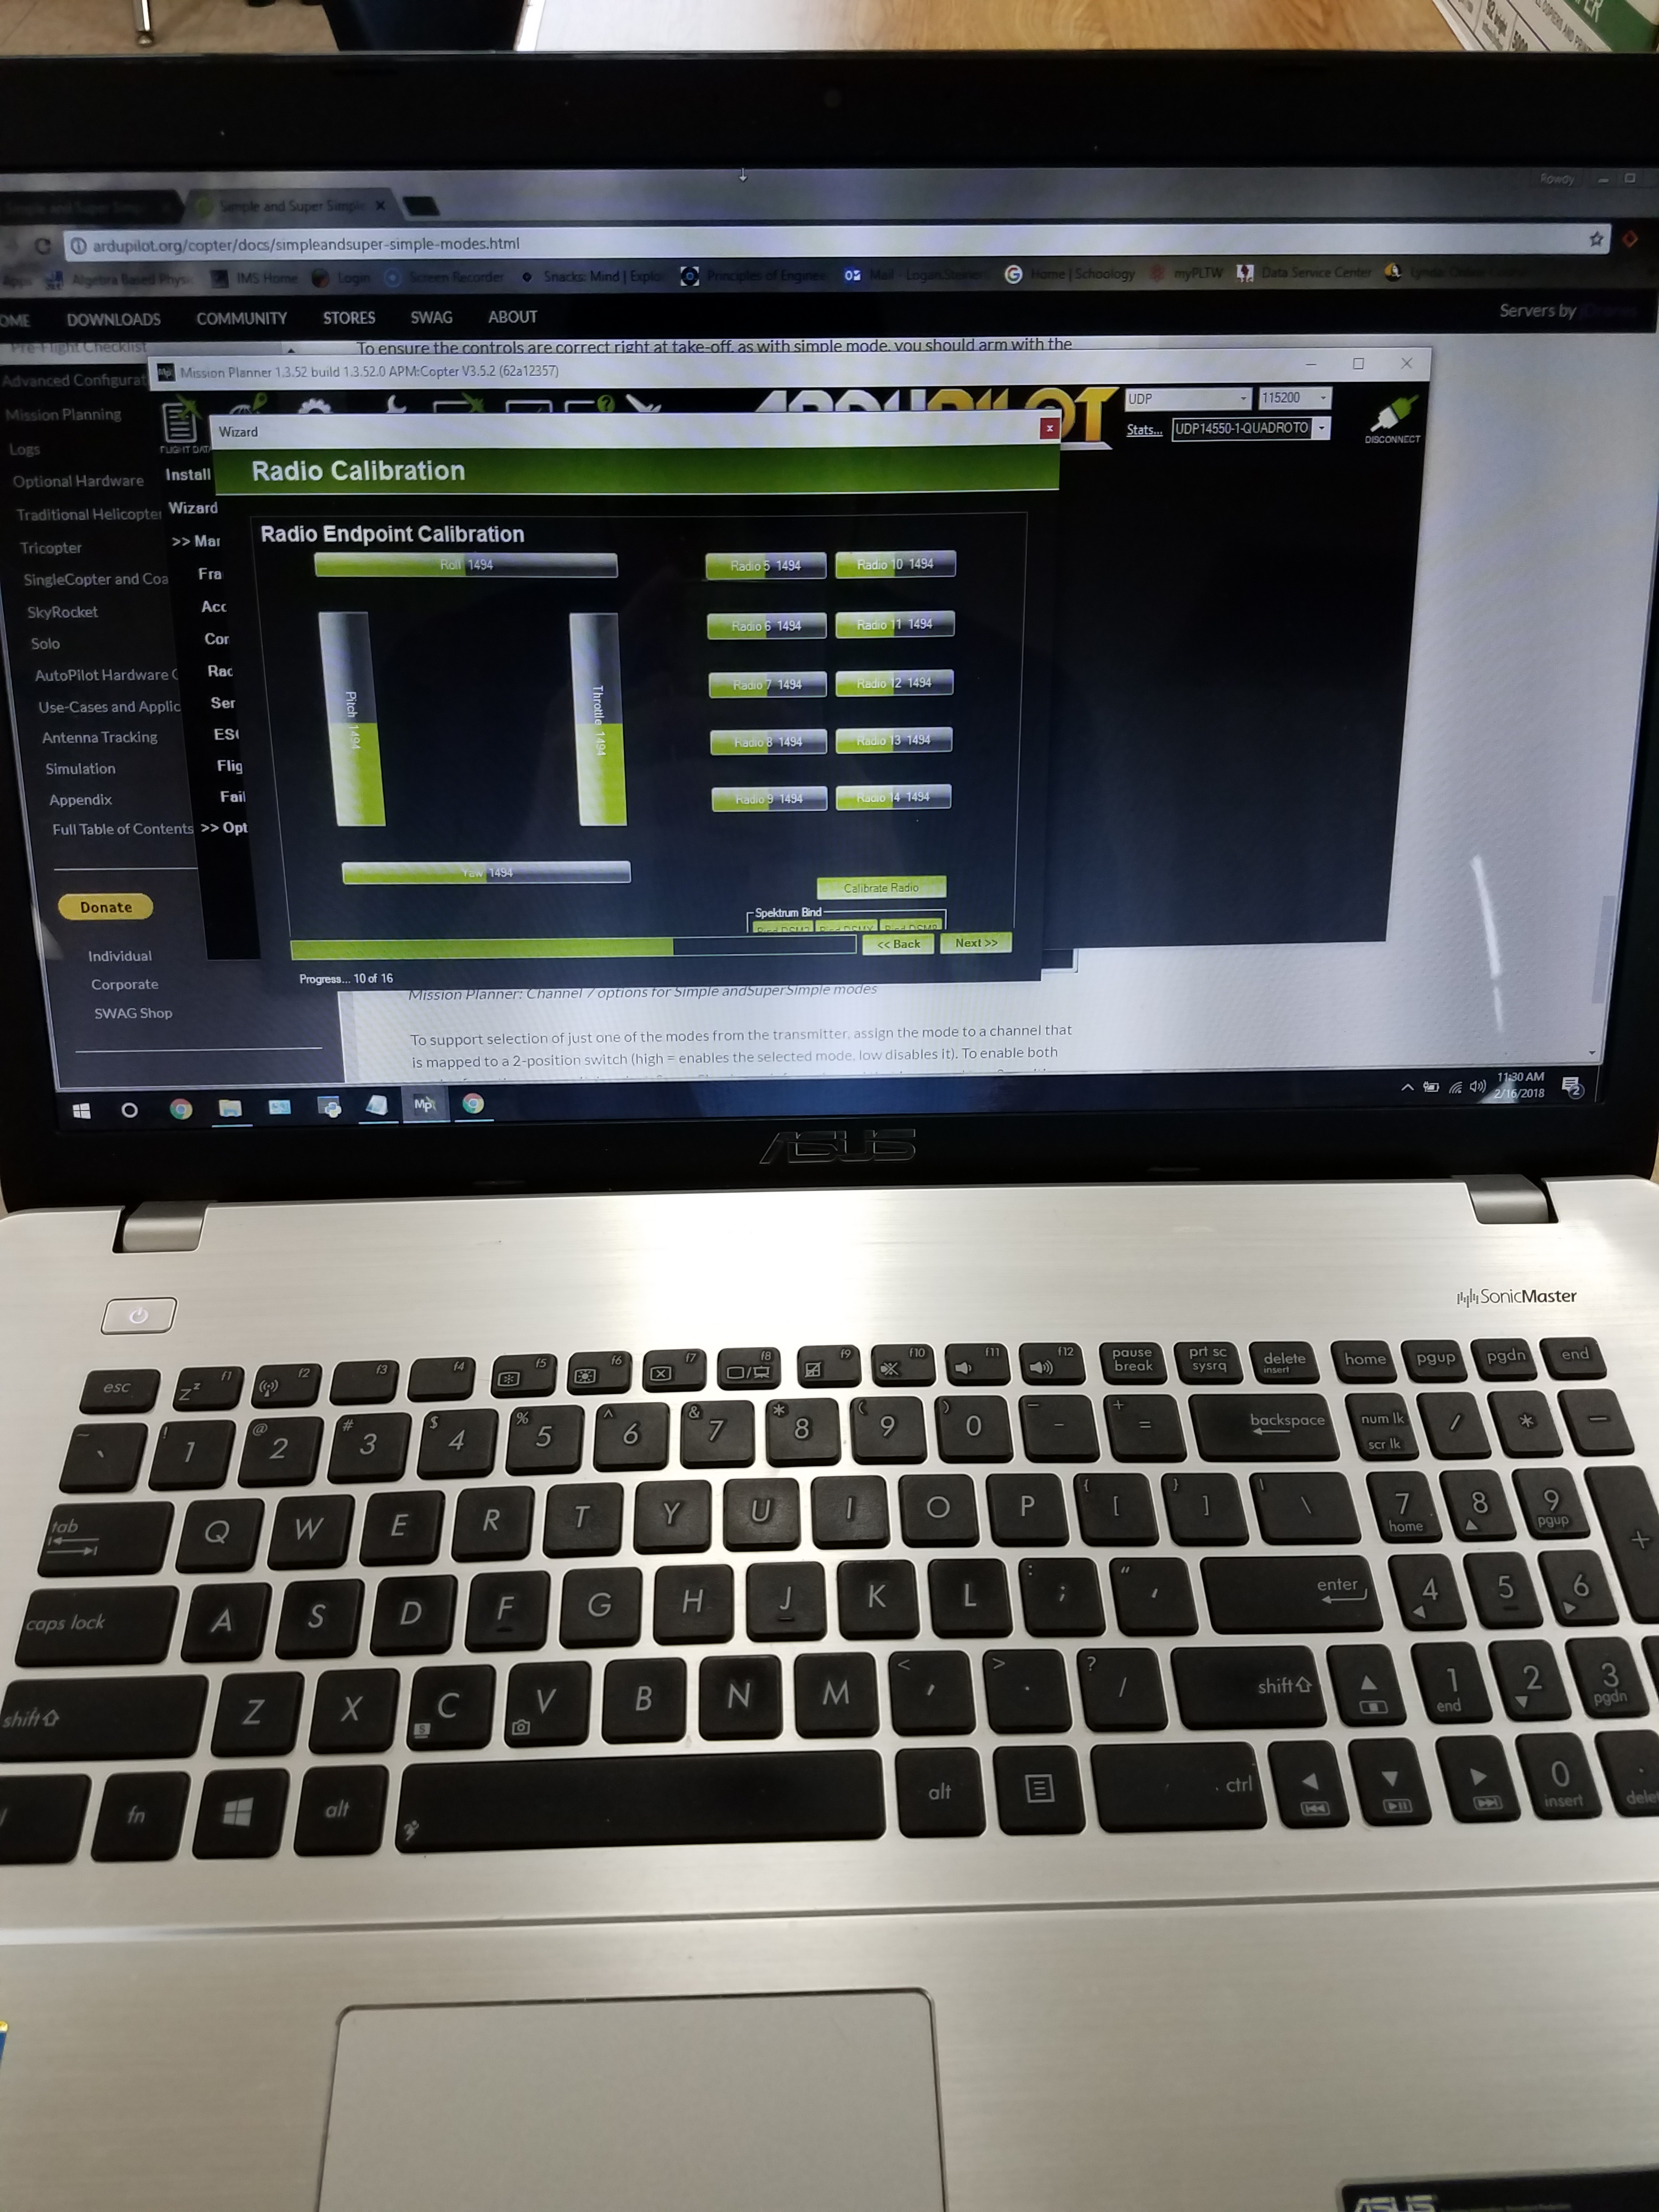
I connected the newly made drone to Mission Planner for the calibration phase, and it was all going well until I got to the RC configuration and motor setup part…
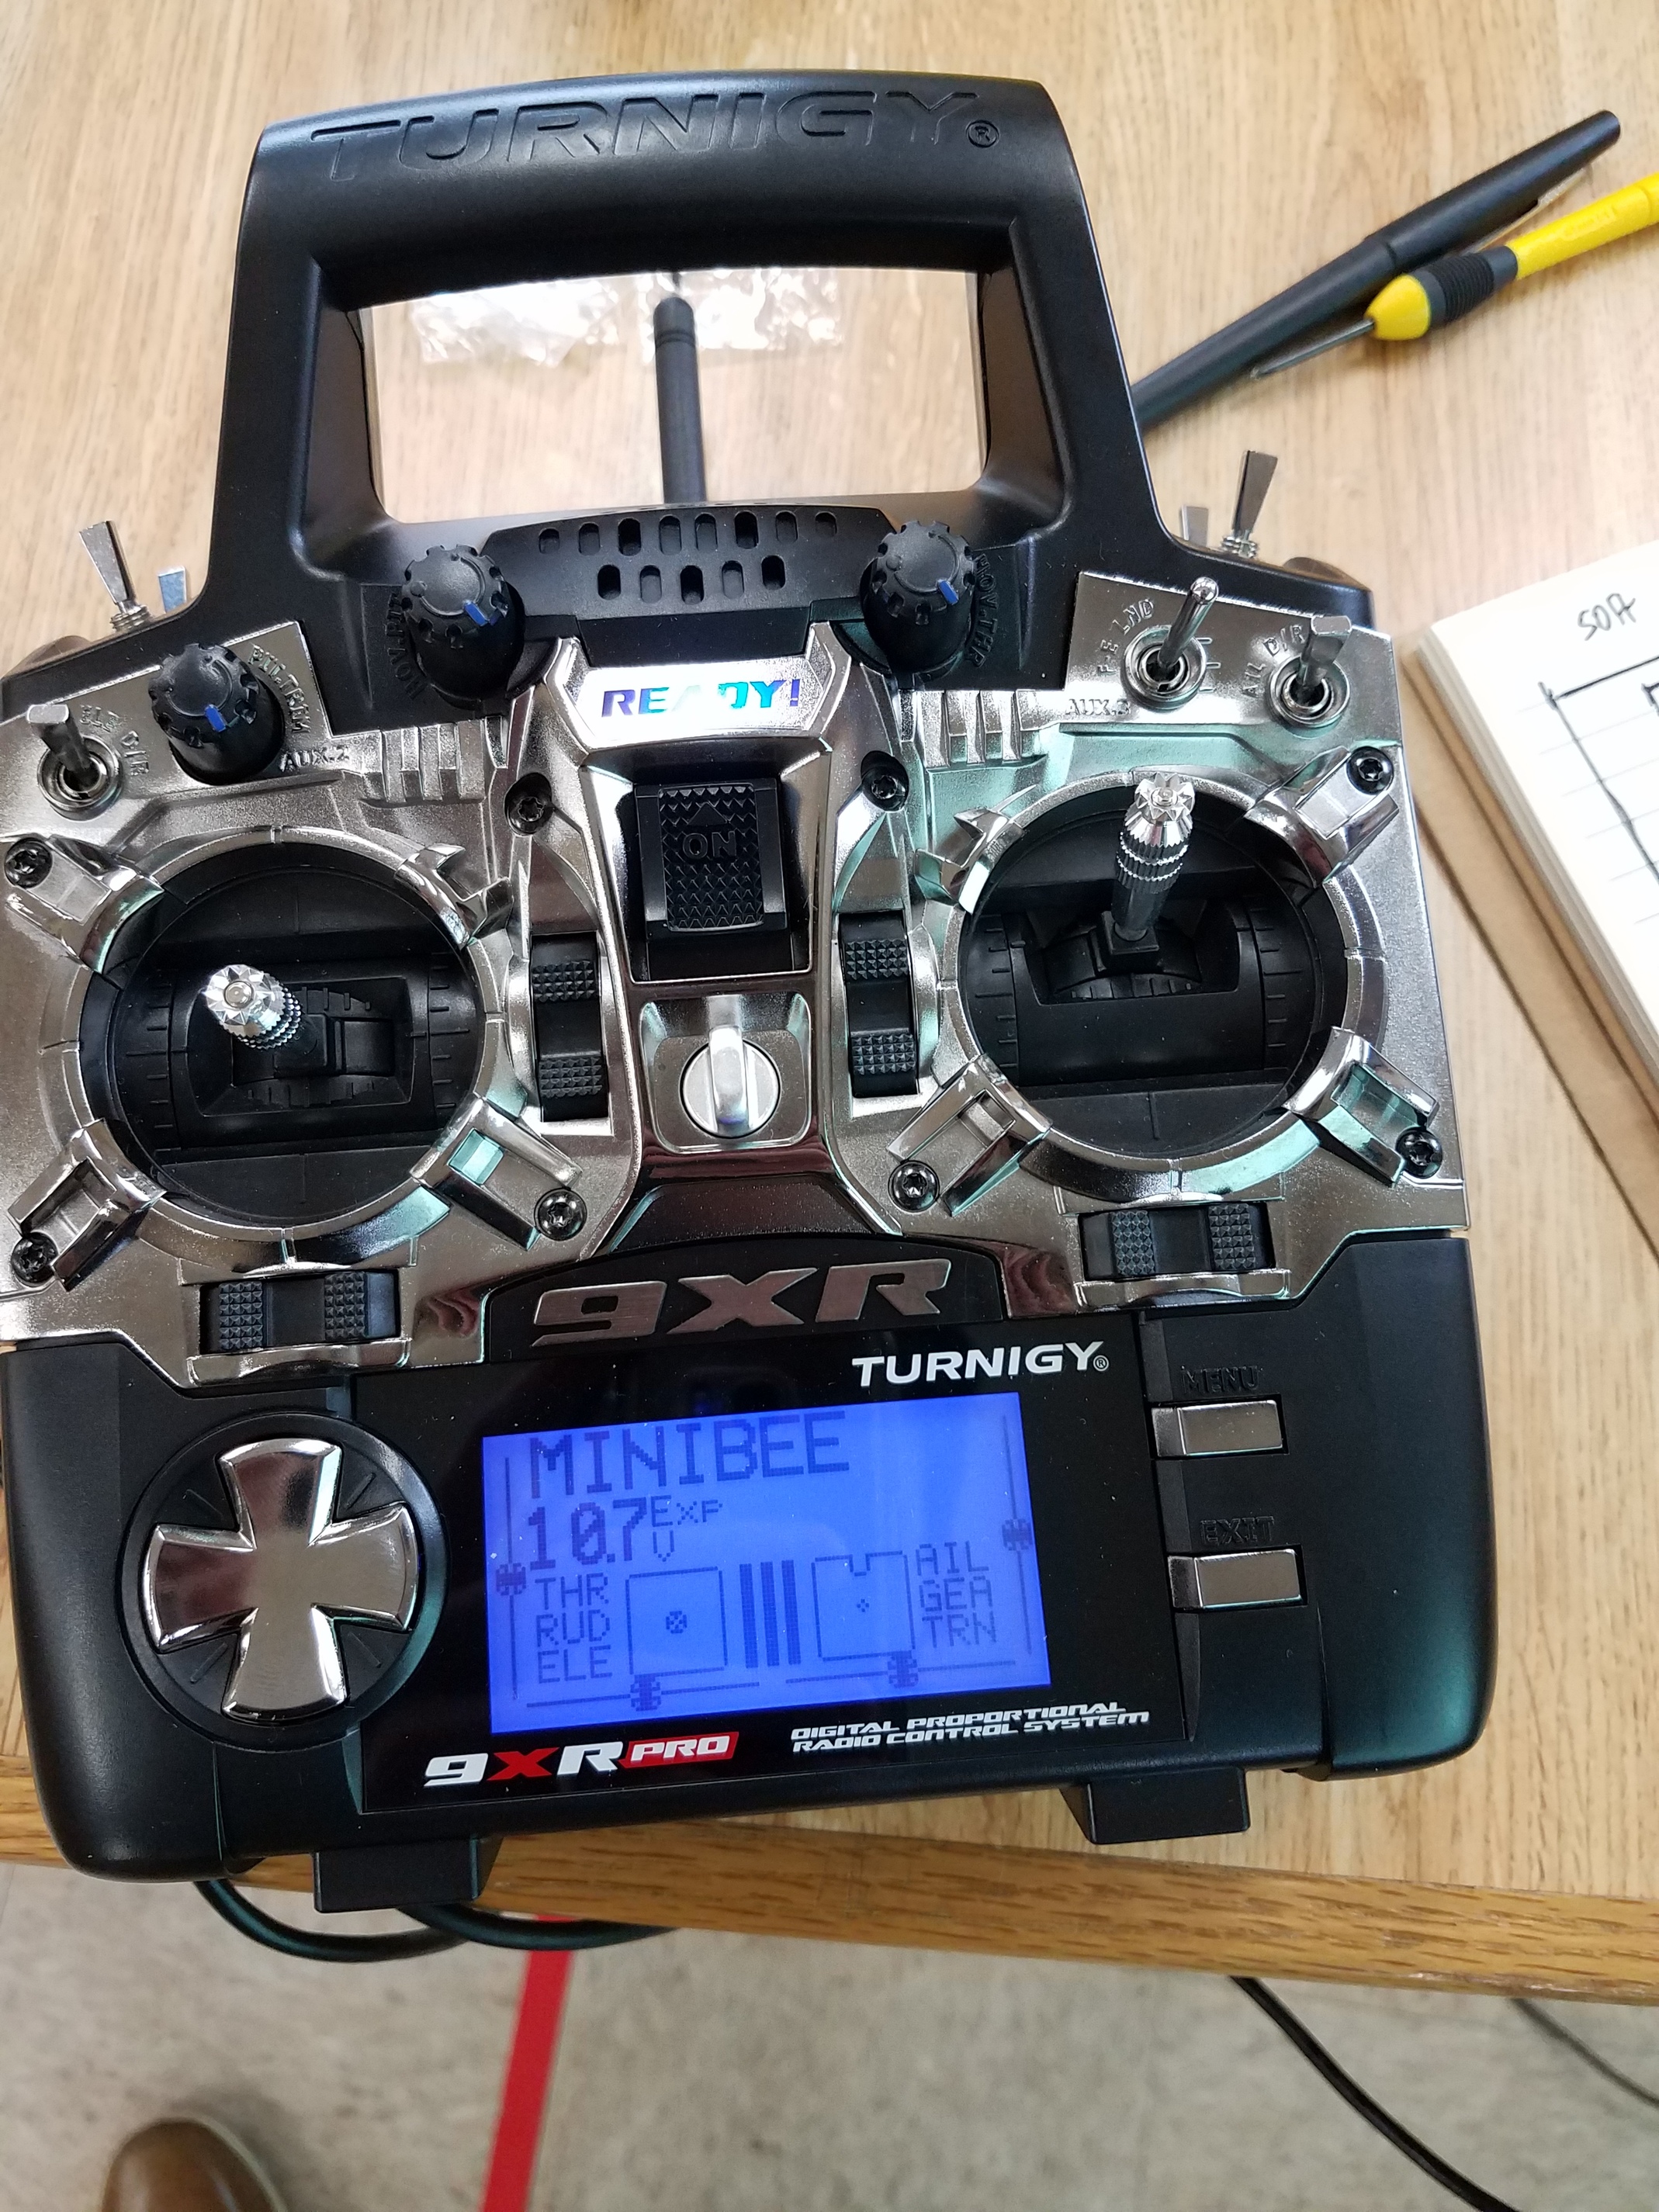
I have the X8R bound to a Turnigy 9XR controller, but I cannot seem to get the motors to activate at all. When I provide power to the drone, the ESCs beep and seem to be working, which has me thinking the physical setup is correct, but the motors are unresponsive. Here are a few pictures of where I’m currently at:
I figured out how to calibrate my RC controller finally, I was using Model 2 on my 9XR Pro (I renamed it MINIBEE), and that was my issue. I should have been using Model 1. After switching over, I was able to calibrate it successfully on Mission Planner, but I still was unable to activate any of my motors. Do I have to do the ESC calibration before turning on my motors?
As for the beeping that I was hearing earlier, I actually found out that it was the motors that were making those beeps.
You need to complete the whole setup. At least everything listed under mandatory hardware, that applies to your copter.
Arducopter has a bunch of safety features to prevent the motors from spinning unwanted, keeping your copter from flying away,
or trying to keep the pilot from doing dumb things.(the hardest part )
You need to ARM the flightcontroller to be able to control the motors by putting throttle
down and yaw to the right or by clicking on arm/disarm in Missionplanners actions tab under the HUD. Then there might be a prearm check that prevents the copter from getting armed. Indoors it is often a missing GPS fix for example. For testing, open the full parameter list and look for “ARMING_CHECK” and set it to 0. Only for testing! Revert this before you do your first flight!
Thank you for your post! After finishing up all of the safety checks, I was finally able to arm/disarm the drone from Mission Planner. The amount of excitement I felt when the motors started spinning was incredible! I was actually able to arm/disarm the drone without the use of Mission Planner as well, and that was even more thrilling!
After making sure all of the motors were spinning correctly, I put the propellers on and took it outside for its first test flight. This is where I ran into probably the last problem I’ll face with this project- I couldn’t achieve flight. I made sure I put the propellers on correctly (CCW props on CCW motors, and vice versa), but whenever I push up on the throttle, it doesn’t seem to be lifting. Now, being new to drones, I’m not positive on this note, but I do think the drone weighs a bit much. As for the precise weight, I’ll have to check on a scale when I get back to my classroom, but I would think it’s around 1.5lbs (or around 700 grams).
I am currently using the following motors and ESCs:
-Lynxmotion Brushless Multirotor Motor 2400Kv 10A (CW)
-4x Emax SimonK 12A Brushless ESC Speed Controller For FPV QAV250 200 Multi-rotor
@Logan_Steiner
Please stop trying to fly the drone with this setup!!! Sooner or later (I bet on sooner) something is going to melt!
You did not write about the size of your copter or props, but I would guess the copter is in the 400-500mm class and you are using 8 or 9" props. Those props are much to big for 2400kv motors. 2400kv motors are used on small race quads (250mm) with 6" props max. For a 3s lipo and 8 to 9" props, I would suggest 1200kv motors. And then your ESCs might still be to small. There is a handy tool at www.ecalc.ch, where you can enter all the base data of your copter and try different setups of ESC/Motor/Lipo/Prop, till you find one that matches your needs.
Are those used parts, or did you buy them for this project? Who advised you to do so?
The weight of your copter should be fine.
Trust me, I only had one attempt and then I stopped! I figured I would break something (or melt- like you said) if I continued to play around with it. I didn’t realize the frame size vs prop size would make such a huge impact on the flight. I figured if I kept the ratio of drone size to prop size relatively to scale, it would be okay as long as I didn’t increase the weight too much in the process.
Even though I’m very much humbled by this experience, this is an easy fix for me! I’ll take your advice and upgrade my motors and ESCs. I truly appreciate the tool that you’ve shared on here for me- that will definitely help me out when choosing my new setup.
As for where I got my dimensions/parts, I was actually following a project that I found here: My first copter build with RPi2 and Emlid Navio2 | Hackaday.io. Although he was using a different body and props, I thought I could still get away with my setup (which I now realize I cannot).
The most important thing is to match motor kV (rpm/V), lipo voltage and prop size/pitch (as low as possible for regular copters). You have to combine those factors, so you get the most thrust, while using the least amount of energy. Copters (except racequads) seldom use full power, so it is best to optimize for efficient hover flight.
My Edge copter for example uses this setup:
Tiger Motor MN3110 780kV motors
12x5.5 carbon props
4in1 25A blheli ESC
4000mAh or 8000mAh 4s lipo
AUW with Gopro, Alfa Wifi dongle and 8000mAh lipo is 1850g.
Ecalc says this results in a 3.5:1 thrust to weight ratio.
Flighttime should be around 25min, with reserve.


 ), but I’m really thankful for your advice!
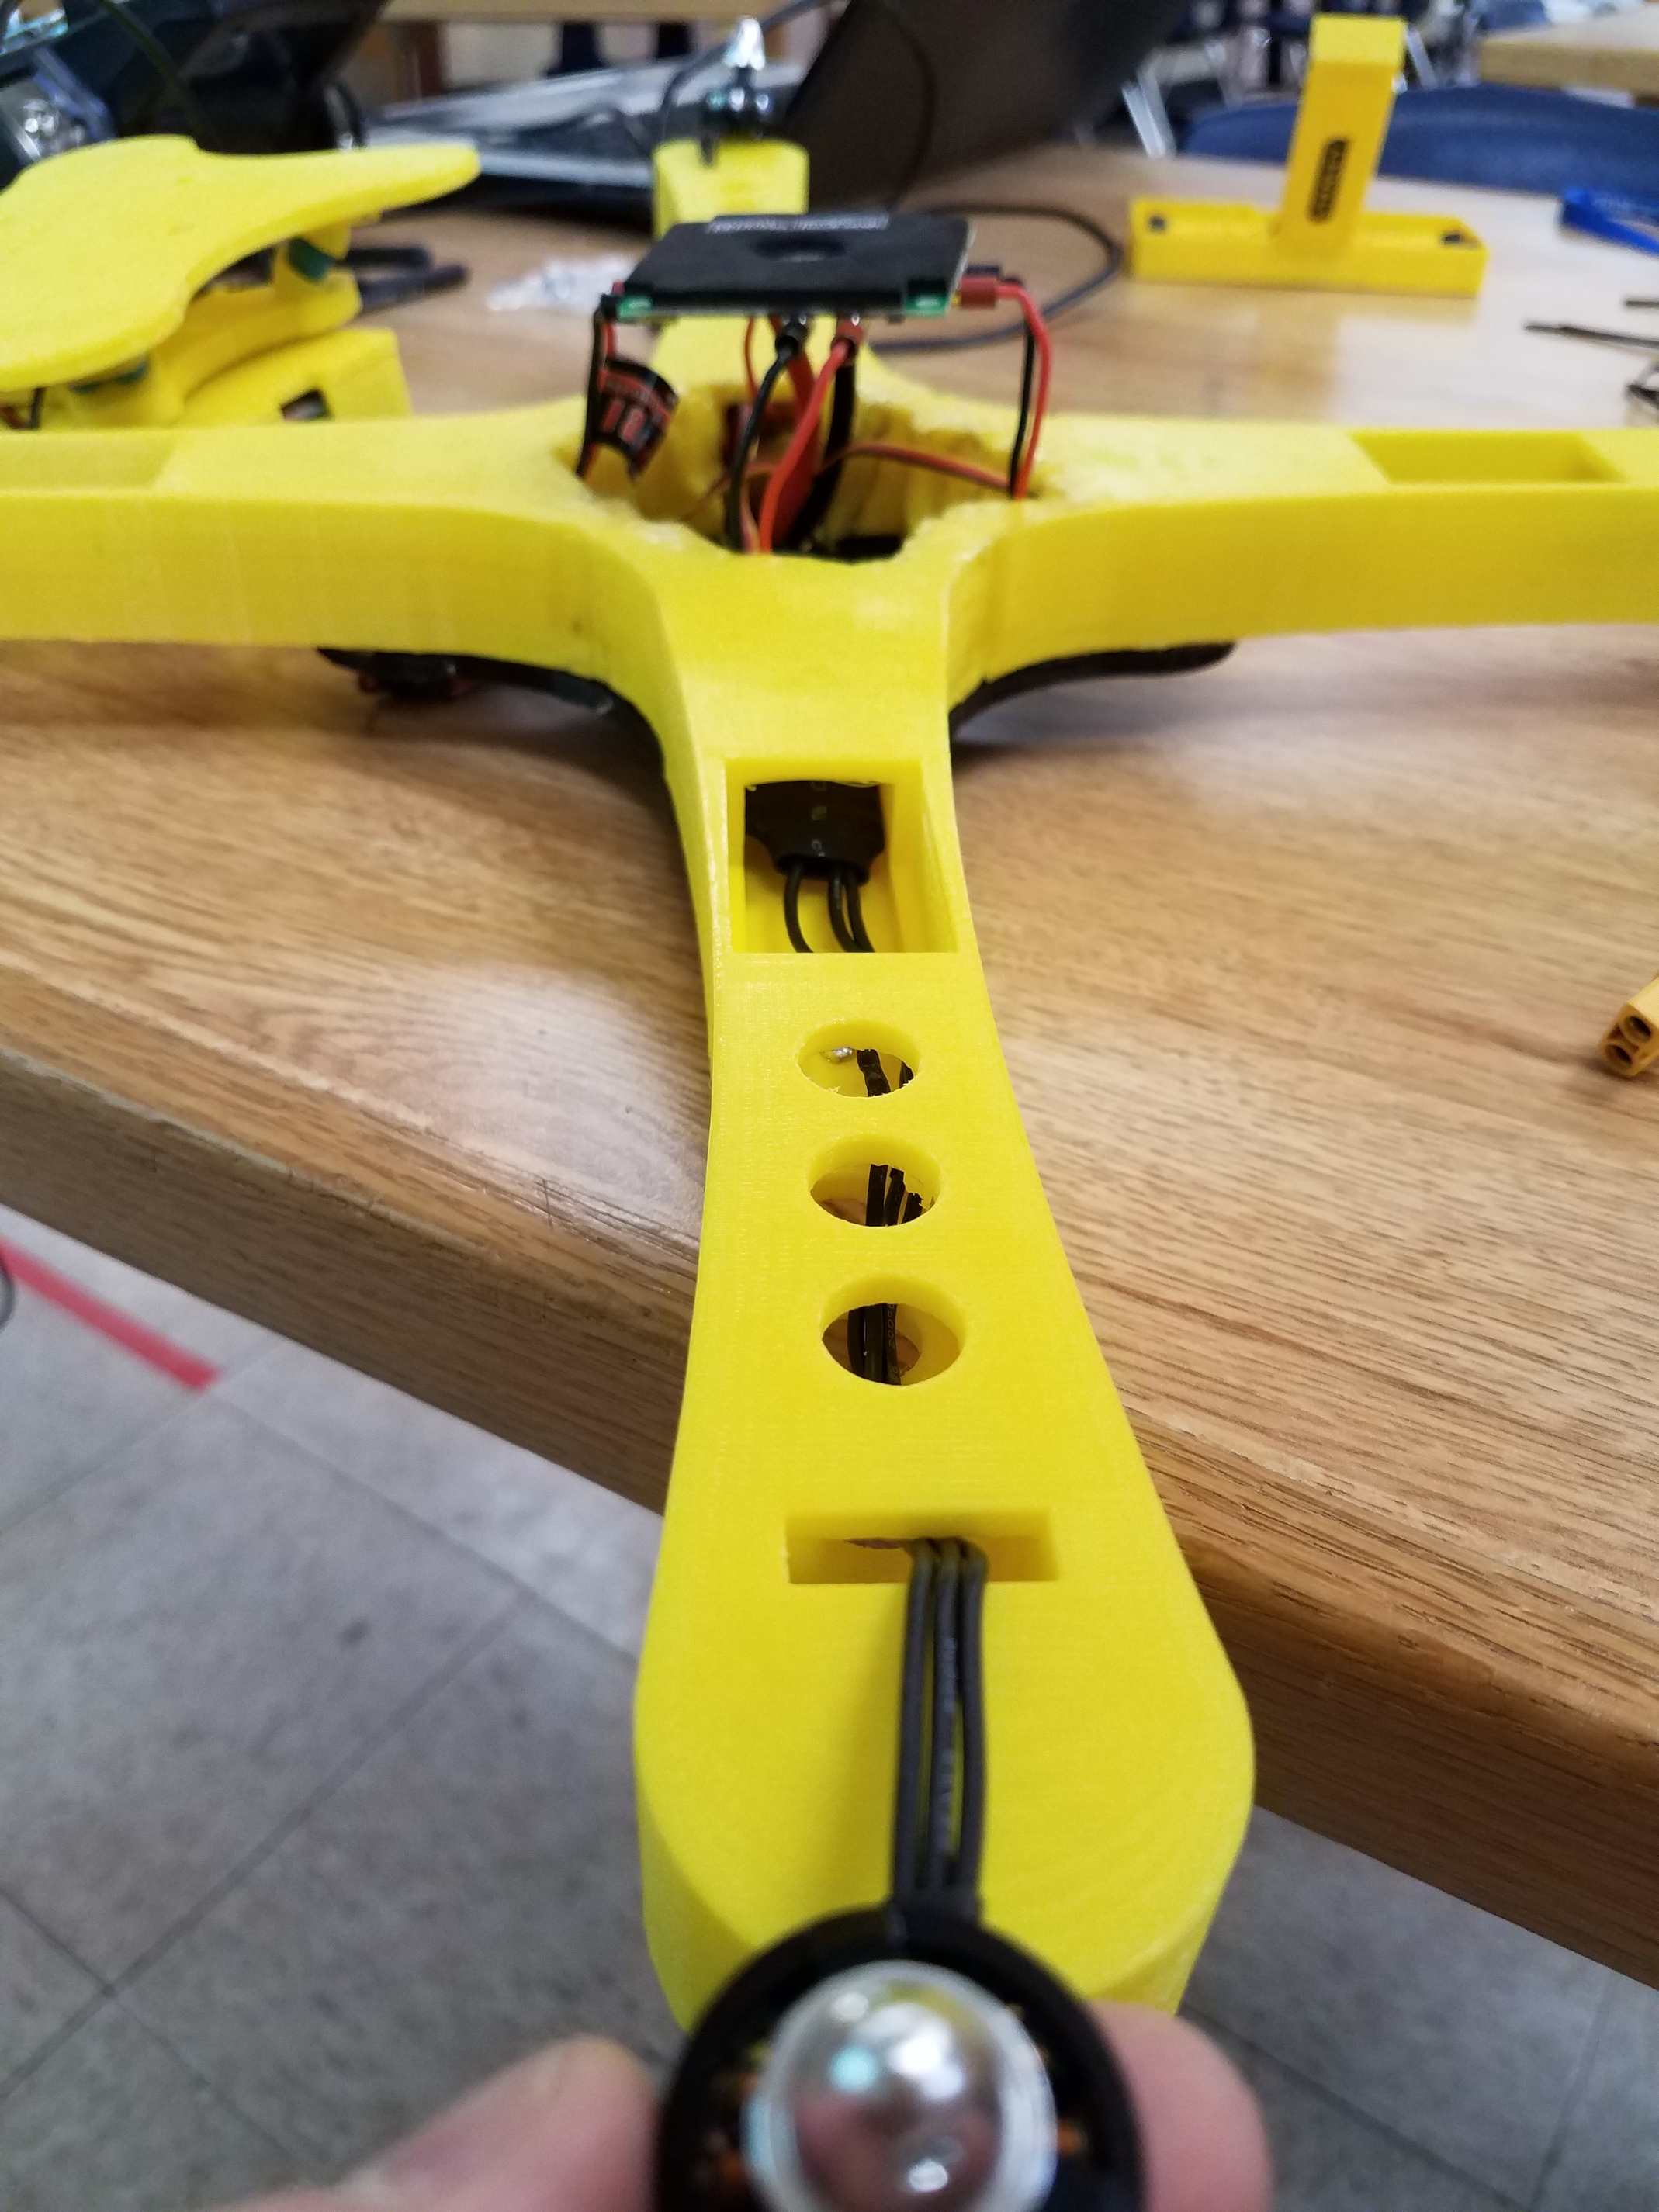


 )
)