


I kind of agree, but the poor guy has been over and over it so many times. I can understand how frustrating it must be.
1 Like
Thanks bide, I really appreciate that.
Are the Emlid people around?
Do they have a powerpoint or pdf specifically for the iPhone 6 (which I believe is not such a rare phone).
Every step, illustrate with screen-shots, so that even a mug like me can follow. Have it tested and sort out the bugs.
Or provide a live chat so that we can sort it out once and for all.
It’s pointless claiming how great the REACH RS is if we can’t even get it to work.
With fing, I am here and I don’t know how to proceed. This does not appear in the documentation.
It shows:
Enter a name,
Enter additional notes,
Enter where device is located.
Can you advise what information to provide?
That’s fine that you have Fing up, but I am getting so little information each time I am making assumptions about what is happening and what you want to do. I think we should do a quick review…
Here in the first post. Please explain what you want to do. “set up the RTK” is vague and I think you and I have not been working toward the same goal.
Also please list how many Reach devices you have, the type and the other devices like laptop and iPhone and what operating systems are used.
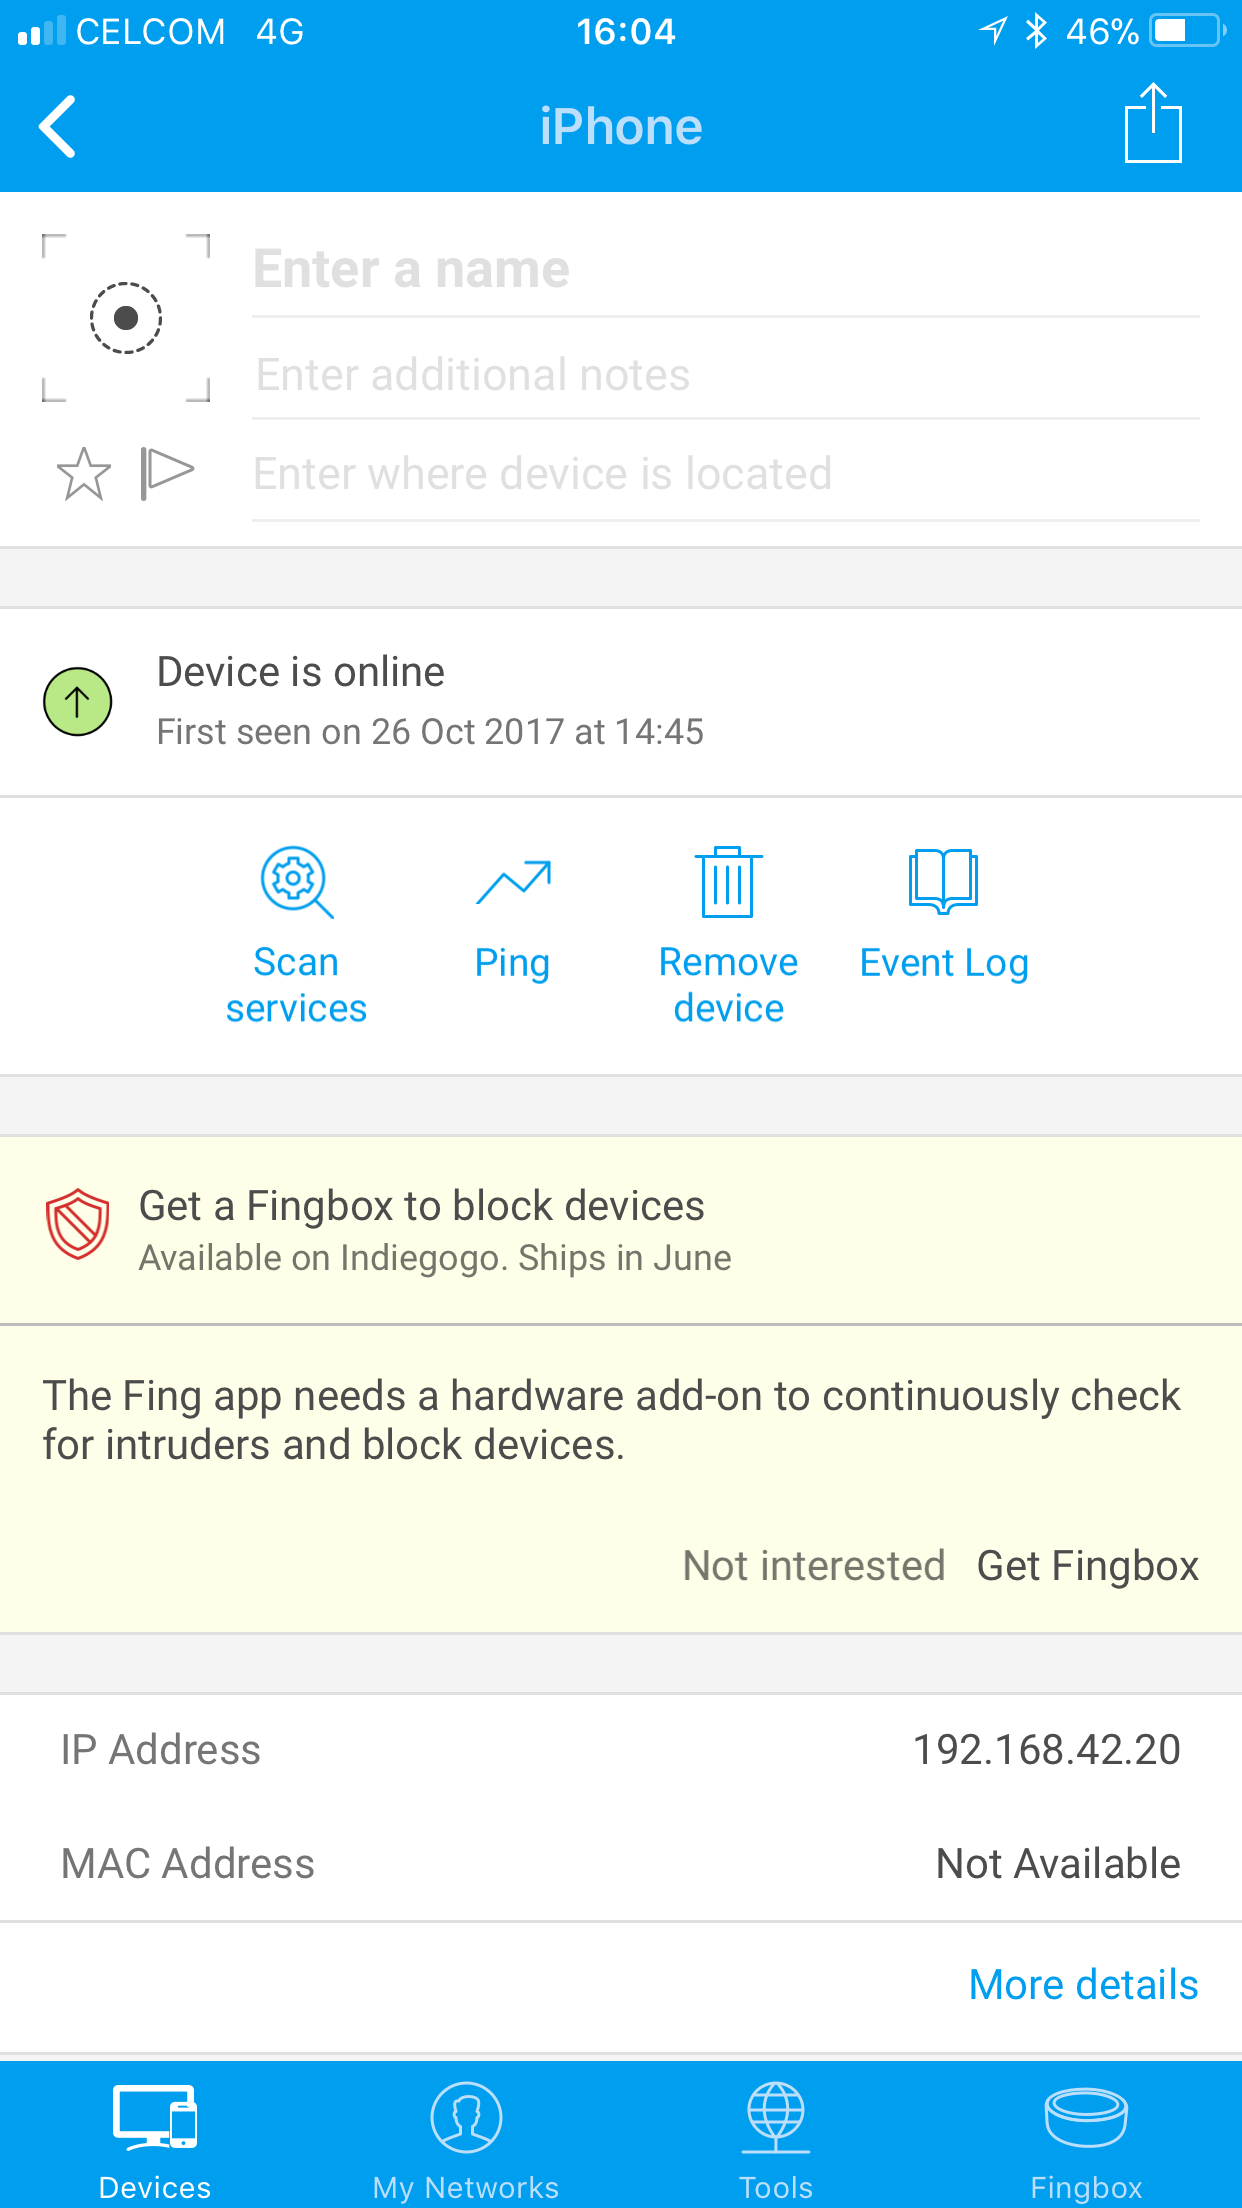

This are the screenshots of what I got.
I tried to load to the browser 192.168.42.20 and safari cannot open the page.
Thanks bide.
Objective:
Use REACH RS for ground survey.
Later, to use a Drone and another EMLID for aerial survey.
Devices:
REACH RS Base,
REACH RS Rover,
iPhone 6+,
Lenovo Laptop on Windows 10.
This screenshot shows that Reach is in hotspot mode, and that iPhone is in client mode. I was trying to make the opposite thing happen. So either we have a misunderstanding about what you are trying to do, or there is some other problem.
OK, great.
Now, how do you expect that you will use Reach RS?
For example, which of these do you want to happen?
- Reach RS to connect to iPhone
- Reach RS to connect to laptop
- iPhone to connect to Reach RS
- laptop to connect to Reach RS
I mean this in the sense that a laptop connects to a wireless router. The wireless router is doing the broadcasting and the laptop finds the broadcast and connects to it. Which device do you want to be broadcasting?
To clarify, this question is about the times when you are controlling Reach RS (viewing status and changing settings) This question is not about the communication of RTK.
My impression was that we set up a REACH RS Base,
then a REACH RS Rover, which will refer to the Base for absolute readings.
A tablet or a detachable notebook attached to the Rover to record the readings. For the moment, I am using the iPhone as an interim measure until I can configure the setting up. Once I have enough confidence that it can work, I will looking for either a tablet or a detachable note-book to complement the Rover. My son recommends an iPad but I am reluctant to have such an expensive toy running about in the field.
The farm I plan to work on is about 1000 ha and there is no internet access. Only sporadic locations where we may be able to get mobile phone signals and send whatsapp.
Initially, the 2 REACH RS will be used to set up Ground Control Points (GCP), which will serve as references when the Drone comes in. I am quite familiar with ground survey using Total Stations, theodolites and levels and can see the advantages of using the REACH RS. But so far, it has been 1 big frustration.
Oh, believe me, I know. ![]() You explained your plan well. Thank you.
You explained your plan well. Thank you.
What I really want you to decide is how the devices will be communicating with each other. Let me repeat the question I added on to the post above:
-and it is also about the times when you are using the survey point collection features
Let me tell you what I do: I do not set up Reach RS WiFi at all. I just let each Reach device create it's own hotspot. I walk up to my base and connect to it's WiFi - then configure it and leave. Then I walk over to my rover, and connect to it's WiFi, and configure it and work with it until I am finished. We'll call this:
Reach hotspot mode.
- Advantages: When you approach the base or rover, it is very fast to use the phone to find the Reach RS WiFi and connect to it to make changes. Also, the initial setup is more simple because you don’t have to configure the WiFi settings at all. Also, the Reach is always at the same IP address: 192.168.42.1 so you don’t need an app to find it.
- Disadvantages: Each Reach RS has it’s own WiFi hotspot, so it is more difficult to switch between base and rover because you have to switch wireless networks each time and the ReachView app is not able to do that for you. Reach RS will not be connected to the Internet and so it will not update itself. You need to connect to some WiFi the first time in order to get past the first time setup (Welcome to ReachView update screen)
So I would recommend the opposite for most people, which is what Emlid recommends too: Set up each Reach RS to recognize your phone hotspot and connect to it automatically. All you have to do is wait for either base or rover to appear in the ReachView app or Fing and connect to either one. We'll call this:
Phone hotspot mode
- Advantages: You can use the Fing or ReachView app to find Reach RS. It is fast to switch between base and rover because they are both connected to your phone’s hotspot at the same time. Reach RS will be able to access the Internet through the phone so it can update itself.
- Disadvantages: More steps to set up. It is a longer wait time for the Reach RS to find your phone hotspot and connect to it.
So, which mode do you think you would prefer?
2 Likes
If i make a youtube video about “how to connect to reach”, i am gonna be a rich man 
Edit: a lot of users with the same problem, so i think a 101 video is in order .
3 Likes
bide, thanks for the clarification. It is very helpful and something I was not aware of. Both methods have their advantages and attractions. And I like both of them.
Say, phones could be changing with different operators, would the 1st method be simpler?
With the 1st method you can provide simple instructions to a user to connect with any phone.
With the 2nd mode, I think you would want to set up each user’s phone in each Reach device. This is something better done at the office.
So yes, maybe method 1 is simpler for multiple users and phones.
Please confirm you have picked #1.
bide, I will go for anything which is simpler. My experience so far has not been very happy.
TB_RTK, brilliant idea. Why didn’t EMLID do it?
bide, confirm Method 1: REACH RS hotspot mode.
Is there transfer of data from the REACH RS to the phone in the event that there is no wifi access? Meaning, how is the survey data stored?
I think they have more then enough work to do with all us users requesting new features and sending bugs to fix 
I think Wong_Piang_Yow has gotten confused about the different hotspots. I would not worry about the iphone personal hot spot until he has connected to the reach’s own wifi hotspot and looked around at the different features then he could add his personal iphone hotspot after that. When he starts the reach module he should not turn on his iphone hotspot but should go to wifi and select the " reach:f2:bf " and then go to Safari (browser in iphone) then enter " reach.local". This should bring up the screen he has had before Now click on Wi-Fi and the blue + sign. In the Network name box enter his iphone’s personal hot spot name and make sure the first letter is the same as the one entered for his iphone name ie J or j. securit should be ok then enter the password for the iphone hotspot. and then click on create. Then shut down your reach module. Change your iphone so that your personal hotspot is on, start your reach module and it should connect to the iphone hotspot, now use your reach ios app to locate the reach module and enter that address into safari.
Hopefully this helps
Jim
1 Like
OK, good. So it may take a while for me to respond each time now, but lets walk through several steps and avoid the WiFi for the moment.
You mentioned that you have Windows 10 on your laptop, so you can connect Reach RS to it by USB cable. Our goal is to access ReachView with the laptop web browser at address http://192.168.2.15
Here are some instructions which should help. They are from the old documentation. Windows 10 might be a little different, but see if it works for you:
Using Reach as a standalone Linux computer
While the intended workflow for Reach is using the ReachView app, no one restricts you from using it as a standalone Linux device.
Using Ethernet over USB
With Reach you can use a virtual Ethernet network over a USB connection. Intel Edison officially supports this type of connection on Windows and Linux hosts.
WindowsYou might need to wait for Windows to install the driver after plugging Reach in.
In Windows 7 and below, go to the Control Panel. Under Network and Internet, click View network status and tasks. Click Change Adapter Settings in the sidebar
In Windows 8, right-click the Windows Start menu button and select Network Connections
Choose the network adapter with RNDIS label. Go to properties, configure IPv4 IP address. Set manual IP address 192.168.2.2 with 255.255.255.0 mask. Apply changes.
Reach should now be available on 192.168.2.15 address.
After doing this, on your laptop, you should get either:
- The “Welcome to ReachView” updater page, or
- The real ReachView status page
Let me know how it goes!