Hello 
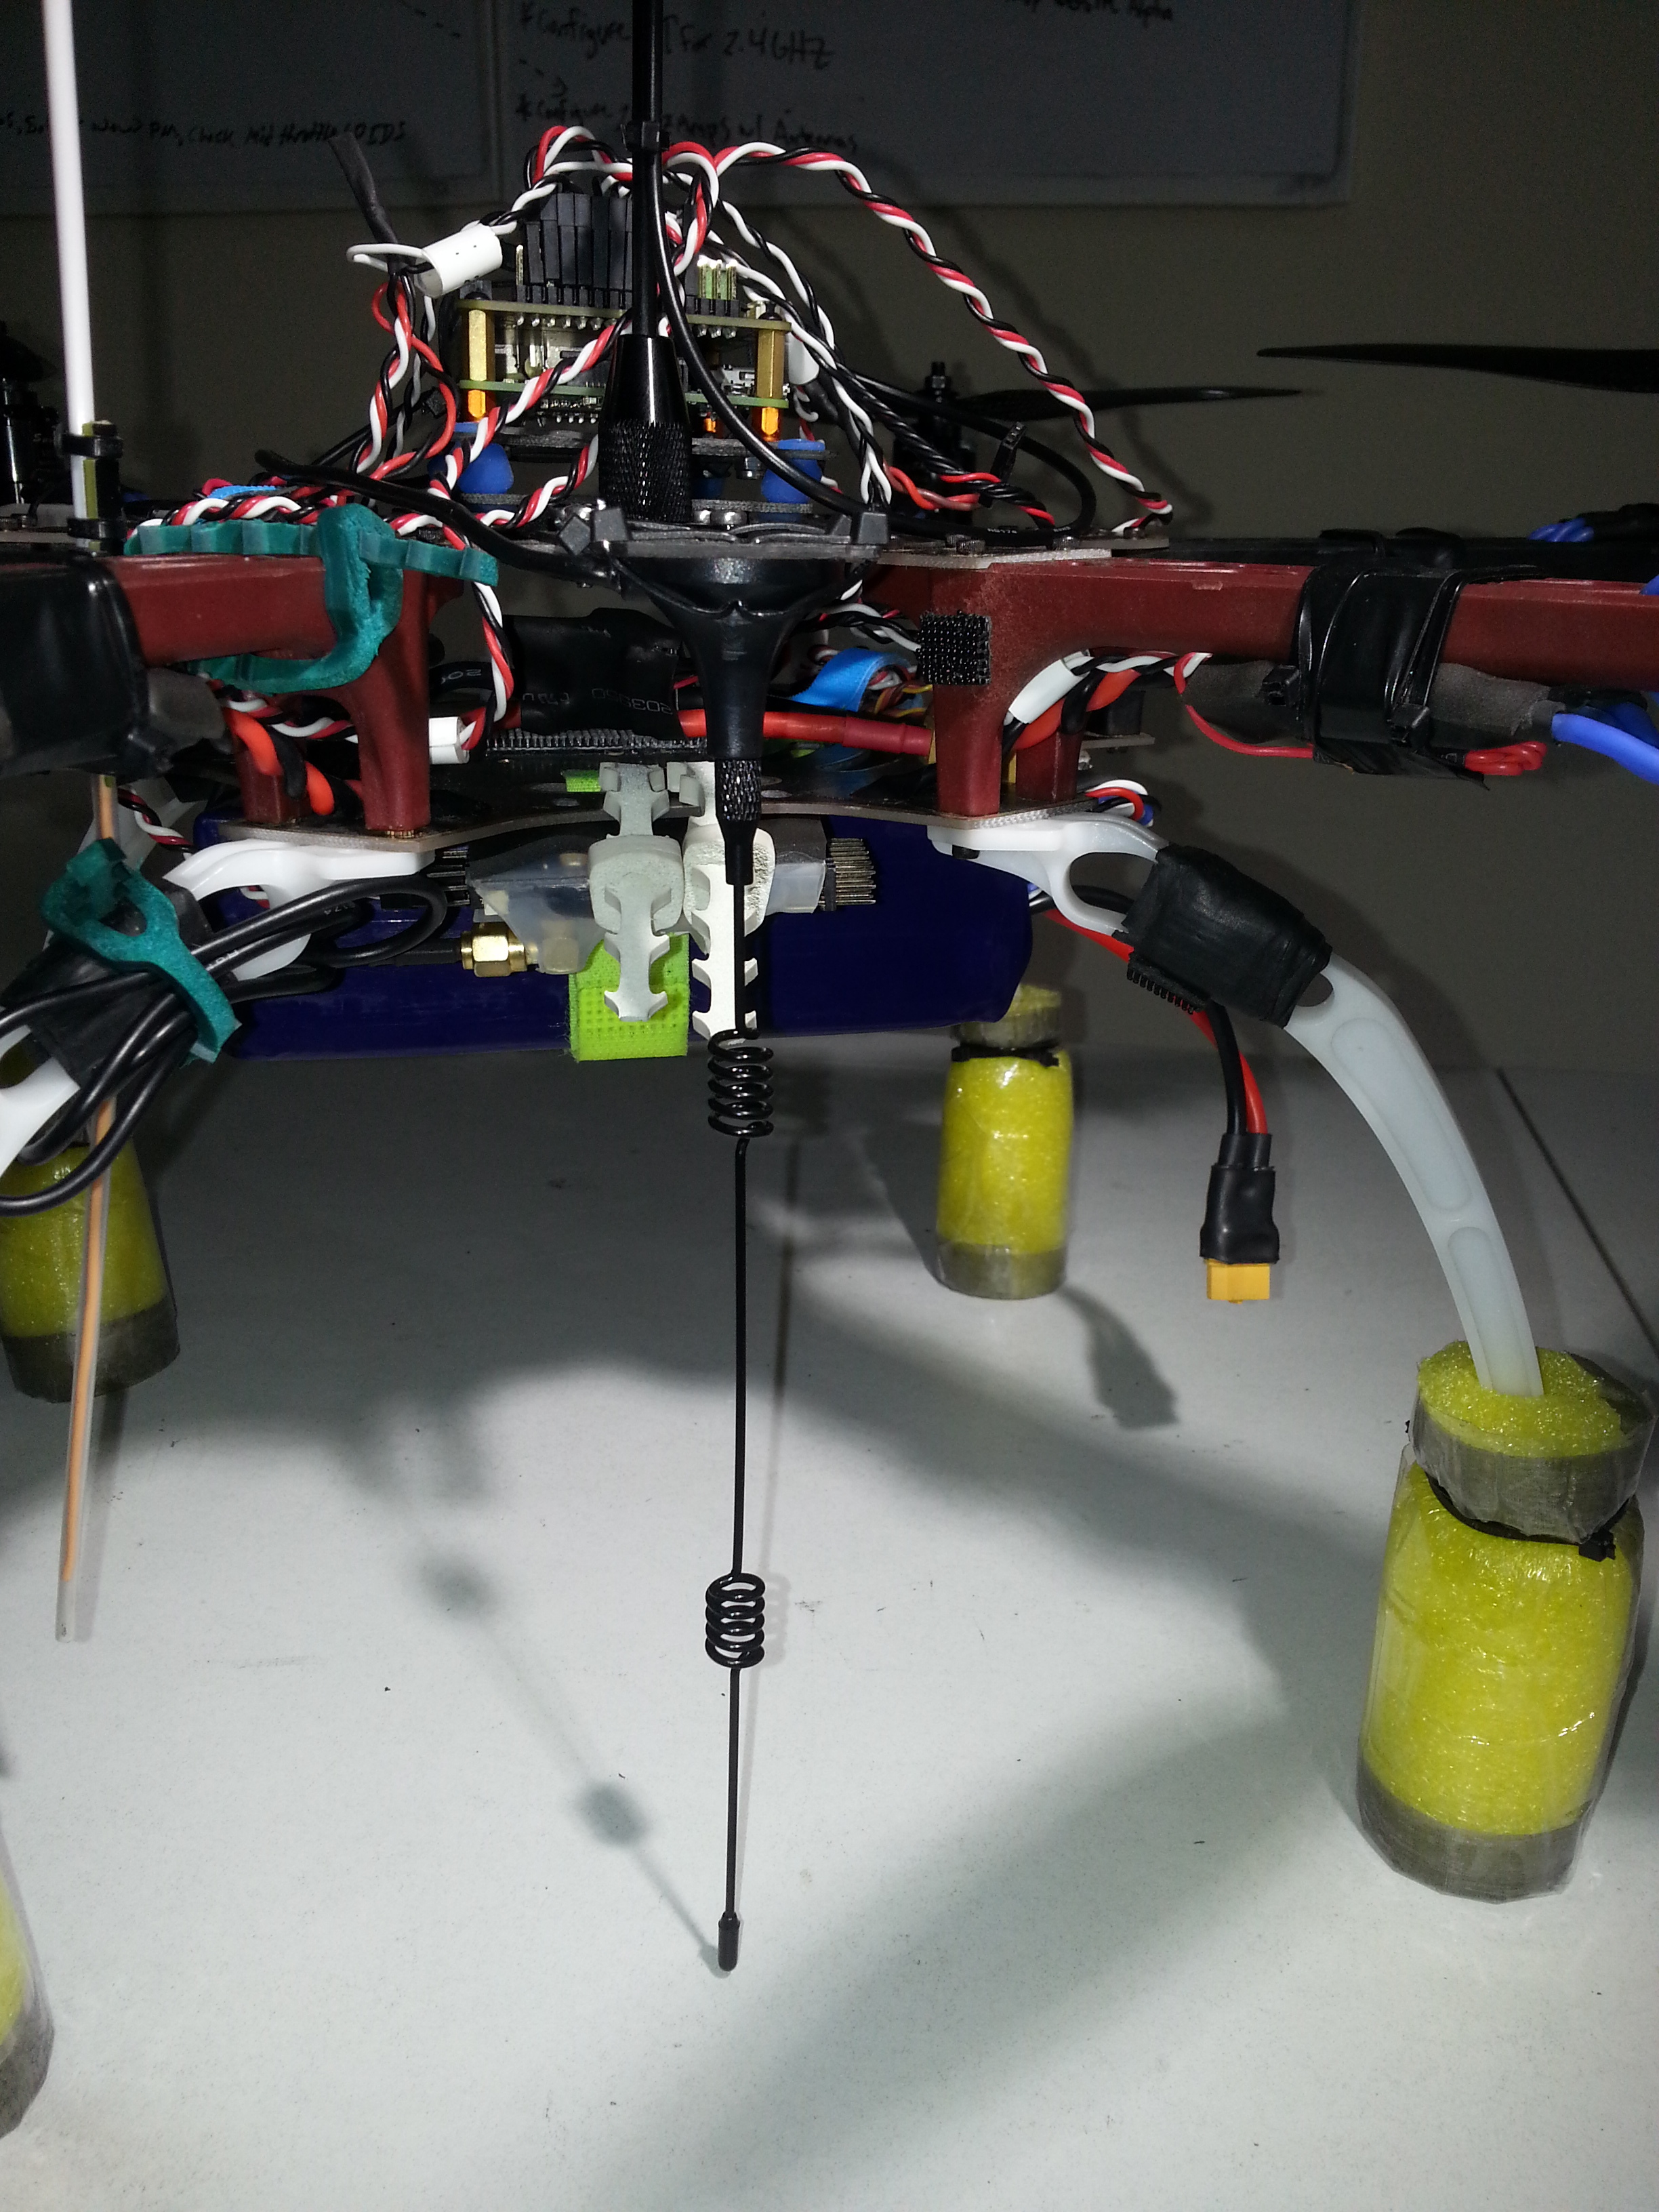
This is my navio setup…
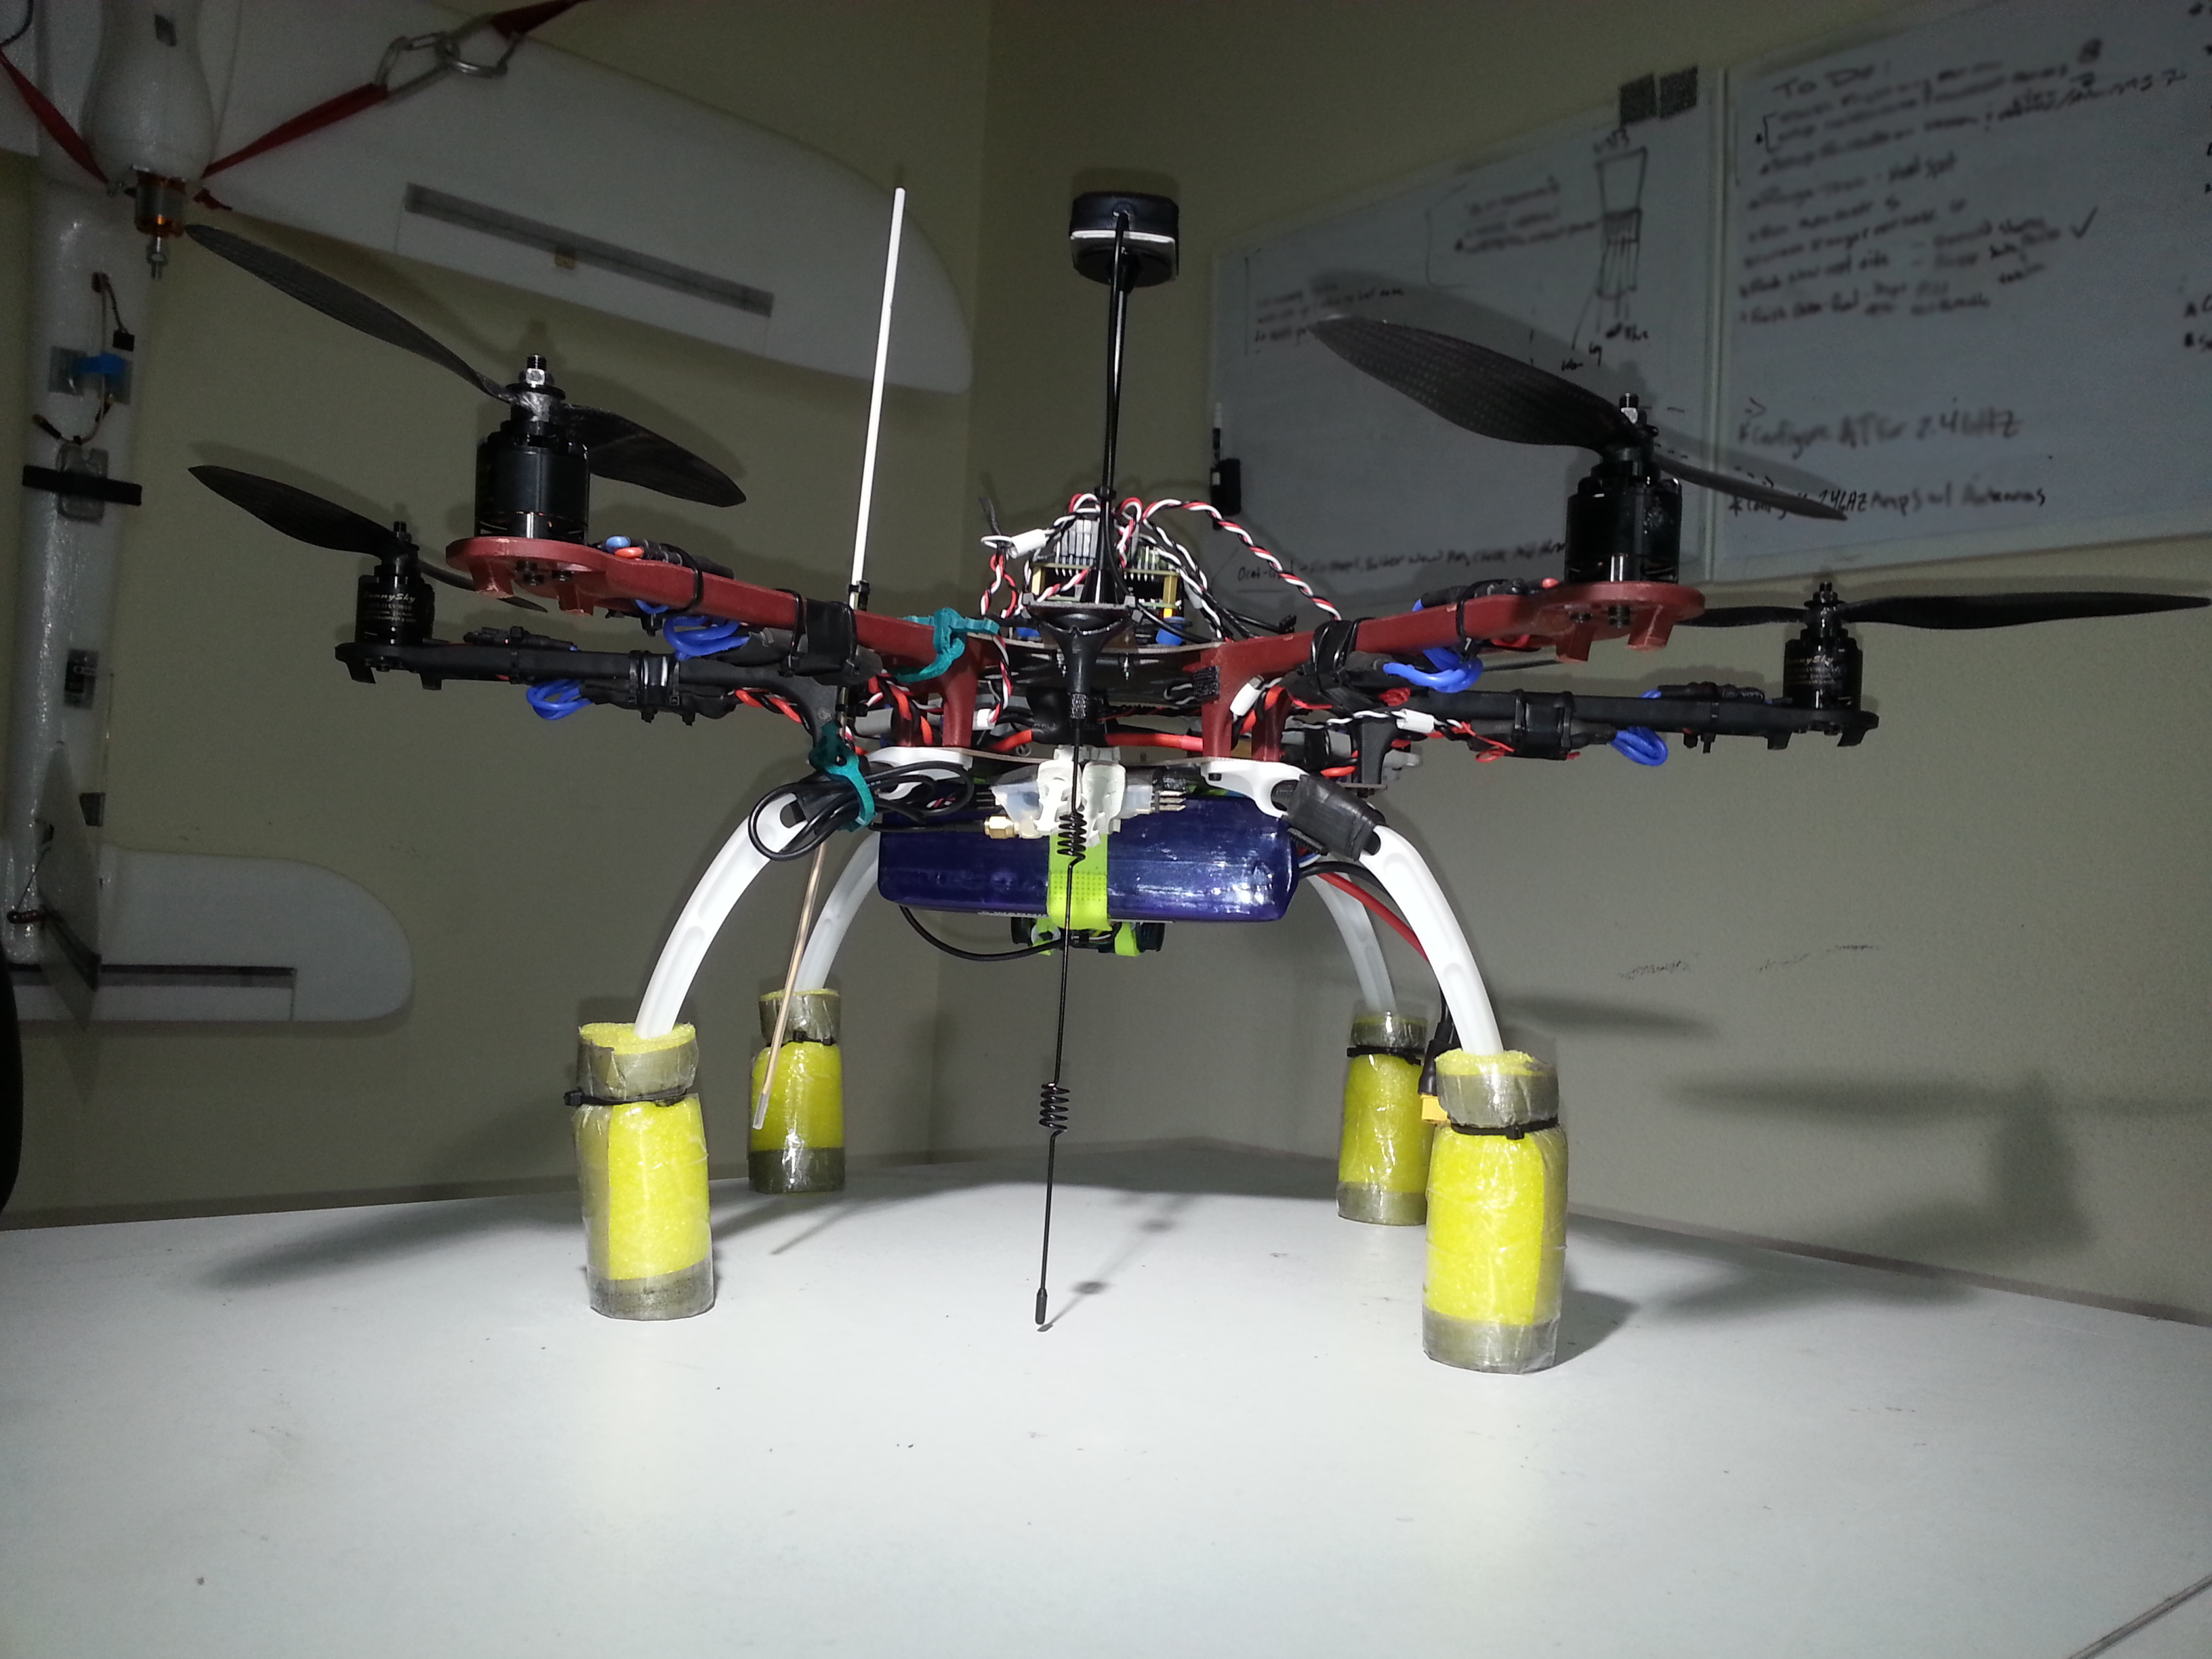
Frame:
dji 550 hexa w/ landing skid
Auotpilot:
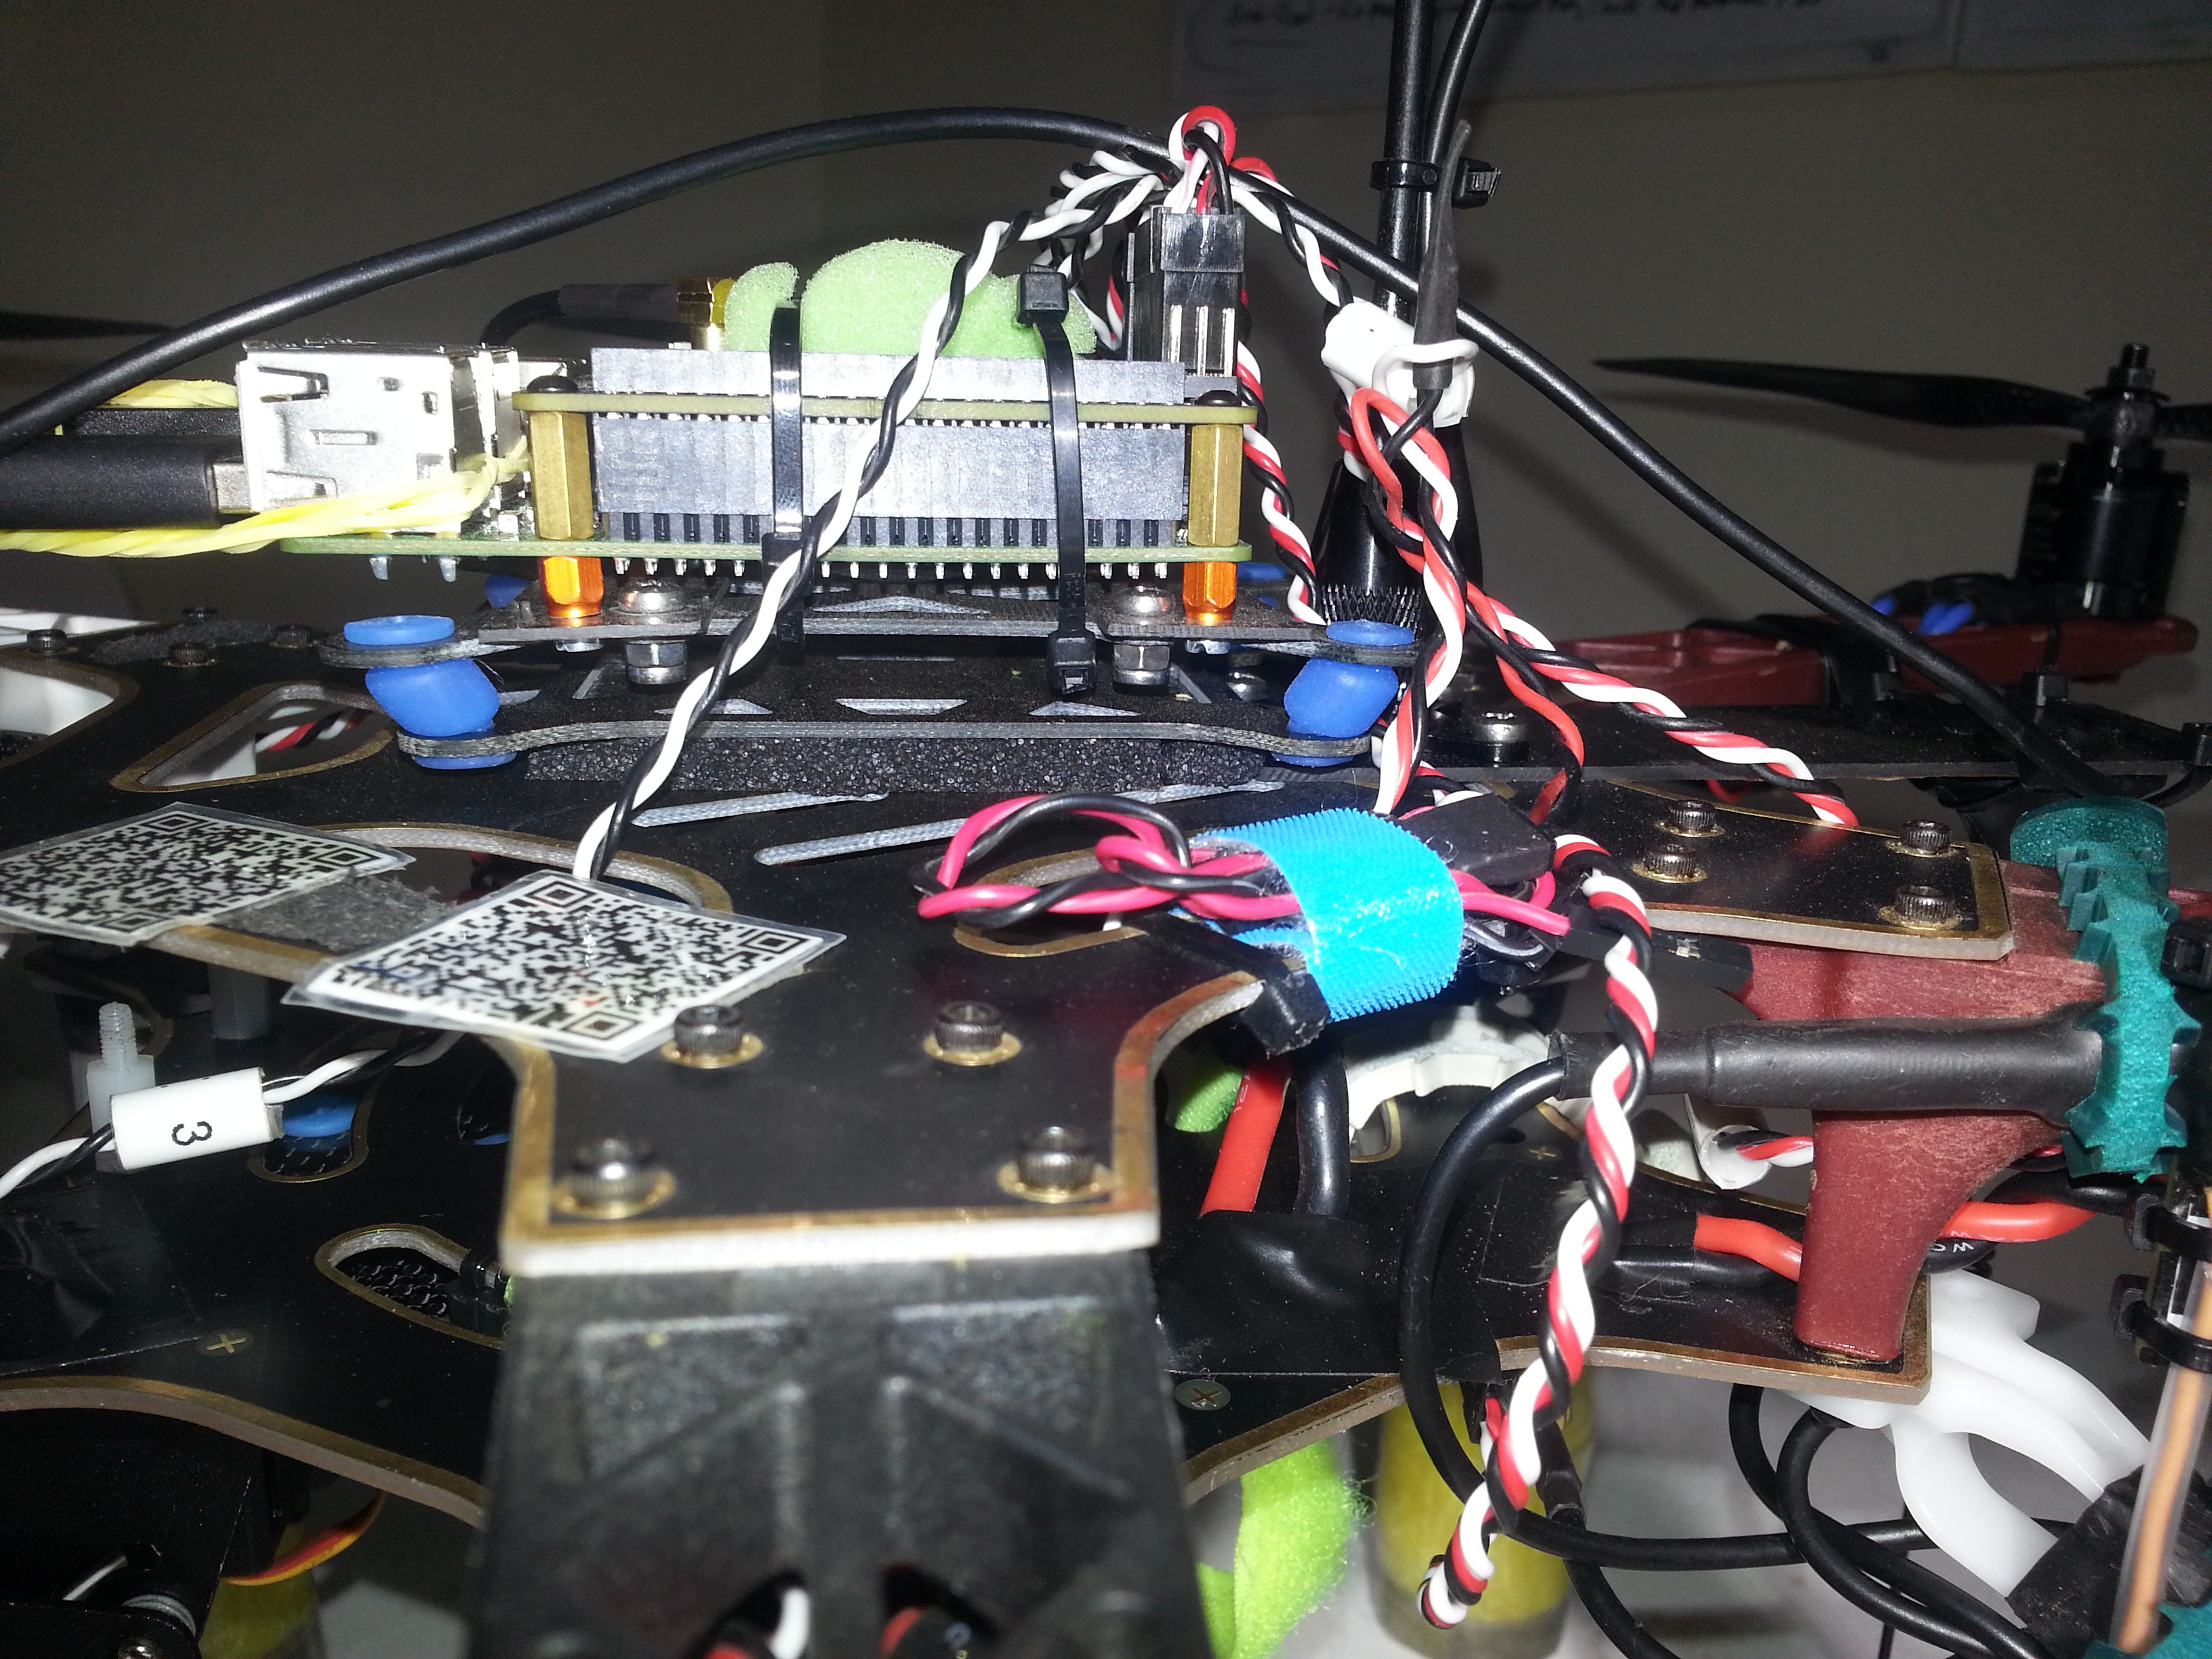
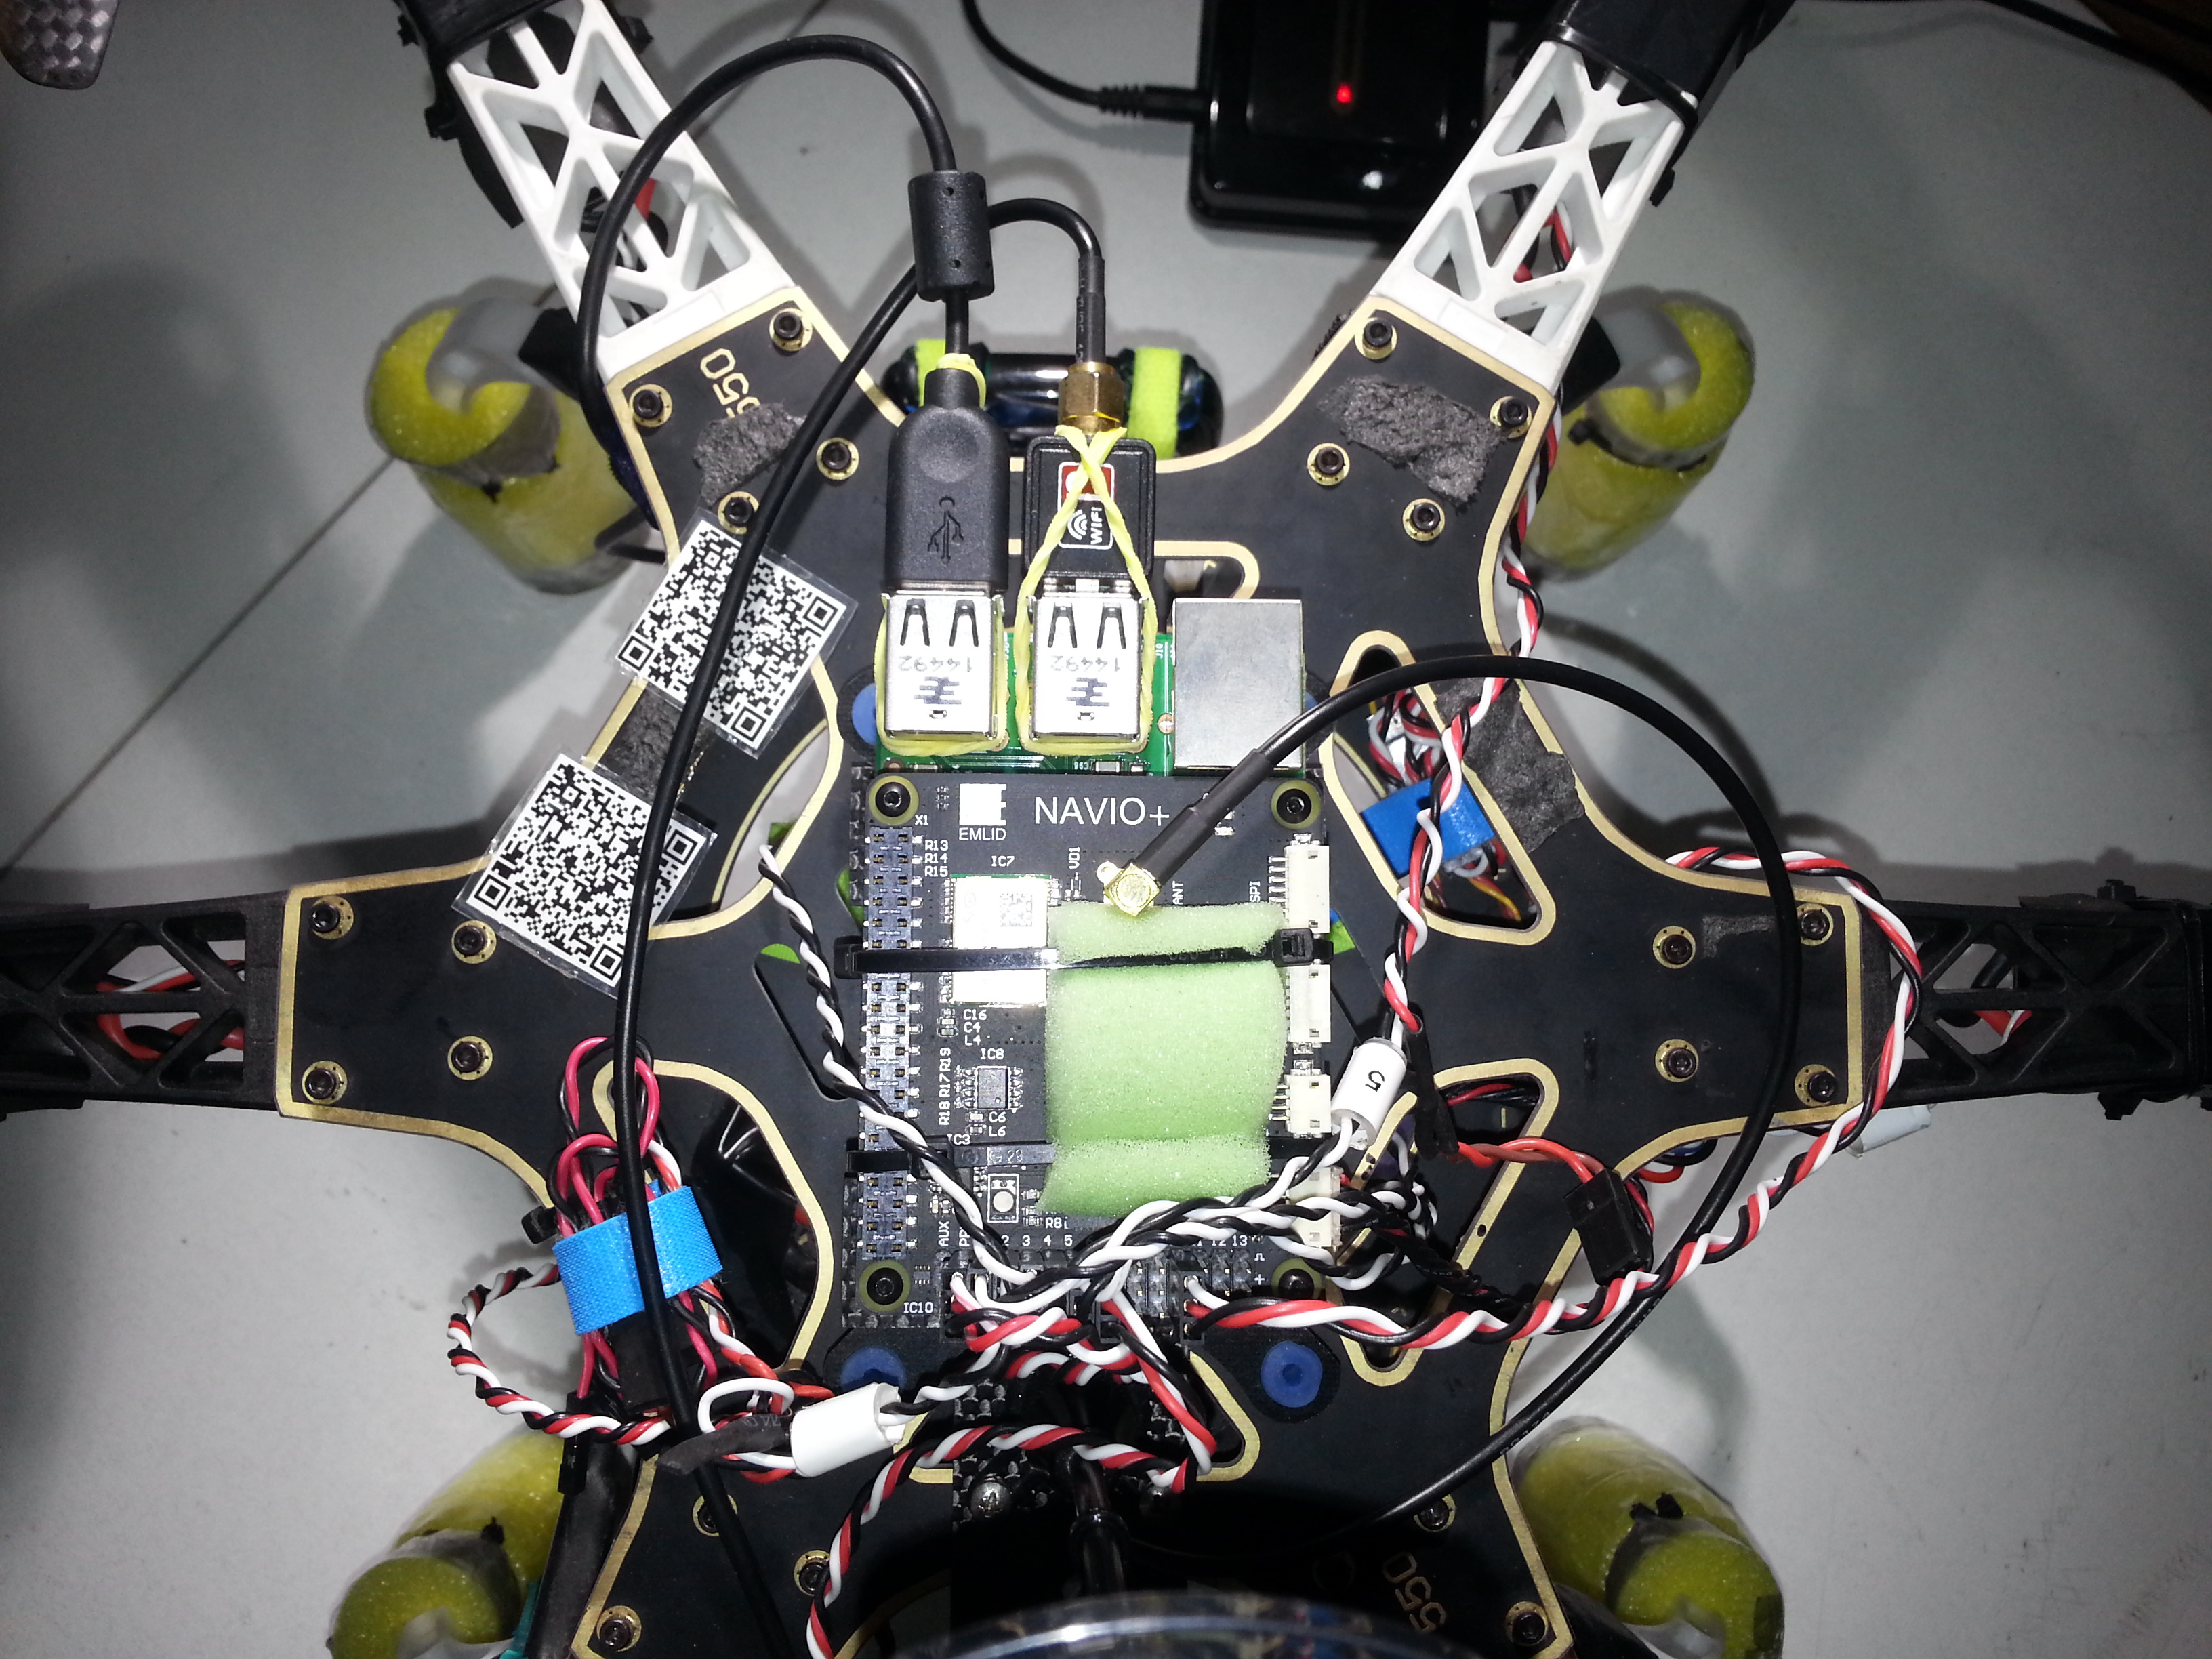
navio+/raspi2
external gps antenna
Radios:
RT5370 2.4ghz w/ 7dbi antenna
dragonlink v2 w/ dipole
Power System:
sunnysky 2212-13 980kv II
1045 CF props
nano-tech 8400mah 3s
generic 30a ESC’s w/ bec “red”
v1 power module
FPV Camera:
logitech C525
12g emax digital servo
custom dampening mount
moongel
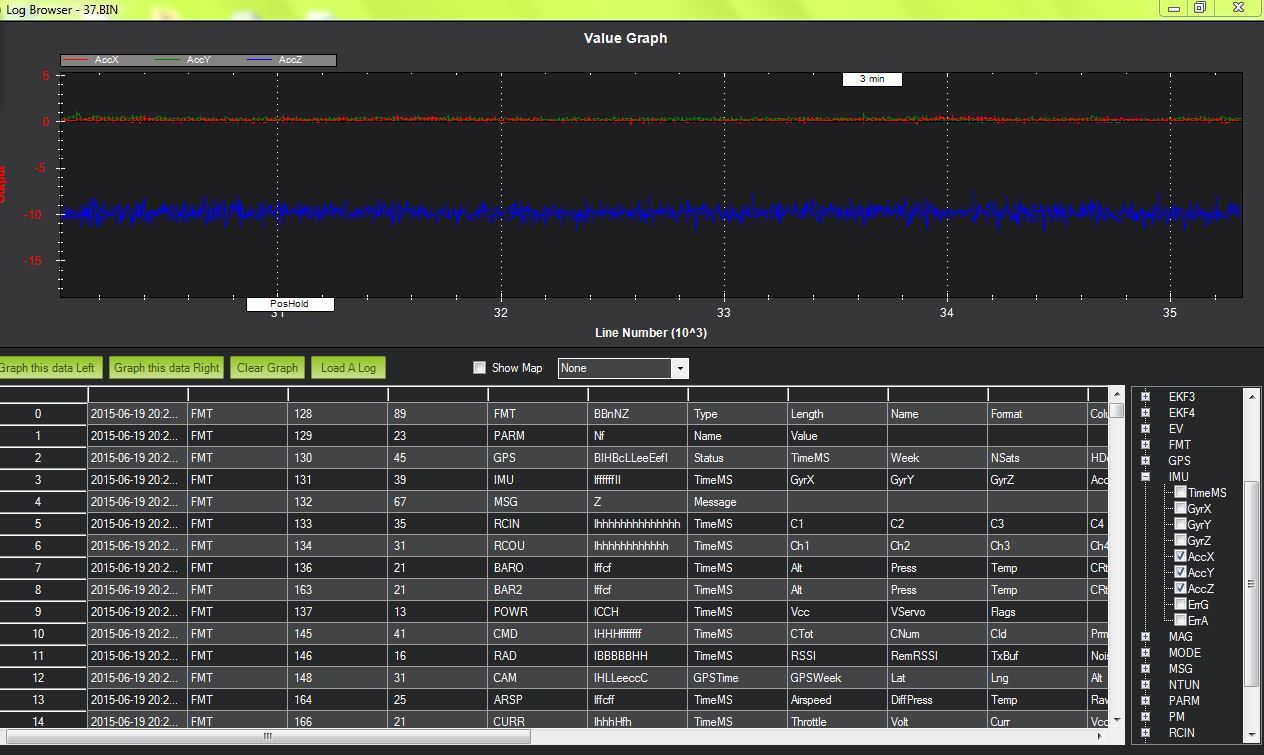
AUW: 2240g w/fpv setup
flight time: 20~25 (mins) mixed
This is is the FPV config. I will add pictures of the mapping setup later.


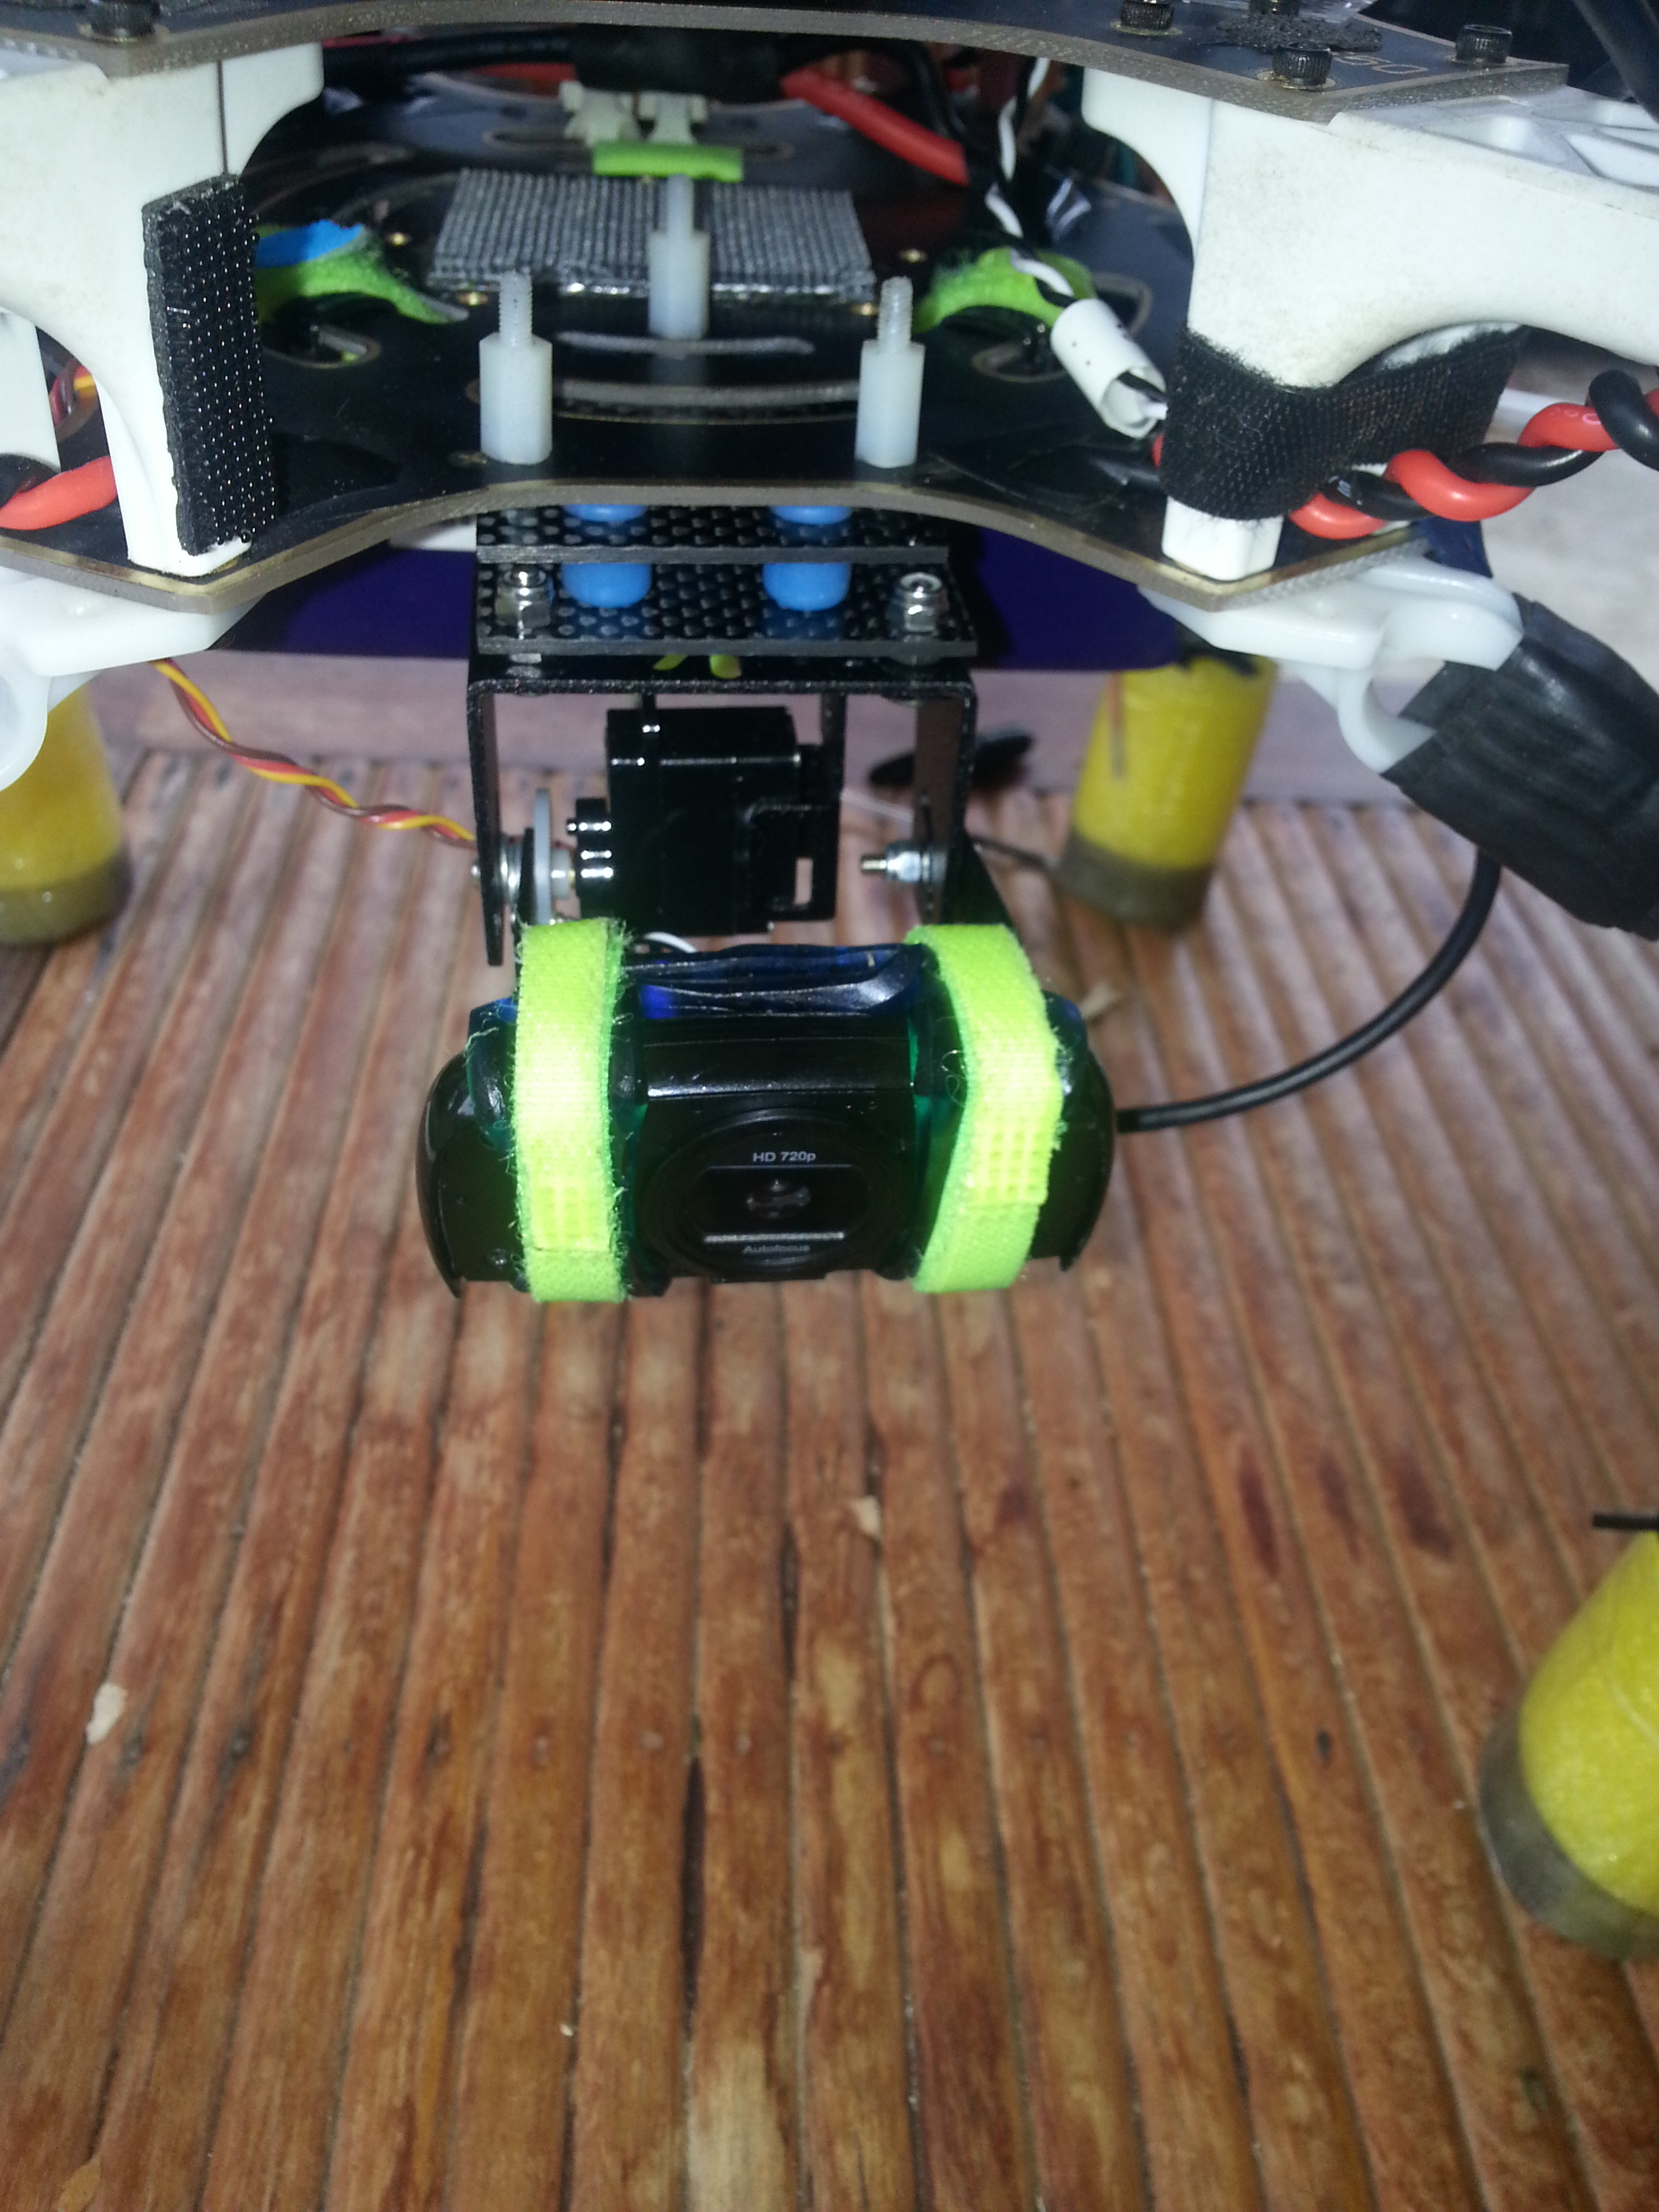
The camera tilt rig weights less then 100g total.
I am streaming via mjpg-streamer. It works really well. With a wrt54g flashed w/ dd-wrt & stock antennas The video is almost real time. I can barely see any lag. I can record the stream via vlc and view via http. Trying to view via vlc introduced a lot of lag.
The settings that produced the best results were 432x240 @ 24fps
The best thing about mjpg-streamer is the cpu usage on the pi, 1-3% max.
If anyone would like to know how I installed mjpg-streamer, I can post instructions.
here’s a couple snippets of streaming tests with the C525:
I am adding 2 x 2.4ghz 2 amp boosters (wrtt54g & hexa) and a 60 degree beam width 8dbi patch (wrt54g) in the next few days. Then I will have some distance to play with