Ya, those are the steps I tried. In another thread where I’m trying to figure out the throttle problem, it was mentioned to look at the ESC value in All Parameters. I looked there and it was set to 0, which means it would never go into calibration mode. I changed it to 1 (throttle up, restart) and also 2 (start in ESC calibration mode) and when I changed those, I was able to get into throttle calibration mode going through the Navio. It was interesting to me though that after I restarted after doing that, when the paramaters loaded again, the ESC parameter (I’m using Mission Planner) would be set to 0 again, disabling ESC calibration mode altogether.
Ok.
I used this ESC a long time ago, so is difficult to simulate.
But the calibration with HUB (or one by one) directly in throttle channel is completely independent from the Navio Board.
maybe … your radio in sending to high or too lot throttle response for your ESCs.
In this case ESCs still wait the end points…
What’s your radio? Frsky ?
The radio is a devo 7 (with is matching receiver) using a converter. I don’t think (correct me if I’m wrong) that it is a problem with the signal or the ESCs (after calibration, both directly and through the Navio, the motors speed is dependant on the throttle). It is only after I arm it that I see this issue.
My next step will be to verify that the correct flight modes are being used. I thought I have it set to standard but maybe I never wrote it to he controller? I’ll check that.
I am basing my build off of this one, however I feel that there is not much documentation for it other than the parts list and a few posts. Especially seeing it advertised on the main page. Would you be able to share more of the build including some pictures as to how you wired up the device. I see in the part list you have two batteries, but I dont see them in any of the pictures.
I am very new to this and really want to learn. I have and continue to do a lot of reading and I am very excited about this build. Thank you!
@KritixChoyce We will make a step-by-step tutorial for this build in the nearest future (but I can’t promise the exact date, sorry). At the moment, please feel free to ask any question here.
Hi, I’m building my first quadcopter based on this one. (I am however adding a thermal camera for some added functionality). If anyone could take a look at my current list of components and give some feedback on how well it would perform, that would be great (flight time, max speed, stability, quality of the components). I’ve tried using ecalc to make some predictions, and it gives me slightly dissappointing results.
Also, can I get away with not using any radio at all? Saves me the cost of an expensive controller. (I have plenty of experience with programming and networking.)
Drone without RC has been discussed many times here, pros and cons come down to how confident you are in your WiFi link. So that really depends on how far you normally intend to fly.
If you were just hovering around one house or on open land less likely to have dozens of WiFi hotspots then you could go really budget with a WiFi dongle, ground station with high gain WiFi antenna stuck in a laptop or an old router (with a replacement high gain antenna). But as you have no RC it would be critical to have failsafe set to RTL and a GPS lock before takeoff. Also if you are surveying buildings you need to set the RTL height (which it goes up to before returning to the home GPS position) higher than any building/tower you may be examining. There are so many YouTube videos of drones which suddenly fly into towers, trees or even cliff faces because they go into failsafe as they fly out of range/round the back and try to return through the object!
If it’s really just for backup/emergency, then you could get the dirtiest, cheapest transmitter and receiver. I think Hobby King have an Orange range which is super cheap (and maybe not so “dirty” either). However if you do decide to “invest” in a transmitter then it should really be something open source and upgradable like these Navio/APM things themselves, so then I’d personally recommend a Taranis X9D Plus.
Generally, the problem with trying to guess your budget (I too made a spreadsheet like yours when I started) is you can’t even guess all the tiny bits and pieces, tools and hardware you need to get everything working. Once you’ve built a drone or two you’ll find yourself with plenty of such items. Things get you could miss like servo cables, charger leads/boards, adapters, tape, higher power soldering iron/solder/flux, replacement connectors and pins, etc…
I too am planning to document my next Navio build soon. There’s another reason why it’d be useful sooner than later so I’ll try to remember you and update here soon…
I am trying to connect everything and I am at a total loss. I tried following the documentation on this website, but I feel like its very vague. I have a x8r receiver as well as a sbus to cppm adapter. I connected the adapter between the navio+ and the receiver. How does the receiver get power? through the adapter? My ESC’s have a BEC built in, and I removed the red wire on 3 of them. I connected those on 1-4 on the Navio+. I really want to build this, but I feel like the documentation is so sparse everywhere I look. There isnt much elsewhere on the Navio+ either. Someone please help, I am a newbie I really want to learn.
You simply need to connect your receiver to the s.bus side of the converter, and cppm from converter to Navio+ PPM input. If you have power present on your servo rail, and if you have connected an ESC with BEC there it should be powered, everything should work.
If you are having issues with this step, please post pictures and detailed description in a separate thread and we will help you.
I am having a hard time getting my device to RPi to connect to my GCS over wifi. I guess I am not sure how else to do it. I bought the GPS antenna with my navio+, but I don’t see anything that shows how it would connect. So I guess I would connect over wifi. I feel like I am asking a lot of dumb questions, and its frustrating because I usually am able to figure things out on my own. I use google, but there is no where else to go for a navio+ setup other than here. I feel like the site claims that its very beginner friendly but I feel l like there is a lot of info left out or maybe the assumption was made that everyone would know.
One thing I don’t understand is that the port number in the command to start the APM is 14550, however on my GCS software, APM Planner, there is no choice for 14450, i am not sure how to make the software recognize my RPi.
update*
I got connected. However, I am still concerned its not operating properly. If i start the APM on my RPi with the command:
sudo ArduCopter-quad -B udp:192.168.1.8:14550
the APM starts, says ready to fly and starts generating a bunch of characters on the screen. randomly it will state PreArm: RC not calibrated and WILL NOT connect to the Mission Planner.
However, If i start the APM with the command
sudo ArduCopter-quad -A udp:192.168.1.8:14450
it never shows that it is started/running, however I CAN connect to Mission Planner.
I don’t understand why this is. Also, if I go through some of the calibration steps in Mission Planner, and then disconnect, when I reconnect it seems as though I have to go through them again.
Is this true?
I also have my RPi connected to my laptop via USB. Where as before when I was trying to connect I wasn’t. However, both my RPi and my laptop are both connected to the same WiFi network.
I appreciate the point in that direction however I have been to that page and I am reading through it. I just feel like when it comes to using the Navio+ I don’t know how it will apply because it just talks about the Pixhawk… Like for instance. Calibrating the compass. The navio+ is an APM with an onboard compass, right?
I think you got some things messed up here.
GPS antenna connection has nothing to do with Wifi or GCS software. It is a hardware connection on the Navio+ board.
Option -B is used for external GPS modules connected to USB or UART.
For telemetry you should use option -A or -C.
If you see output on the monitor connected to the Rpi or on the ssh console, it means you specified a wrong/no telemetry output and APM is using stdout.
Everything you should see, if you start APM with correct options is a message about the hardware APM is running on.
APMPlanner is listening for UDP on port 14550 per default, no need to do anything. Just keep in mind, you need to specify the GCS IP not the RPi IP address. Like so:
sudo Arducopter-quad -A udp:GCSIP:14550
You can not connect to the RPi via USB. It is USB host only and the Micro-USB connector is only used to power the RPi.
Navio+ is an IMU shield for the RPi, it provides the sensors for the APM firmware, which is running as an executable on the RPi.
A navio makes a raspberry pi a pixhawk. So everything in the arducopter documentation referring to pixhawk applies to the navio as well. If there is a difference or additional options, such as telemetry via udp, or turning off the board voltage failsafe, etc, it’s covered in the navio docs. They are meant to be used in conjunction.
If this is your 1st build, I highly suggest you build up a little foundation, you will be less frustrated and things will make more sense.
I am testing a setup very similar but I’m having problems with vibration. I think my problem is my engines and propellers.
When I select altitude hold the quad accelerates to full power. My GPS support was broken for this reason when my quad shot in the air and hit a power cable.
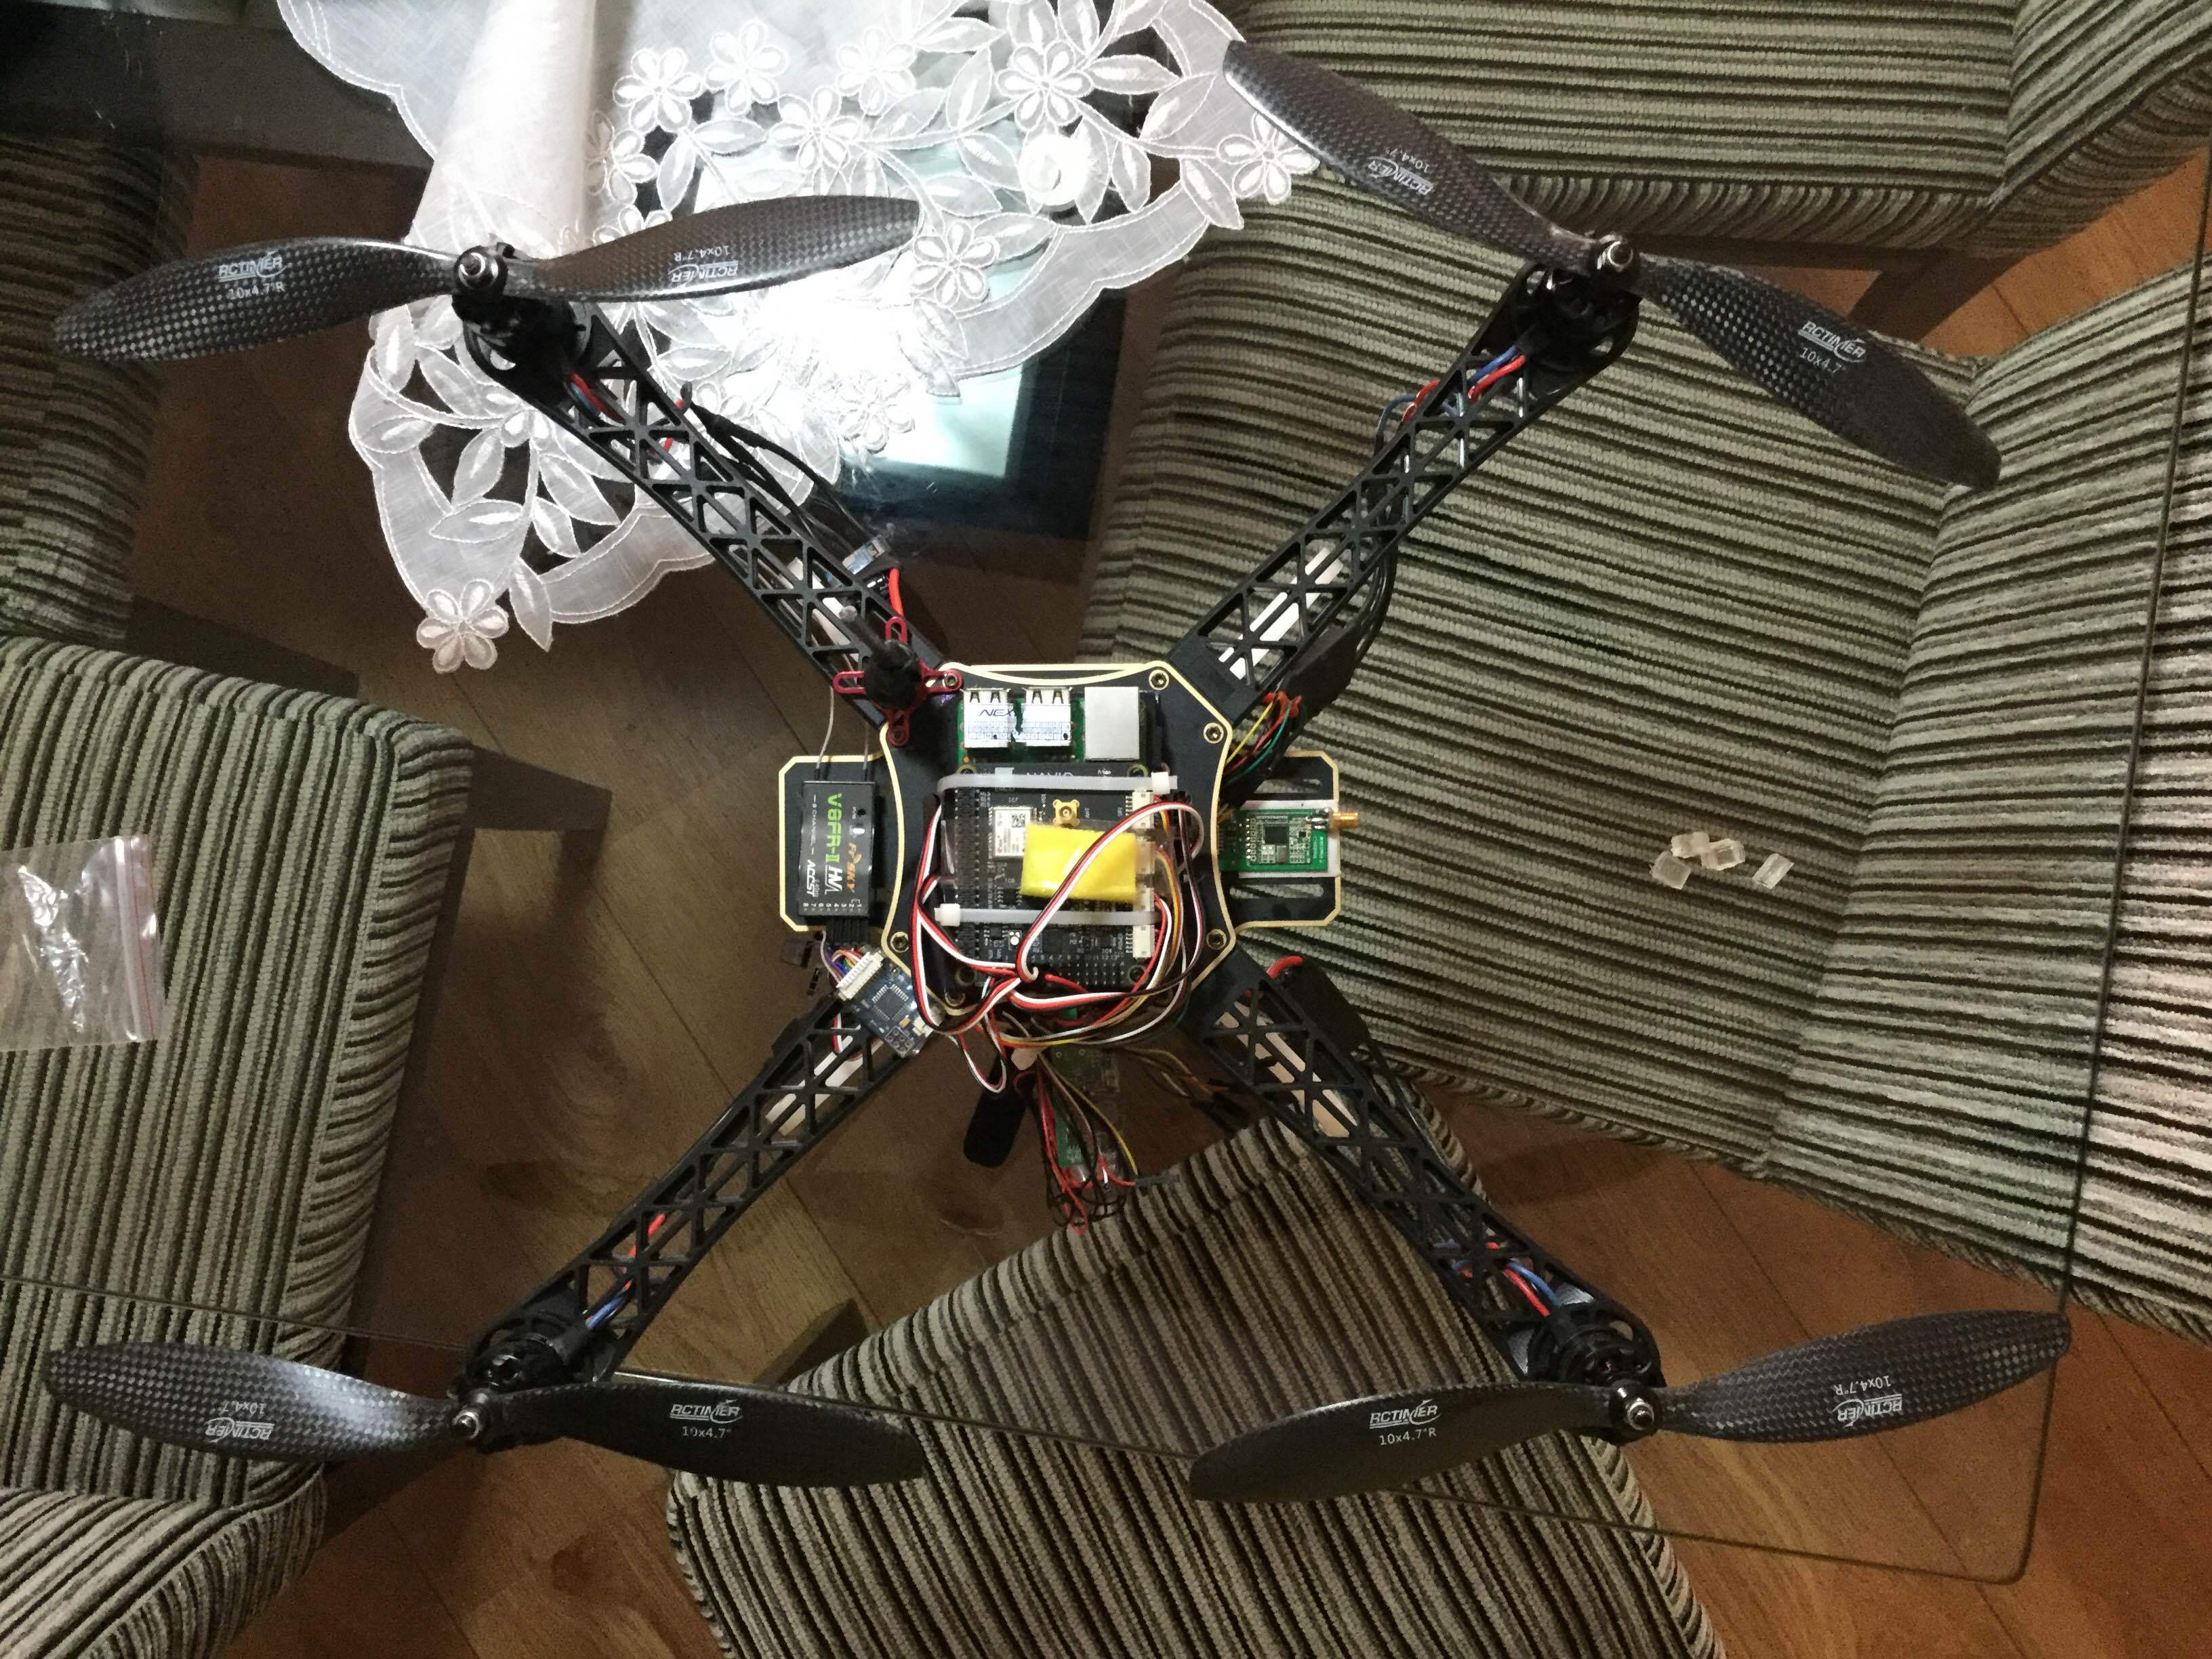
Thanks for the tips! I’ve had these problems in the past. I use silicone to isolate the vibration. You can see small squares of silicone on the right side of the photo. The lack of balance (motors and propellers) is very disturbing. I do not have the right tools to do this right now. I will transfer all the electronics for my Tarot 650 quad. He is already balanced.