It is necessary to provide following information to get help:
Firmware V1.2
ReachView version: v0.4.9
I have Rover reach connected to Serial4/5 on Pixhawk that also has 3DR radio connected via 6 pin connection to telemetry. Base is connected to the matching 3DR radio via provided OTG USB. They link up and it looks like they are communicating since the red LEDs are both blinking.
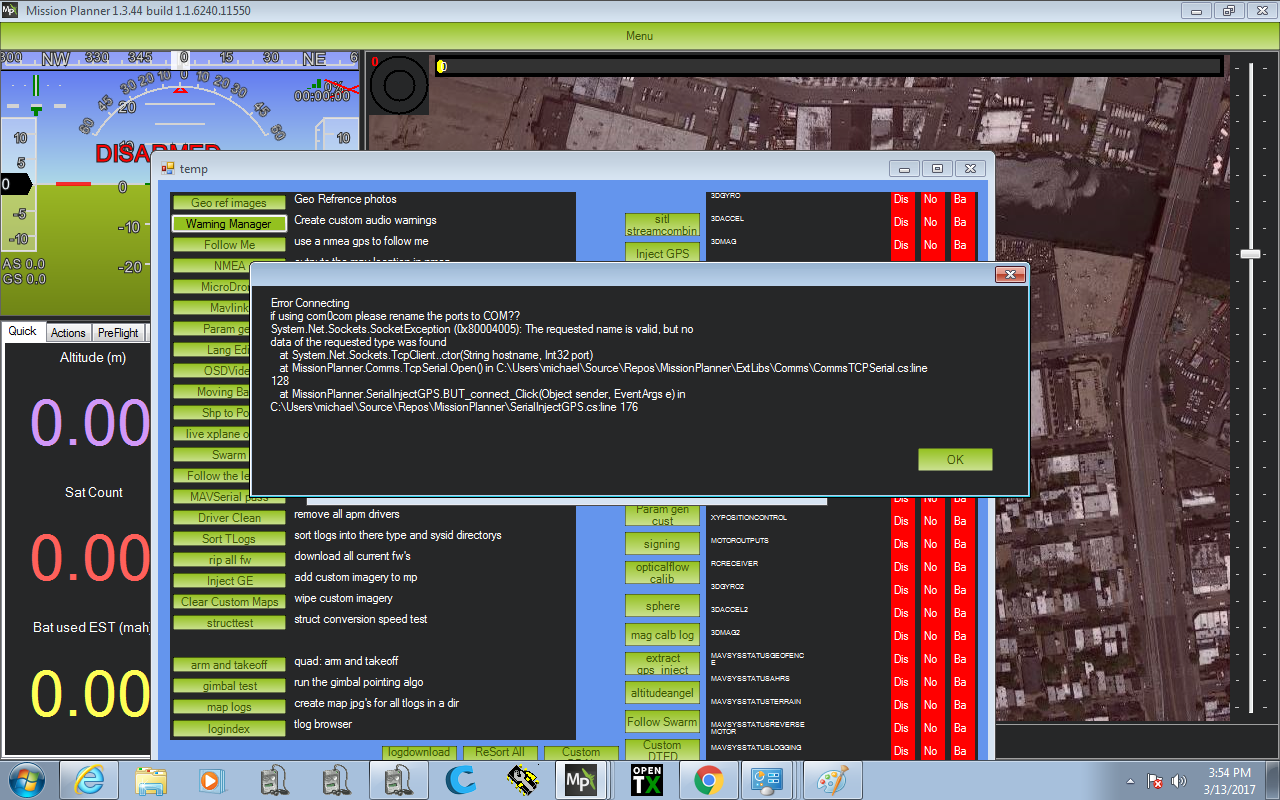
I connect my PC to base reach and open mission planner. Without connecting the main Mission Planner app, I open the ctrl/F menu and hit Inject GPS. I put in reach:97:8a (base) and 5000 for the port and I get the following error message:
It looks like the connection is established, but there is no data. Is that the case?
How can I troubleshoot from here?
I am generally not sure how to set up the GCS with WiFi base and find out if there is communication happening.
What are the settings on your base device?
Do you have the radio connected directly to the base Reach? If so, then read through our ArduPilot integration docs, especially the recommended setup part.
If you have more questions after reading this, don’t hesitate to post more questions here.
Also, I would recommend trying our new beta. We are working on documentation for it.
Thanks for a quick response! You guys are awesome.
So I have the radio connected to Base Reach directly via USB OTG cable provided. Base radio has a full size USB plug.
Output format is rtcm3 and I have 6 messages for output just like in the link above.
I have the lat, long and height of my location approximated from google maps. (Sorry I don’t have screengrabs with me today).
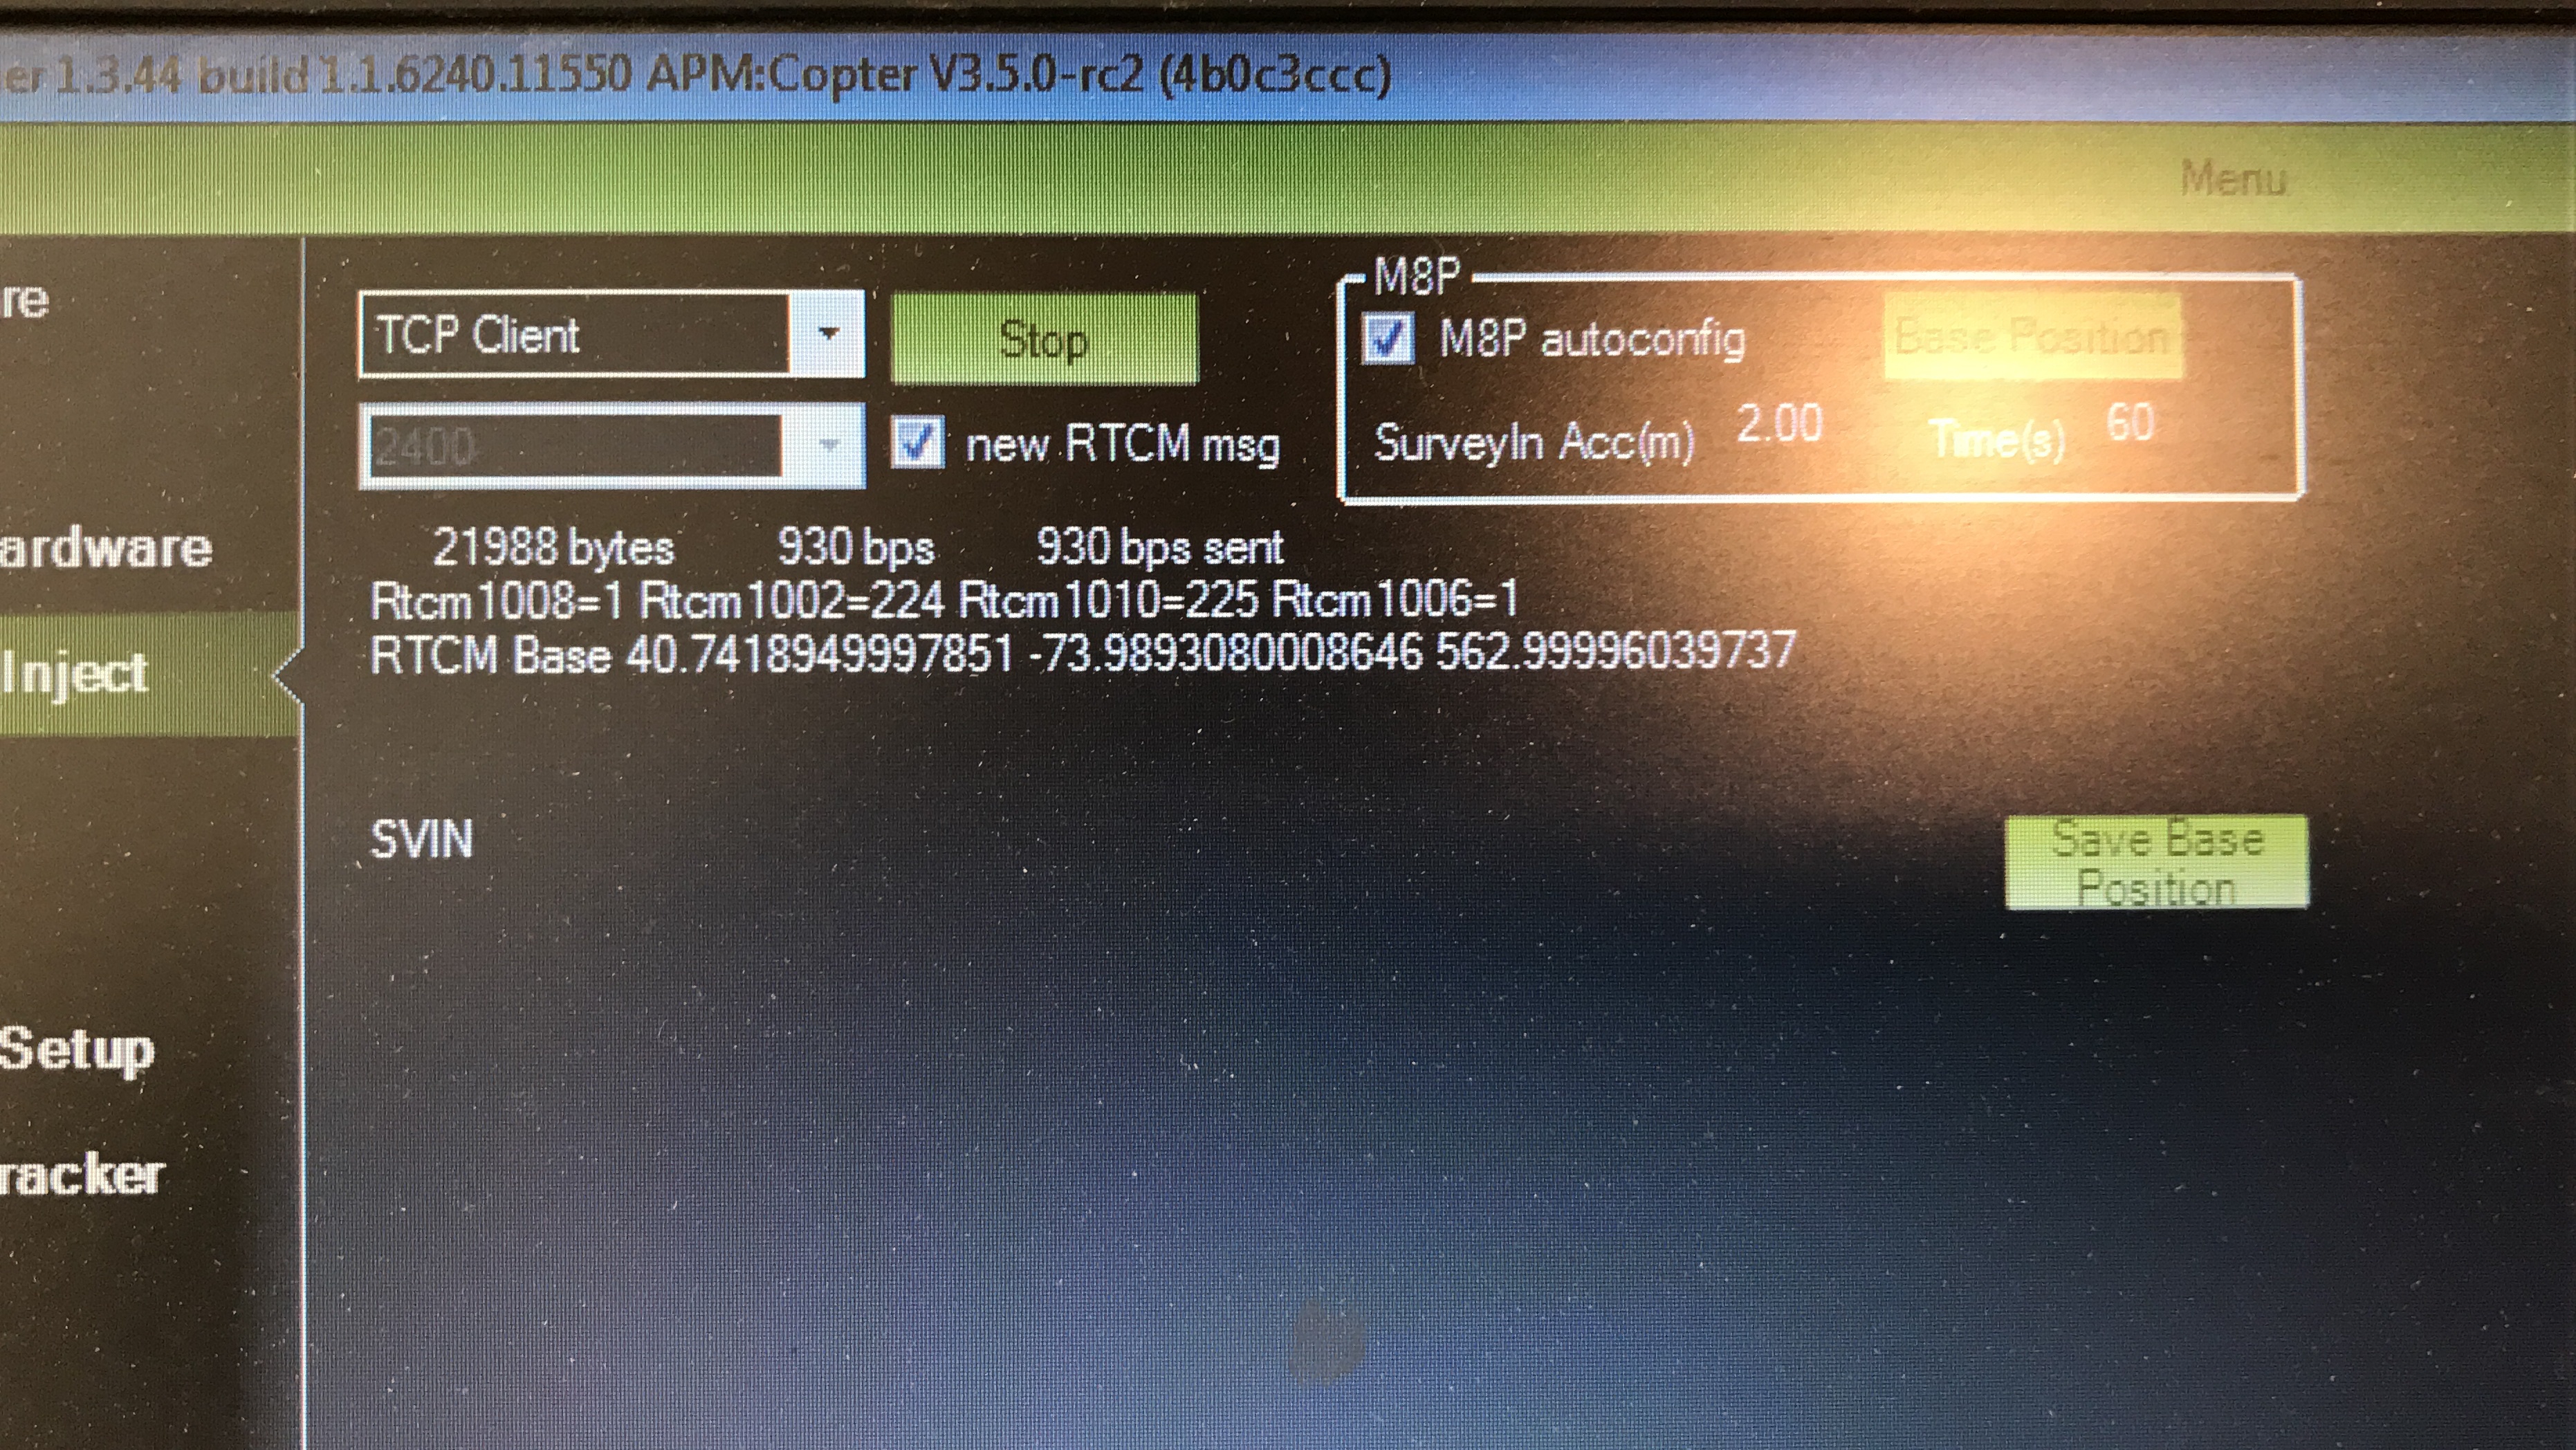
My laptop is connected to the Base Reach WiFi and I choose TCP Client to inject GPS data. For name/IP I put reach:97:8a (my base) and port 9000. Testing with both setups outside with satellite view. This gives me the message that I posted previously.
Rover
Rover is set up the same way you have laid out here - ArduPilot Integration | RTK Modules
Reach is connected to Pixhawks serial 4/5 port and radio is connected to telemetry 1 via a 6 pin cable (RX/TX wires back to normal and communication tested directly to laptop running Mission Planner).
reach_kinematic_default.conf
Select Serial
Choose UART as the serial device
38400 baud rate
RTCM3 as base corrections format
ERB as solution output format for Solution 1 (UART 38400 as well)
Radios
have the same settings and Raw Data selected as well as ECC checked off. Mission Planner
all settings exactly as noted in documentation.
What was tested so far:
I get both color and gray bars on Rover status screen when Rover and Base are communicating directly over the radios. Base reach with USB OTG and rover reach with UART connected radio directly. (RX/TX swapped on UART cable). This was confirmed serial communication by turning off the WiFi on Base and still getting gray bars.
NOTE: This only worked at 57600 baud rate.
It also works directly over WiFi of course.
Looks like the bottleneck is the Pixhawk (running 3.45 firmware) as this is where communication stops.
It seems that your radios are configured to work at 57600. What is the baud rate for autopilot telemetry? If it works, then probably 57600. Try configuring rover to accept the corrections at 57600 too.
I tried different baud rates for rover and base 57600, 115200 etc. didn’t work.
My Pixhawk telemetry is set up to work at 57600 (3DR Radio default).
Should I try changing that to 38400 on Pixhawk and change radios to 38400?
I wonder if you heard of this issue with Pixhawk before?
So I was able to make it work (I can see the numbers changing on the injection screen.
I tried a few things, but one of these two made it work and I believe it’s the later one.
First I changed everything to baud rate 38400 - the serial port (4/5) on Pixhawk, radios and Reach Rover.
Then instead of the name in MissionPlanner GPS injection screen (reachbase:97:8a) I entered the IP 192.168.42.1 and it started getting the data in.
Then I reversed everything to 57600 baud rate and it was still working. So I wonder if it was only the IP address instead of the name that did it?
Quick question about getting regular telemetry in Mission planner this way.
So I am connected to reach base access point and receiving data in the GPS injection window, however I can’t connect the main Mission Planner app to get the rest of the telemetry. I’ve tried UDP, TCP, and all of the IP’s and ports to no avail.
Is your telemetry radio connected to your laptop or is it still connected using the OTG cable to the basestation Reach?
I typically connect the base station to the laptop using USB and communicate with it using Ethernet over USB (IP 192 168.2.15).
I connect MP to the serial port of the attached telemetry radio to communicate with the Pixhawk. I also connect MP to the Base Reach using the TCP/IP connection. MP will wrap the RTCM3 messages in Mavlink messages and route it through the normal telemetry with the Pixhawk to the Rover Reach.
In summary, remove the telemetry radio from the Reach and attach it directly to the laptop.
It worked!!!
Thank you for your instructions.
Even with the extensive documentation that Emlid provided this was a setup I would have never thought of myself.
Now it did take me awhile to make it work because of the windows driver for ethernet over USB. I followed the instructions from the documentation, but it still took a LOT of time to set up. It’s Windows fault though not Emlids.
Anyways, it’s working and pulling in both telemetry and RTK.