Ok, I just purchased a Emlid Edge and worked yesterday on setting it up and had these issues:
1: Followed the onscreen documents on installing Firmware on a Windows 10 computer: Got through the firmware install just fine, but in the onscreen instructions one is to then download RpiBoot and then Etcher. It was very unclear what and were RpiBoot was to be installed and there is no way the Etcher could find an “image” with which to install?
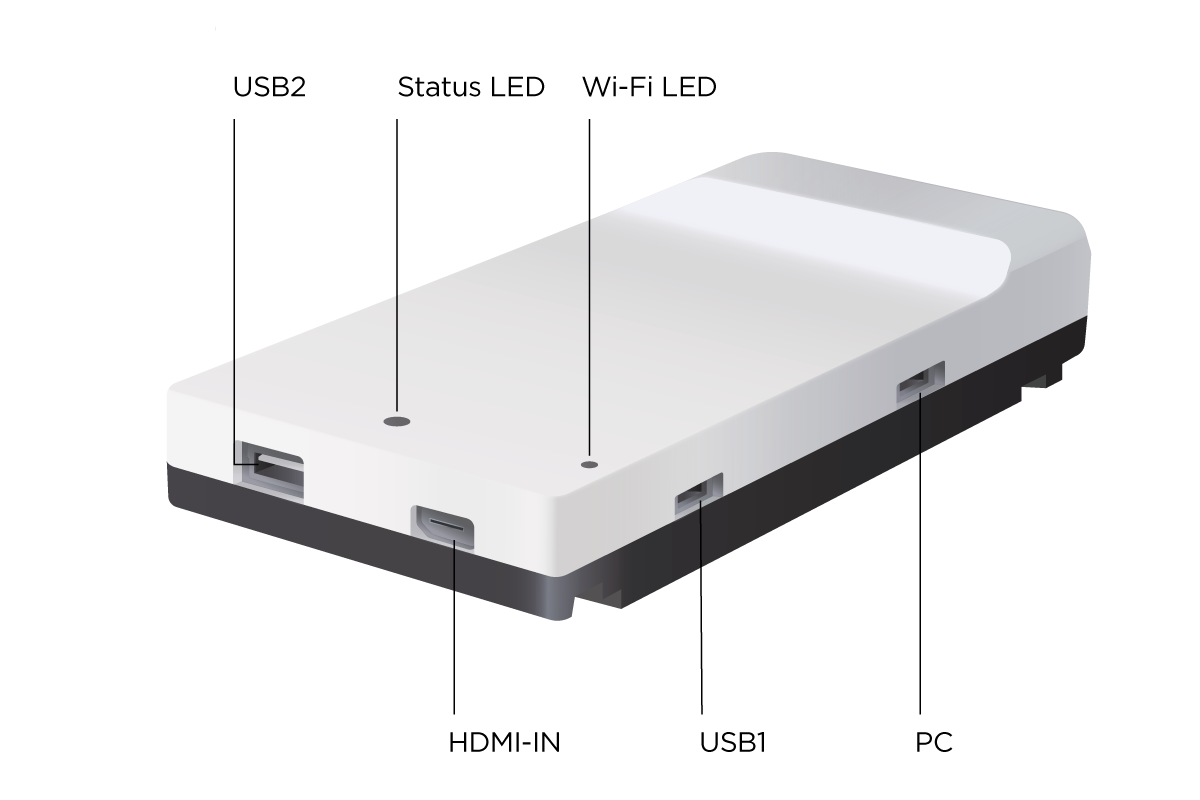
2: Then I went to the QuickStart Guide to set up the Wifi. The Quick Start Guide says to “Plug Micro-USB connector into Micro-USB port of the Wi-Fi module.” Well the in the 2 Wifi modules I received there is no Micro USB port on them, it is a USB-3 connection and even in the sales image on the Emlid site it shows them as USB-3 ports.
3. I don’t understand why I have to use the Wifi modules to set up the Edge in QGroundControl. QGroundControl keeps asking for the Edge to be connected. But there is no function (like in Mission Planner) with which to connect it.
RpiBoot install drivers needed for the PC to see Edge as an external disk. Etcher may work to update firmware (it work fine on Mac and also with Linux).
QGroundControl has an option to update Edge firmware.
Edge firmware (version 1.3) is factory installed, so no need to do it now.
With the Edge kit you have a cable with mini usb plug on one side and a white plug. White end is plugged in Edge USB2, mini USB go in the mini usb part of the USB3 plug of the Wifi module.
As @mlebret stated, RpiBoot is used to identify the Raspberry Pi in the FC when it is plugged into your computer via the Micro USB port labelled “PC”. Having installed the driver with RPiBoot, you can use Etcher to update the firmware on the RPi - it serves no other function.
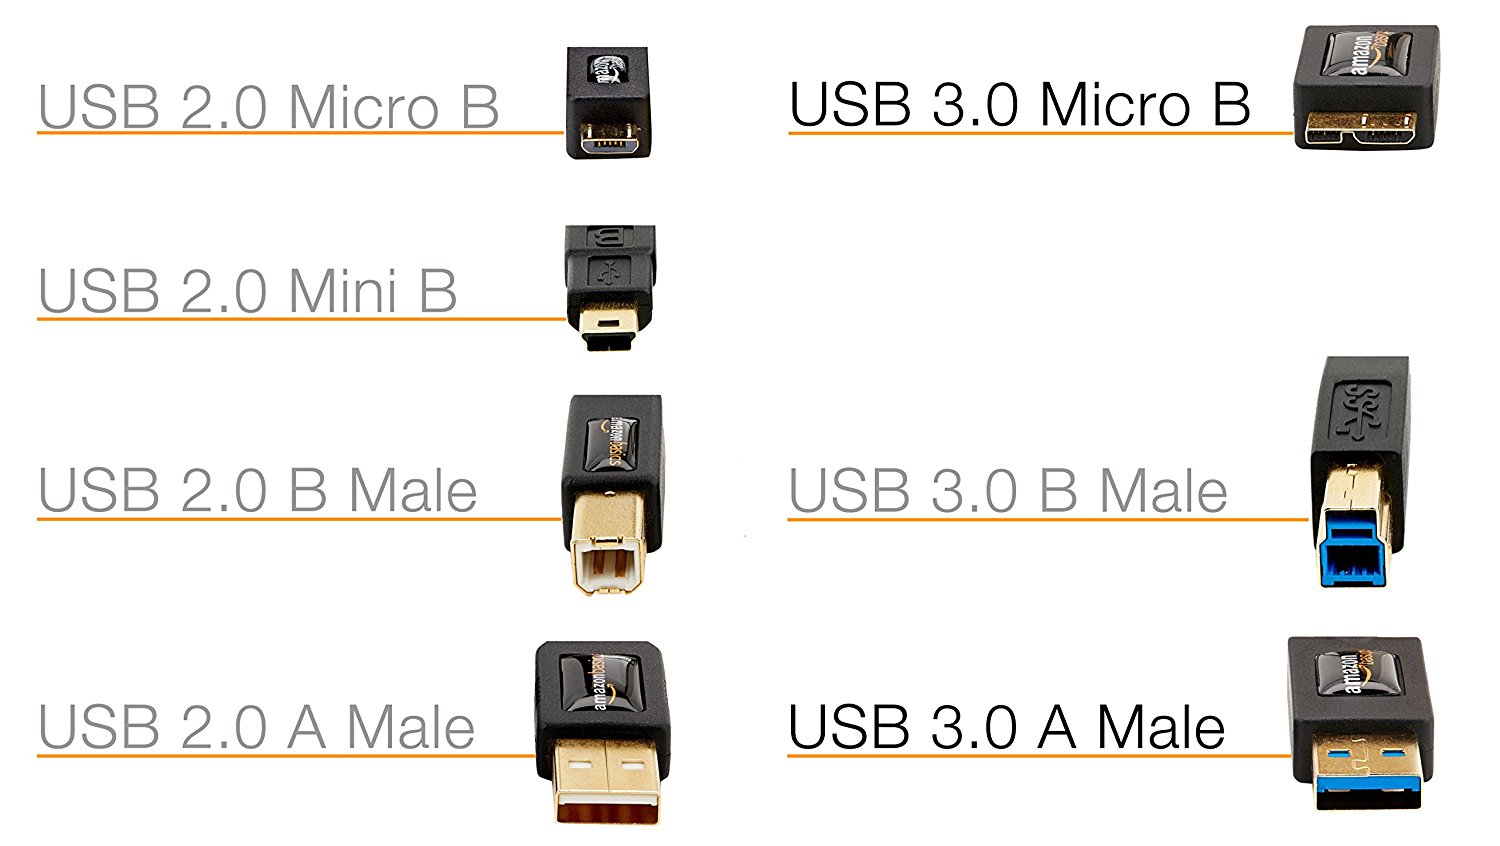
The USB 3 cable that comes with the units is a USB 3 Micro Type B. If you look closely, you will find it is backwards compatible with USB 2.0 Micro Type B cables by using only part of the connector. So either use the full size USB 3 Micro cables provided or a standard USB 2.0 Micro cable. I have already checked with the Emlid guys that there should be no performance degradation using the lower standard USB 2.0 cables.
I’ve also clarified this with the Emlid team already - there is no way to connect the Edge directly via USB to a computer and run connections like in Mission Planner. Annoying, yes - but the WiFi modules do work well. I tend to favour my laptops integrated WiFi and only use the reciever module when doing anything long range. There are some janky work-arounds for direct connection, but for the most part you need to follow the docs and set up the WiFi modules to communicate between your computer and Edge unit.
I found it very simple and informative, just make sure you follow it word for word so you don’t miss anything. I’d also recommend selecting “Auto Connect” as telemetry begins feeding through QGC as soon as the WiFi network has been connected to - no drop menus and connection settings required like in MP.