This project shows how we helped with official approval for the construction of a new dairy barn. Then we helped lay it out on site according to the plans.
-
Purchase propery information. CAD
-
Fly the site with a drone and survey gcp’s in very cold weather. - 20 Celcius
-
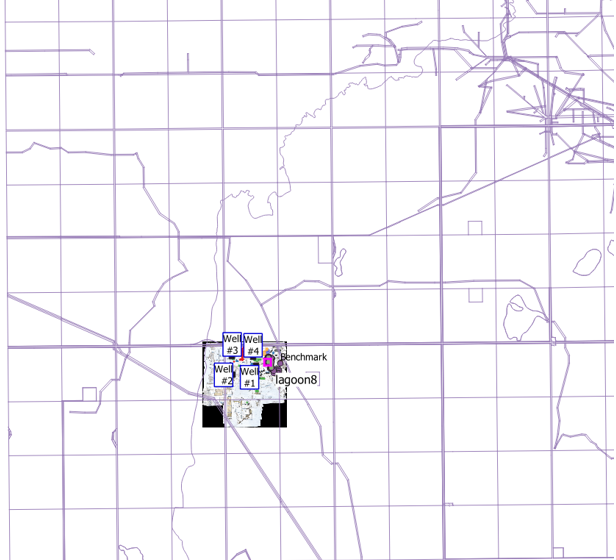
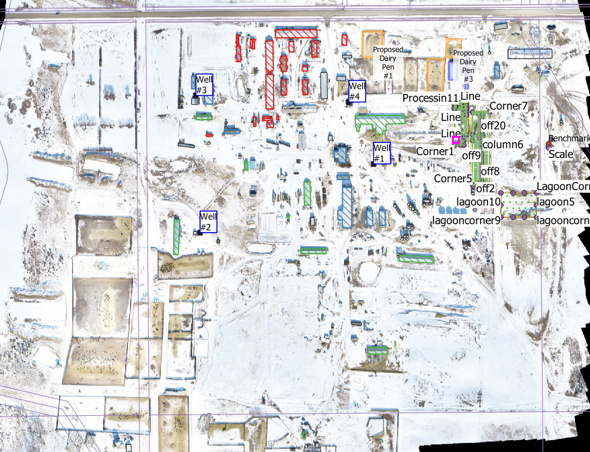
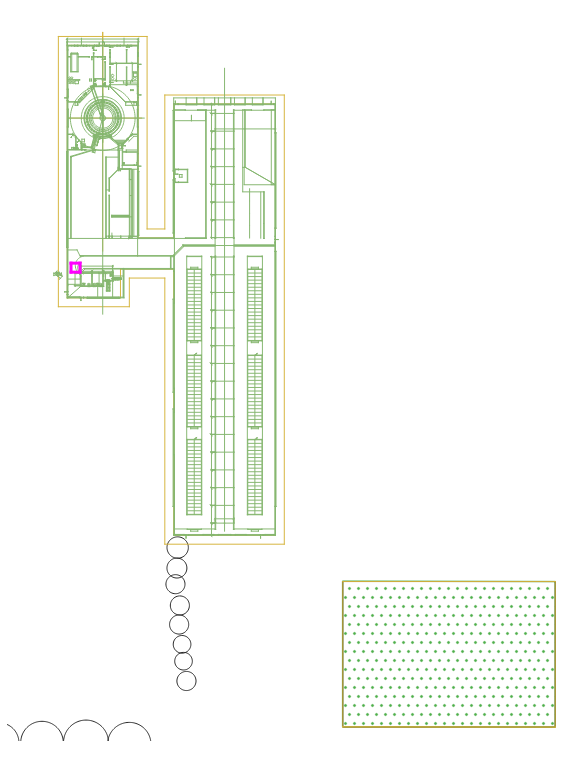
Document all the buildings on the site using Emlid to drive around and save the description in the points. It is a rural agricultural community (colony) so there were lots of buildings.
-
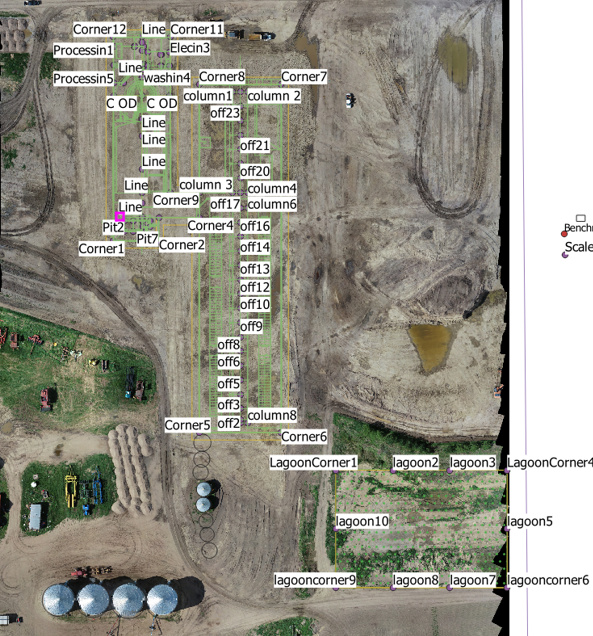
Georeference the proposed building CAD file using Revit. Survey and all the programs are in UTM 12N. If you look closely at my screenshots, you’ll see some discrepancies.

-
Determine elevations using the DEM.
6. Interpolate points from the existing linework using QGIS.
7. Export points to .csv file.
8. Import .csv file into Reachview 3.
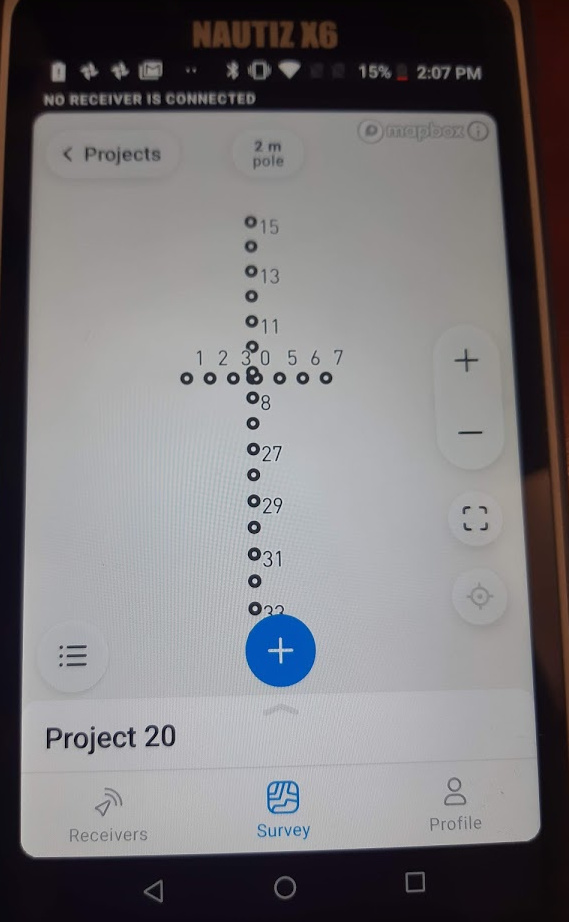
I’m gonna focus on points #6, #7, and #8
Aerial surveys at different seasons. GCP’s and Emlid Reachview 3 were used for all of these.

6. After the linework is all in QGIS, how do we get it into Reachview 3 to lay it out?
a) Overview
b) Select the line or lines you want to lay out.
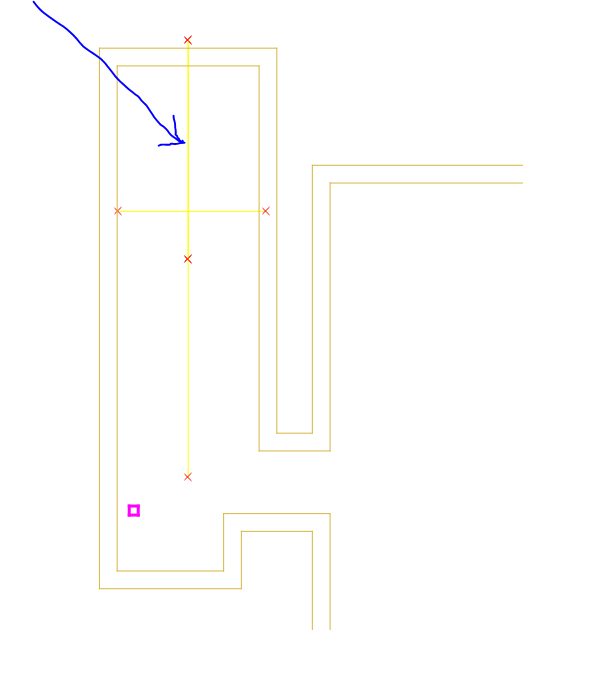
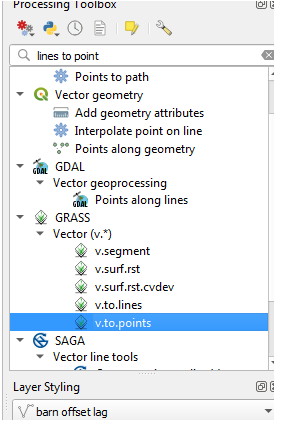
c.)In your QGIS toolbox, select v.to points. This will convert vector layers to points.
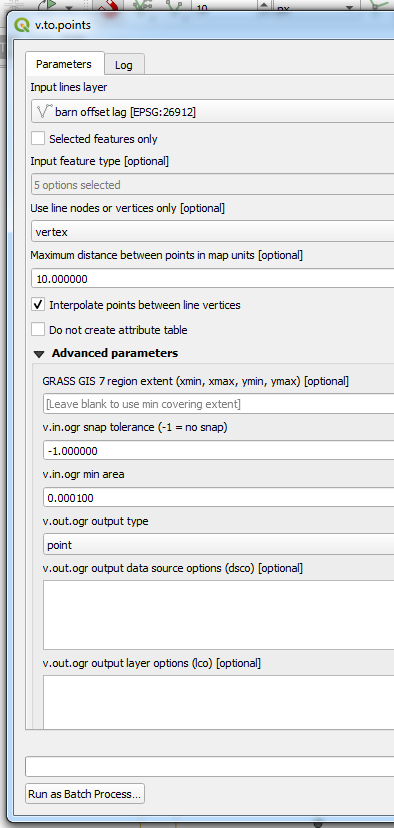
d.) Choose to convert either all the lines or just ones you have selected. Choose to interpolate between points and how far apart they should be if you want to lay out points along a line. Otherwise it will just do one point at each end of each line. Be sure you select “Points” as output type. Run.
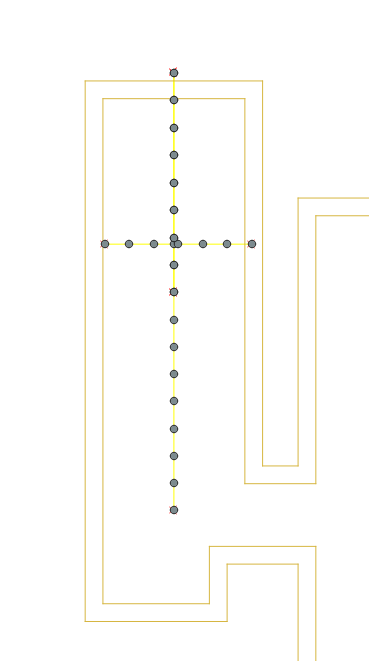
e.) After running, you will see something like this, points along the line and on each end. It will be it’s own layer.
7.) Export the layer to a .csv files.
a) You should have one field selected for a name and then enable “create geometry.” you should have a “z” or “elevation” field even if you’re not using it.
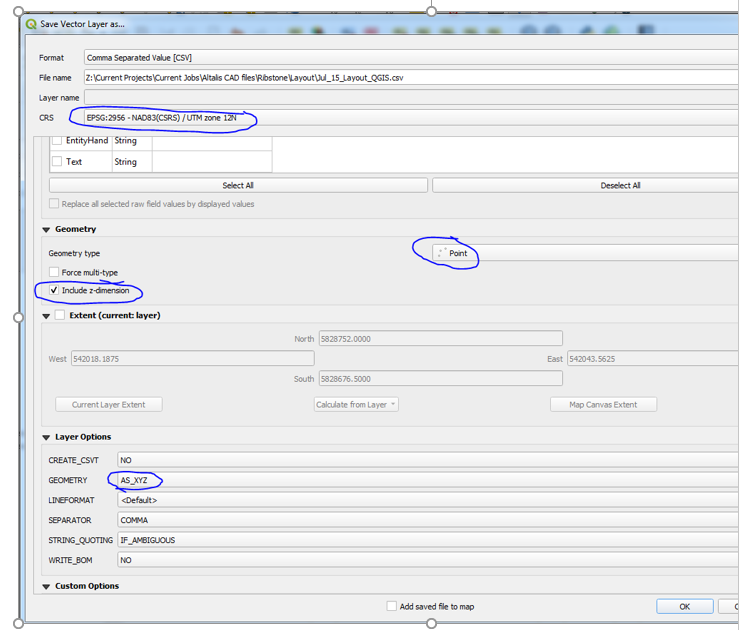
Enable Point type, include z-dimension, and Geometry. I used AS_XYZ. This will create a file that opens like this.
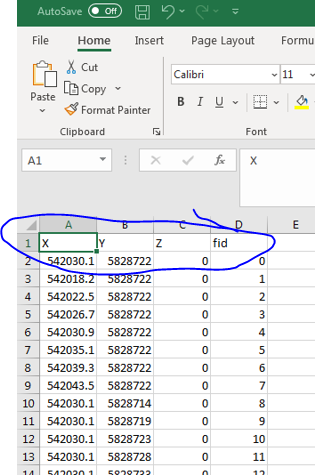
b.) Open it in Excel. It will look like this.
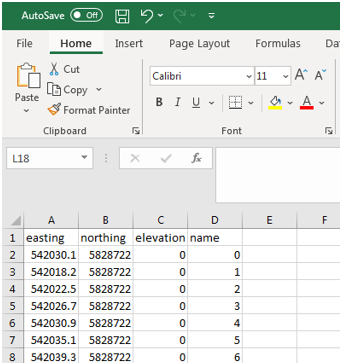
c. Change the XYZ and name field to the following. Close and save to Dropbox, for example.
- From your mobile device, create a new job in Reachview. Import the new points!
Get to work!