I am currently working on an autonomous drone for school.
I currently have my Navio2 mounted on my pi.
I am able to connect to my Navio/Pi through udp and I am able to see GPS, and IMU data sent to Mission planner on my windows machine.
I was able to get SITL to run on my Linux machine (separate device) and run a basic mission with QCGroundControl.
My question is am I able to do something similar where I can test the Navio using SITL/HITL?
Will this prove to have any benefits?
How does one go about running missions once the drone is complete from the GCS?
I am extremely new to all of this, and my Network protocol knowledge isn’t great (for connecting to the GCS from the drone).
I a sorry if this is confusing at all.
Hi Michael,
can’t answer all of your question but at least some.
Re. network communication: UDP is designed for telemetry transfer from a remote, and most likely moving object. (Drone, plane, helicopter,rocket,…).
You can think of it as a one way street (with some foot-traffic going the other way). The data is mostly just sent from the remote object without any confirmation if it has been received or not. This is different to all other data communication as usual the receiver has to confirm each data package as being received and if not a request has to be sent back to repeat last data package in order to ensure a full and correct data stream. Whilst it is possible to sent some signal back to remote device, there is no certainty if it was really successful or not. Hence not a good idea to use UDP for controlling a remote device.
If you want to control a device with your Base Station I would recommend using TCP as this is a more regular form of communication and ensures correct data streaming both ways. (Two way street)
This brings us to your next question: Usually a mission is created first in your Base (Ground) station. You can do that easily in MP or QGroundcontrol by using the “Plan” tab on top and following the instruction found online for each Ground-Station.
Once ready ( make sure you’ve double checked your flight height compared to ground level) the file will be uploaded to remote device. Then all you have to do is start the “Auto” function either via the GS or using a switch on you RC transmitter. This makes independent (auto) flying much safer as no live data transmission is needed to carry out the auto flight.
But it is still possible to sent signals to override the auto function. I.e. if you discover a problem with the GPS sending the drone of course you can fly it back manually. Also for those wanting to use a drone for filming / camera work, it is possible to control camera from your GS whilst auto or manual flight is in progress. This allows for a single person operator to achieve good video/picture shots without the need having a dedicated person available.
Hope this helps…
So let me check my understanding.
I understand UDP and TCP.
I think my disconnect was running the actual missions.
From what you’re saying the missions are set up on the GCS and the drone flys them accordingly?
So if I want to run a python script to utilize drone kit and complete a flight autonomously that script is on the drone?
So there is no way to check if the drone is setup correctly with out actually flying it?
what do you mean by " I think my disconnect was running the actual missions" ?
Not sure what you are trying to say with that.
The GCS will allow you to create an auto mission. This is then sent to drone prior to mission starting. I.e. you can upload it a day or even a month before the actual flight or you can sent it just a few seconds prior to flight. It is one file with details inside and once the auto mission is started, no matter if by RC or by clicking the “Auto” button within GCS the mission will start. But it can be interrupted at any time if needed. - Provided you have a working live connection.
The only check there is in regards to your mission is an optional check for things like mission flight height compared to actual ground height (usually taken from google maps). Or you can check the distance of mission in order to ensure your battery lasts that long. As it is optional it is up to you to ensure everything is correct prior to starting an auto mission. --> To use that function you need to be on the “Plan” tab in MP and then right click on map and it will give you some “Map Tool” options. Also an active internet connection is required to get the elevation graph data.
The next auto mission you upload will override the existing one on your drone. But if not deleted it could stay there for a long time and can be repeated as many times as you like.
You can also save mission files on your computer and then upload when required. So you could have one for example called “Fly around lake” and another one called “Fly over lake”. If you then want it to fly around the lake just upload that mission.
In regards to python scripts I can’t really help you much with that. My understanding is you can either have it on the Rpi directly and then just run it by remotely starting it or you can sent it from your computer directly without using a GCS software. But this requires a live connection and there is the risk that if connection is lost to your drone you will also loose control over it.
Hence having the mission file uploaded completely is a much safer way.
Thank you for your depth of knowledge, it has been really helpful.
What I mean by my disconnect was I did not understand how to actually run a mission.
I was wanting to be able to run a mission from a python script and see the data sent back to the GCS.
From my understanding so far, I belive I can connect to the navio with the GCS through telemetry radio antenna (/AMA0) and connect the navio to the pi via localhost (127.0.0.1). Does this sound correct? I have not tested this theory yet (still waiting on telem antenna).
I was really trying to connect to the GCS and the pi both through UDP but it wasn’t working I (TELEM1 = localhost , TELEM2 = pi ip address ). Because I wanted to try and run a basic script but all I have is the pi board and the navio board.
Hi Michael,
sorry missed that remark in your last message. Was simply looking at it from a technical point and didn’t make that connection.
You don’t need a telemetry antenna. The Rpi has got WiFI build in. As long as you in reach of a Router you can connect to your drone in that way. - May not be the best for flying as you may be away from home for that, but certainly for testing data link, uploading missions and downloading flight logs certainly very useful.
But you have to keep in mind: When using UDP you must use the IP address of your GCS. Howver, When using TCP you have to enter the IP from your drone instead. - You do this in the GCS within the connection tap but make sure you also select a suitable port.
I.e. in the RPi config file you might say “TELEM1-TCP:0.0.0.0:1400” This will allow the RPi to listen on all IP’s using the 1400 port.
So all you have to do is check the IP of your RPi and then enter that value together with the port number in your GCS software and then just click connect.
…have fun…
Ok that makes more sense now.
I was running into the problem of whenever I would set my TELEM1 to the IP address of my GCS I would get no heart beat/no response from the drone. But if I switched it to the localhost IP I would get a heart bet yet I would not be able to see any data feedback on the gcs.
All of this was done while SSH into the pi.
Even if I set my TELEM1 to listen to local then TELEM2 to listen to the GCS it would only ever recognize the GCS.
Am I misunderstanding how this works or are you only able to connect to one other IP address while SSH into the drone?
My goal is to simply talk to the pi/navio, receive a heartbeat and see data on the GCS (attitude, alttitude, etc)
Yes, you certainly can SSH into the Rpi whilst still having telemetry coming across TCP or UDP at the same time.
The SSH is into RPi directly - in essence you’re talking to the operating system of the Rpi.
Whilst the the telemetry link is provided by Arducopter firmware in conjunction with the Navio board. (It is then also channeled through the RPi in order to make use of the communication system regardless if WiFi, USB (the wireless telemetry kit or a 4G dongle, …just as some examples) or even the LAN port.)
Let’s connect it to your GCS:
-SSH into your Navio/Rpi.
-Enter and execute “sudo nano /etc/default/arducopter”
-Make sure one of the entries is: “TELEM1=”-A tcp:0.0.0.0:14000"
(…change that last number to something that’s just for you in order to be more secure)
-Place “#” in front of the other “TELEM” lines
( this is so we don’t get a clash with other IP settings & protocols. You can play around with it later once the first link is working well)
Save those settings and reboot RPi.
(The reason why we do that is that sometimes new settings won’t work until a reboot is carried out)
Once again SSH into RPi
Enter and execute “ifconfig”
Look through the listing and find the section " wlan0"
In the second line of that section it should show you “inet” followed by an IP address. - take not of this IP address
Start MP
At the top right hand side it gives you a dropdown menu - select “TCP”
Next to that is a dropdown menu with connection speed settings - select “115000”
Click “CONNECT”
A menu will pop up asking you for the IP address - Enter the one you have just seen on the RPi - click “OK”
Another window pops up asking you for the port number ( this is the one I recommended to change for security reasons) - click “OK”
Within a few seconds it should connect to your drone and retrieve and display all available data.
I really appreciate the detailed description ( and also your patience ).
So I was able to connect to the GCS through tcp, but if I uncomment TELEM2 and connect to local for the navio it refuses to connect to the GCS (tcp) connection. I tried doing both TCP, UDP, and a mix of the two.
It almost seems like it only wants to connect to one other IP address at a time. I am not sure why, maybe I am doing something wrong.
I was contemplating trying to so use Pi 3 but I am not sure if that will lead to any resolve. I know there were several issues with the Pi4 a few months ago but I was under the impression that this was solved with the updates.
I don’t think it has anything to do with your RPi4. I have a RPi3+ and it also works only on one IP setting at a time.
My understanding is that you essentially asking to communicate the same thing twice but through two different channels and the system simply doesn’t know which one has priority over the other. Which means it just clashes with each other. There are some who claim to have it working, but I suspect you would then have to set one as TELEM A and another to TELEM B. - Just my thought without trying. But that’s where it is getting tricky because only the A type has the fast 115000 bit rating. So obviously that would have to be the one you want to use for sending control signals as it is important to reach drone fast.
My other thought is once you receive your USB telemetry kit the problem may be also sorted as this is essentially seen as a serial connection, rather then a IP connection. - But be aware that this also only usually runs on 56000 bit speed.
Anyway, just to make things more interesting: If you ever consider using a live camera (Rpi camera or USB camera) you will have even more challenges ahead of you as the mentioned transmissions speeds are not suitable for the required speeds. Such system will only work over a good WiFi connection or 4G / 5G Mobile phone network connection.
…thought I will mention it just in case you’re tempted with that.
I want to be able to communicate/give control inputs from the terminal as python scripts and recieve data to the GCS (but not control it from the GCS).
Sorry for the confusion, as I mentioned before I am still really new to this.
Our intention for the video feed will be to analyze it on the pi for precision landings/image recognition.
I had the suspicion that I would not be able to accomplish through IP (connect to the GCS and give commands to through python scripts. I really appreciate you help again.
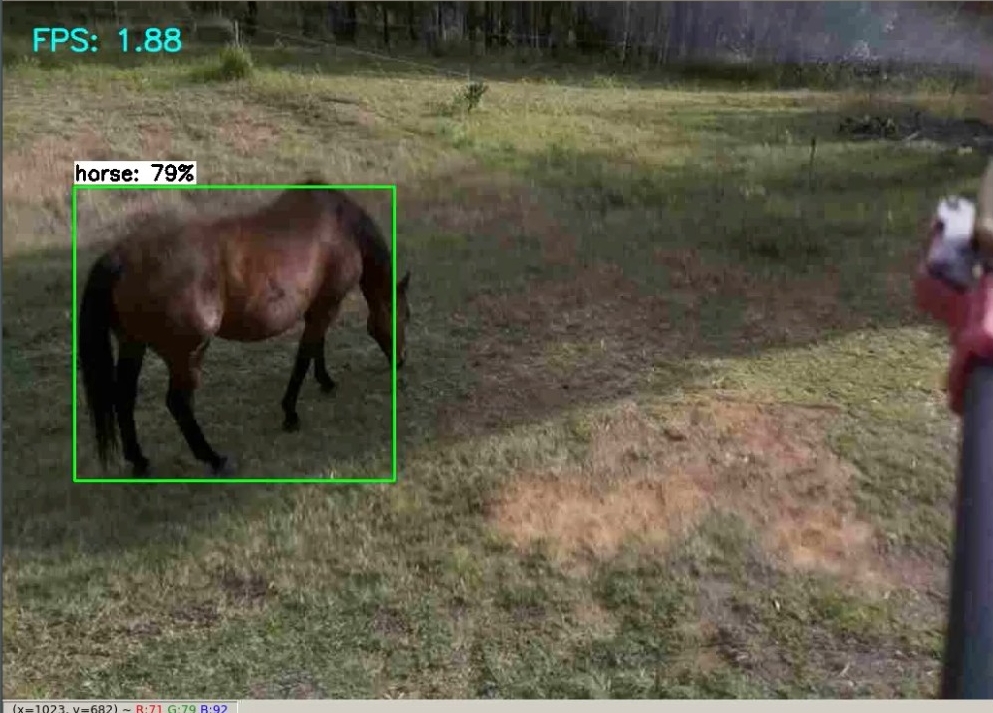
Very challenging field and be very careful as you can easily crash and destroy your drone due to the CPU resources required by object detection system. In fact since that original test I haven’t used it again whilst flying as I was only able to save my drone due to my experience in flying drones.
Just to give you an idea here is a little video clip and towards the end there is a table comparing different Rpi versions &setup. This gives you some idea about the challenges.
In my opinion the object detection script needs to be modified to limit the CPU resources used. However, that of course will impact on the speed at which it can detect objects.
The other, and in my opinion much safer option is to use a second RPi just for that purpose and only exchange certain data with the FC. So I would be using a RPi4 for the object detection and perhaps a RPi3 for the FC.
I think its great that you ask all the question as just simply testing various things in flight can become very costly and time consuming if you / your group end up crashing drone time and time again.
In regards to controlling it directly with python I think it may be possible just SSH into RPi and sending commands across that way.
Found a video showing someone doing exactly that:
Wow, Thanks for the heads up.
One thing we were worried about from the start was the CPU usage, at first we thought we might want to go with a Jetson Tx2 but decided against it due to cost.
I never thought about using 2 Pi’s let alone wouldn’t know where to start for something like that.
We do plan on using a RPiLidar for collision avoidance, so the main purpose of the camera would be to land on a specific spot ( i.e. a logo ). So I do foresee us running into CPU usage issues.