Navio 2 UART/USB bluetooth hacks?

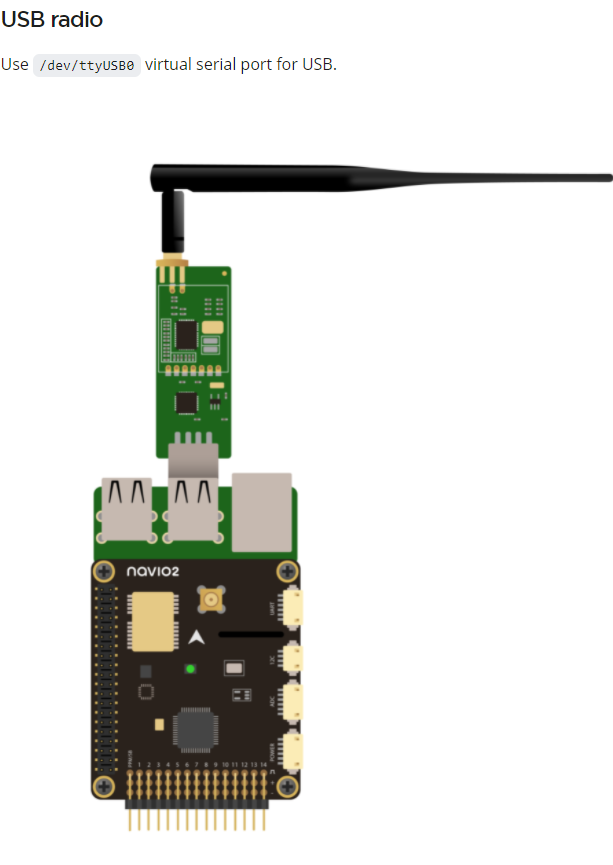
so the documentation for Navio2 suggests UART or USB radios (see image below) via links to jdrones store which no longer exists, as far as I can tell. bummer. I just want bluetooth for my navio project and can’t seem to find one on sparkfun and it seems like emlid had to do something to disable the built-in BT functionality of the rpi 3B motherboard but because I’m not in the board yet I can’t do any further diagnoses.

Apologies in advance for lacking some of the necessary information to get help, I’m just shopping:

  1. Image and ArduPilot version.
    not installed yet; pricing out hardware; wanting to cast mock location from navio 2 via BT;

  2. Detailed problem description. How does observed behavior differ from the expected one?
    I’m reading threads that the rpi BT doesn’t work. I love being able to mock location into android from RS2 and would like to be able to do so via navio2.

  3. Your step by step actions.
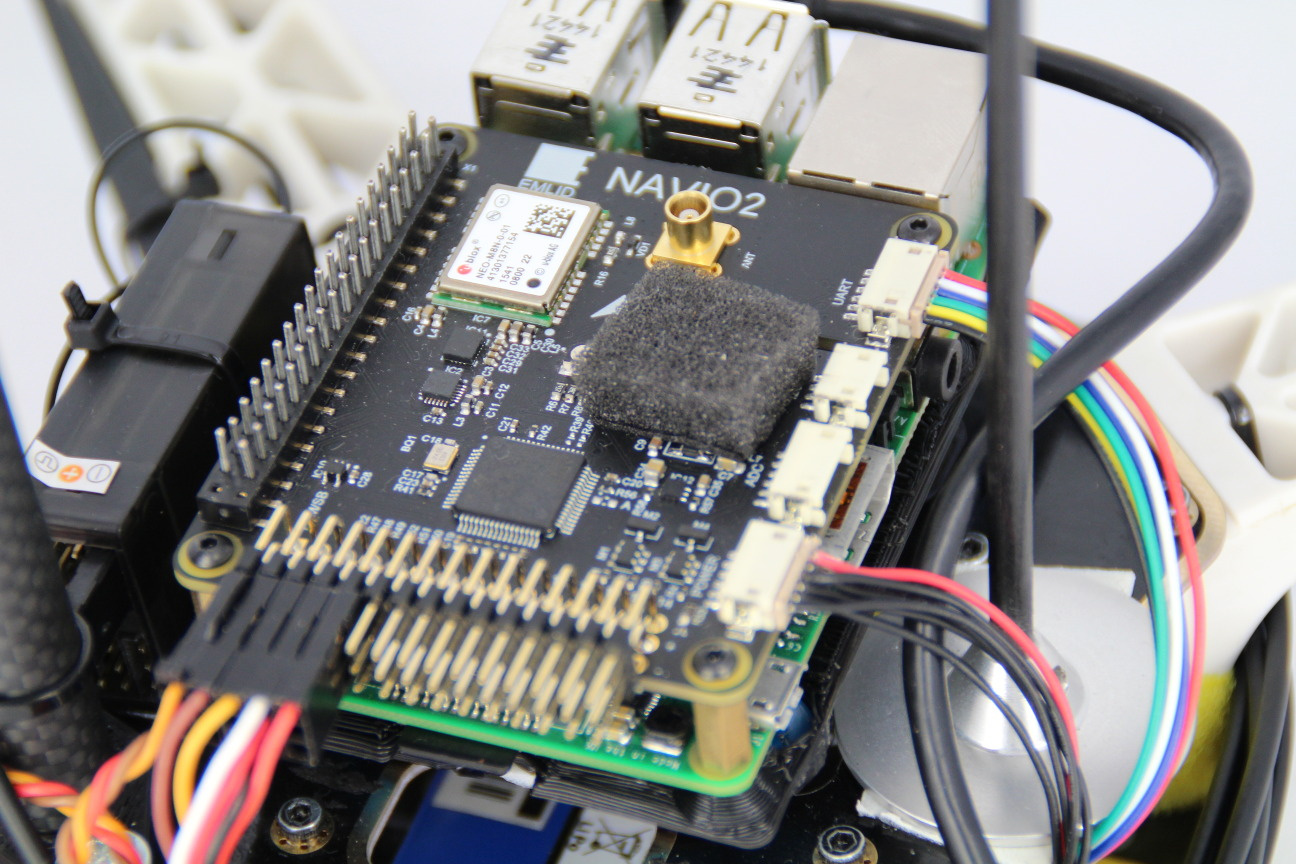
    just readin’ the forums. thanks for all the great posts. I’ve also noticed in other documentation images that there is a device plugged into the UART port, with no mention of what specifically it is because the image references barometer UV protection:

  4. Picture of the setup and connection scheme.


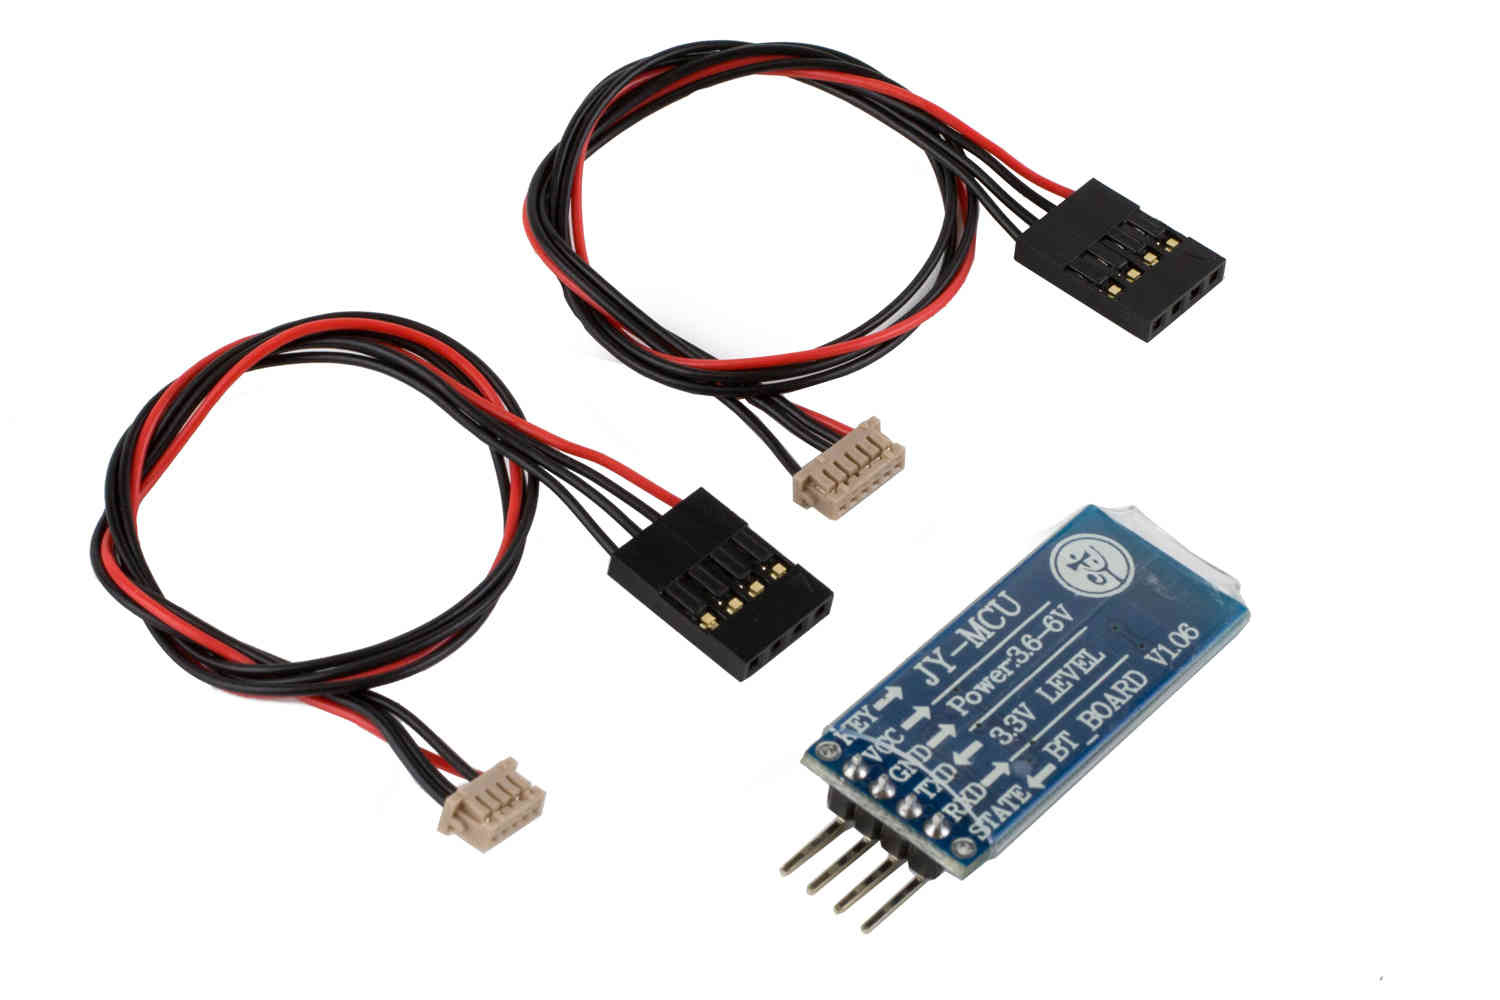
    I just want one of these that kicks off BT location signal like the RS2 to be cast. But all the links in the documentation via emlid and via ardupilot are dead ends to jdrones store that doesn’t sell what I need anymore. pic related.

    Furthermore, it appears that using a simple dongle is no amateur feat.

  5. If using any additional hardware please provide exact make and model.
    Any and all community hardware recommendations welcomed. Or if I’m missing a big obvious software solution please correct me. Thanks for your time and attention.

Hi Michael,

The Bluetooth is disabled since it interferes with ttyAMA0. Without disabling it, RX and TX wouldn’t be accessible.

Reach uses its method to send its position via Bluetooth so that it can be configured as a mock location on Android. Even with the enabled Bluetooth, it’s not possible to do the same on Navio2 straight away. It’ll require additional code development.

Would you mind sharing why you need to get the mock location of Navio2? I might suggest some workaround for your workflow.

I can hardly tell what exact device was connected to the Navio2 UART port in this picture. However, it might have been external GPS. For example, Reach M+.

Good to know re: RX/TX & /dev/ttyAMA0; does that also mean that /dev/ttyUSB0 is also disabled?

your documentation suggests this is an option. I’d ideally like to know what USB device I ought to get that could plug into my rPi as shown above.

It’ll require additional code development.

How much additional code dev? Not seeing any completed anywhere. My intuition is that hardware is still required, esp since native hardware on the rpi is disabled by the Navio disk img.

Would you mind sharing why you need to get the mock location of Navio2?

It would be convenient for me, in dev work, to have the location of a “rover” on my screen which I can control across my driveway, and receive information about the location of that rover via BT to my Android tablet, which is a bit more weatherproof than my laptop. Perhaps there’s a necessary step to cast the location via wifi and to then access the location via wifi in whatever mapping app I’m using. I want flexibility across apps without having to figure out a specific workaround for each app I may be interested in seeing my rover in. Give a man a fish, feed him for a day; teach a man to fish, feed him for life, y’know?
image
If that’s not possible, I can accept that, but I’ll admit I’m a bit disappointed that there are images like the one in the Ardusimple docs and Emlid’s own docs that suggest the Navio can be configured flexibly to output its location signal like the RS2s units (which I own) do via LoRa.


(is that a bluetooth dongle I see there _________________/^ !?)

The RS2s work very well for me and I understand why the M+ would be sold as an additional hardware piece to achieve full hardware/software integration; I was under the impression that the ublox chip on the navio empowers M2/M+ accuracy of autopilot, but just has fewer turnkey features, i.e. doesn’t have its own hot shoe for camera control, lacks Reachview integration, etc. Seems like BT mock would be a great option to allow for close-range field dev work.

So… if I’m applying for a grant to make some type of rover, do I need to budget in an M2/M+?

I can hardly tell what exact device was connected to the Navio2 UART port in this picture. However, it might have been external GPS. For example, Reach M+.

Thank you for directing me to this documentation page; am I understanding correctly that one “workaround” is just to buy an M+/M2 which handles all BT &/ RS2/R+ integration protocols completely turnkey?

Furthermore: if I don’t need any /dev/ttyAMA0 access for a test project, can I just reenable the rpi BT on the raspbian image?

Thanks for your time and attention!

Hi Michael,

RX/TX & /dev/ttyAMA0 ; does that also mean that /dev/ttyUSB0 is also disabled?

/dev/ttyUSB0 is enabled. There should be no issues with using USB radios. However, I can hardly recommend you some exact radio since there are a lot of them. They all have different characteristics, which may not be suitable for your exact project. However, you can check some examples in Ardupilot docs.

Navio2 is an autopilot HAT, and Reach M+/M2 is a GNSS receiver. They are designed for different applications and have different functions because of that.

Navio2 and its Raspbian image allow you to build your own vehicle, configure all peripheral hardware without additional coding, and connect it to Ground Control Station software to operate.

Reach M+/M2 can provide you with centimeter-accurate coordinates in RTK, which you can either collect as points or output to a 3rd-party device or software.

However, Navio2 u-blox chip can’t work in RTK. That’s why it provides few-meter accuracy only. It can hardly be used for mapping. If you need precise coordinates on your vehicle, it’s indeed better to install Reach M+/M2 additionally.

It’s possible. However, it’s not an easy task. You can find a bit more info here.

This topic was automatically closed 100 days after the last reply. New replies are no longer allowed.