I have been stuck on this for a few days trying to figure this out. This is the step I am stuck on.
Trying to get everything set up for the first time.
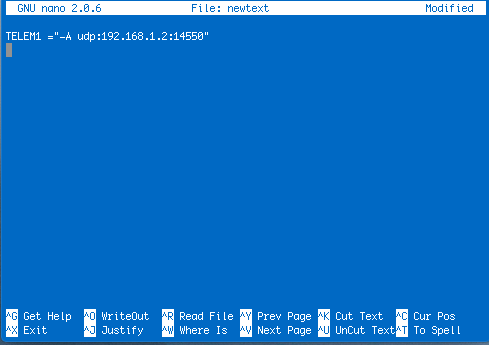
TELEM1=“-A udp:127.0.0.1:14550” #TELEM2=“-C /dev/ttyAMA0” # Options to pass to ArduPilot ARDUPILOT_OPTS=“$TELEM1 $TELEM2” # -A is a console switch (usually this is a Wi-Fi link) # -C is a telemetry switch # Usually this is either /dev/ttyAMA0 - UART connector on your Navio # or /dev/ttyUSB0 if you’re using a serial to USB convertor # -B or -E is used to specify non default GPS
All lines marked ‘#’ are comments and have no effect.
For example, you’ll need to modify TELEM1 to point to your IP like this:
TELEM1 =“-A udp:192.168.1.2:14550”
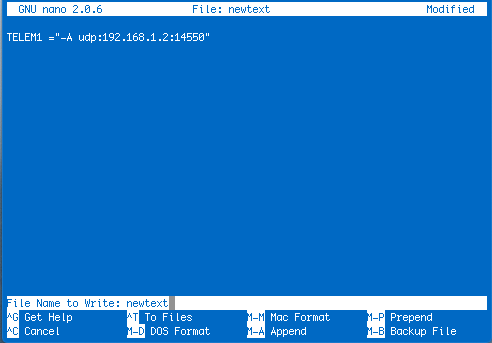
So After I change the IP address to the address of my Ground Station. How do I get it to save?
Powering down at this point will not save it. None of the commands on the bottom of the screen do anything. There isn’t anything in the instructions on how to save it. I have no experience with Linex so this is new to me. Total newb here. Thanks
Awesome. Thanks for the help!
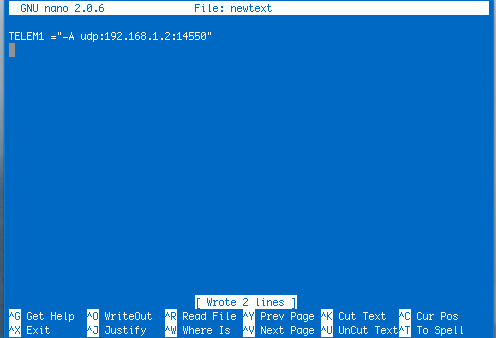
I didn’t know the ctrl key ran those commands!
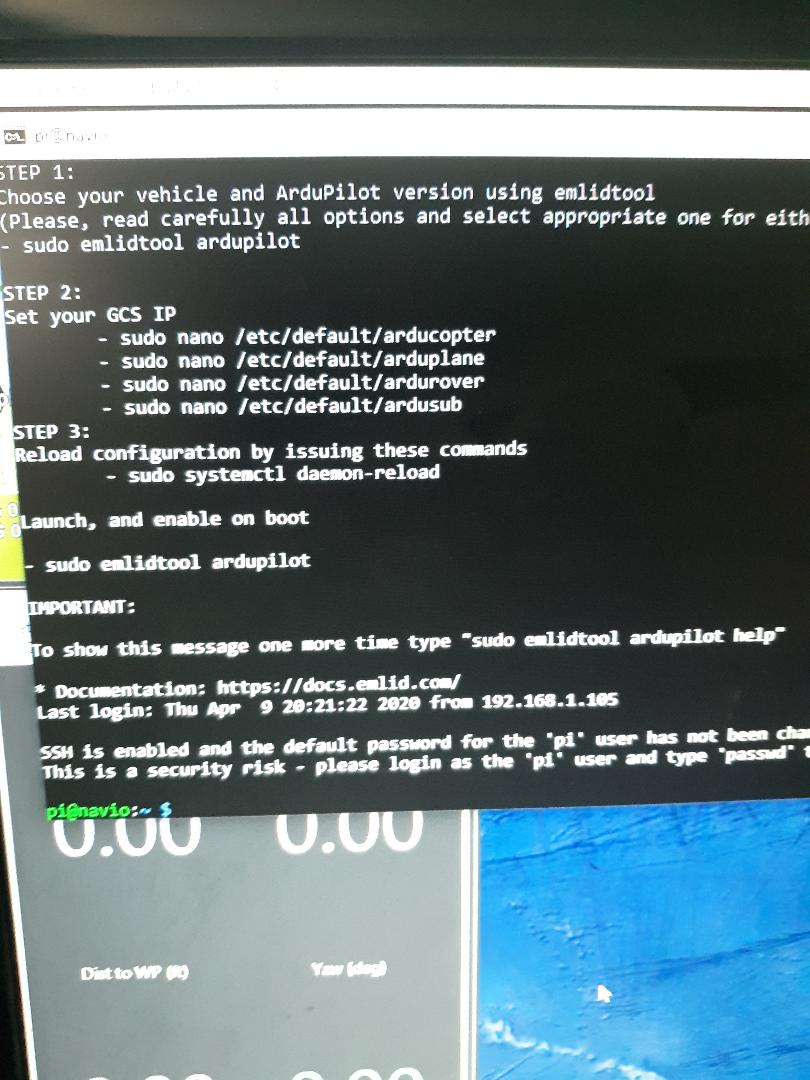
I got the file changed and also confirmed ArduinoRover loads on Boot!
I Am using mission planner but am not able to connect yet.
Is “Launching a custom ArduPilot binary” required(the next step)?
The instructions weren’t clear on what I need to do next. Up until this far I have been able to stumble threw this without help.
Ignore this option. It require more steps (linux friendly only).
UDP connection work with the Raspberry wifi link. If the IP of your computer is the right one in TELEM1, Mission planner connection is automatic when you launch the application.
Thanks for all the help.
I did not configure the Wifi on my PI.
I will be Using a much larger Access Point on the rover.
So I have it plugged into a switch with an Ethernet cable.
This shouldn’t be an issue should it?
I booted up Mission Planner and hit connect with UDP and it is just sitting there. Been 15 minutes now and nothing has happened. BUT it hasn’t given me an error.
Any Ideas? I feel like I am just missing one little piece right now.
Thanks so much for walking me threw this.
I have been able to SSH into it on port 22. Always works perfect.
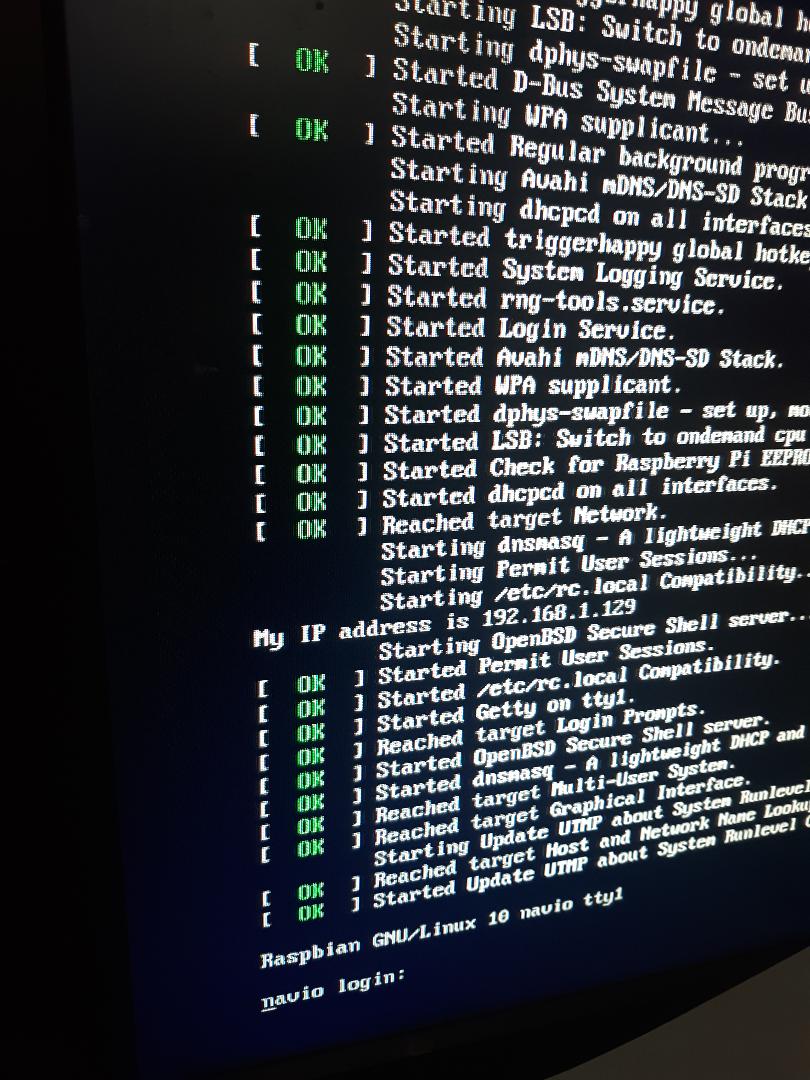
Have an old TV i have plugged into the PI so took a picture of that.
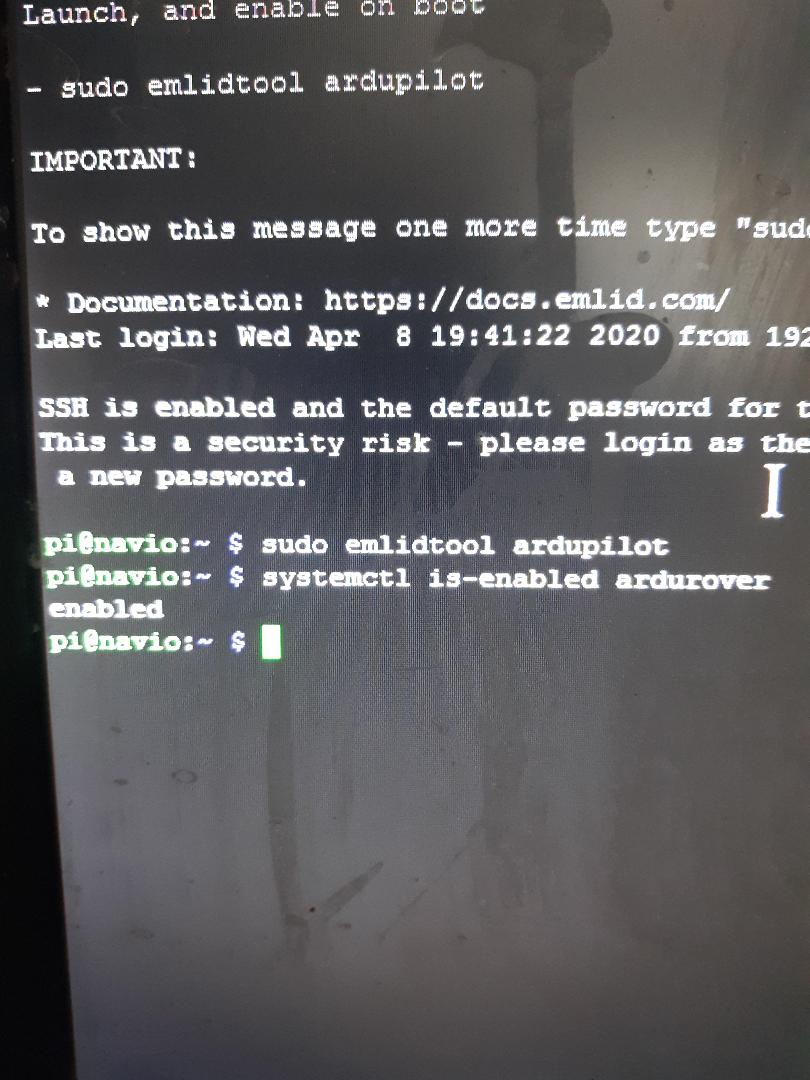
Ardurover is running.
As @mlebret has already mentioned, this could be a switch firewall issue.
Have you connected to Navio2 through SSH via the same ethernet connection to the switch? You can try to connect Navio2 to you PC directly with Ethernet cable and see if this works to exclude issues with Navio2 configuration.
To connect to Navio2 you can use navio.local host name:
Press Win+R and enter

cmd /k ssh pi@navio.local
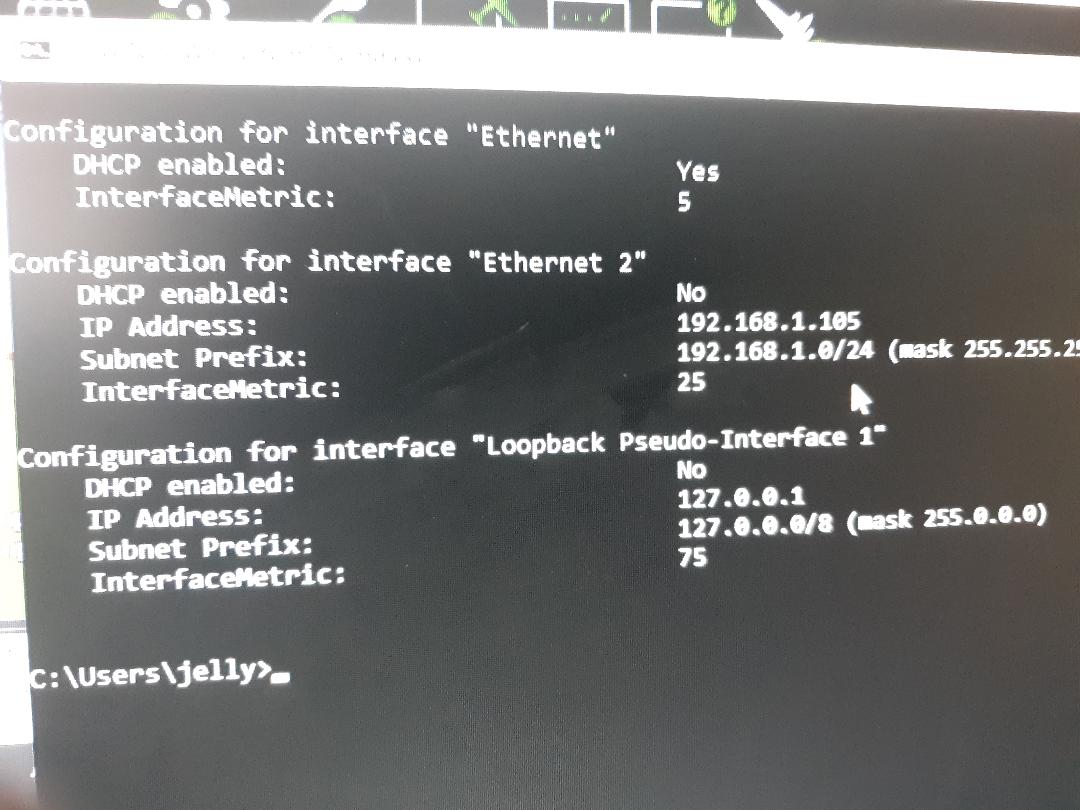
To get your GCS’s IP for ArduPilot’s config file:
Press Win+R and enter

cmd /k netsh interface ipv4 show addresses
One of the output lines should contain your PC’s IP for an Ethernet connection.