Originally published at: https://emlid.com/breaking-down-the-drone-mapping-a-step-by-step-guide/
Drones are no longer just a part of sci-fi stories. 3D maps made by drones are used in land surveying, agriculture, construction, archaeology, real estate, and others. As time passes, aerial mapping is becoming more and more affordable and inclusive. Drones and special software are working on making it easier.
Table of Contents for the Article
- How Does Drone Mapping Work
- What is Ground Control Points
- Setup For a Drone Mapping Mission
- Step By Step: Mapping a Gravel Pit
- Tips and Tricks From the Field
How Does Drone Mapping Work
One of the key points in drone mapping is accuracy. Having an accurate map is crucial for further analysis and for projection. However, before we move on to solving the accuracy question, let’s take a brief look over the working mechanism of drone mapping.
A very rough sketch of the workflow looks like this. Drones are equipped with a camera positioned vertically on its surface. You plan the flight beforehand, using special software so that the drone covers the whole working area. The drone’s onboard camera takes pictures during the mission. Multiple photos of each feature are taken, as frequently as you set it. The aim is to produce an orthomosaic map afterward. An orthomosaic map is sort of a puzzle, made from detailed and accurate photos of the area stitched together and corrected geometrically. The rest lies in post-processing.
Seems pretty easy, right? The only question is, how to stitch the photos together accurately relative to the Earth’s surface and to the objects in the photos? This is where ground control points help.
What Is a Ground Control Point
A ground control point, or GCP for short, is a very accurate coordinate located on your worksite. The main function of the GCP is to help you align the map according to it and position it accurately relative to the surrounding environment.
To create an accurate aerial map, you need more than one GCP. Usually, from four to ten, depending on the landscape and size of the site. GCPs are surveyed and marked before the flight. Points are marked on the surface using paint, a checkered square or any other kind of marking. Set your imagination free. However, make sure the mark is a contrast to its surroundings and that it is big enough to be visible on the drone’s photos. Check out some of our users’ creative GCPs and get inspired!
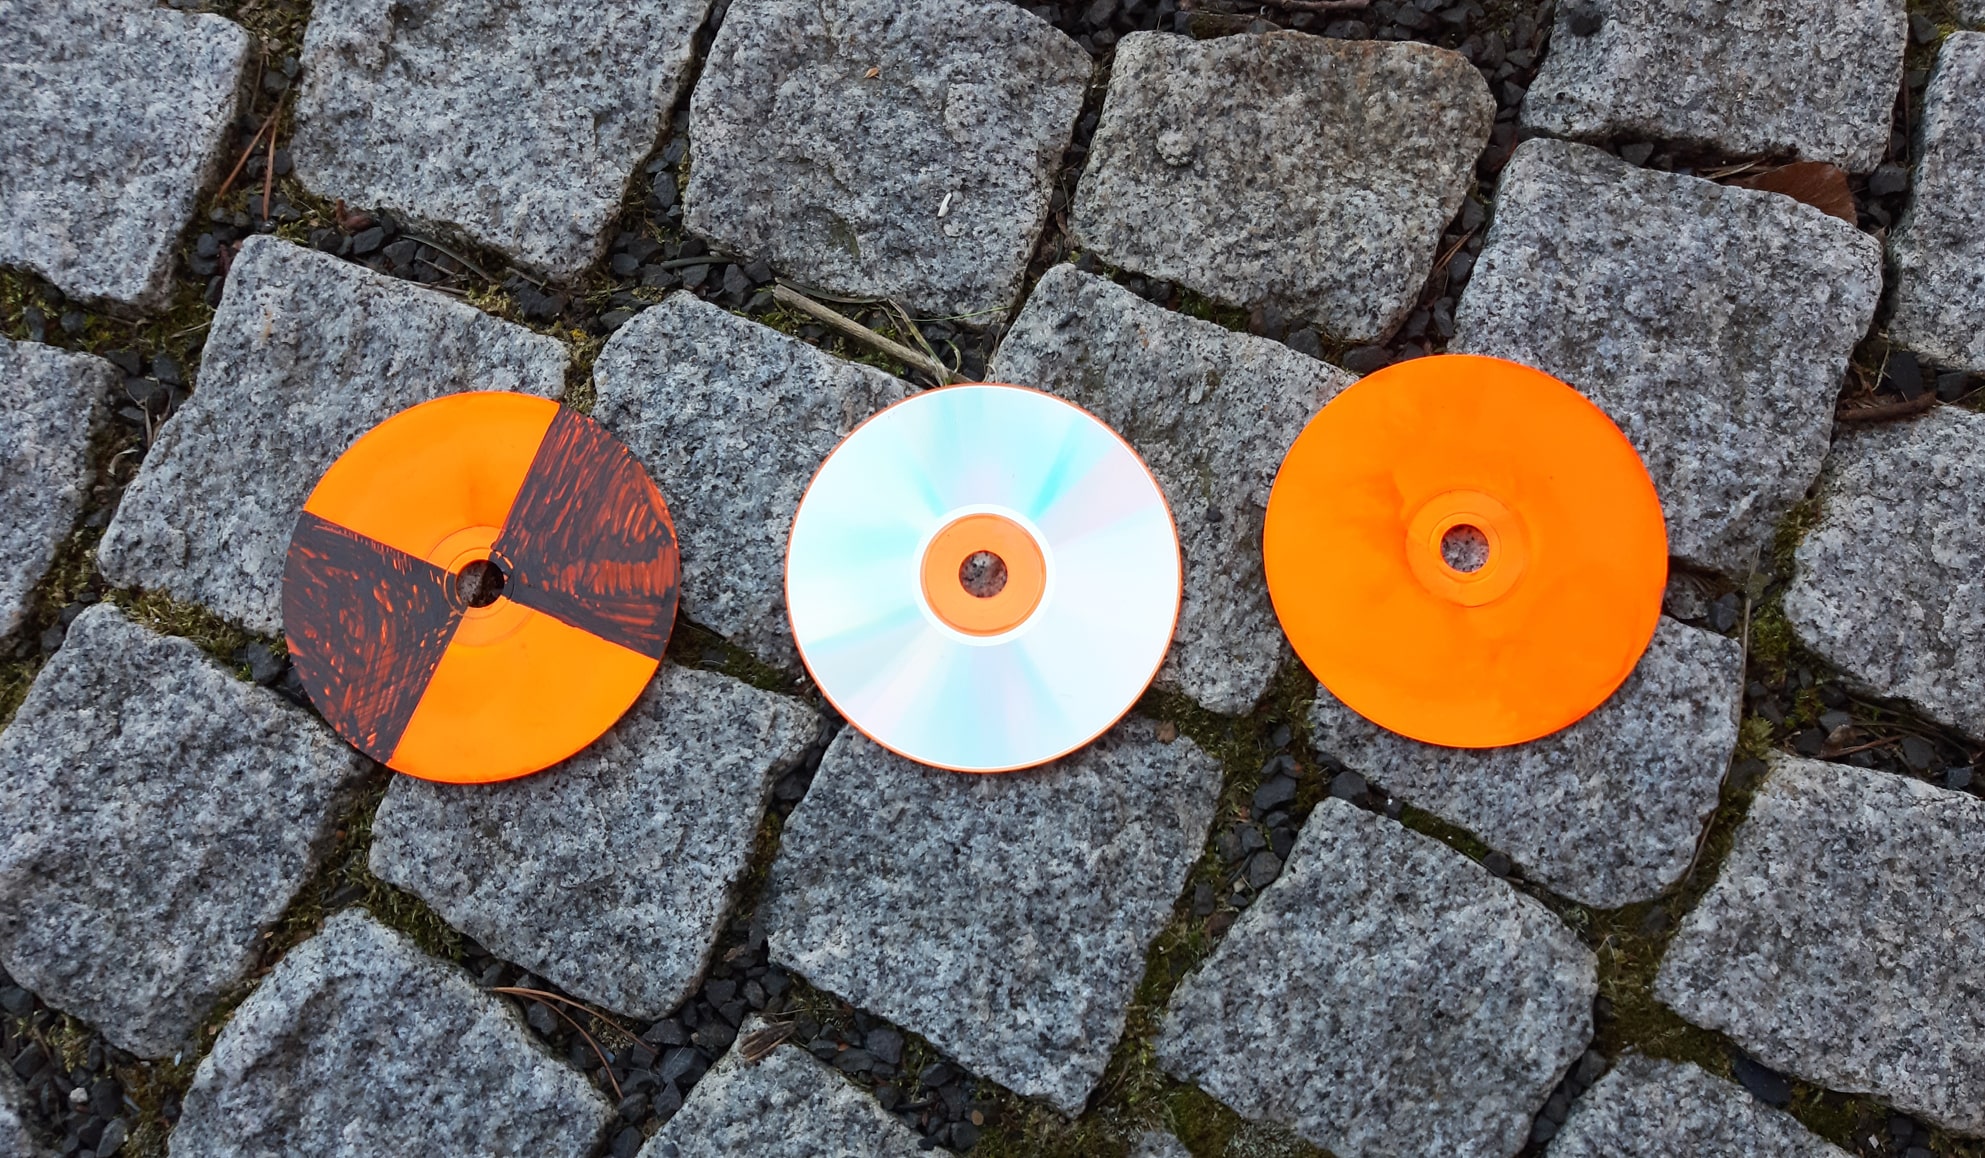
We say “creative”, and we mean it: the CDs can become GCPs as well
Once you set the mark for your future GCP, you need to find out the exact coordinate of its center. Reach receivers used in RTK mode are perfect for accurately recording the GCPs’ coordinates. If you need absolute accuracy, you can also use the PPP services for each of your GCPs. Further in this article, we’ll reveal some tips and secrets on how to increase the accuracy of your GCPs.
Setup for a Drone Mapping Mission
Every project has its own peculiarities, and therefore requires different setups. However, a basic setup for a drone mapping mission can be listed and estimated. One of our users in Canada, Grant Mills, shared his own setup, and costs, for mapping a gravel pit. All the prices are in USD:
- DJI Mavic 2 drone (~$1395)
- Base station: Emlid RS2 on a tripod ($1899 + $377 tripod)
- Rover unit: Emlid RS+ on a survey pole for marking GCPs ($799 + $226 survey pole)
- 8 GCPs, painted with the bright white dots in the center of orange or green X, with about 3cm of space between the colors. ($8–$38 paint)
- 2 permanent self-made checkpoints made out of rebar to perform check-in and check-out shots
- Laptop to process the photos
- Software:
- Ground Station Pro for controlling the drone’s flight (Free software for iOS)
- Agisoft Metashape professional to tag all the GCPs, adjust medium alignment and process medium dense cloud (~$3015)
- Global Mapper to translate the data to a different coordinate system if needed ($377)
You can find alternatives in almost every case, but the basic components of a setup stay the same: drone, base and rover units, GCPs, laptop, and a set of software to post-process the data.
Step by Step: Mapping a Gravel Pit
Let’s see how the mapping works in real life using the case we’ve mentioned above. The accuracy of the data was essential for Grant Mills.
The purpose of this survey was to find out the exact amount of the gravel removed from the pit. Two weeks before, I performed the survey of the gravel pile at the same place, and the accuracy in data meant accuracy in payment.
Grant Mills needed his survey to be highly accurate.
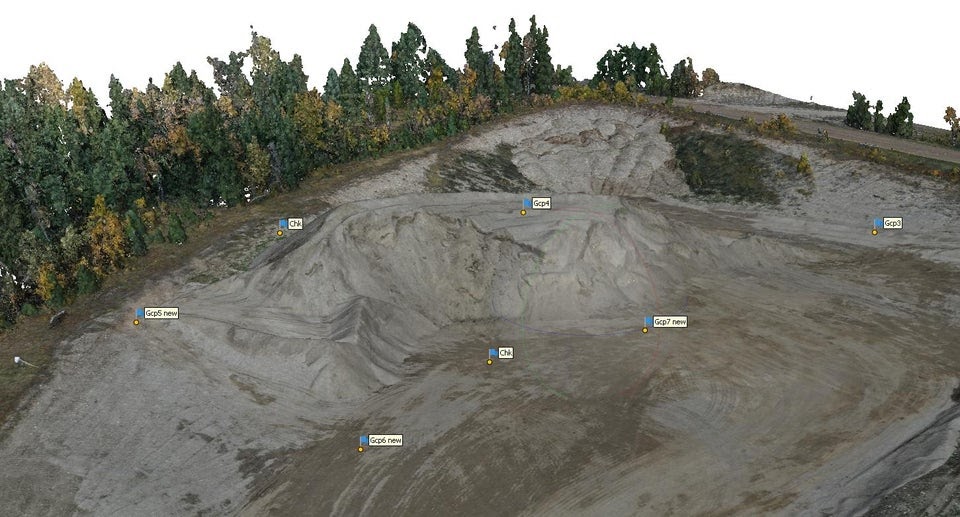
It all begins with GCPs. In this case, the site is not completely flat, so several of the 8 GCPs are situated on the elevation to mark it. The GCPs are bright and large enough for the camera to notice them and capture them on the photos.
Grant Mills used Reach RS2 as his base and collected the GCPs with the Reach RS+ rover. Positioning the pole in the very center of the GCP, he managed to record accurate coordinates of all 8 GCPs and 2 checkpoints for further data processing.
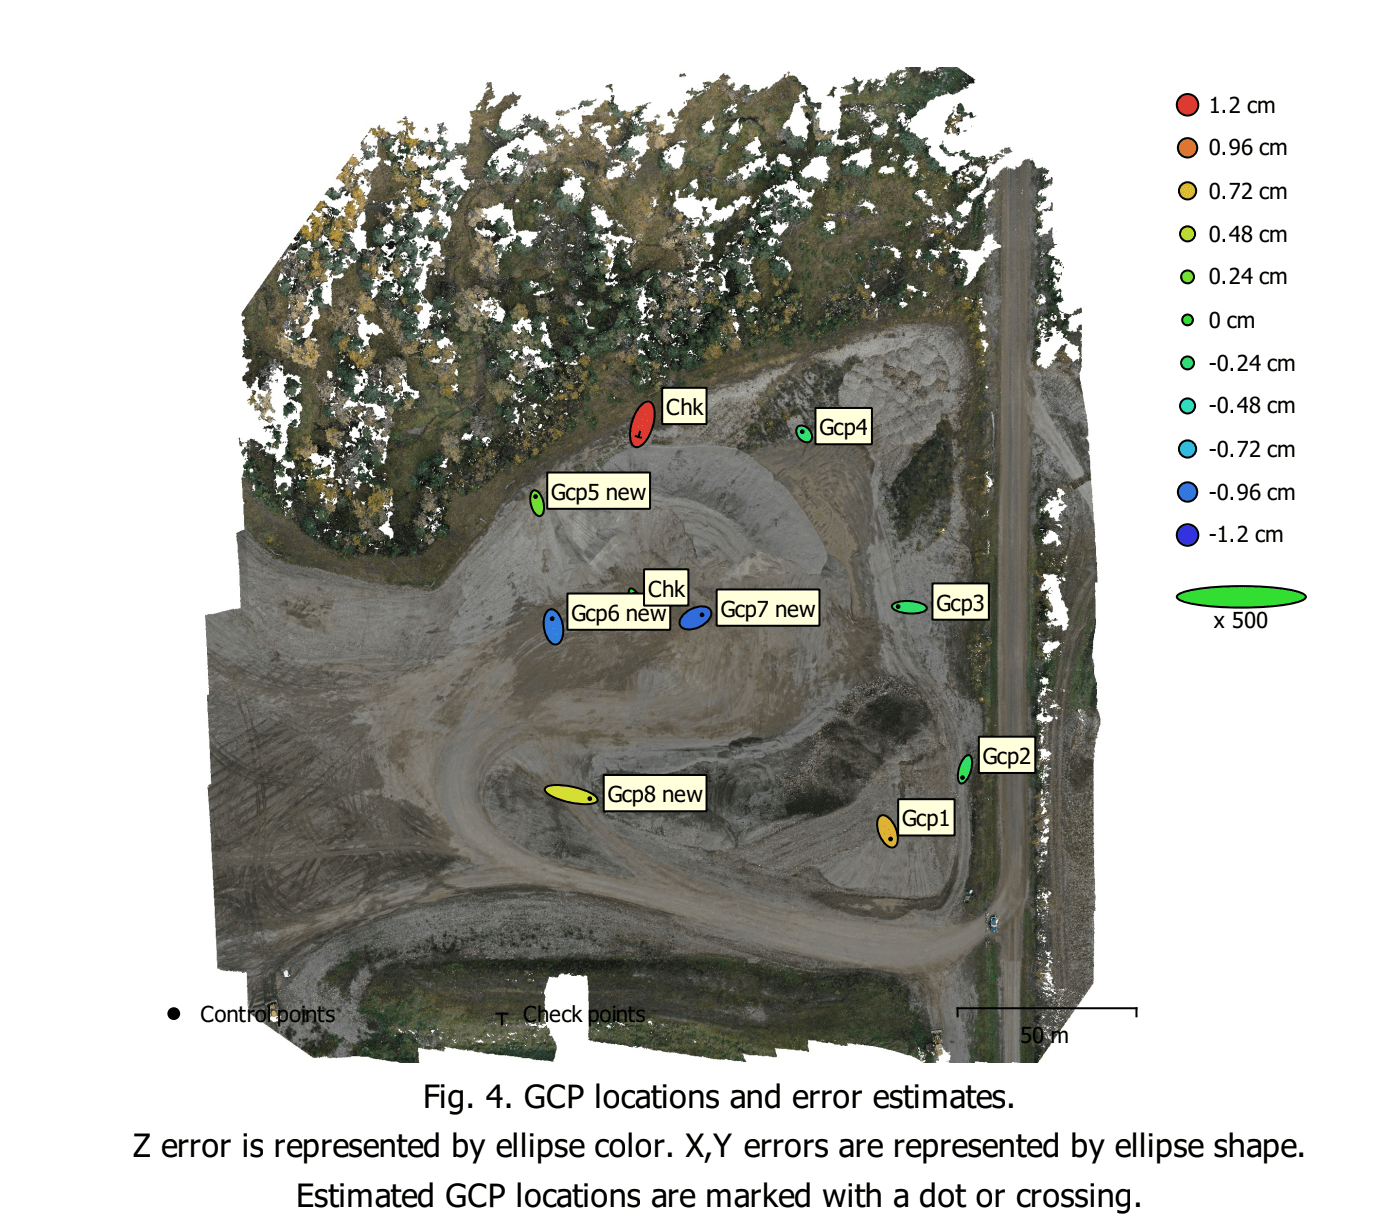
Here are the GCPs and checkpoints Grant Mills used in his survey
The next step is setting up the flight. That includes such things as the flight altitude, side, and front overlap.
Setting a higher flight altitude allows you to capture more in a single picture. This means it can ease the further stitching of the images. Side and front overlap show how much the photos will overlap each other in post-processing. Increasing side overlap helps you catch more matching features and stitch the pictures with higher precision. However, it reduces the area you can cover in one mission. Increasing front overlap makes your camera take photos more quickly, but at some point, you will face its tech limitation.
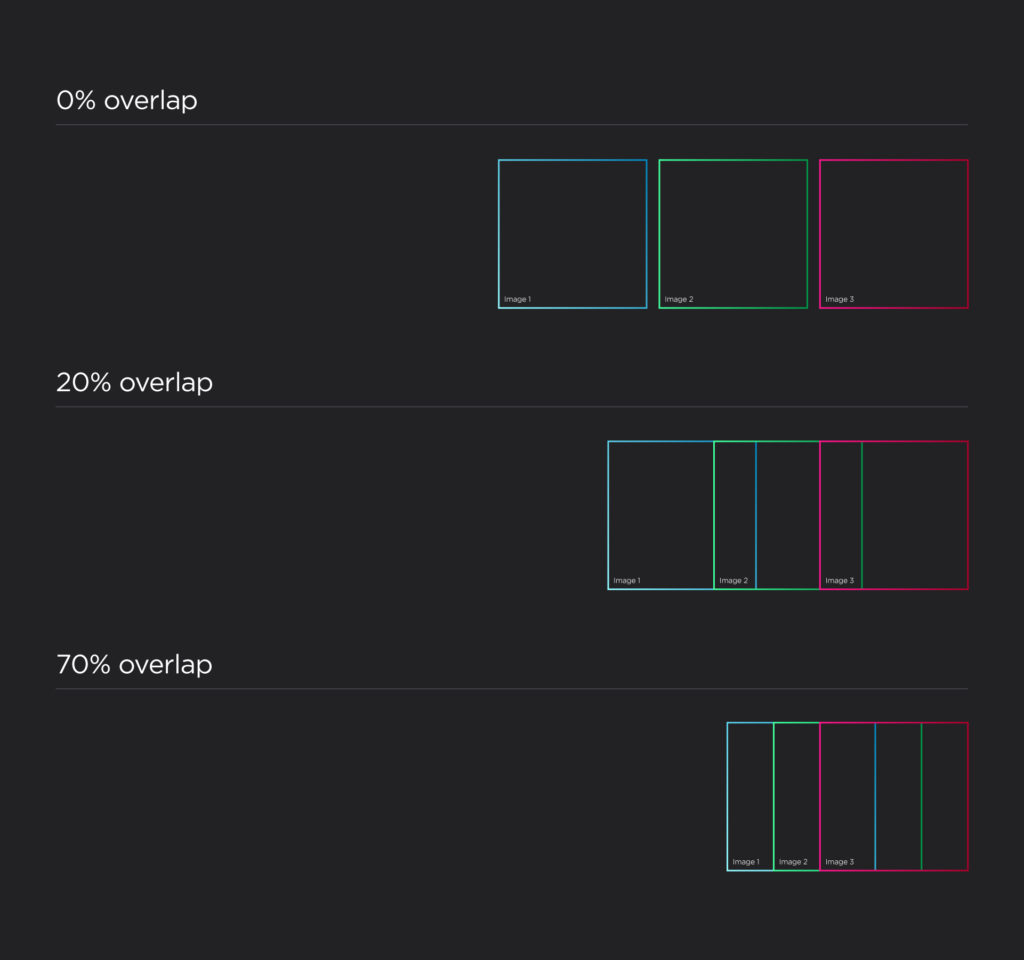
This is how the overlap works
In this case, the setting was 80% front overlap, 70% side overlap. The whole mapping area was around 0.0582 km2. The flying altitude was 73.2 m.
When all the GCPs are recorded and marked, and the drone’s route is ready, it’s time to collect the data. In this particular case, Mavic 2 has a rolling shutter on its camera, which means it can distort the shapes of the moving objects. However, our user came up with a solution – making Mavic Pro 2 stop at every waypoint that occurs while mapping.
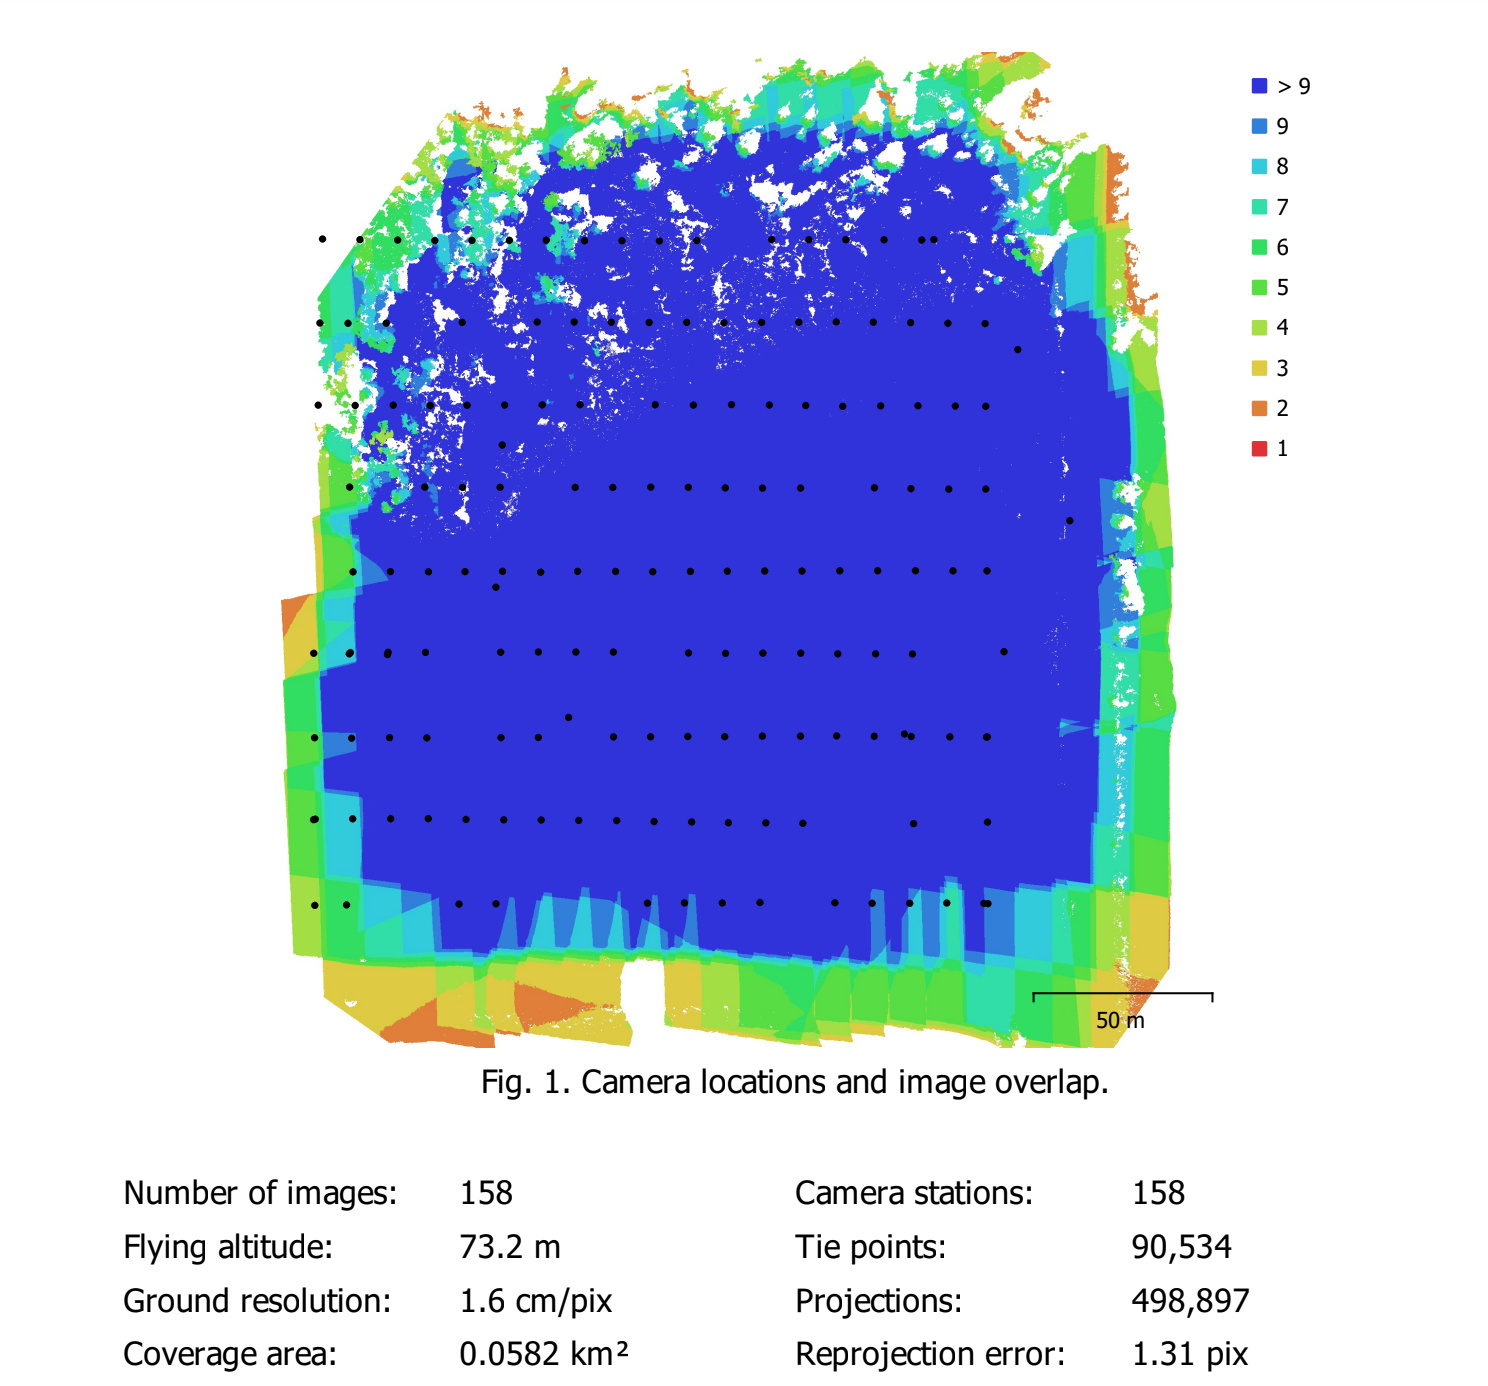
The data from Grant Mill’s survey report
After the planned flight, you can conduct a manual flight to capture some tricky points one more time. For example, in this case, manual flight collected some 45-degree shots in a perimeter of the survey area to get better coverage of vertical surfaces, equipment, and steep piles.
Next, you work with post-processing your drone data using professional software. In this case, the software was Agisoft Metashape professional. It analyzes the photos, aligns them according to your settings and forms an orthomosaic map. The software can calculate the point cloud – the collection of points or coordinates on an object’s surface. Dense point clouds are usually used to create 3D models or maps of the sites.
Once you finish the post-processing, you’ll get an accurate map of your site. Grant Mills managed to create a map with an accuracy of less than 2.5 cm.
The 3D map of the gravel pit from Grant Mill’s survey
Tips and Tricks From the Field
As we mentioned previously, accuracy is one of the key concerns for mappers and surveyors. Here are some professionals’ field tips on improving your data’s accuracy and avoiding common mistakes.
Using a Bi-pod for a Survey Pole
This is a quite common tip, but it doesn’t make it less useful. Even the slightest touch of the survey pole can cause the rover to move while recording the point’s coordinates. It’s better to use a bi-pod to ensure the rover stays still while recording the point.
Take 5–10 Seconds When Collecting the Point
When you record the coordinates of your GCPs, wait for 5–10 seconds on the point before collecting it. Reach receivers provide a reliable fix solution, but sometimes when there are trees or other obstacles blocking the sky view, it’s better to ensure that the fix solution is updated accurately. After several seconds, hit “collect” and move on to the next GCP.
Place the GCPs right, bright and visible
When marking your GCPs, try to make all the marks the same size and shape. That way it is easier to make sure you reliably mark the center and place the survey pole in the same spot every time. Also, punching the center of the GCP is a good practice. It makes the pole center itself when you set it over the center of the point.
When using paint to mark a GCP, make sure the colors show up clearly. Photos from 120 m can be blurry, or the point can be shadowed. Try using different colors: one for the center of GSP and one for the outer cross.
Tagging the very center of GCP
Again, this is vital. When flying at a lower altitude, it is easier to detect the very center of your control point and mark it with the known coordinate. However, if you are off, even a bit, it can very easily lead to 3–4 cm errors. Zoom in and out to get a better look at the marks, and when you aren’t sure, don’t guess.
Setting the right number of GCPs
GCPs should be spread out evenly, usually in a 50–100 m grid, with a minimum of 5, in each corner of the site and in the center area. GCP density depends on the surface relief. If there’s a big change in elevations within the 50–100 m range, set GCPs more often to make sure the elevation changes are taken into account.
As long as it is safe to access, place GCPs on the lowest and highest points of the surveyed site.
Create your own checkpoints on-site
Besides the GCPs, it is also useful to check your data with some permanent distinguishing features of the site. It can be an easily seen corner of the pavement, or something else. If there are no “natural” distinguishing features on the site, create your own. For example, it could be rebar that’s been pounded into the ground to act as a control point for check-in and check-out shots.
Practice Makes Improvement
The survey we’ve presented above was made by one of our users, Grant Mills. We’d like to thank him for sharing his survey and his tips with our community.
Drone mapping is of great help in many different spheres from commercials to constructions. Performing the survey correctly and accurately is one of the major concerns when surveying, and following these tips can help you increase the data accuracy significantly.
Lifehacks result from practice and trying new things. Perhaps, you’ll come up with something else. Broaden your horizons with Reach receivers!
Reach receivers for placing GCPs
Both Reach RS+ and Reach RS2 are a great fit for setting the GCPs in RTK mode. Control points locations are recorded with the ReachView app available for iOS and Android. Choose your receiver for comfortable and accurate fieldwork.
Do you have any tricks and tips you’d like to share? Feel free to add some in the comment section!