


Oh ya now i get the math code chief. I better opt for IGor’s specs. I have these doubts after watching video
1.for each motor there is an esc.then in navio+ power module there is single port for esc. How do i split that.
2. In IGor’s specs he doesn’t have RC specs. I DIDN’T GET THAT IS IT OK WITHOUT RC??
Oh dear!! all IGOR’S component specs are out of stock.Any replacement for these.
The tip with HK is to go to the frame product page then click through the accessory tabs at the bottom. When clicking the “Motor” tab you will see this one in stock (get 4):

Also another ESC option:
http://www.hobbyking.com/hobbyking/store/__42549__Afro_HV_20A_MultiRotor_ESC_High_Voltage_3_8s.html
Then these could either be mounted on the arms or directly soldered to the PDB if space permits (some kind of stand-off may be necessary to separate the hot ESCs from the rest of the equipment and ensure airflow). It would be neater to use a Quattro ESC but they are only in stock at the HK European warehouse at the moment:
http://www.hobbyking.com/hobbyking/store/uh_viewitem.asp?idproduct=42797
Connecting ESCs is not a problem, Navio has 13 outputs for anything from an ESC, servo to some other kind of servo compatible device (e.g. some gimbals, switches, cargo doors, landing gear). The power for the ESC is just tapped directly from the battery, but to be cleaner (and safer) than a bunch of DIY split/soldered wires often a PDB of some kind is used. You have two solutions here, 1st the frame has an integrated PDB so it not only provides one battery input and multiple outputs near each arm, but also removes a lot of wiring (as it’s going along the PCB integrated into the plates of the central area of the frame). 2nd if you get the “quattro” ESC you have another PCB which has integrated multiple components, so you don’t really need to the PCB in the frame much (except to tidy-up the wiring a bit).
If you get separate ESCs, the normal layout is to strap them to the arms so they get the most airflow. I’d mount the ESCs in the centre (also if not quattro) for space saving and also to bring the weight of the quadcopter towards the centre. Because with the LED “ghost” frame it will look a lot nicer with clear arms (no electronics on them except the motors).
I haven’t used quattro ESCs myself yet but my biggest concern is cooling. Actually I prefer “low hung” configurations, so would stick a quattro ESC on top perhaps next to the battery (so good 50/50 vertical weight distribution) and all the electronics underneath with vibration isolation. But that’s a much more complex build so just stick everything inside as best you can, closest to the solder points (where it was designed to be) on the frame’s PDB and make sure there is no clutter/wires in the way of cool airflow.
Finally, chargers/batteries/props… Lots of lots! You will break props so get a 4 pack times about 10 or something. Because relative to the costs of shipping they can be very cheap (e.g. GemFans). Don’t get expensive props for your first quadcopter and perhaps consider a second frame for spare parts, it WILL crash!!! Batteries… more the better so also then one of HK’s quattro chargers makes sense:
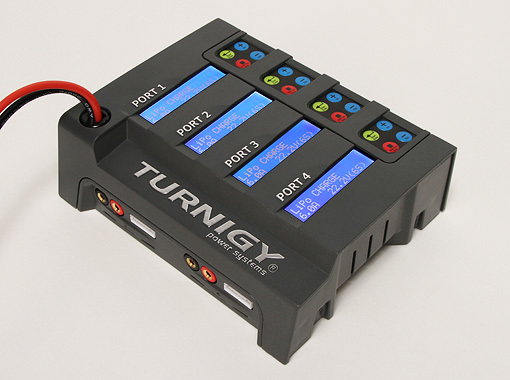
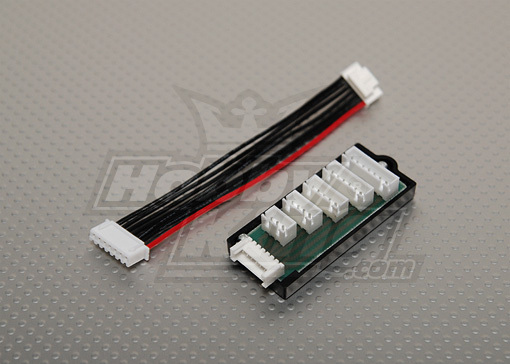
And additional balance boards so you can properly charge all 4 batteries:
3 of these (1 is included with the charger):
http://www.hobbyking.com/hobbyking/store/uh_viewitem.asp?idproduct=10360
The charger takes 12-15v supply but needs to provide more amps than your average laptop battery supply. So you will need a proper DC power supply. Best buy that locally (e.g. in Europe the Graupner 12-15v 30A is cheap on Amazon). I suppose you could hack an old computer power supply if you have one knocking around and wanted to reduce costs.
You really need more than a couple of batteries, especially as this is a project. You will be programming it, flying it, adjusting settings then trying again the whole day. The average flight times for quadcopters are 10-20 minutes (less than 10 on 250 racers, 10-20-odd on larger quadcopters with lower KV motors and hence lifting more weight/higher capacity batteries). I would get a least 4 batteries (or 8 for a racer) if you really want to do a “good days work” with it/more than one hour of continuous/hard flying with maneuvers.
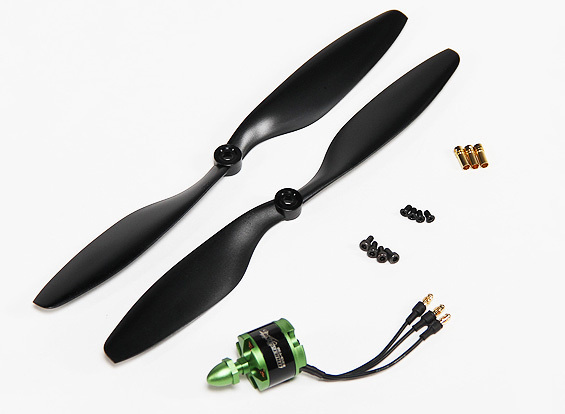
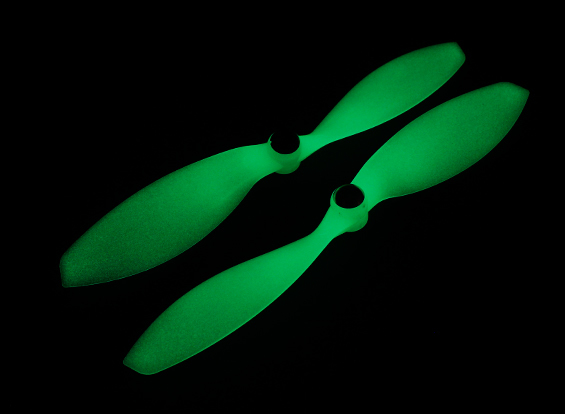
On the propellers, get some of these, they will look fantastic on your frame!
Also the 4.5 pitch will give a bit of a power boost (still within the range of the motor). Some 10x4.5 propellers are included with the motor so you can try both. If you’re not happy with flight times you can always order some more of the lower pitch propellers. They are so cheap. As the 10x4.5 combo was recommended for the frame by HK it should be fine and these 9x4.5 are already stepping back a bit towards Igor’s 9x4.3 propellers and these motors are a tiny bit bigger so well capable of swinging the extra 0.2 pitch.
Actually now I’ve helped you spec that up, I feel like I want to build it myself… What a wonderful sight it would be with all those LEDs and glowing props! ![]()
![]()
![]()
3 Likes
Oh!!! Thanks a lot!! Last but not the least good RC??cheap one.
The cheapest radio is this:
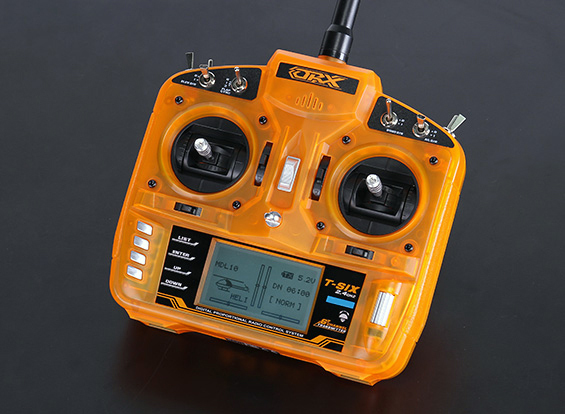
With this receiver:

The next cheapest radio which has the maximum potential is the Turnigy 9XR.
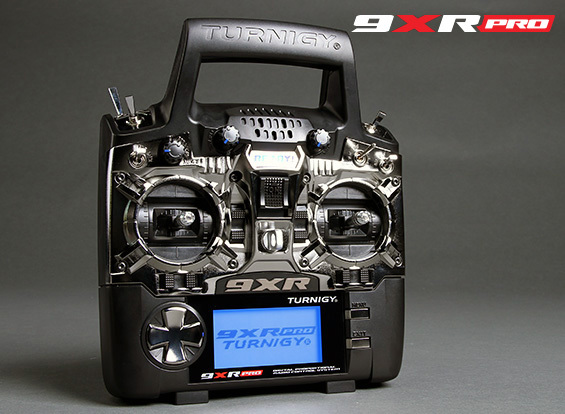
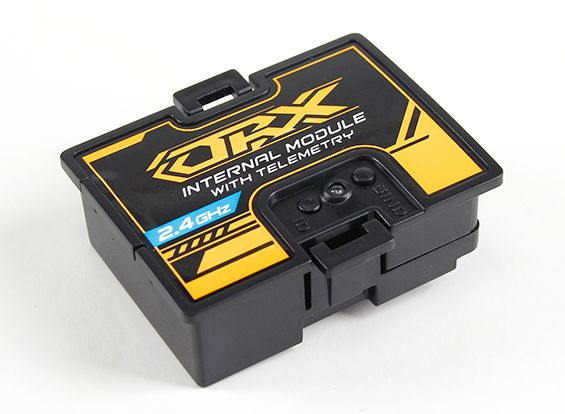
Which doesn’t come with a specific TX module installed so you have to get one:
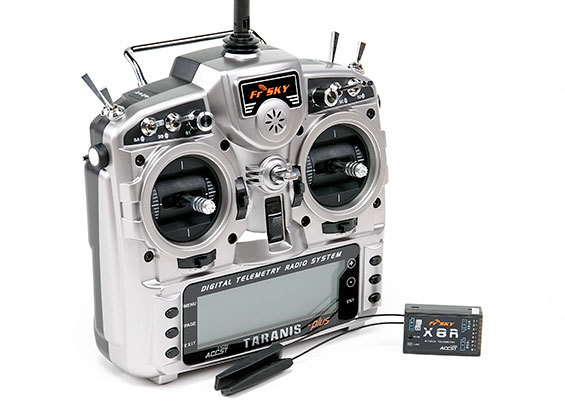
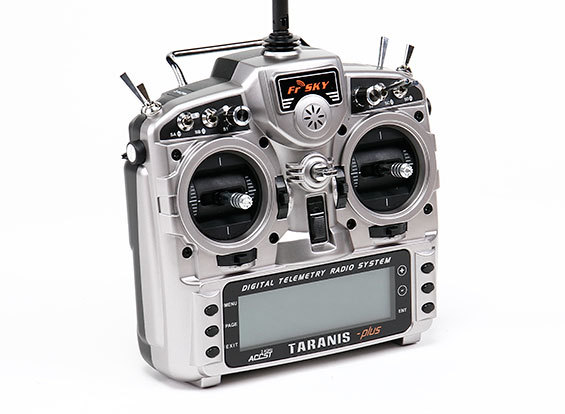
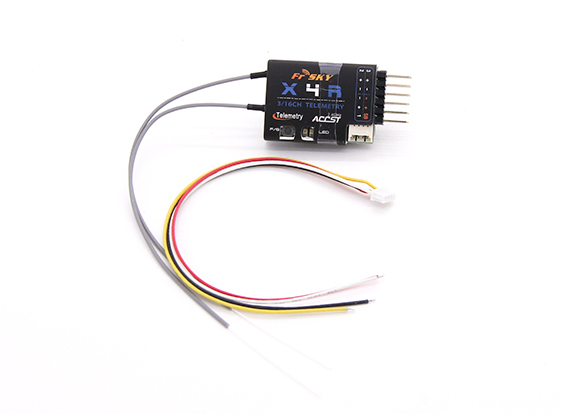
But professionally something like the FrSky Taranis X9D Plus along with a telemetry capable receiver like the X8R or X4R-SB (must be with “-SB” for digital telemetry).
Combo with receiver:
Separate items with smaller receiver (you don’t need more physical outputs on the receiver because the whole RC control messages are passed through to Navio via SBUS/CPPM anyway = they are redundant so smaller = more flight time/less mess!):
The only issue with Navio/Navio+ the FrSky Taranis is the SBUS output (which is technically better). But if you have a Navio2 it’s no problem as it supports SBUS. So for Navio2 that’s all you need, but for Navio1 (plus and non-plus) you will EITHER need one of these:
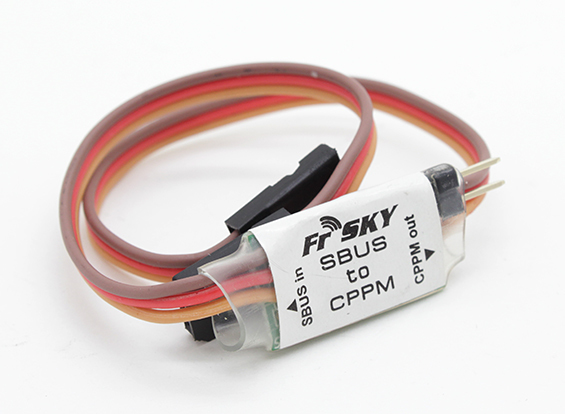
http://www.hobbyking.com/hobbyking/store/__52185__FrSKY_SBUS_to_CPPM_Decoder.html
Or get the radio without receiver and this receiver instead of the X4RSB:
Summary:
Cheapest possible - Orange TX and RX < 100 dollars.
Mid-range - Turnigy 9XR >= 100 dollars.
Top-range full potential - Taranis X9D Plus ~ 200 dollars.
FrSky variant for: Navio2 = Get the better receivers with SBUS, e.g. X4RSB.
As you are using a Navio with Wifi dongle, you can always control the copter remotely with a PC joystick via the ground station software and also with bluetooth controllers and some of the mobile phone/tablet ground stations. If you are around campus with good wifi then no worries. If not then maybe you could upgrade the wifi antennas a bit. For long range the usual thing is one of the “3DR radios” (which are too expensive so you actually get an APM compatible clone) but that’s halfway as expensive as upgrading to long range wifi or the same price as some GSM mobile sticks so I’d stick with the more modern (wifi or mobile internet) technologies for a new project.
3 Likes
Okay here is the final list
450mm framehttp://www.hobbyking.com/hobbyking/store/_66628__Q450_Ghost_Edition_LED_Night_Quad_Copter_Frame_KIT.html7
Propellers and motors Radio Control Planes, Drones, Cars, FPV, Quadcopters and more - Hobbyking
Battery charger
RC transmitter and reciever
As far as lipo battery i thought of buying it from the local store.
Since the cost has reached $221, Im think of cutting down the cost.
Any suggestions regarding RC like can we make it optional. If so the overall cost reduces to $150. Since we are using ground station and wifi dongle is it necessary to buy now?
And still any cheaper lipo charger??
Any suggestions regarding this final components we can’t afford too much on this. Still we need consider the software issues. So humble request any more effective ideas such that i could reduce overall cost below $150.
That motor combo is only one motor, i.e. the “combo” in this case means propellers and prop adapters, not a complete set of motors!. So you need 4. What about extra props, there’s no way you will complete the project with only two sets of props?
There are single battery chargers at cheaper prices but you need one which will balance 3S-4S lipos (what most people use) including the JST-XH “balance board” or cables. You’ll probably end-up at half price of the 4-way charger but can only charge one battery at a time (1 hour minimum per battery!). Really worth the effort/lost time for just 20-odd dollars difference?
Flying a quadcopter the first time without any RC is not advised. Things don’t always work, your software and settings will have mistakes. You need a RC system (joystick has latency and more likely to disconnect) to takeover in case something goes wrong. Best use it for all take-offs and landings at the start of your project.
Are you really sure you can finish this project? If your budget is that low it is VERY unlikely. One big mistake and you will need the double cost to correct it! Also there are tons of additional costs when getting into RC generally. All the tools, soldering irons, adapter cables, things even experienced hobbyists forget from their shopping lists.
In practice it costs at least 500-1000+ dollars (all-in) to get into RC multirotors. Think carefully before you order! Even if you bought an off-the-shelf APM compatible multirotor you would find yourself needing additional tools and accessories, again adding many hundreds more than the face value of the parts.
Sorry if that sounds negative but better be realistic now than very sorry when it’s too late.
Think about:
- Camera and short USB cable.
- Servo cables, connectors, crimp tools. Maybe other connector types like JST.
- Power cables and connectors, i.e. XT40.
- Bullet connectors of various sizes (maybe you don’t need this if you solder ESCs and the power cable directly to the PDB).
- Heat shrink of various colours and sizes, i.e. red, black assorted. And some kind of heat gun to shrink it with (worst case use the side of the soldering iron carefully).
- With Pixhawk/Navio sometimes one or two DF13 connectors are required. Tools for those are fairly expensive, the Engineer range PA-09, PA-21 and PA-14 will allow you to do everything at a relatively cheap price. The individual crimp pins and connectors do quickly add-up in price. To avoid this, get the “Navio wire pack” so you can just solder halfway down an existing wire rather than having to make-up your own (DF13s are really difficult). Maybe you could also find a pre-soldered XT60 and servo connector pack from somewhere else. Still it’s likely at some point you will need to deal with customizing cables and connectors.
- Soldering iron, solder (60-40), helping hand, cleaning pads, flux, de-solder wick.
- Bag/case for drone and accessory storage and transport.
- Storage bags for lipos, metal case for house/uni, soft fireproof bag for transport.
- Screwdrivers of many different shapes and sizes, e.g. small hex set 1.0->3.0, range of small cross-head and flat-head.
Not forgetting the Raspberry Pi 2 and Navio 2 (with GPS antenna and voltage sensor, which were optional on Navio+, not sure about the Navio 2 as it’s new to the store/not fully available yet). What about SD cards, you probably need more than one to test different images or versions of APM and your software.
Just saying, that you need to really sit down and do some MORE research. Think through the logical steps of building the drone and what you have, what you need. Every cable and connector. Only then you will have a full list.
I spent days looking at my shopping lists before I ordered my first drone, and still got it a bit wrong (some things I didn’t need, some things missing or not the ideal sizes). Be prepared for delays in the build, getting to a point then having to order something else and wait for it. You are aware this is something which takes months for most people? How long do you have/expect to finish it in?
2 Likes
We need to complete this project by the end of april. And after chosing this we really need to complete it. We cannot step back because we have already pi2 and navio+. And even if we step back its too late. We really didn’t want to mess up things like this. We were least bothered about this hardware. Even if build this drone and hover it. It is only first phase of project. But it doesn’t count for our grade. Our basic implementation is fixing gps location from ground station. Reach that place click pics and upload it to the cloud. For that the score is awarded. What right now we are doing is least concerned to the mainframe. What do you think? Can we do it? Apart from those we have tools like soldering gun etc etc provided in our college. The only thing is the price. After spending a hell lot and our project turn to fail. It is a biggest disaster on our career that we couldn’t complete as told. It will affect our career also.
Please suggest us a solution such that we can relax ourselves to the software and not thinking about connection,controller,esc etc. Or let me know i could order of things items and guarantee that it will work accordingly. Time required to completely build this drone and complete our first flight. Later part is not the problem. I know i shouldn’t be asking this. Now we are getting tensed that we shouldn’t had taken. This project.
If you want to finish your project in time, one suggestion is to buy a ready to fly (RTF) drone, and replace the controller with Navio+ and PRI2. Not sure if RTF includes charger/battery, but just buy from local and a cheapy $10 charger.
April is possible. Here’s my revised list for you to think about:
- I forgot to recommend a battery monitor/beeper, they are so cheap at HK but essential. This one is good because it will also beep after crashing so you can find it behind hills/grass/buildings: http://www.hobbyking.com/hobbyking/store/__60454__Turnigy_3_In_1_Battery_Monitor_Signal_Loss_and_Lost_Airplane_Alarm.html
- Camera - get any web cam that works with Linux and RasPiVid capture command line tools. Maybe you’ve got one lying around at Uni already. Remember to edit the boot config of RasPi2 to increase the power to the USB ports (search for that on RasPi forums).
- You need an XT60 cable to connect the batteries to the drone. There should be additional types of connectors in the HK charger box, all with XT60s pre-wired, so to cut costs just cut the ends of one of those and solder to your drone.
- Forget glow propellers and just get a any “slowfly” 10x4.5 propeller set (with both CW and CCW or both types bought separately). I know 9x4.5 was discussed, but let’s stick to 10x4.5 because you have a different motor and the HK specification for it says to use 10x4.5 for 3S batteries (avoid problems as much as possible). Get at least 2 of the following then you have the most common “disposables” covered (4 complete sets off propellers, you get two sets with the motors): http://www.hobbyking.com/hobbyking/store/__43849__Hobbyking_8482_Propeller_10x4_5_Black_CW_CCW_4pcs_.html?strSearch=10x4.5%20CW/CCW
I read back to the beginning and noticed you already got some servo cables and the Navio power sensor. I think you’ll be able to cut whatever you can find and re-solder then to get this thing flying, else look for some old project lying around Uni and “borrow” bits off it ![]() As you are not buying any 3DR telemetry you should be able to avoid the DF13/Navio wire pack too.
As you are not buying any 3DR telemetry you should be able to avoid the DF13/Navio wire pack too.
I’ll have a think about this for you and post a build process (brainstorm)… I’ve also just decided to build exactly this same model as well (maybe some bits upgraded for night flying but a 90% parallel for you to compare with nevertheless). So I should be able to help you more.
2 Likes
thanks a lot. And for time being shall I order the components or wait? And another thing since I have navio+ package and Pi2 can i virtualize my implementation in PC? If so how can I do it? Else what progress can I achieve with just navio+ and Pi2?
If you are doing same build parallel to us let me know CodeChief. Thanks a lot for some much help and trouble you are taking. You say by april we could complete the project hoping so. I need to make a work breakdown structure. Two of my teammates are concentrating on IOT and app development. Me and my another friend are concentrating on the implementation. To have a work breakdown what do you suggest? even if I ORDER THE COMPONENTS IT WILL TAKE AROUND 8-10 DAYS to arrive at our place. Once we get the components time estimation in days or weeks that we could get off the ground.
Yes parallel build no problem. Just good timing and the Ghost 450 with PDB is the right frame for what I also need right now ![]()
I will check the build, finalize the shopping list and ordering later today. You could wait if you want. If you did it already it wouldn’t be a big problem either as I think what we discussed so far came to a pretty good conclusion in the end.
When the parts arrive I’ll be making photos with instructions because I want to put them on a web site together with a another couple of builds I did last year. Then you should be able to get it built within a week.
For your planning add a couple of weeks to your build time to allow for delivery problems/re-order, i.e. best case built in 2 weeks, worst case built by end of January.
In the meantime, yes there is plenty you can do with just a RasPi and Navio. Tell your programmers that they need to look at MAVLink protocol. Play around with the MAVProxy and tools like that to get a good understanding how a program or script running on Linux can interact with APM.
There are also “software in the loop” and “hardware in the loop” test mode of APM/Ground Station software which will allow you to simulate the drone. It’s a bit tricky to set-up and it is generic so should work for Navio. See:
1 Like
Oh great thanks a lot Codechief. lf you are making one MAV we would certainly wait for another week. Please let us know the complete parts list you have shopped. Screenshots for each and every connection you make so it would be easy for us just to mimic your work and reduce the time for the build. I guess we could finish of the build by this month right? By this week we will work with simulation part of Navio+ and ask my teammates to learn and hands on with mavlink protocol and its related tools. So that we could parallely work and funnel at the end. At least by February first week we could have finished the first flight and concentrate on the actual implementation part. Once again thanks and I’m grateful to you for building one to make us understand. Certainly I would credit your name at the documentation time of our project. For us now you are the only hope.
Almost finished with the list. Some changes were necessary.
- The QBrain ESC is in stock in 4x25A form (same physical size so no problem) and really should be purchased to keep the build clean and also it’s much cheaper than 4 ESCs.
- The 4-way charger has gone out of stock but there is another cheaper option for one battery to get you started which means you don’t need balance boards either (use that then later get a more expensive charger and batteries if you need more flight time - also good in the field to recharge from a car/spare battery). Use the saved money to buy more batteries or find a multi-charging solution locally (HK are totally out of cheap 4 way chargers at the moment). http://www.hobbyking.com/hobbyking/store/__76461__IMAX_B6_DC_Charger_5A_50W_Copy_.html
- You don’t need an XT60 connector because you bought the Navio power cable/sensor. Just cut that cable and solder to the QBrain.
- If you also cut the bullet connectors and re-solder in the QBrain like Igor did, you will need some kapton tape to insulate it.
- Whilst you are opening the QBrain you might want to borrow an Arduino from Uni and perform the BLHeli/bootloader upgrade so you can flash it externally in the future with better firmware. But the standard firmware should be okay so that’s just nice to have. Flashing BLHeli 14.2 to Q-Brain 4 in 1 ESC - YouTube
- 20C batteries are way under-powered/exhausted = crash & burn risk. You will be drawing up to 4x the number of amps per motor (60-80) and a few more for the Navio, flight controller, receiver, web cam and anything else you add later. So you need about 90-100A / number of battery amps. So for a 3.0AH/3000MAH battery you need about 30C. The only way 20C would be possible is if you had a higher capacity battery (again multiplying up to at least 90A). The general rule I learnt was the battery should not be heavier than the weight of the quadcopter (without the battery) 50/50 for the limit where adding more capacity no longer has benefit. Maybe you can send a personal message to Igor or he comments he on how heavy the quadcopter is without the battery. But a 3.0AH 3S 30C or 4.0AH 3S 25C should be within limits.
- Get an old “ammo”/metal box from somewhere and use it as a makeshift battery “bunker”/transport case.
I’ll sleep on it and finish brainstorming the build tomorrow then send the final list and I will order mine directly then. Have patience and don’t worry in yet another item goes out of stock then we just find an alternative. Also I found most the parts from HK are also available on Banggood or AliExpress (all the popular China export stores).
2 Likes
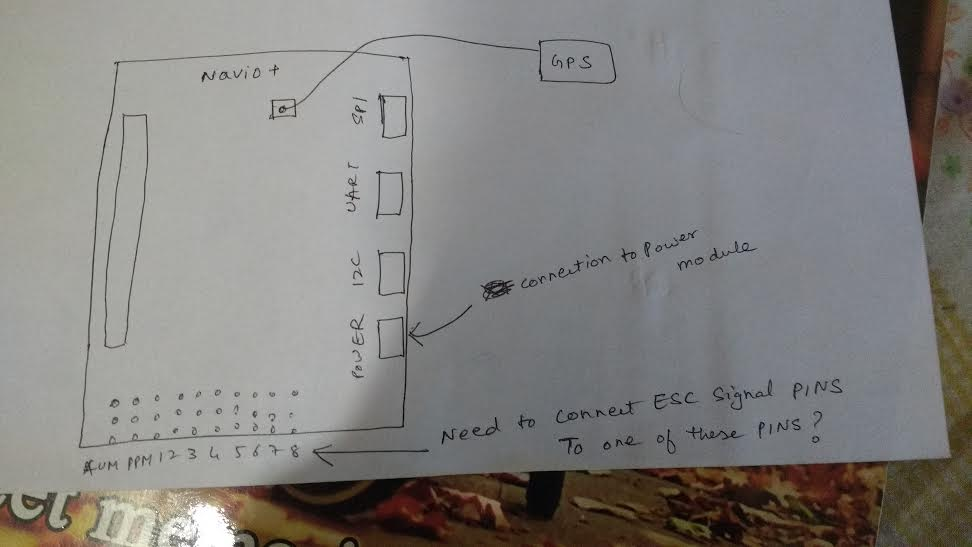
according my observations and knowledged gained from previous builds. I drew a diagram regarding the connections to be made to the quad. please feel free to correct the diagrams or any necessary changes that i NEED TO MAKE FROM THE FOLLOWING IMAGES. please let me know any extra connections that I need make referring the image below.

1 Like
Correct with a couple of notes:
- Image 1 bottom “Need to connect ESC signal pins”. Important: Connections start at #1 (the third pin from the left) and will follow a specific which is documented in APM Copter. Must be correct else it will crash to one side at first takeoff, so write “check sequence!” next to it. Second and also important, one of the cables from the QBrain will provide 5v power to the receiver via this connector “rail” (it doesn’t come from the Navio+, one important difference to Pixhawk documentation!). Third add a line from the PPM to the receiver with a note “CPPM” compatible (the OrangeRX thing we are getting).
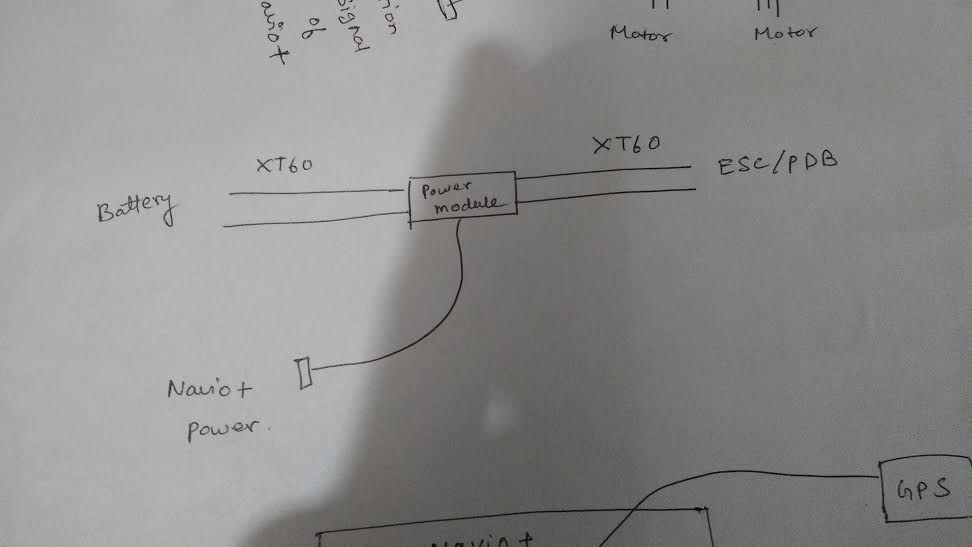
- Image 2 “XT60 === ESC/PDB”. Note: Remove the XT60 and write “cut and solder to ESC/PDB wires (or direct to board best if you are good enough at soldering = ask tutor to do it best?)” .
- Image 3 "ESC x 4 (QBrain). Note: Add a “BEC/5V Out” comment next to the first connector. Note the first plug on this image is the only one with power and ground and signal, the rest just signal.
Something like this:
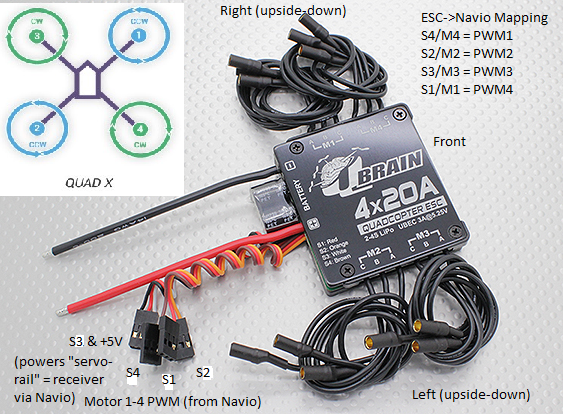
As motor numbers I see the QBrain does not follow the Quad-X layout and we want a tidy wiring job so we will connect the PWM pins to the Navio in a different sequence, so that the ending sequence on Navio addresses the Quad X layout (1 = front right, 2 = back left, 3 = front left, 4 = back right). The mapping depends on the best orientation of the QBrain on the frame of course. It doesn’t matter really, just that in the end however you connect it that the correct 1234 motor PWM signals from Navio end-up at the correct physical motor location  So we can try to make this as tidy as possible.
Another important note, that people forget (even experts) sometimes, is the correct propeller rotation must be physically installed on each corner (the CW/CCW). As the motors/prop-adapters have a directional thread, this is safer. But during the build of course the dumbest mistake which could really cost you time would be if you put the wrong direction motor on the wrong corner, and soldered all the wires. So for first tests I think the motors wires should not be soldered then, just connected and ZIP tied down. Once it works I will then document a “clean-up/upgrade” section with things like that in.
2 Likes
third image correction what’s that i didn’t get you what you said
"Image 3 “ESC x 4 (QBrain). Note: Add a “BEC/5V Out” comment next to the first connector. Note the first plug on this image is the only one with power and ground and signal, the rest just signal.” ???
Updated image (see edit with motor mappings). That and note “S3 & +5V” explains your question and next to it the words (powers “servo-rail” as it’s called in the documentation which on Navio also means it powers the receiver). On a Pixhawk the power for the receiver can also come from Pixhawk itself. But on Navio we must add it separately. It’s better overall but of course a very important difference to the official APM documentation.
2 Likes
yeah I GET NOW THANKS
How about the progress CodeChief?